
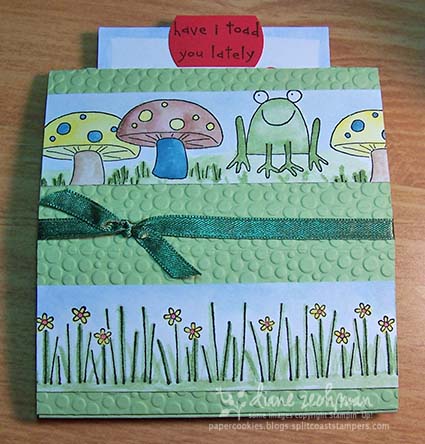
I made one of these pop-up cards several years ago but it was smaller and slightly different. I changed the measurements last night so that it is more like a 4 1/4 x 5 1/2 inch card when it is flat and therefore it will fit nicely in an A2 envelope. I also changed the side folds so it is more “box-like” when open. Here is a pic of the card in the closed position:
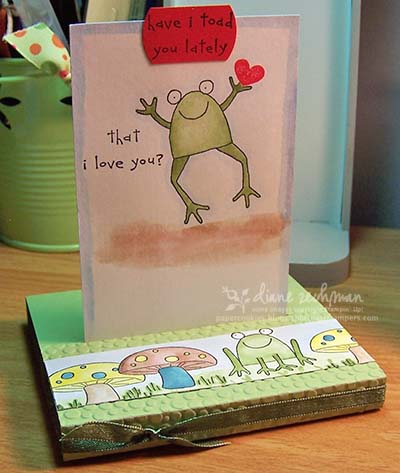
and this is what it looks like when it is open: 🙂
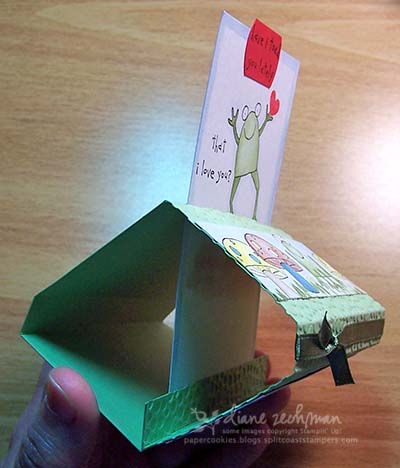
I did not take “step by step” photos as I made it, but I will try to give you instructions on how to make it and you can see the side view below to help you understand how it goes together.
Start with:
1 piece of 4 1/4 X 10 cardstock (I used Certainly Celery)
and 1 piece of 3 x 5 cardstock (I used White)
1. Score the Celery cardstock at 1/2, 2 1/2, 3, 5, 7, 7 1/2, and 9 1/2.
2. With your paper trimmer or a craft knife, cut along the center (5 in.) score line from the 1/2 inch to the 3 3/4 inch measurements. *(You will leave 1/2 inch UNCUT on both sides of the slit).
3. Mountain fold all scored lines.
4. Stamp your image on the 3 x 5 piece of cardstock and color if needed.
5. Insert the 3 x 5 piece of cardstock through the slit you cut in the center.
6. Sandwich the bottom of the 3 x 5 piece between the 2 bottom (1/2 inch) scored & folded ends. Attach the 3 x 5 piece to the 1/2 inch folded ends with strong adhesive.
7. Decorate as desired. (I used the Cuttlebug embossing folder before assembling.)
Here is the side view showing how it is assembled:
stamps- Unfrogettable, Daisy Field Wheel, heart- Big Bold Birthday
paper- Celery, White
ink- Celery, Olive, Black, Summer, Cocoa, Real Red, NQNavy, Caramel
accessories- ribbon, Tiny Bubbles Cuttlebug embossing folder
Have fun with it and let me know if you like it!
 cookiestamper ♥


14 responses to “Sliding Pop-Up card”