
hello friends! Today I have a tutorial to share for making a Mini Blind Card. Some of you may remember making these several years ago. Here I have an up-dated version using tools to make it easier that we now have available such as the Scor-Pal and Nestabilities. Bear with me…this may be a long post!
Here’s the card I made. First pic is with the blind “closed”…

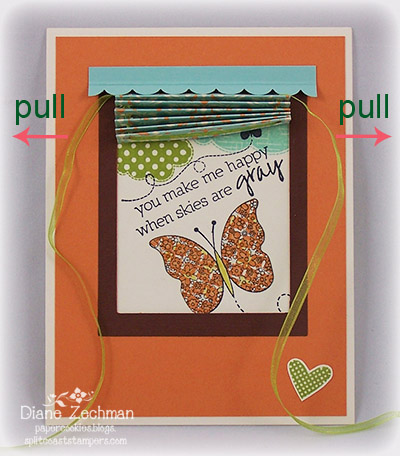
When you pull on the ribbons, the blind opens…

Let’s get started!
Supplies used: base- 5 1/2 x 8 1/2 piece of cardstock (vanilla), layer- 4 x 5 1/4 piece of cardstock or patterned paper (Peach Parfait), blind- 2 3/8 x 4 7/8 piece of patterned paper (Everyday Enchantment), valance- 3/4 x 3 1/8, extra cardstock for window frame and embellishing, Scor-Pal, Scor-Tape, 18″ of ribbon, Crop-A-Dile, Rectangle Nestabilities, SU! Scallop Edge punch, stamps (Unity), ink (SU! and Memento), large-eyed needle (if needed), glue.
First, adhere the Peach layer to the cardfront. Using the next to largest size of the Large Rectangle Nestabilities, die cut an opening in the card front only.
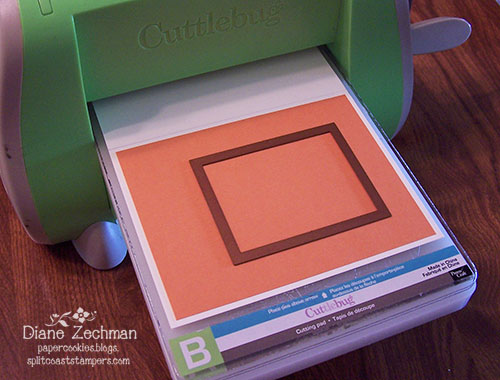 If you want to have a frame around your “window”… use the same die, along with the largest die to cut a piece of brown cardstock. I used a little tape to hold them in place. Attach this to the card front. Note: I added a frame as an afterthought, so the next several pictures will be without a frame.
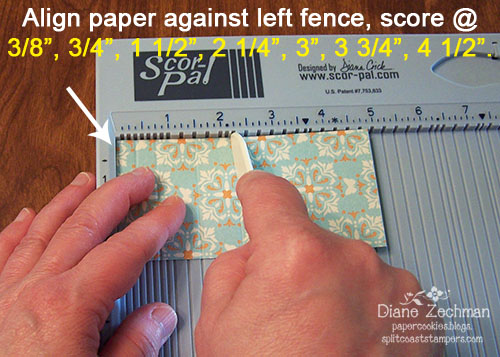
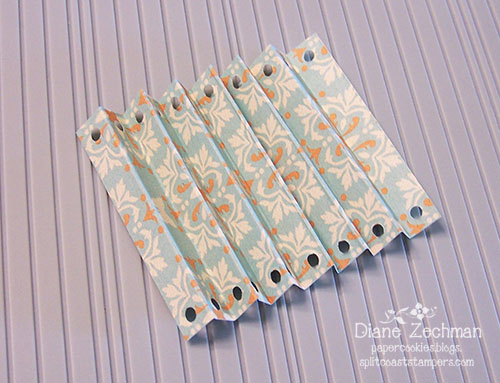
 Score the 4 7/8″ side of the blind every 3/8″ and then mountain/valley fold. *To do this on the Scor-Pal- first align the paper against the left fence and score @ 3/8″, 3/4″, 1 1/2″, 2 1/4″, 3″, 3 3/4″, and 4 1/2″.
 Next, move the paper over so the left edge is aligned at the 1/8″ groove. Score @ 1 1/4″, 2″, 2 3/4″, 3 1/2″, and 4 1/4″.
 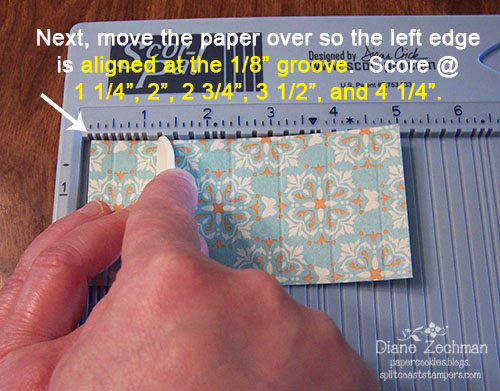 Starting with a valley fold at the top, accordian fold the blind. Then, holding it folded up, punch each end with the smallest hole of the Crop-A-Dile.
 It should now look like this…
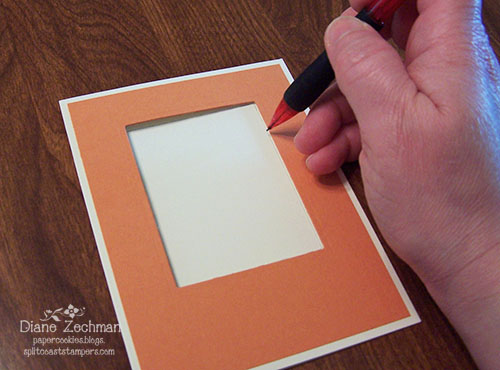
 Now lightly trace the window opening onto the inside of the card with a pencil.
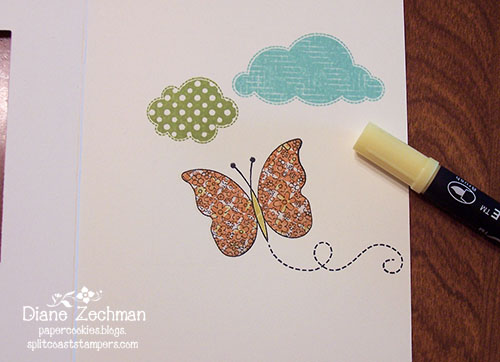
 Open the card and stamp images as desired using the pencil lines as a guide.
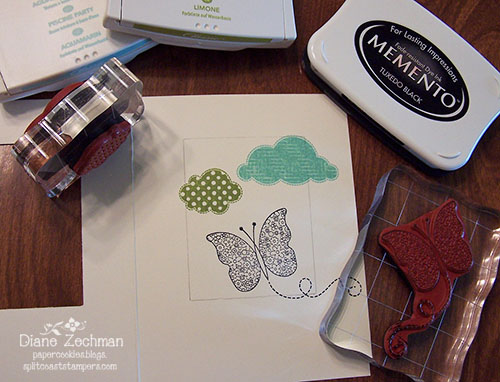 I stamped the butterfly again onto patterned paper and paper pieced the wings.
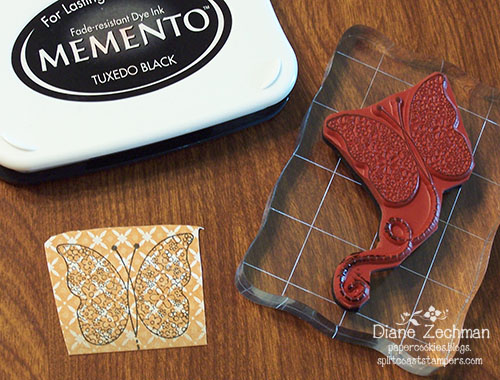 Finish your stamped images and erase the pencil lines. (I later added a sentiment here too).
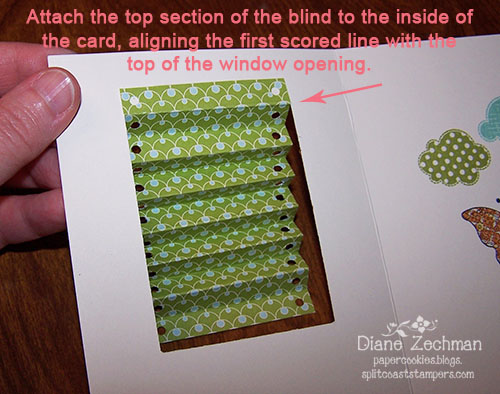
 Now you can attach the top section of the blind to the inside of the card front, aligning the first (top) scored line with the top of the window opening.
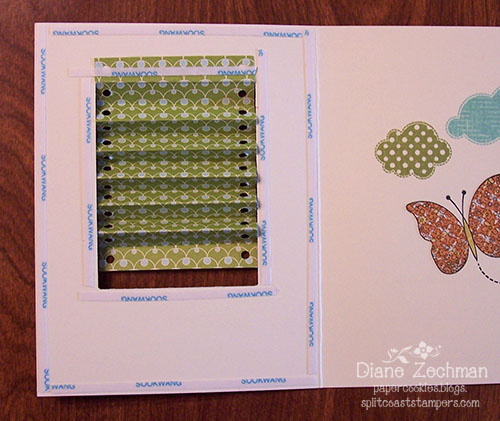
 Apply Scor-Tape to the inside of the front as shown in the photo below. Adhere the front to the back. (The finished card will not open like a normal card.)
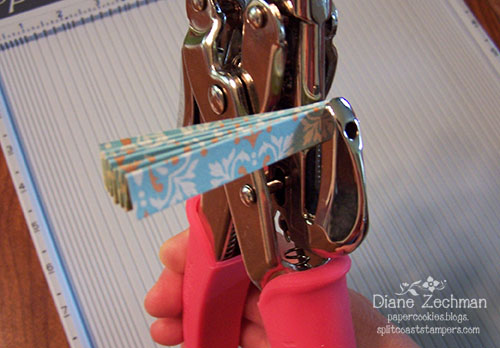
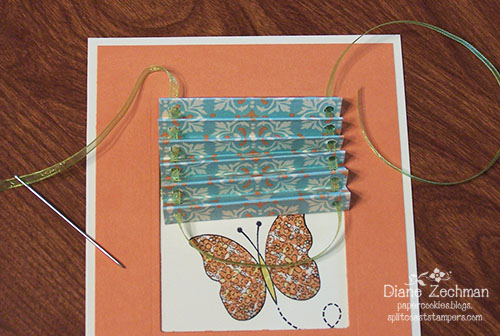
Thread ribbon through the holes in the blind, starting and ending at the top. A large-eyed needle may be used to thread the ribbon through if needed. Knot ends of ribbon.
To create a valance, I used a 3/4″ x 3 1/8″ piece of cardstock. Score the length at 1/4″. It may be easier to hold if you align it along the right fence to score. Then punch the other side with a scallop edge punch.

Attach valance to the top of the window and finish card as desired.
Pull both ribbon tails at the same time, in opposite directions, to make the blind go up.
You’re done! Have fun and be sure to give me a link…I’d love to see your creations!
 cookiestamper ♥


Pingback: Mini Blind card tutorial with video |