
It’s my turn to share a tutorial today on the Sweet ‘n Sassy blog. With Valentine’s Day approaching, I created a fun Pull Tab Slider Card using the elephant and a sentiment from my Valentine Critters stamp set and the matching set of dies.
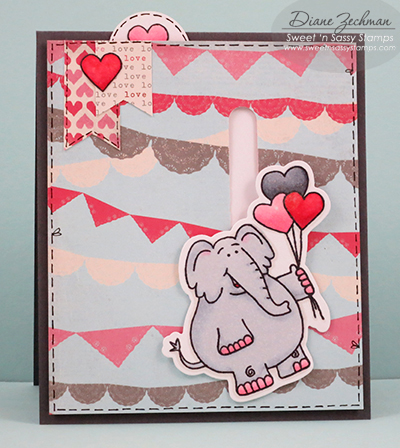
When you pull the tab, the elephant and balloons “float” through the air and reveal the sentiment!

You can make the pull tab vertical or horizontal, according to how you orient your card and which direction you want your image to move. Let’s get started!
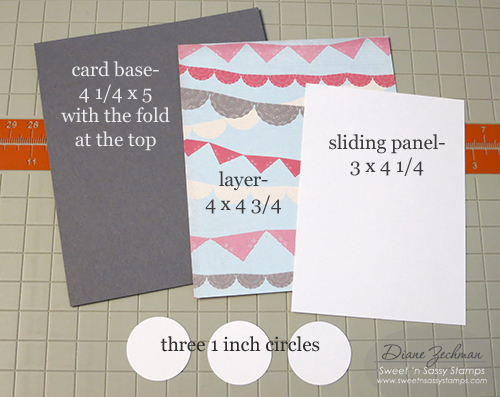
You will begin with a card base, a cardstock or patterned paper layer, a cardstock piece for the sliding panel, and 3 punched circles. See measurements in the photo below. Note: I made my cardstock base slightly shorter than a normal A2 card to allow for the pull tab to extend beyond the base a bit, and still fit into an A2 envelope. So, start with 4 1/4 x 10 and score at 5″.
Besides the papers shown above, you will need an additional scrap of white cardstock for your image. Stamp and diecut your image.
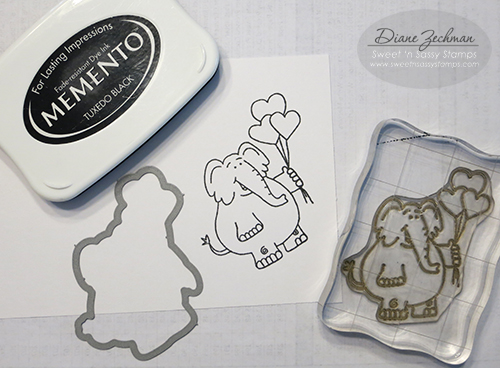
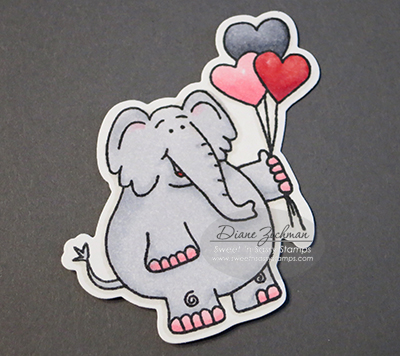
Color your image and set it aside.
Next, create a slot in the layer by sliding the punch in from the right side as far as it will go and punching twice. You can also cut a slot with a ruler and craft knife. My slot is 3/8″ wide.

Adhere the first circle to the short side of the sliding panel to create a pull tab. Next I applied a strip of 1/8″ wide Scor-Tape down the center of the second circle and adhered the third circle on top of it.

Slightly bend the sides of the two circles that were joined. The adhesive strip holds them together in the center.
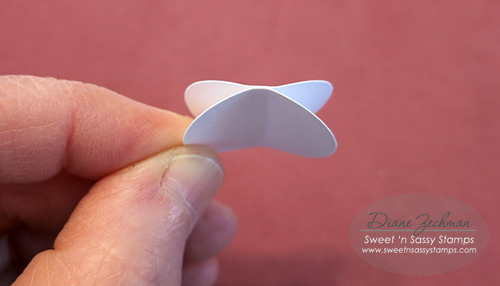
Slip each side of the joined circles into the slot in the punched layer.
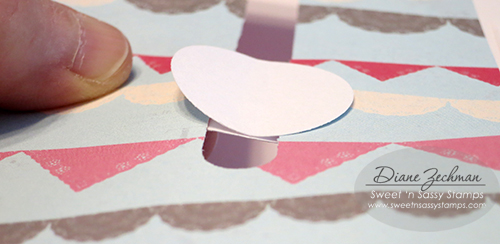
Turn the layer over and slide the circles all the way to the left (this will be the bottom of the card). Apply adhesive to the circle shown.

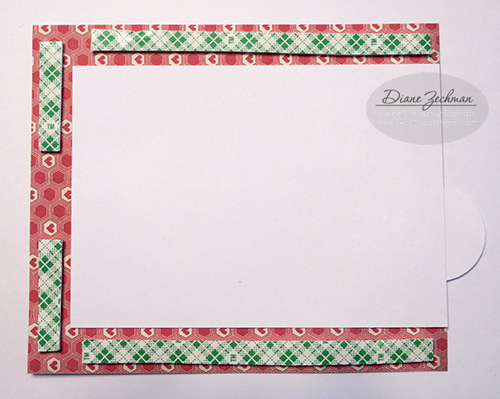
Center the sliding panel with three sides, keeping the side with the tab in line with the fourth side (this will be the top). Lay the sliding panel in place, adhering it to the cardstock circle underneath. See photo below for placement.
Add foam tape to the three exposed sides as shown. Remove backing from the foam tape to expose sticky surface.
Turn the layers over and adhere to the card base with the pull tab and card fold on the top. Attach your image to the circle shown.

Pull the tab up and stamp your sentiment. Note: Keep the sentiment to the left so it does not show through the slot when the sliding panel is down.

Then decorate your card as desired.
Thanks for visiting… I hope you enjoyed this tutorial! Have a great week!
stamps- Sweet ‘n Sassy Valentine Critters; paper- white, SU! Basic Gray, MME- Love Me; ink- Memento Tuxedo Black, Versafine Black; accessories- Sweet ‘n Sassy Valentine Critters dies, circle punch, SU! Word Window punch, foam tape, 1/8″ Scor-Tape, Copics, clear Wink of Stella.


 cookiestamper ♥


