Category Archives: recipes

herb baked fish…yum!

I hope you are enjoying your long weekend!  We will have a meal with family later today. 

I have a few projects that I haven’t shared yet and I was reminded of this one.  DH is out on his boat fishing this morning so I thought this recipe card would be fitting for the day.  I have made this for years…it’s a yummy way to bake fish!

6x6-pj-fishing-bear-diane-zechman.jpg

The Penny Johnson Fishing Bear image was the first to come to mind when I started and I like how it turned out.  Did you notice the real fishing hook and line on the fish’s mouth?  I poked it through so the sharp points would be covered.  And the line goes up and connects to the end of the line in the image.

The fish shape was created on the computer and then I placed the text inside.  Here’s a close-up…

6x6-pj-fishing-bear-close-diane-zechman.jpg

Have a great week…it can’t be bad when we start off with a holiday, right?  😉

stamp- Penny Johnson’s Fishing Bear by Stampavie; paper- blue, white, Making Memories Swirl Blue; ink- Memento black, Distress ink Spiced Marmalade; accessories- Copics, wiggle eye, Fiskars Boundary Waters punch, fish hook and fishing line.

equivalents & substitutions

Is it a beautiful day today or what???  LOVE this weather!

The only yucky part of the day is the computer problems I’m havin’.  I hate those nasty bugs!  Hopefully I’ll be able to edit my pics soon but in the meantime, here’s a few that I haven’t shared yet.

These are my recipe and ATC swaps from the Buffalo gathering I attended 2 weeks ago.  This recipe swap was inspired by one a friend of mine had done.  I thought it was such a handy idea!

I printed everything out on vellum cardstock and used my Bumble B. Bear set.  (BTW, if you like recipe sets…I just wanted to let you know that ATS is retiring some of mine here.)

6x6-substitutions-diane-zechman.jpg

Here’s the back….I couldn’t fit it all on the front!

6x6-substitutions-back-diane-zechman.jpg

And here’s my ATC.  I stamped the old Coke image on glossy cardstock.  The background is an old Coke Ad that I printed off the internet.  Since it wasn’t on glossy paper, I attached a layer of acetate over the background ad with a glue dot. 

coke-atc-diane-zechman.jpg

…and here it is opened… I stamped the “memories definition” on top of the acetate.

coke-atc-inside-diane-zechman.jpg

Have a fabulous weekend! 

who you callin’ cheesy?

Made this for the 6×6 recipe swap at our gathering on Saturday….he he ….

6x6-cheesy-chicken.jpg

stamps- Get Well Critters by Cookie Crumbs; paper- brown, white, Wasabi, dp- My Mind’s Eye; ink- Garden Green, Memento Black; accessories- Copics, Martha Stewart grass punch, EK Success “bubble” punch, sponge, Primas, Stickles.

more CHA samples…Day 9!

Hello friends!  The fun is going on in Anaheim and the pictures shown so far look like everyone is having a great time!  Meanwhile, the Stampavie team is continuing our 40 days of CHA samples.  Today is Day 9 and it’s my turn again to share some sneak peeks with you. 

These images are from the new Helz Cuppleditch collection.  The first one is called Celebration Table and the other two are of a new rabbit image.  Can I say “I love this bunny!”?  :0)  Her name is Loopy Lops…how fun is that? 

This one is making me hungry for a cupcake!  lol.

hc-celebration-table-diane-zechman.jpg

Here’s another 6×6 recipe card…these are fun to do!

hc-ll-strawberry-fair-diane-zechman.jpg

And a simple card with Loopy Lops popped up on dimensionals….

hc-loopy-lops-plant-pot-diane-zechman.jpg

Be sure to continue stopping by the Stampavie blog.  Tomorrow Kittie will share some more samples….and I bet they’re adorable!  :0)

First card:

stamps- Helz Cuppleditch Celebration Table and Rachelle Anne Miller Sentiments 2 by Stampavie; paper- Real Red, Pretty in Pink, White; ink- Memento Black; accessories- Martha Stewart mini hearts punch, brads, ribbon, button, silver cord, glue dots.

second card (recipe page)-

stamps- Helz Cuppleditch Loopy Lops Strawberry Fair by Stampavie; paper- Pretty in Pink, white, red, The Paper Studio Yellow Gingham; ink- Memento Black; accessories- Copic markers, Martha Stewart Doily Lace punch, Labels 1 Nestabilities.

third card:

stamps- Helz Cuppleditch Loopy Lops Plant Pot and Rachelle Anne Miller Sentiments 1 by Stampavie; paper- Saffron, white, black, Amethyst dp; ink- Memento Black; accessories- Copic markers, pop dots, Primas, cell phone bling.

dirty dinners

6x6-italian-chik-crm-sauce-diane-zechman.jpgWow…it’s another beautiful day again today!  We have had a great weekend weather-wise!  I hope you are enjoying your Sunday wherever you are! 

Today is another challenge day for the SCS Dirty Dozen and Alumni.  Betty (gbedwright) challenged us with the theme of Dirty Dinners!  Yum…I enjoy checking out new recipes so I knew this was one I wouldn’t want to miss!  I also enjoy scrapping our favorite recipes in a 6×6 format and Betty’s challenge was just the incentive I needed to get another one done.  ;0)

Here’s Betty’s info:

Challenge: Dirty Dinner Recipe paper project. Share at least one tried and true prepared entree recipe in decorative paper crafting format of choice.

Restricted Element: There are NO restrictions…bring on the calories, carbs, fat grams, and sugars!!!! We can alter it on our own if need be.

Required Element: It must be something you have cooked and your family LOVED it!!!! Also, share a little bit about the history of this recipe and how it came to be.

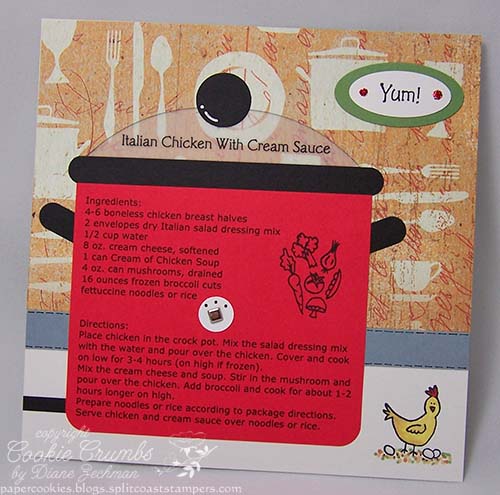
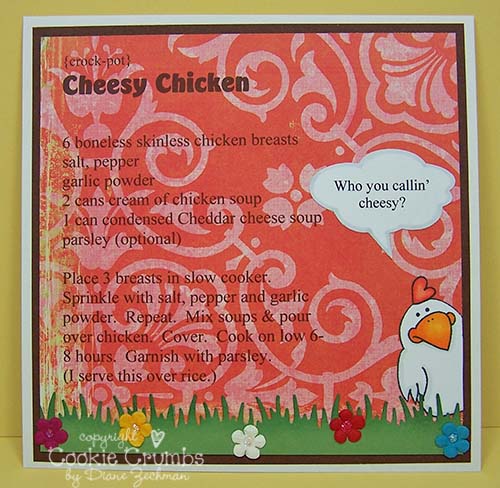
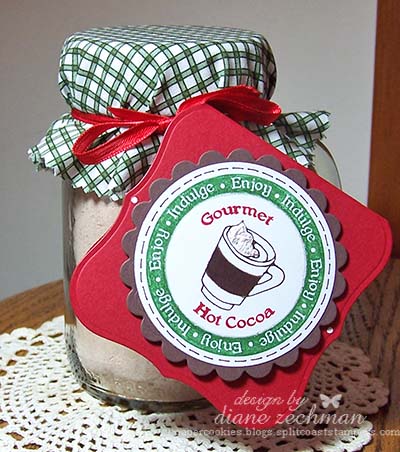
Well, it wasn’t hard to think of which recipe to scrap!  This is one of my family’s favorite dinners.  I think I started cooking it a little over a year ago (can’t remember where it came from) and we have had it so many times that I’m surprised they aren’t sick of it yet.  LOL.  They keep requesting it and it’s so easy.  I wanted to try making the recipe in a Crock Pot shape since that is how the dish is prepared.  So here’s what I came up with…I hope it looks like a slow cooker!  


I tried printing the recipe title onto acetate to resemble the glass lid but it wasn’t turning out very well in my printer.  So I pulled out some cardstock weight vellum instead and I think it worked pretty well.  First I drew a quick pattern and then I printed the recipe on red cardstock in the size I needed.  It was cut out in a rectangle and the bottom corners were rounded.  Then I used the SU! Word Window punch to make the handles and round the edges of the black rim.  Next I traced my lid pattern over the title and cut it out.  The top edge was lightly inked with black and I added a punched circle for the handle.  A smaller circle and a square brad were used for the knob to adjust the temperature.  (I could swear I had some triangle brads but where they are I don’t have a clue!)  To finish it off, I added a small strip to the base which I’m hoping resembles the cord.  The stamped images are from my Create A Recipe and Cupcake Occasions sets. 

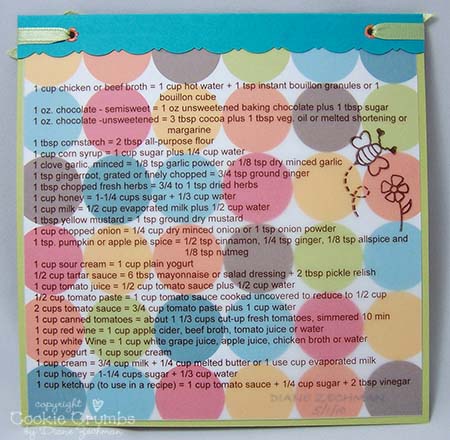
Here’s the recipe if you’d like to try it.  I always leave out the mushrooms since I’m the only one who cares for them but someday I might just sneak them in.  ;0) 

Italian Chicken With Cream Sauce

Ingredients:

4-6 boneless chicken breast halves

2 envelopes dry Italian salad dressing mix

1/2 cup water

8 oz. cream cheese, softened

1 can Cream of Chicken Soup

4 oz. can mushrooms, drained

16 ounces frozen broccoli cuts

fettuccine noodles or rice

Directions:

Place chicken in the crock pot. Mix the salad dressing mix with the water and pour over the chicken. Cover and cook on low for 3-4 hours (on high if frozen).

Mix the cream cheese and soup. Stir in the mushroom and pour over the chicken. Add broccoli and cook for about 1-2 hours longer on high.

Prepare noodles or rice according to package directions.

Serve chicken and cream sauce over noodles or rice.

stamps- Create A Recipe and Cupcake Occasions by Cookie Crumbs; paper- red, black, white, Wasabi, Bordering Blue, vellum cardstock, dp by Flair Designs; ink- Memento Black; accessories- SU! Word Window punch and Oval punches, circle punches, corner rounder, square brads, Copic markers, Stickles, gel pen.

an ornament and a recipe

soft-summer-ornament-diane-zechman.jpgDon’t ask me what these two things have in common.  Nothing really.  They are just two projects left from the gatherings I recently attended that I haven’t shared yet.

This first one was a tutorial on Splitcoast a few weeks ago.  It is rare that I try a tutorial right away, but I thought this was cool and tried it the day the newsletter went out!  You can find the directions here

I didn’t use markers on my project, though.  I never seemed to have good luck with regular markers on shrink plastic.  Instead, I stamped the outline with Stazon ink and colored the image with colored pencils.  This way it doesn’t smear when you roll it up to insert it into the glass ball.  This was a fun project to try and it is kinda cool to see it shrink inside the ball.  

The shrink plastic was cut with my Nestabilities and then I outlined the edges with faux stitches using a fine point permanent marker.

stamps- Warm Words, Soft Summer; ink- Stazon Black; accessories- colored pencils, thread, glue dots, hole punch, shrink plastic, Labels 3 Nestabilities, clear glass ornament. 

6x6-pie-crust-diane-zechman.jpg
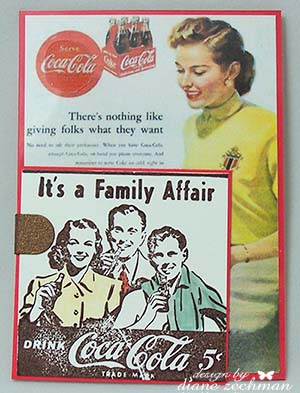
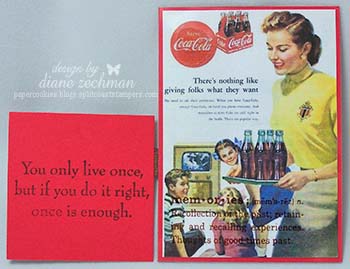
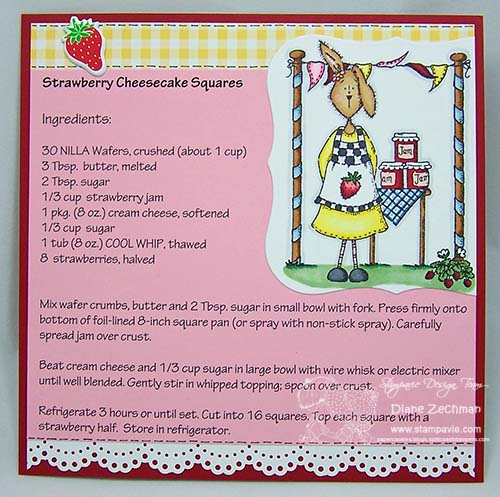
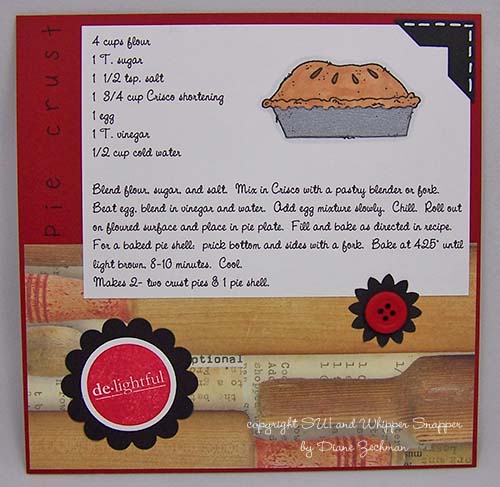
The second project is another 6×6 recipe card.  This time I decided to scrap the pie crust recipe my MIL used to make.  It makes the best pie crust, IMO!

This is a very simple page but I was short on time (and mojo!) LOL.  I love the decorative paper, though, with the rolling pins on it!

The Whipper Snapper pie was stamped twice…once on the recipe layer and again on a piece of silver cardstock.  Then the pie pan was cut out of the silver paper and paper pieced on the first one. 

stamps- Whipper Snapper Homemade Pie, SU! It’s All Good, Karen Foster Snap Stamps; paper- Red, White, Black, Silver, dp- Creative Imaginations; ink- Memento Black, Real Red; accessories- Copic markers, Photo Corner punch, Scallop Circle punch, Flower punch, button. 

Have a great day!

6×6 Crispy PB Eggs and a sneak…

6x6-crispy-eggs-diane-zechman.jpgHere’s a 6×6 recipe page I made for an upcoming swap.  I hope the recipients don’t mind that I did an Easter recipe when Easter is over!  But if their house is like mine, there’s still plenty of candy left.  ;0)  And these eggs are so yummy that I’m sure you could shape them any way you want and make them for the next holiday.  LOL.

This is pretty self-explanatory and I am short on time, so I’ll be brief.  The chick is from my Cupcake Occasions set and the yellow background paper came in 12×12 sheets already embossed (got mine at Michael’s).  I’m not sure why the yellow is so bright…I tried to adjust it but this was the best I could do.  ugh.

*Be sure to check back tomorrow– I have a special little mid-month release!  Here’s a little sneak peek:

cookie-box-sneak-diane-zechman.jpg

stamps- Cupcake Occasions by Cookie Crumbs, SU! Rough Texture Wheel; paper-embossed cardstock by Making Memories,orange, tan, white, green, SU! Lavendar Lace and Bashful Blue; ink- Memento Black, Wasabi; accessories- Copic markers, Stickles, circle punch, Scallop circle punch, Double Ended Tags Nestabilities, eyelets, Martha Stewart Frond punch, EK Success flower punches.

6 x 6 Oreo / Cream Cheese Balls

6x6-oreo-balls-diane-zechman.jpgHere’s a 6×6 recipe page I recently did for a swap.  Of course, I had to try out the recipe first to make sure it was a good one and it got the family’s approval.  ;0)

Someone said they thought that this was a Pampered Chef recipe?  I don’t really know where it came from….I found it on a website somewhere but I never go to the PC site so I’m not sure if that’s where it originated.

Anyway…I used my Cookie Jar and Cookie Jar-gon sets for the Oreos, mixing bowl and words.  The truffle is one of Anna Wight’s images and I thought it would be a perfect addition.  The Oreo cookies were stamped with black ink onto brown paper.  Then I used a white gel pen to color in the white center.  It was much easier to do it this way when mass-producing and I thought they turned out kinda cute.  One was popped up on a dimensional.

The base cardstock has a swirly embossed design which is sort of hard to see in the photo.  The cardstock came already embossed which made my background easy!  I chose the colors for the base layer and the printed recipe by looking at the package of cookies.  That gave me the inspiration I needed to start the project. 

Well, I am off to bake another favorite cookie….molasses!  And work on a few more projects.  Have a great day!

stamps- Cookie Jar and Cookie Jar-gon by Cookie Crumbs, truffle by Whipper Snapper; paper- Making Memories Swirl Blue, white, brown, dp- EK Success; ink- Memento Black; accessories- SU! Top Note die, Copic markers, Stickles, SU! Scalloped Circle punch, Circle Nestabilities, SU! Word Window punch.

Riley and a recipe

riley-12-28-08.jpgGuess what Santa brought! 

Well, she was a bit late for Christmas, but a sweet present to ourselves anyway!  

Now if only she will train quickly….*crossing fingers*.   :0)  If you have any tips, I’d love to hear them!

I hope you all had a wonderful Christmas with your friends and family!

Ok, so below is a recipe page I did a few months ago.  One of my favorite pies is a custard pie.  I just called this Berry Custard because I use blueberries or raspberries.  And if you are short on time, it can be baked in a baking dish without the crust- still yummy!

I used the House Mouse Pumpkin Pie image and just made the pie a different color.  The fun decorative paper is by Flair Designs and I purchased it at All That Scraps.  Christine has a ton of papers to choose from!

In case it’s difficult to read from the picture, here’s the recipe:6-x-6-berry-custard-diane-zechman.jpg

4 slightly beaten eggs

1/2 cup sugar

1/4 tsp. salt

1/2 tsp. vanilla

2 cups  milk

cinnamon

fresh or frozen blueberries or raspberries

1 T. flour 

Blend the first four ingredients.  Stir in the milk.  Pour into a baking dish or unbaked pie shell and sprinkle with cinnamon.  Shake berries in a bag with the flour and add to the custard.  Bake @ 400° for 45 minutes.  Let cool and then refrigerate.

stamps- House Mouse Pumpkin Pie and footprints by Hero Arts; paper- SU! Pumpkin and Choc. Chip, non-SU! Blue, Red, White, and Beige, dp- Flair Designs; ink- Palette Black; accessories- Stickles, Copic markers, Nestabilities, SU! Curly Label punch

need a last minute gift?…

hot-cocoa-jar-diane-zechman.jpg…Just run to your local grocery store!  I found a few recipes on the internet for hot cocoa mix but I ended up altering one to suit my own taste.  Then I found these drinking jars with a handle in a local store but you can easily use canning jars or any other jar with a lid. 

I made the tags by placing the folded edge *just inside* the top edge of the Labels 1 Nestability die.  The stamped image is from JustRite Stampers and can be found here or here.  It was a gift to me and turned out to be perfect for this project.  In the close-up pic below you can see that I added some dimension to the frothy cocoa with a puffy ink marker (similar to Liquid Applique).  I also added a bit of sparkle with a glitter pen. 

hot-cocoa-tag-diane-zechman.jpgstamps- Baking Stamp Ensemble by JustRite Stampers; paper- Red, Choc. Chip, white; ink- Choc. Chip, Real Red, Garden Green; accessories- Labels 1 and Circle Nestabilities, glitter pen, gel pen, Marvy Puffy Velvet fabric marker, heat tool

And here’s the recipe I ended up using after my alterations:

Hot Cocoa Mix

8 cups powdered milk

2- 3.5 oz. pkgs. Cook and Serve chocolate pudding mix

1 cup powdered chocolate drink mix (Nestles Quik)

1 cup powdered non-dairy creamer

3 cups confectioner’s sugar

3/4 cup unsweetened cocoa powder

Mix all together in a large bowl and place in jars. 

Attach a tag with the following instructions:  Dissolve 1/3 cup cocoa mix in 1 cup boiling water.

I hope you and your family have a Blessed Christmas!  Thanks for stopping by!