Category Archives: Sizzix

remember when…

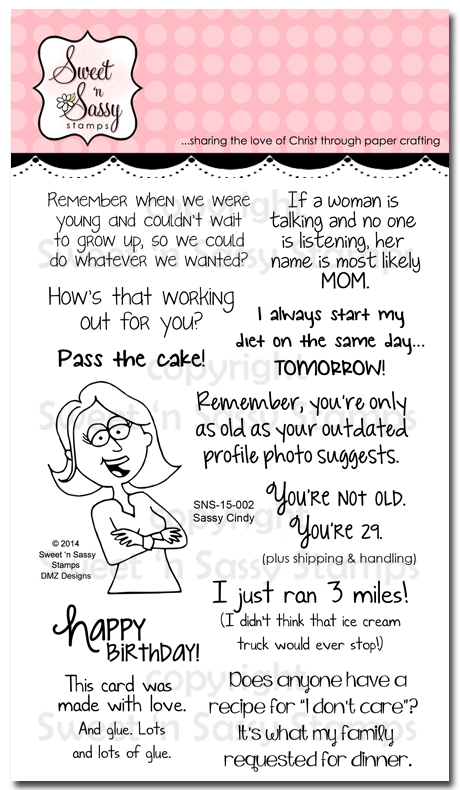
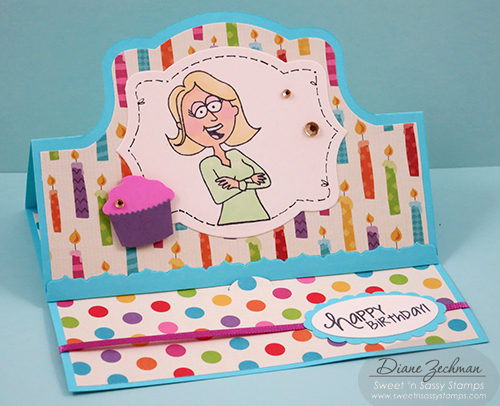
Last weekend I attended a shoebox swap in Ilion, NY with about 25 stamping friends.  We designed and prepared the supplies for a card that everyone in attendance could make.  I grabbed a Sizzix card die that I hadn’t used yet and my Sweet ‘n Sassy- Sassy Cindy stamp set to create my card.

When the card is opened, the front stands up when placed behind the die cut notch.

remember when diane zechman

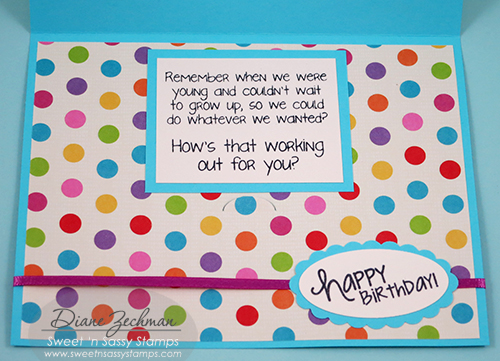
On the inside, above the notch, is one of the Sassy Cindy sentiments.

remember when inside diane zechman

The cupcake is a Martha Stewart punch popped up with foam tape.

Hope you have a great weekend!

stamps- Sweet ‘n Sassy- Sassy Cindy; paper- Aqua, Cream, SU! Pixie Pink and Perfect Plum, The Paper Studio- Party Polka and Party Candles; ink- Memento Tuxedo Black; accessories- Sizzix Royal Stand Ups Card, Promarkers, Martha Stewart cupcake punch, ribbon, SU! oval punches, foam tape, rhinestones.


Silent Night tag

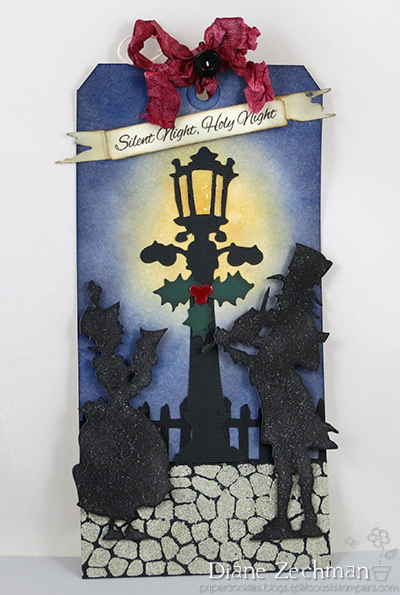
I am a little late (or very early!) in sharing this Christmas tag that I made for a class.  It was supposed to be done in December but with all the holiday activities, our group didn’t meet…and I didn’t prepare it.. until the end of January.

Sizzix Christmas tag diane zechman

The Sizzix Carolers were cut from Grunge board, sponged black, and popped up.  Their feet were attached to the tag, though, without any foam dimensionals underneath.  The Sizzix lamp post and fence were cut from black cardstock.  The background was sponged with Distress Inks and I applied Crystal Lacquer to the top of the lamp post to resemble glass.  I liked how it had a few tiny bubbles in it.  The banner words are from Sweet & Sassy.

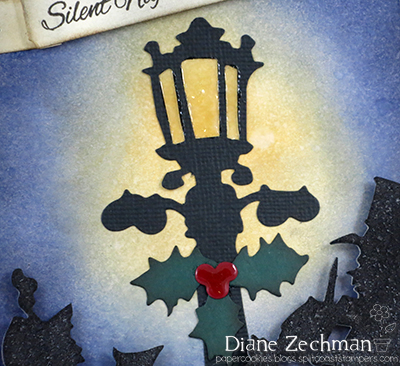
Sizzix Christmas tag lamp post diane zechman

The berries also have some Crystal Lacquer on them.

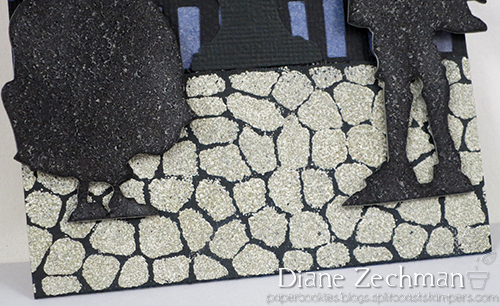
Our friend Lisa, the owner of the shop, had the Sizzix Cobblestones die and it was perfect to create a street for them to stand on.

Sizzix Christmas tag cobblestones diane zechman

How to make the cobblestones:  I knew there wasn’t enough time in a class to piece together all the “stones” in this die so I decided to create a stencil with it.  The acetate we had was too thick to cut through so we just made our “stencil” out of cardstock.  The Cobblestones die was diecut from cardstock and the stones were discarded.  The “grout” was held in place over a strip of black cardstock with removable tape.  Embossing ink was applied over the stencil and then then stencil was removed.  Pumice Stone Distress embossing powder was added and then heated to create the look of cobblestones.

Thanks for looking in and have a great weekend!

winter ATC frame

Hello friends!  I have a special project to share today that I made for a Christmas gift.  I wanted the recipient to be able to enjoy it all winter long, though, so I went with a snowy/winter theme.  Each little card in my frame is ATC size (2 1/2 x 3 1/2 inches) and I used lots of my favorite Sweet ‘n Sassy stamps and dies.

I also made this for our Challenge Chicks Challenge…this month Anna wants us to create winter scenes!
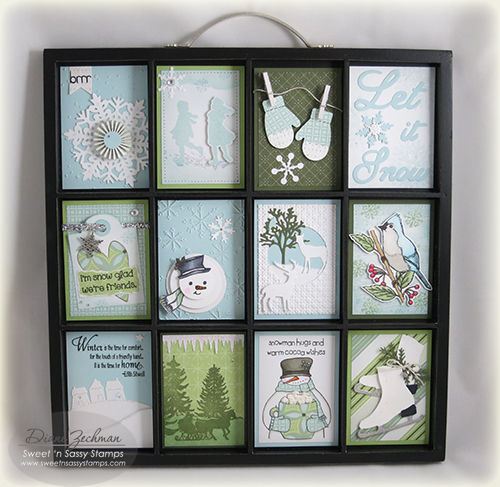
SNSS ATC frame diane zechman

I wanted to be able to switch out the ATC’s for each season/holiday or whatever theme I want…so they were attached in the frame with Removable Glue Dots.  I found these to work perfectly for the right amount of adhesion needed, yet still be able to be easily removed.

Here’s some close-ups of each ATC.  For the first one I made a rosette with my Scor-Pal and centered it onto a Sweet ‘n Sassy Large Snowflake diecut.  The “brrr” is from my Snowman Soup stamp set and the background was embossed with the Cuttlebug Kars Snowflake embossing folder.

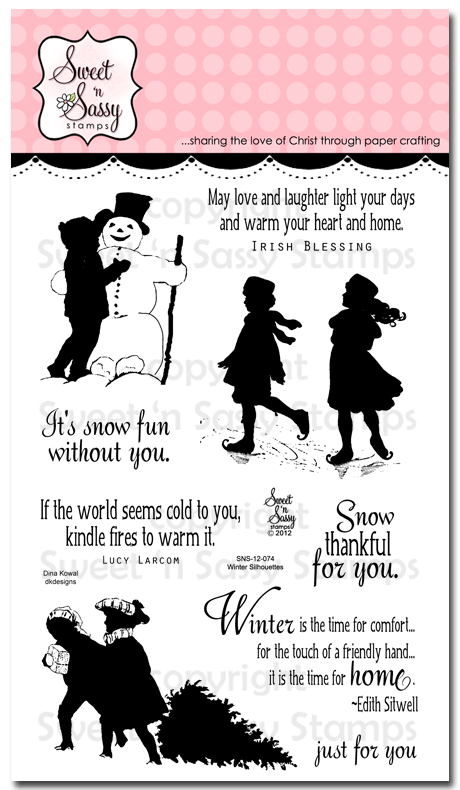
The second one has some stamped skating friends from the SNSS Winter Silhouettes stamp set, with one popped up for dimension.  There’s a few tiny snowflakes from my Snowy Hello stamp set lightly added to the top.  The edges of this one were stitched on my sewing machine.
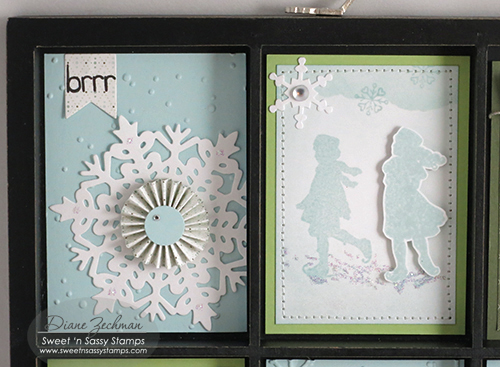
SNSS ATC frame 2 diane zechman

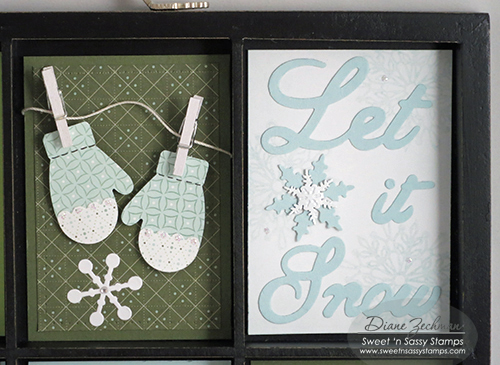
The mittens were made with a SU! punch and the white tiny clothespins came from Michael’s.  They were attached with 1/8″ Scor-TapeCrochet thread was perfect for the string.

The Let it Snow words are a Sizzix die and I faintly stamped snowflakes in the background from the Spectacular Snowflakes.
SNSS ATC frame 3 diane zechman

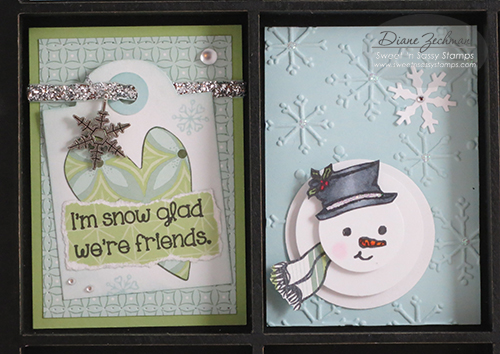
On the left, below, I used one of the Bookmarks & More dies to create a tag. The heart was cut from the Heart dies and the tiny snowflakes and words are from my Snowy Hello set.  The snowflake charm is SU!

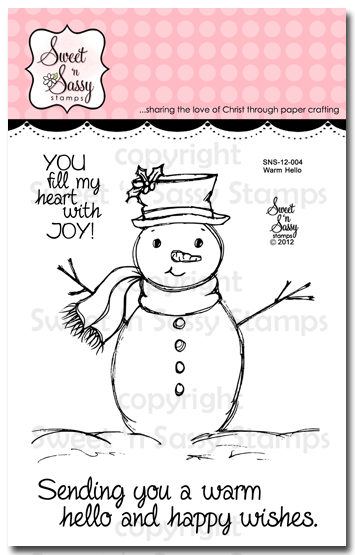
On the right the background was embossed with the Sizzix Snowflakes #3 folder.  3 circles were punched and popped for dimension.  The snowman’s face, hat and scarf are from the Warm Hello stamps.
SNSS ATC frame 4 diane zechman

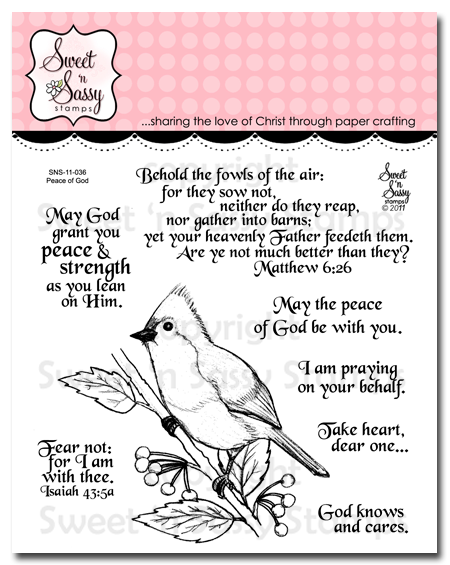
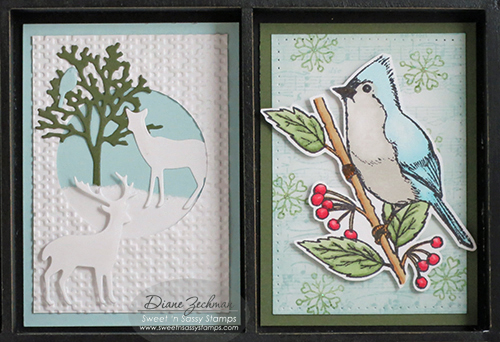
The tree, deer, and bird, below are from Forest Silhouettes dies. On the right, I lightly stamped the Music Background.  More Snowy Hello flakes were stamped (this time in green) and the bird from Peace of God was popped up.
SNSS ATC frame 5 diane zechman

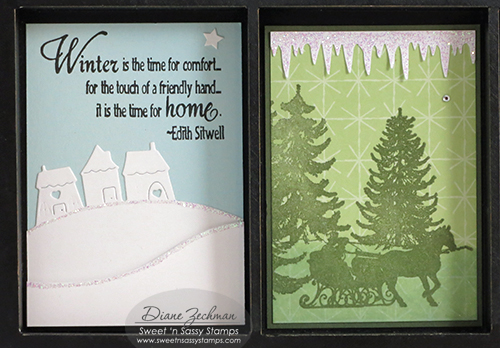
The Hillside Edges dies made a cute snowy scene and the words from Winter Silhouettes went with it perfectly.  Then I stamped the sleigh ride image from one of my fave Christmas sets, Old Fashioned Christmas.  The top border was punched with the Martha Stewart Icicles punch.
SNSS ATC frame 6 diane zechman

The words and snowy fella below, drinking hot cocoa, is from my Snowman Soup set.  The mug, scarf, and mittens were paper pieced.  Then I applied a Puffy Velvet Fabric marker (like Liquid Applique) to the marshmallows and heat them with a heat tool to puff them up.

The skates are a Sizzix Movers & Shapers die.  The blades were heat embossed with silver e.p. and the Martha Stewart branch punch, along with a tiny jingle bell, finished them off.  You can’t see in the pic but the skates were painted with Picket Fence Crackle Paint.
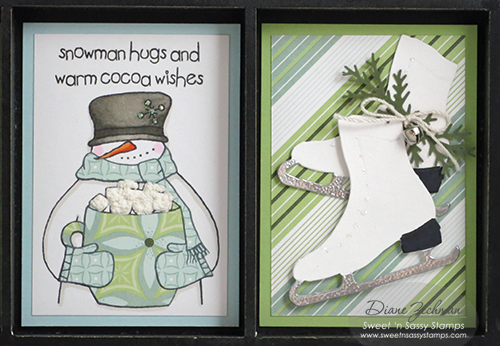
SNSS ATC frame 7 diane zechman

Lots of glitter and bling were added to each one to make this frame sparkle!  My ATC memory tray was purchased at Hobby Lobby.

Please join us and create a card with a winter scene… then share it on our Facebook page!  Also, you can upload it to the Splitcoast gallery…and use the keyword CHXJAN15.  Now be sure to click on the links below to check out what the other Chicks created!

challenge chicks logo small

stamps- Sweet ‘n Sassy Snowman Soup, Winter Silhouettes, Old Fashioned Christmas, Warm Hello, Peace of God, Music Background, Snowy Hello, and Spectacular Snowflakes;

paper- white, SU! Soft Sky, Certainly Celery, and Always Artichoke, SU! Wintergreen dsp;

ink- Memento Tuxedo Black, Versafine Black, Versamark, SU! Soft Sky and Always Artichoke;

accessories- Sweet ‘n Sassy dies (Large Snowflakes, Forest Silhouettes, Hillside Edges, Bookmarks & More, and Hearts), Scor-Pal, Scor-Tape, Cuttlebug Kars Snowflakes emb. folder, circle punches, hot glue gun, tracing wheel, sewing machine, Stickles, rhinestones, foam dots, Wink of Stella clear, Cuttlebug Snowflakes #2 die, Martha Stewart Icicles punch, SU! Square Lattice emb. folder, SU! mitten punch, SU! snowflake charm, Copic markers, Sizzix Snowflakes #3 emb. folder, ribbon, crochet thread, mini clothespins, Sizzix Let it Snow #2, Sizzix Movers & Shapers ice skate die, Puffy Velvet Fabric marker, Ranger Picket Fence Crackle Paint, silver embossing powder, tiny jingle bell, Martha Stewart branch punch.

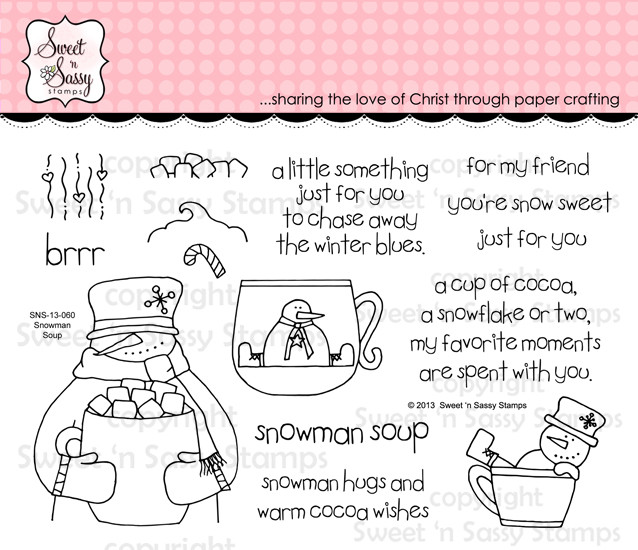
Here are the Sweet ‘n Sassy products that I used…
 

Snowman Soup pocket card (with Envelope Notcher and video!)

Brrr!  We were spoiled with a few extra days of nice temps but now it has gotten cooler.  I am not especially fond of the cold but today I have a card to help warm someone up.

I recently purchased the We R Memory Keepers Envelope Notcher which compliments their Envelope Punch Board.  And I wanted to use it for a Make & Take for some dear friends who came to visit at my friends Lisa & Lou Ann’s store.  But I thought it would be fun to notch something else besides an envelope… because we can all read & follow the directions on the package, right?  lol.  But when I did a quick search, I soon realized that there aren’t any tutorials using this tool for projects other than making a notched envelope…or maybe I’m not looking in the right place??

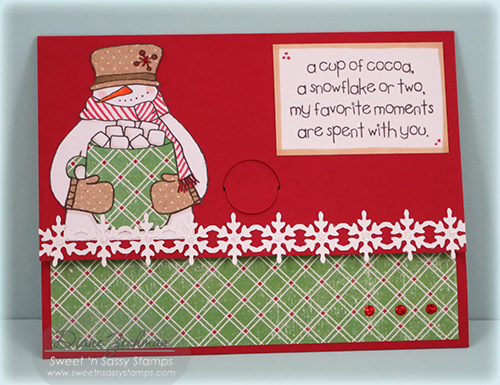
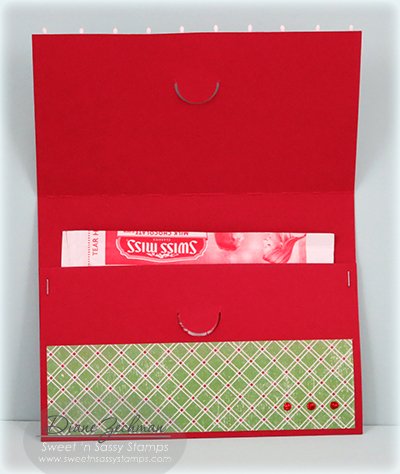
Anyway, I first decided to create a tri-fold card so I figured out the measurements for cutting and scoring.  Then I changed it up a bit and turned my tri-fold into a pocket card… so you can tuck in whatever you wish.  Mine has a hot cocoa packet.  And I used my Snowman Soup stamp set by Sweet ‘n Sassy Stamps.  🙂

IMG_3515

And here it is open…with hot cocoa inside…

IMG_3519

My snowman was paper pieced (still one of my fave techniques!).  A marker was used on his scarf though.

IMG_3516

To create the Tri-fold card base, I started with a 5 1/2″ x 10 1/4″ piece of cardstock.  Using my Scor-Pal, I scored the length at 3″ and 7 1/4″.  (Or you can just score each end at 3″)  Crease scored lines.

Next, centering the Envelope Notcher in the middle section both horizontally and vertically, fold and punch each end (the top and the bottom).

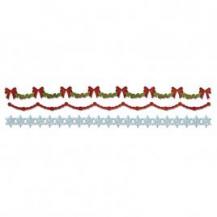
Then staple, tape or glue each side of the pocket and decorate your card as desired.  The snowflake border was diecut from white cardstock using the Sizzix Decorative Strip Die – Holly, Beaded & Snowflake Garland.  I dotted this with a little Stickles.

Here’s a quick video with a few hints on using the envelope notcher and making this project…


[youtube]https://youtu.be/x6JXLHWLJzE[/youtube]

Hope this helps you have a little more fun with this cool tool!

stamps- Sweet ‘n Sassy Snowman Soup; paper- white, red, ?dsp; ink- Memento Tuxedo Black; accessories- Scor-Pal, Copics, Sizzix Decorative Strip Die – Holly, Beaded & Snowflake Garland, We R Memory Keepers Envelope Notcher.
snowman soupsizzix holly beaded snowflake
envelope notcher

paper dresses, purses, and shoes

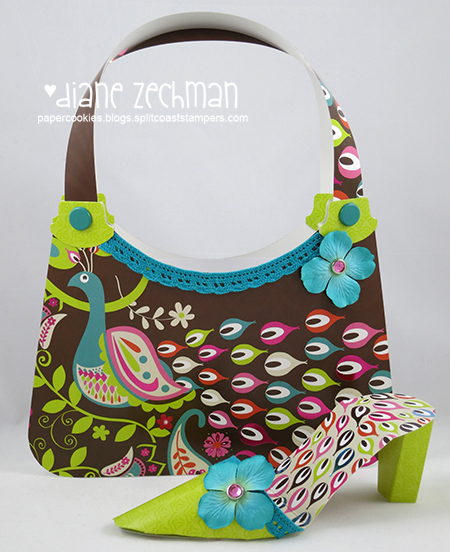
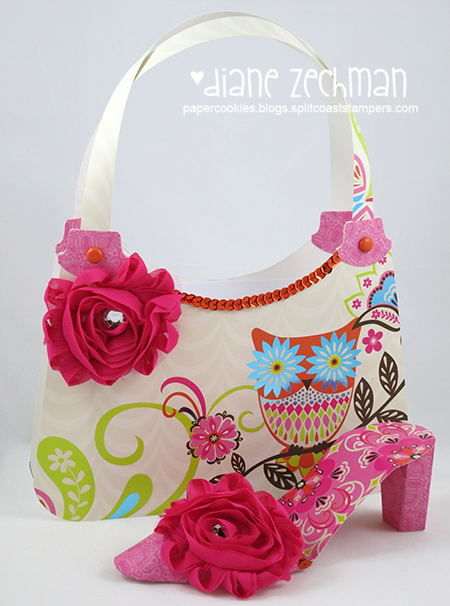
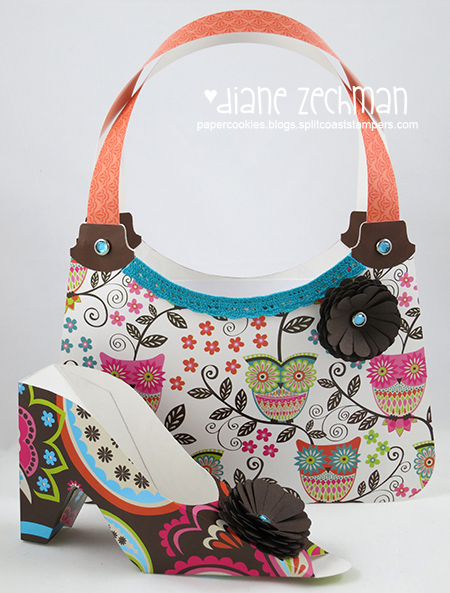
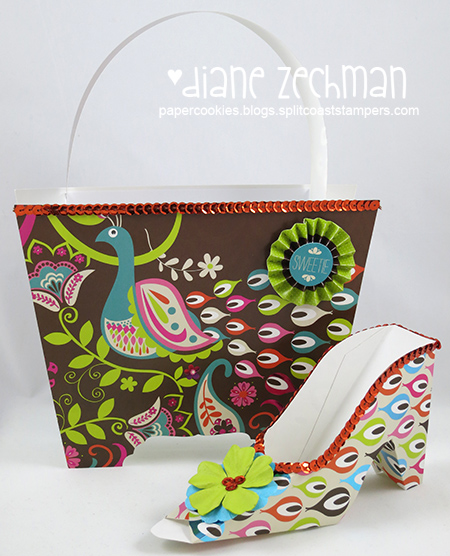
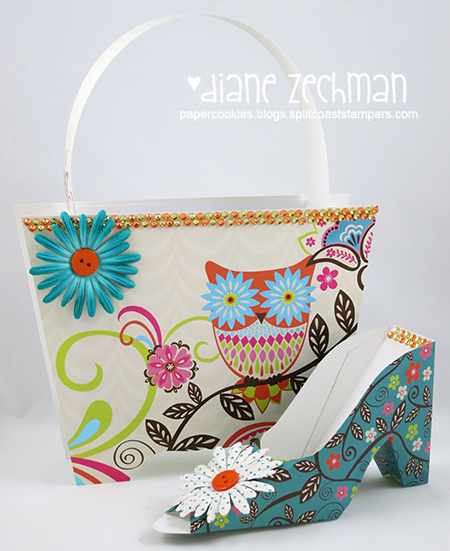
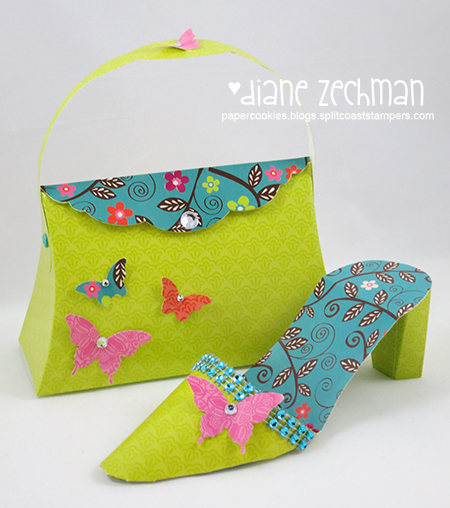
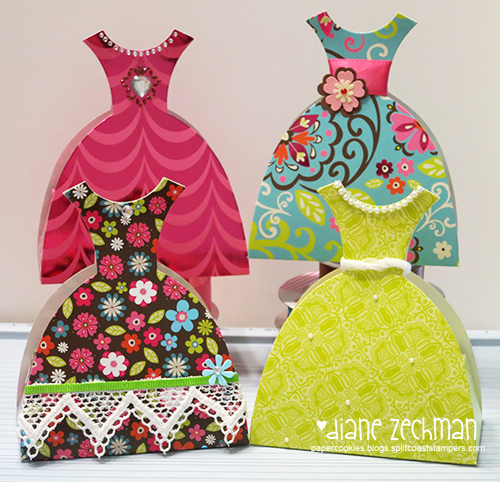
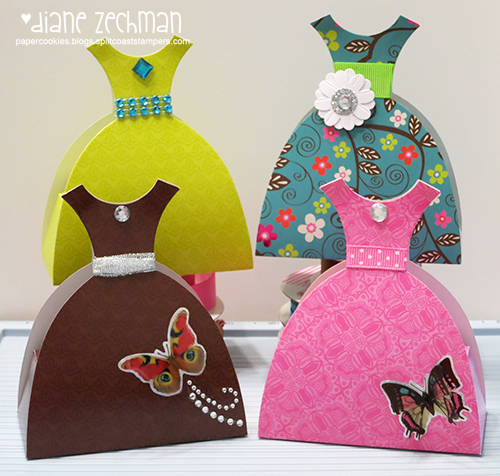
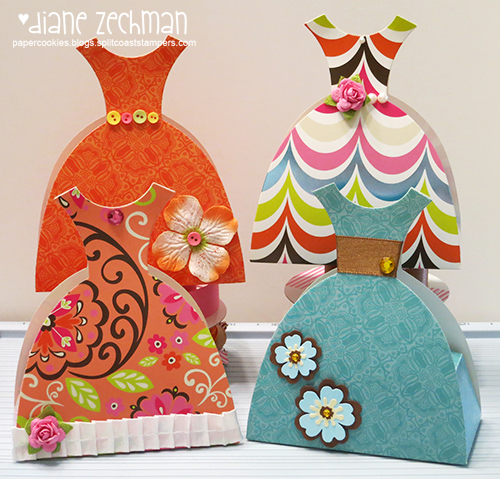
On Saturday we had a bridal shower for my daughter, Kayla.  I still can’t believe my girls are all grown up!  For her shower we went with a girly theme.  I made some paper purses and shoes for the table centerpieces and die cut lots of dress boxes for favors.  They were a lot of fun and turned out quite cute, I think!  My Scor-Pal was a life-saver and I used lots and lots of Scor-Tape!

A friend helped me to trace and cut the purses and shoes that were done by hand with patterns or templates.  I went to Michael’s and bought 2- 12×12 paper packs (Recollections- Dreaming In Color) so the projects all coordinated.  The first three purses are a template by Becky Roberts.  The next three were done by making up my own measurements and were inspired by one my friend Tracy made a few years ago.  The last two purses were cut with my Sizzix Bigz Pro Pillow Purse die.  I used two patterns for the shoes… the Slip On Mule is by Stacy Cohen and the other shoe template is by Ellen Hutson.

Here they are… what fun to create and embellish!  Do you have a favorite?

After the purses and shoes were decorated, I started making dress boxes for favors.  These were die cut with the Sizzix Bigz Pro Dress Box die.  I made over 40 and they all turned out a bit different.  Here’s just a few…

Thanks for popping in.  I will share more shower pics soon.  The games were fun too!  😉

the greatest gift

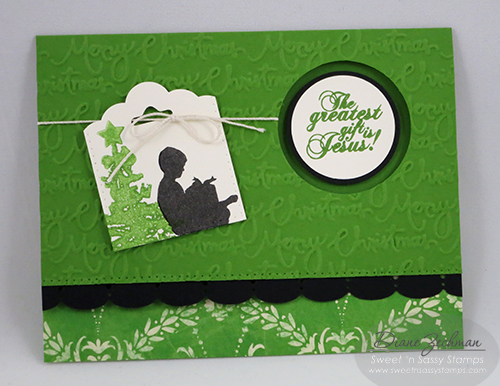
I’m sharing another Christmas in July card on the Sweet ‘n Sassy blog today.  This card uses three new Christmas sets called Christmas Morn, Jesus is Born, and Christmas Innies.  They are wonderful sets for jump-starting your holiday card making.

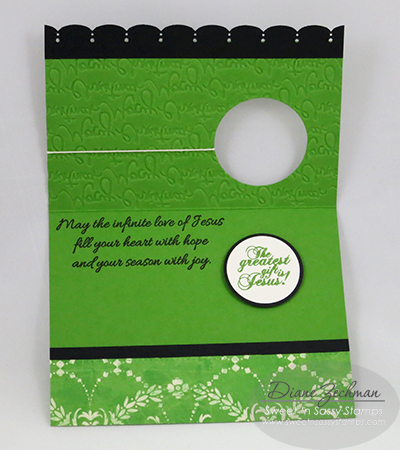
A circle punch was used to create an opening in the card front in which the popped up sentiment shows through.  An additional sentiment was also stamped on the inside.

I hope this inspires you to get some Christmas cards ready.  Have a great Monday!

stamps- Sweet ‘n Sassy Christmas Morn, Jesus is Born, and Christmas Innies; paper- SU! Gumball Green, black, vanilla, Bo Bunny ST. Nick Mistle Toe; ink- Gumball Green, Versafine Black; accessories- Sizzix Merry Christmas #2 embossing folder, circle punches, Martha Stewart Traditional Scallop Edge punch, SU! Tag Topper punch.

butterfly birthday

Welcome!  Today Sweet ‘n Sassy Stamps is hopping with Add A Little Dazzle!

First we’d like to share a little bit about the two companies featured in today’s hop…

Sweet ‘n Sassy Stamps
We are a small family owned specializing in wholesome/Christian clear stamp designs. We also carry a wide range of coordinating dies and digital stamps. We have been in business for over 6 years and have been so very blessed to be a part of the paper crafting industry. Our stamps are a lot of sweet and little bit of sassy.  We invite you to check us out and enter coupon code ALDSNSS to save 15% on your order. Coupon good through May 31st.

Add a Little Dazzle
We specialize in an exclusive line of craft metal sheets that helps you take your crafting to the next level. Whether you are a seasoned or new crafter, our craft metal sheets will help you create unique projects that will make you stand out among the crowd. Are you ready to take your crafting to the next level? Add a Little Dazzle Craft Metal Sheets will help you turn the ordinary into the extraordinary. We invite you to visit our blog and receive a FREE BONUS TUTORIAL when you purchase the Add a Little Dazzle Sampler Pack. This special offer is good through Wednesday, May 21st.

Now how about we get to that blog hop! Be sure to stop by and comment on each of the DT blogs for a chance to win 1 of 2 prize packs from both companies valued at $25! You have until Monday, May 26th to enter. The winners will be announced on both company blogs by Friday, May 30th.

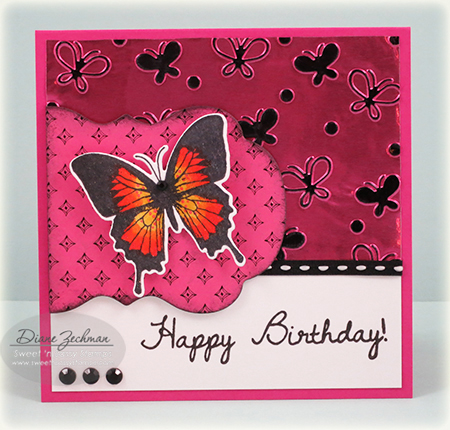
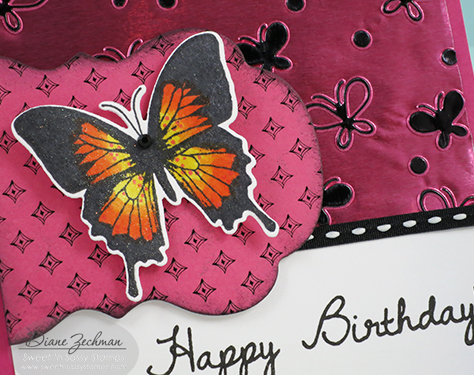
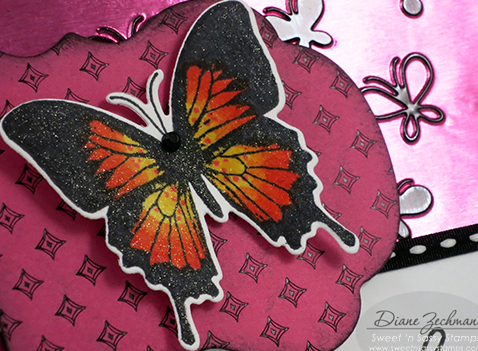
Add A Little Dazzle’s metal sheets come in several colors and I chose the pretty Princess Pink to make my card. I also used Sweet ‘n Sassy’s New Beginnings and coordinating dies, along with a sentiment from Special Blend.

Here’s my card…I took a few photos so you can see how different the shiny metal looks when turned in the light.  The metal craft sheet was embossed with a Sizzix butterfly embossing folder.  Then I carefully added Stazon Black ink to the raised areas, dabbing my inkpad directly on the metal sheet.

Here’s some close-ups of the embossing.  It’s also difficult to see but I added Wink of Stella to the butterfly and it really sparkles!  The patterned paper diecut and the butterfly were both raised with foam dots.

The metal sheets are super easy to cut and work with.  I used Scor-Tape to adhere it to the card which worked great.  This was a fun project!

stamps- Sweet ‘n Sassy New Beginnings and Special Blend; paper- white, SU! Melon Mambo, DCWV Street Lace; ink- Stazon Black, Memento Tuxedo Black; accessories- Add A Little Dazzle Metal Sheet, SNSS New Beginnings Butterfly die, Sizzix Butterflies embossing folder, Scor-Tape, Labels 14 Nestabilities, ribbon, foam dots, Copics, Clear Wink of Stella, gemstones.

so sweet cocoa

Just popping in quick with a card for this week’s sketch challenge

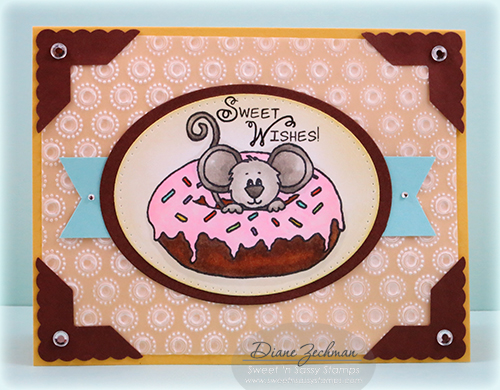
I used the cute doughnut image in the So Sweet Cocoa set from Sweet ‘n Sassy.  The sentiment is from Sweet Kiwi Koala.  I’ve been wanting to emboss on vellum since I haven’t done that for a long time so I used a Sizzix embossing folder that has dotted circles.  I thought it would go well with the main image.

Mother Nature teased us this morning with a dusting of snow.  Come on spring!

stamps- Sweet ‘n Sassy So Sweet Cocoa and Sweet Kiwi Koala; paper- SU! So Saffron and Cool Caribbean, white, brown, vellum cardstock; ink- Memento Tuxedo Black, SU! So Saffron; accessories- Copics, Sizzix Dotted Flower Rings embossing folder, Spellbinders Ovals, tracing wheel, Paper Shapers Scallop Photo Corner punch, rhinestones.

my furry valentine

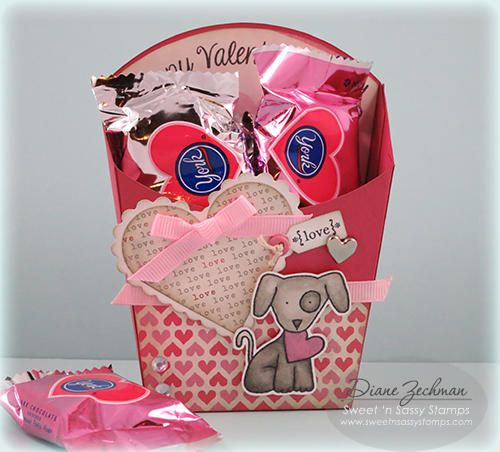
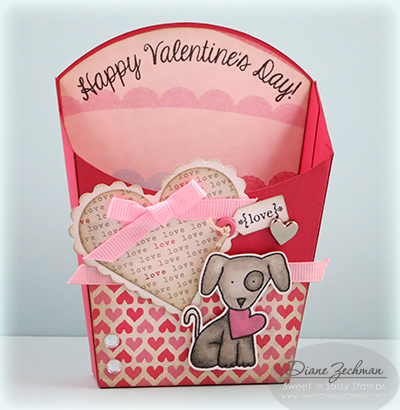
Hello friends!  It’s time once again for another Challenge Chicks Challenge!  We’re a small group of friends who post a new challenge on the first Sunday of each month…no stress, no deadlines…just for fun!  This month it is my turn and my challenge theme is “My Furry Valentine”…use any kind of animal to make a Valentine!  I was going to make a card and then I changed my mind and decided on a treat box.   Here’s my furry valentine…

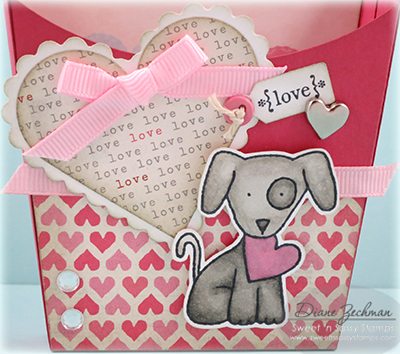
I used the puppy from my Sweet ‘n Sassy Valentine Critters and popped him up on the front.  The “Happy Valentine’s Day” sentiment was placed on the acrylic block in a curve so it could be stamped across the top of the back and align to the curved shape of it.

A close up…

I love the Sizzix XL dies and this Fry Box is one of my faves.  I see it is now only $7.99 on the Sizzix site…wow!

Please join us and create a Furry Valentine… then share it on our Facebook page!  Also, you can upload it to the Splitcoast gallery…please use the keyword CHXFEB14.  Now be sure to click on the links below to check out what the other Chicks created!

stamps- Sweet ‘n Sassy Valentine Critters, SU! Tiny Tags; paper- white, SU! Primrose Petals, MME- Love Me; ink- Memento Tuxedo Black, SU! Sahara Sand; accessories- Sizzix XL French Fry Box die, Heart Nestabilities, Scor-Tape, Copics, ribbon, rhinestones, SU! Jewelry Tag punch, heart brad, button, thread.

Have a great week, friends!  I hear Ol’ Phil saw his shadow.  And there’s more snow is in the forecast.  🙁

live love bloom

Today I have a card that I made with my set, Prim Blessings, from this month’s Sweet ‘n Sassy release.  This fall-ish set was used to make a summery card by changing the tones of brown in the sunflower to shades of pink.  I also used the fun triangle die from the Shape Dies.

The background was embossed with the Sizzix Dotted Flower Rings embossing folder…one of my favorites.

stamps- Sweet ‘n Sassy Prim Blessings; paper- white, black, Crumb Cake, Primrose Petals; ink- Memento Tuxedo Black; accessories- Sweet ‘n Sassy Shape Dies, Copics, Sizzix Dotted Flower Rings embossing folder.