Gold Foiled Flowers Tunnel Card

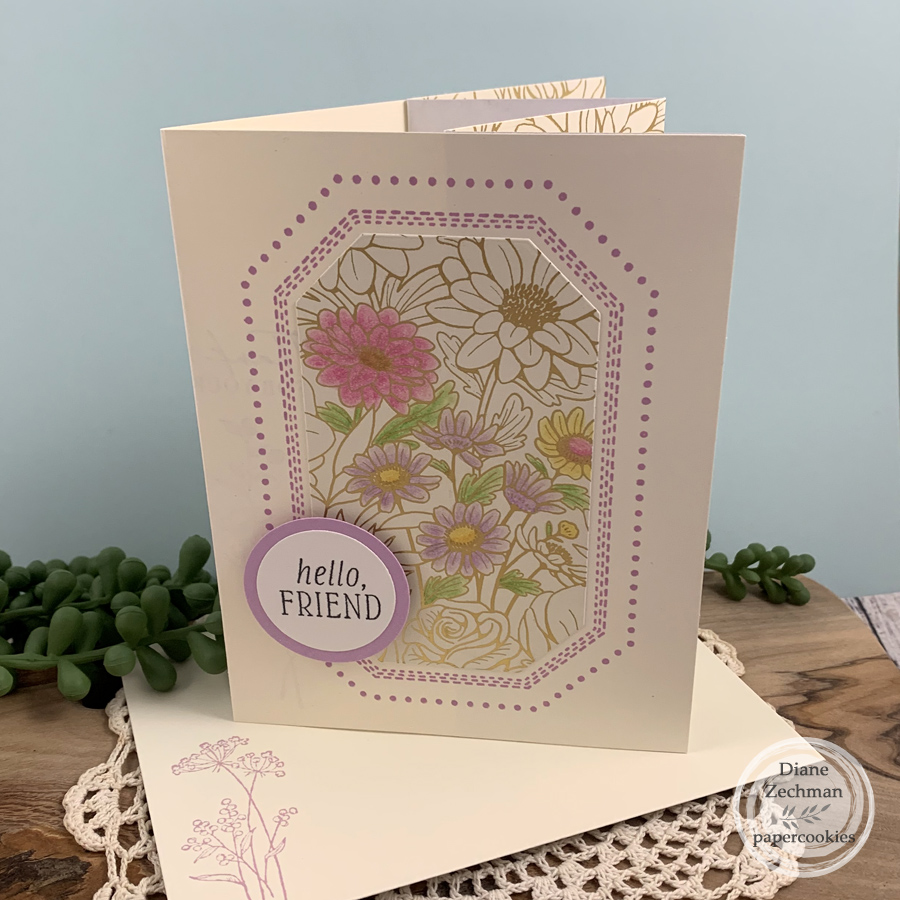
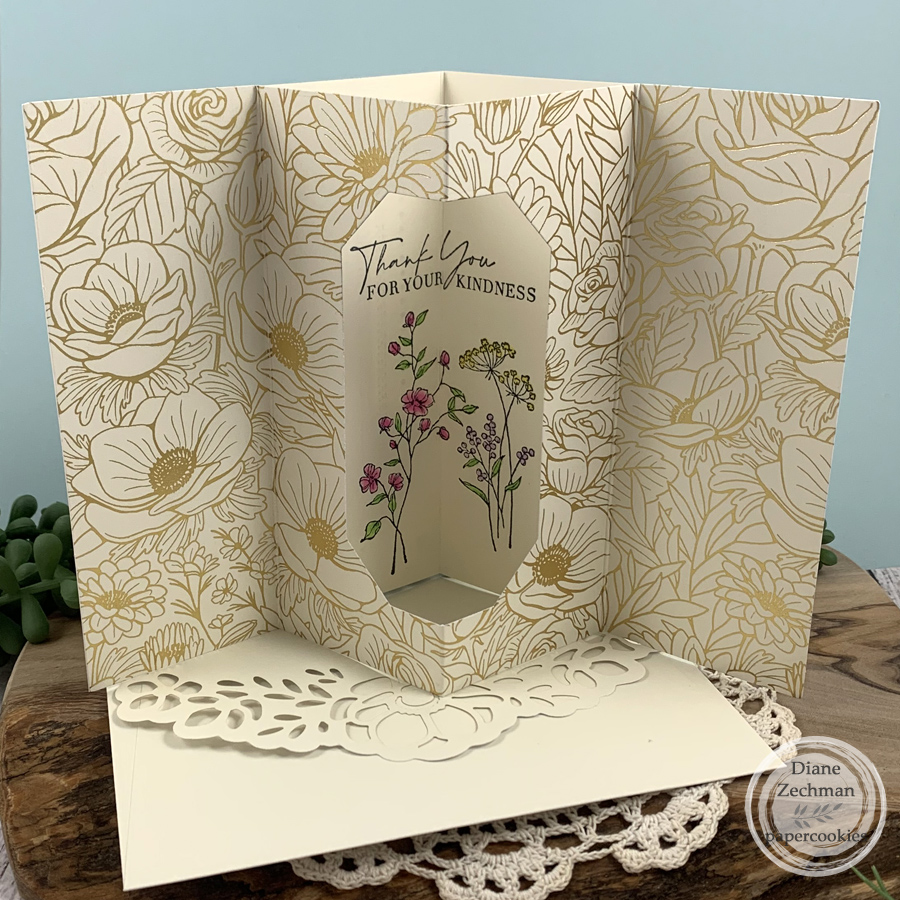
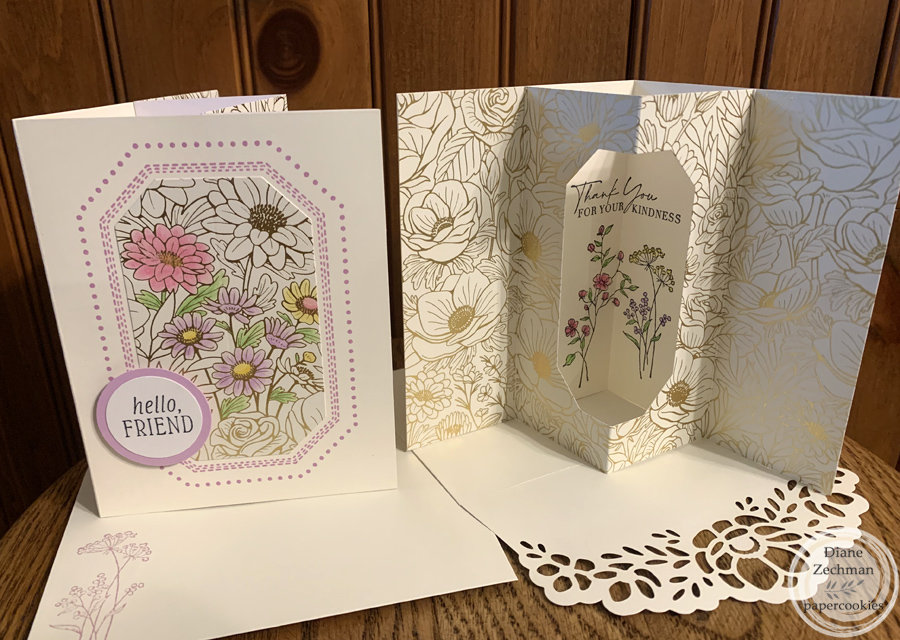
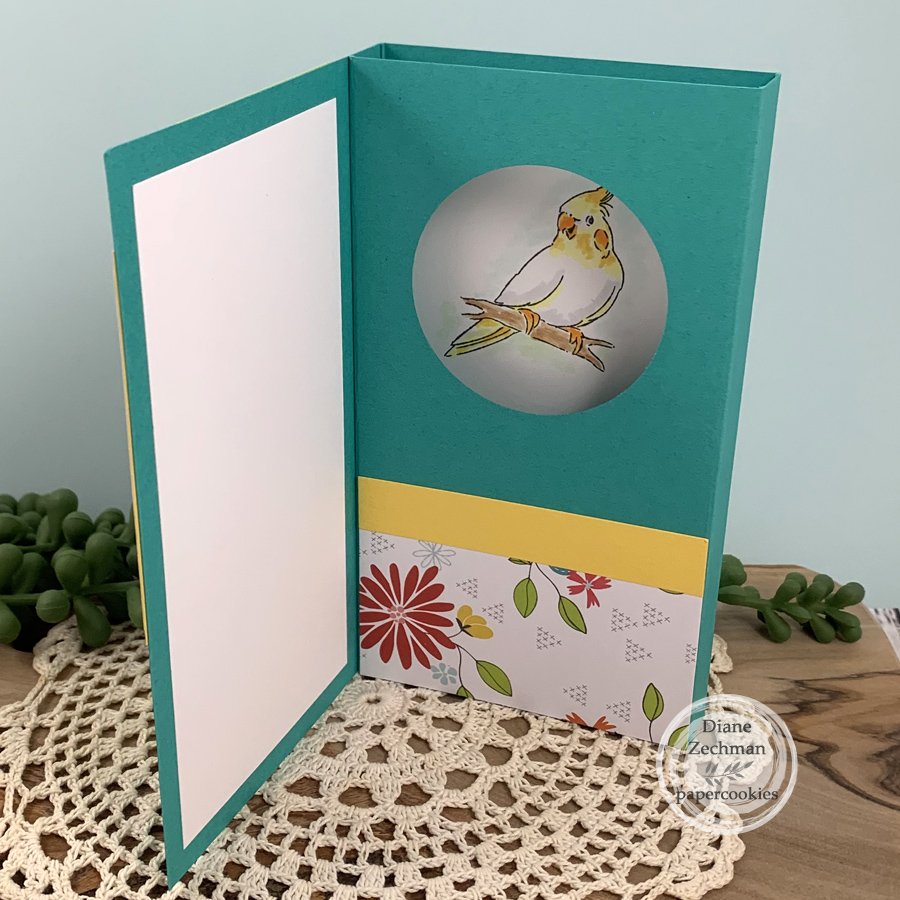
I was recently gifted a pack of the SU! Gold Foiled Flowers Cards & Envelopes. They’re so pretty! I decided to use two of them to create a Tunnel Card. So instead of having the full foiled pattern on the outside of the card, I scored/folded it for the inside. I used the Countryside Corners Dies to cut a window in the center, then used the cut-out piece on the card front. The outside sentiment is from the Inked & Tiled set, and the inside was stamped with the Dainty Delight Set.

Have a great day!

Ai Pop-Up Diorama Card

Recently I made a Pop-Up Diorama thank you card using another Art Impressions freebie stamp. I loved the layout of the card in the tutorial, so I cased it. Here I used the Ai EX5755 Cockatiel Freebie and the 5434HL Greenery Invite Set for the sentiment.

When you open the card, there’s a pop-up on the inside with a little window for your image (or sentiment) to peek through. The finished card, closed, is 3 1/2 x 5 1/2 so it can technically be a Mini Slim card.

Stay warm!

a birthday wish

Today I am sharing a card using one of the Sweet ‘n Sassy Stamps gnomes. I’m trying to get a few birthday cards in my stash, so I pulled a birthday sentiment from the Snail Village set to go with him. And since he has a flower in his hand and the patterned paper is floral, I used the scalloped circle dies in yellow and white to mimic them. A simple bow was added to finish it off.

Products used: Gnome-one Like You, Snail Village (sentiment), Stitched Rectangle Dies, Stitched Circles Dies, Stitched Circles 2 Dies.

Have a great day!

bargello birthday

Hello! I’m just popping in to update that due to the closing of the brick & mortar store and moving products, Sweet ‘n Sassy Stamps will not be having a February release. Since there won’t be a new release in February, we will be sharing projects with mostly Spring and Easter in mind. Be sure to check out the 40% Off Sale!

Here I used two of my favorites… Courage Dear Heart Stamps/Dies/Stencils and the Simple Sentiments Bundle.

I found some background pieces that I created a few years ago with the Bargello technique and paired them with the SU! Fluttering embossing folder. The butterfly and sentiment are popped with foam dimensionals.

Have a great weekend!

no prob-llama

Hello friends! I was previously on the Art Impressions Design Team and although I have taken some time now to care for my grandkids, I am still in love with Bonnie’s stamps. They are timeless, classic, and oh so FUN! When I was asked to Guest Design for February and told that the Theme is All Creatures Great and Small (Animals), I immediately thought of the Llama Set from the Funny Farm Series which I purchased a while back but hadn’t used yet. It’s an awesome set!

Products used: Ai 5458- Llama Set, 5463- Slimline Dies, 5135- Hexagon Double Stitched Dies, and 5133- Flag Double Stitched Dies.

This cute llama needed some bright and fun papers, and I colored the images with Copic markers to match. I cut some strips of the patterned papers, each about 2″ wide, then taped them together on the backside. This long piece was then die cut with one of the slimline dies to create the background. Then I offset 3 of the flags and the stitched hexagon die cuts were placed on a diagonal for a bit of whimsy. The second photo has a close-up showing the pot of flowers and cacti popped up with foam tape.

For the inside of the card, I added another one of the sentiments in the set and stamped the 2 llamas with orange ink.

I hope you join this month’s challenge and I am looking forward to seeing all of your creatures, great and small!

never ending universe

It has been a long time since I made a Never-Ending Card, and I forgot just how fun they are. I needed a masculine birthday card for a friend and wanted to use the SU! Reach for the Stars Bundle and the coordinating Stargazing papers. When I searched for the measurements for the N-E card, I found that someone already used this set in the A2 size. I will link her post HERE. I believe my measurements are a bit different, and I decorated mine slightly different as well.

As you continue to open the card from the center, four designs appear, then continue to repeat as it continually “opens”. (Quick video on my IG!)

If you haven’t tried this style of card yet, you need to! I even glued together two plain white N-E Cards for my granddaughters, and they had fun drawing on them! Have a great weekend!

diamond floral flakes

Hello! I have another card today with a background using new Sweet ‘n Sassy Stamps stencil sets. Read on to see how I created this fun background, then head to the store and check out the Bursting at the Seams Sale!

Products used: Diamond Floral Stencils, Simple Sentiments Bundle, Seasonal Trees Stencils, and Large Snowflake Dies (which are now on SALE!)

After brushing purple ink over the stencil shown below for this project, I didn’t clean the ink off of the stencil right away. Instead, I spritzed it with water and lay it down on a fresh piece of cardstock to transfer the remaining ink. It made such a cool, distressed looking pattern and reminded me of snowflakes.

Next, I randomly brushed purple ink “dots” with the circled stencil below. Then, I blended the card edges with the same purple ink.

The card was finished with a die cut snowflake, added sentiment, and a few rhinestones.

Have a great weekend!

love is in the air balloon

I am loving the new Sweet ‘n Sassy Stamps Love is in the Air Bundle! I previously shared a card with the cute helicopter boy and today I’m using the girl in a hot air balloon. I used shades of purple, pink, and blue and paired her with one of the new window dies.

Products used: Arched Window Die, Love is in the Air Bundle

Some teeny pearl hearts were added to finish it off. ♥

Have a great day!

cathedral shaker card

I am sharing two cards today using products from this month’s Sweet ‘n Sassy Stamps release. The first one is a shaker card. They are fun to create and receive.

Products used: Cathedral Window Die, Love is in the Air Bundle, Delicate Doily Die, and With Love.

I started with a 4 1/4 x 5 1/2 piece of double-sided patterned paper and cut it in half diagonally. One piece was adhered to the bottom front of the shaker card. The other piece was flipped and added to the bottom of the second card. A different coordinating pattern was added to the top of the shaker card, but I left the top of the other card white. Some polymer clay valentine chips from Hobby Lobby were placed in the shaker window (check out the cute tiny envelopes) and I fussy cut the sentiment and envelopes to add on top.

The second card is simpler, with a die cut doily accenting the sentiment.

Have a great day!

cathedral window sympathy

There are some mixed emotions with making sympathy cards, right? It’s not our favorite, but I was pleased with how this one turned out and will probably make more of the same in the future. I used Sweet ‘n Sassy Stamps products, along with the SU! Brick & Mortar embossing folder. I traced the outside of the window die to cut the layer with the scene behind it by hand.

SnSS Products used: Cathedral Window Die, Nature Silhouettes 2, and Simple Sentiments Bundle.

Have a great day!