
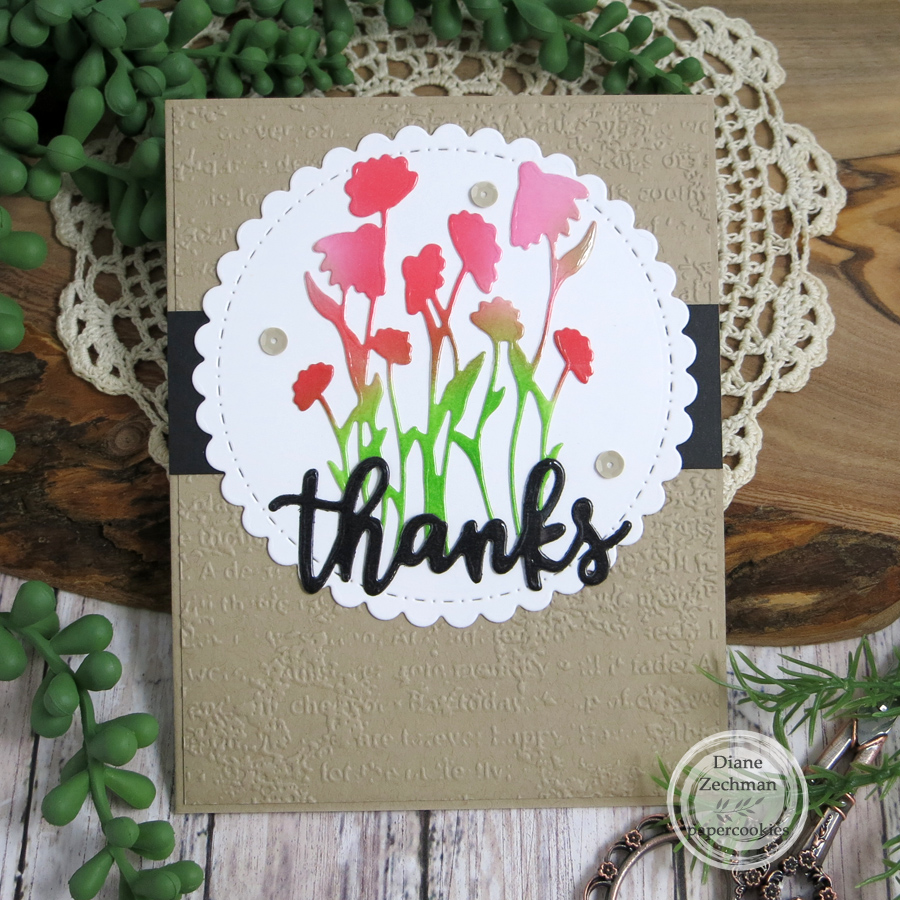
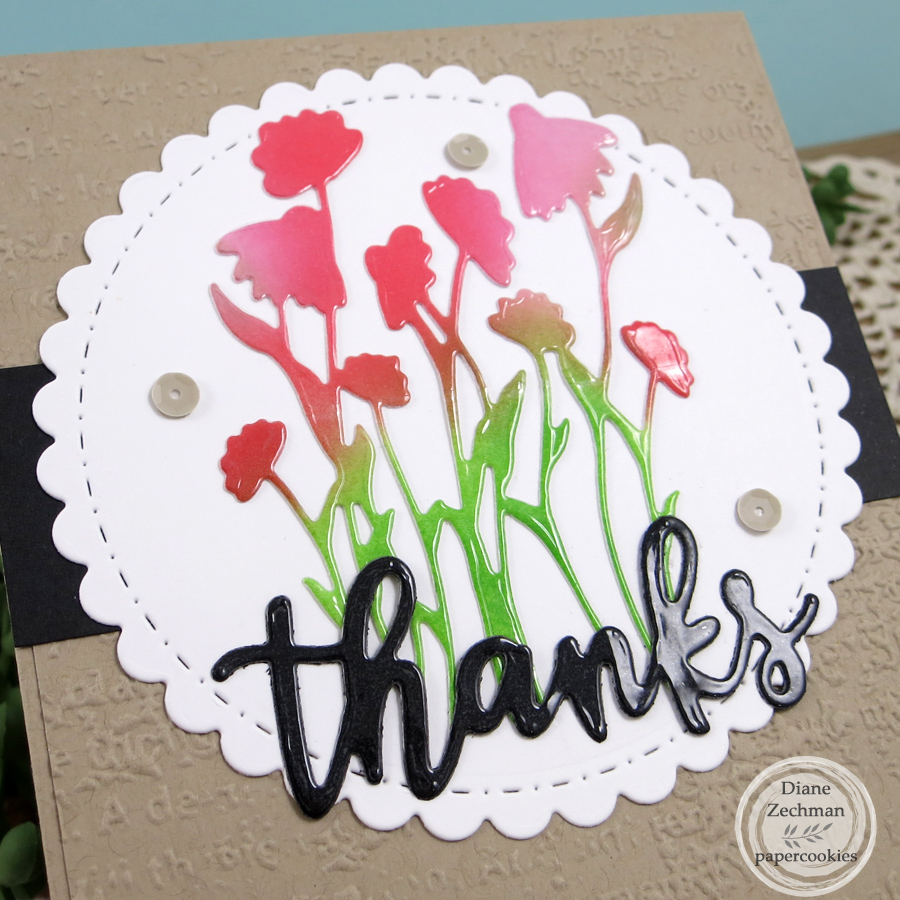
Hello! I have some cards to share today that I made using a few Sweet ‘n Sassy Stamps dies, an awesome technique, and a fun fold. First, I used the Wildflowers 2 Die and Thanks Die with the Faux Heat Embossing technique to make my die cut image and sentiment shine. It’s very simple, fun, and takes your project up a notch! Simply cover your cardstock or patterned paper with clear packing tape, smooth it out with an old credit card, and die cut. So easy!
Here’s another photo of the shine…
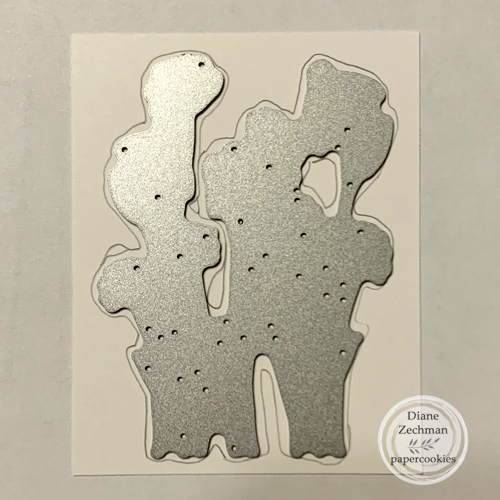
Since I wanted my die cut image to have different colors, I first loosely traced the die (cutting side down) onto white cardstock with a pencil.
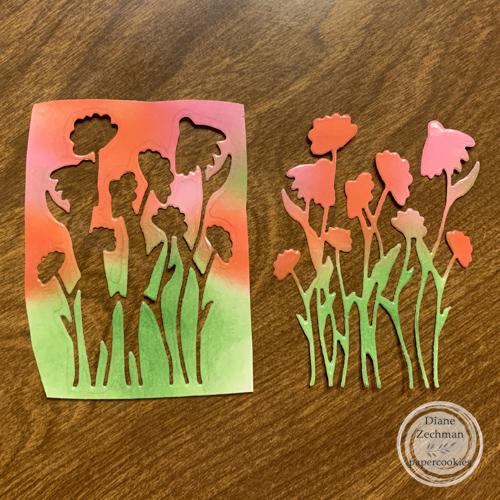
Next I blended the inks in the general areas that the colors were desired. I didn’t worry about getting them perfect!

After the cardstock was covered with ink, I applied the clear packing tape. Remember to smooth it out with the edge of an old credit card.

Then place the die inside your pencil lines and cut. Admire the shine! 🙂
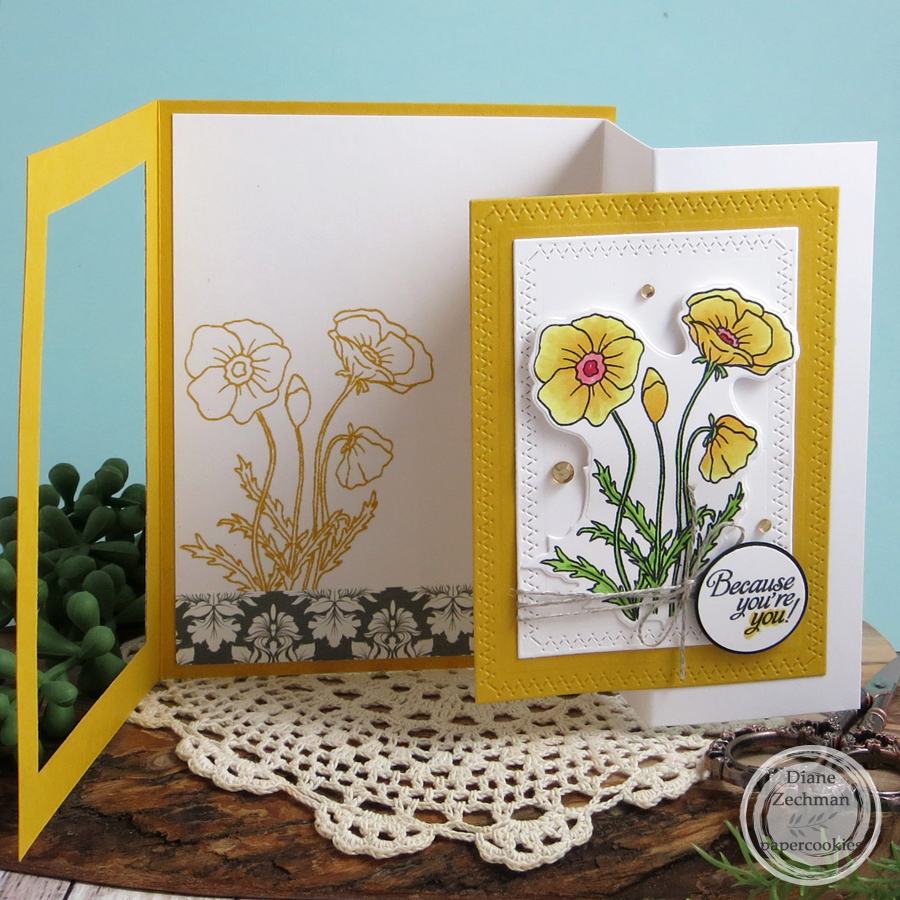
My second card uses an older poppy set but the matching dies are new! I added the colored & die cut image to a fun card fold. Here I used the Poppies & Greetings Stamp & Die Bundle (also sold separately).
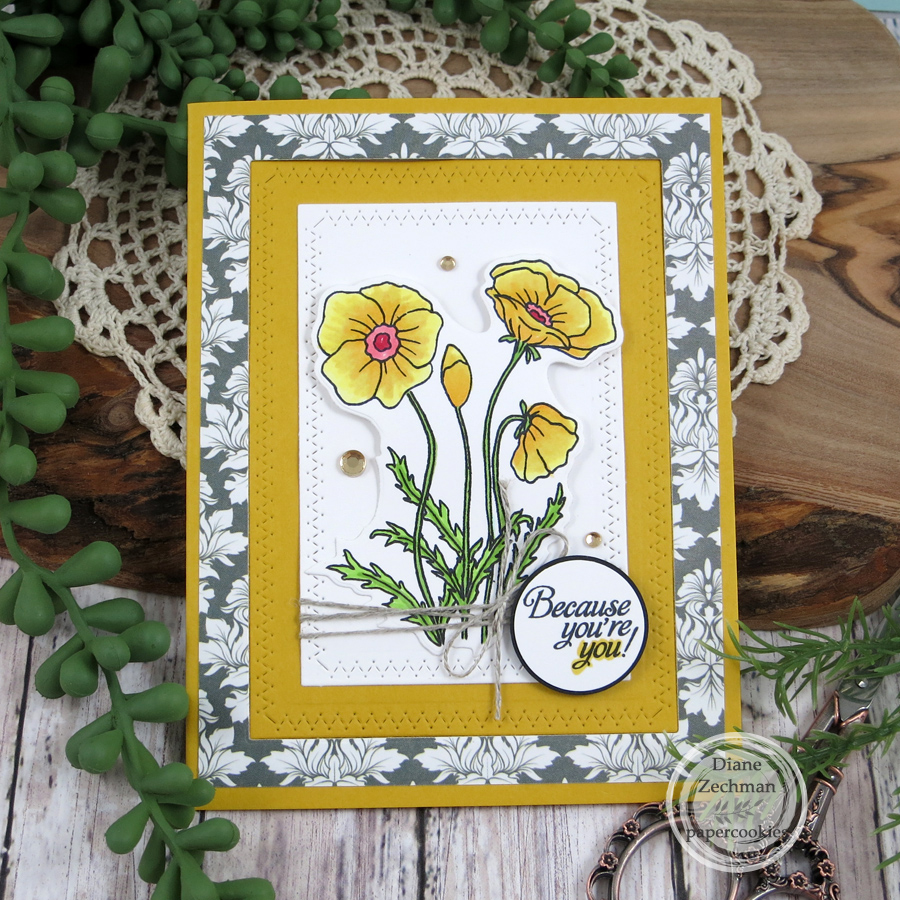
The yellow card base is an A2 size- 4 1/4 x 5 1/2. A panel is die cut from the card front and then attached to the white z-fold piece inside. The white cardstock is 5 1/4 x 8 inches, scored @ 2 and 4.
Thanks for popping in and have a great day!
stamps- Sweet ‘n Sassy Poppies & Greetings Stamp & Die Bundle; paper- white, black, SU! Crumb Cake, Crushed Curry, MME-Breeze; ink- Memento Tuxedo Black, SU! Crushed Curry, Distress Kitsch Flamingo, Abandoned Coral, and Mowed Lawn; accessories- MISTI, Scor-Pal, Gemini Jr., SNSS Wildflowers 2 Die and Thanks Die, Copics, circle punches, Gina Marie Stitched Scalloped Circles, sequins, rhinestones, SU! Timeworn Type embossing folder, blending brushes, packing tape, Penny Black Zig-Zag Stackers, foam tape, linen thread.
 cookiestamper ♥


