Category Archives: Scor-Pal

Scor-Pal Challenge #3

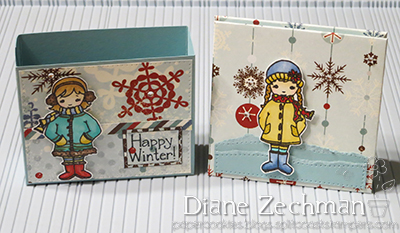
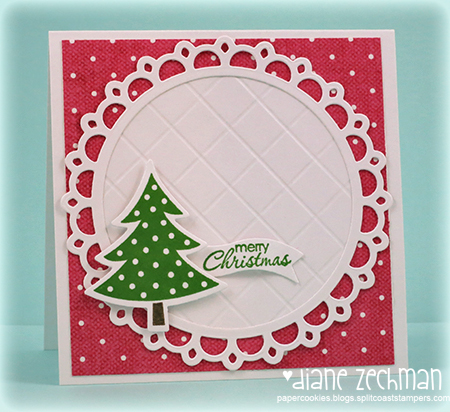
It’s the first of the month, which brings a new challenge on the Scor-Pal blog.  This month we are making monochromatic cards and projects.  Here’s my sample and a sneak peek of some new Sweet ‘n Sassy stamps and dies coming next week!

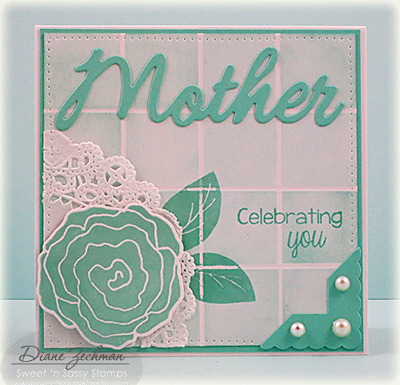
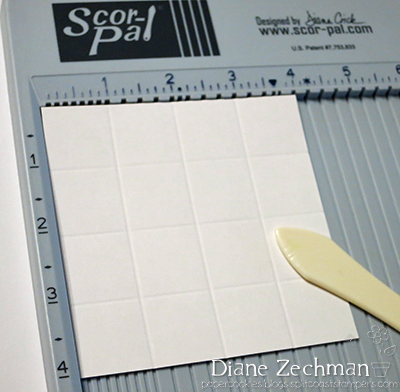
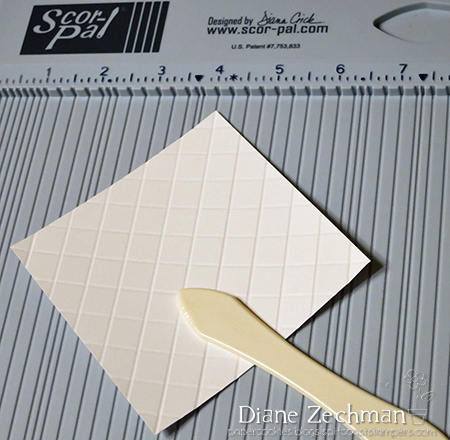
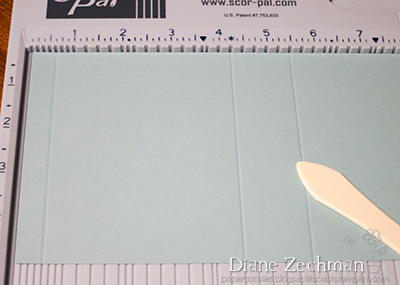
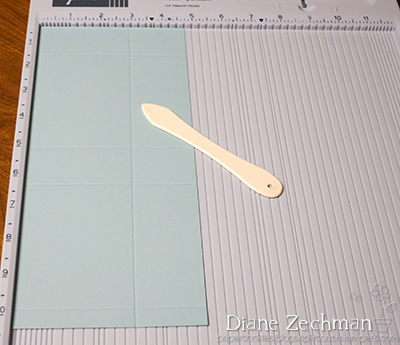
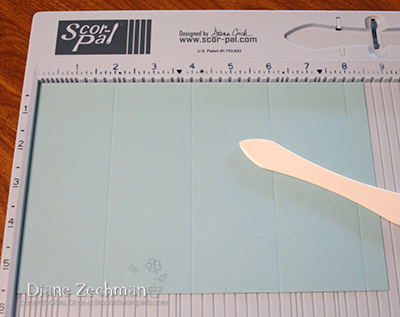
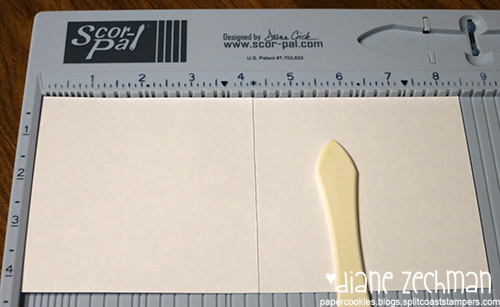
I started with a 4″ square piece of white cardstock and scored it both vertically and horizontally @ 1″, 2″, and 3″ with my Scor-Pal.

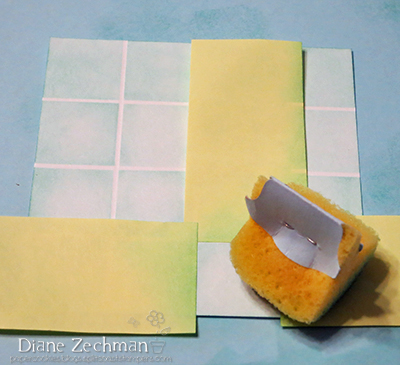
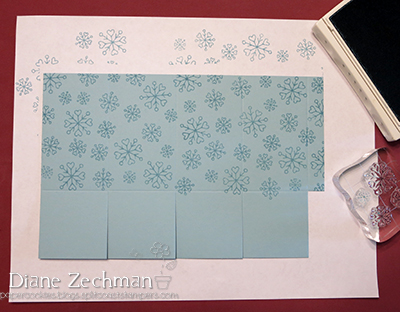
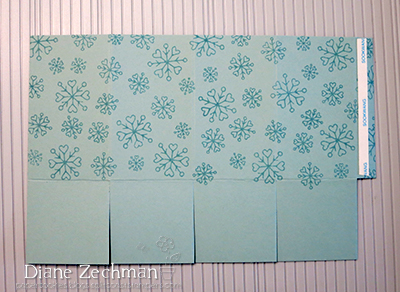
Then, using post-it notes, I masked each square and lightly sponged them with dye-based ink.  I made sure to mask so that my scored lines were left un-inked, thus creating the effect of tile and grout.

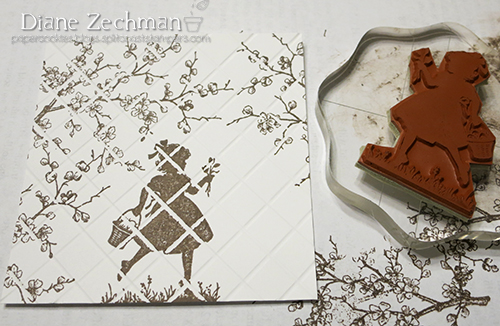
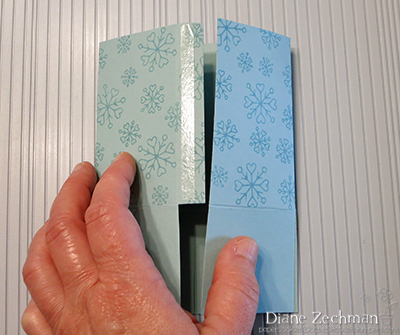
Stamp if desired and layer this panel onto a 4 1/4″ card base.  I added a piece of paper lace doily to make it more feminine.  I am really *loving* this new flower set!!  It has quickly become a favorite!

Come join us on the Scor-Pal Blog for the April Challenge!

stamps- Sweet ‘n Sassy- Thankful Blooms and Lots-A-Spots (sentiment); paper- white, SU! Coastal Cabana; ink- SU! Coastal Cabana; accessories- Sweet ‘n Sassy Thankful Blooms dies and Mother die, Paper Shapers photo corner punch, paper lace doily, foam dots, tracing wheel, adhesive pearls.

quick and easy Easter card

Good morning!  This week the Scor-Pal team is sharing some ideas for Quick & Easy Easter cards.  Today I have a card that may look time consuming at first glance but I assure you it is both quick and easy!

I used the Grid Technique to create my card.  First I started with a 4×4 square of white cardstock and scored it diagonally in both directions every 1/2″ to create the grid.  The finished scored background will look like this.

Next I stamped my images over the same side, with the indented grooves.  The ink will not stamp in the scored areas.

Then I colored select areas with Copic markers.  Be sure to avoid coloring in the scored lines.  Trim the panel if desired and finish the card. 

Be sure to check out all the inspiration this week on the Scor-Pal blog to jumpstart your Easter card creations!

stamps- SU! Easter Blossoms; paper- white, brown, SU! Pink Pirhouette; ink- Memento Rich Cocoa; accessories- Scor-Pal, Copics, tracing wheel, Sweet ‘n Sassy Lacey Eyelet Border die, dimensional, rhinestone.

a March Christmas challenge

It’s finally the first day of March (come on Spring!) which means it’s time for the second monthly Scor-Pal Challenge!  This month it’s a Christmas challenge and I made a few of the Cami Tri-Fold card from the Scor-Pal site.  Cami came up with this design several years ago and it’s still a fun card fold!

The little punched tab on the right side keeps the card closed.  Here it is open..

I used the Spellbinders Circles and Stately Circles to frame the sweet penguin from Sweet ‘n Sassy’s Cozy Friends.  Be sure to check that stamp set out…it’s on sale 1/2 off!

Join us on the Scor-Pal blog and enter your Christmas cards in this month’s challenge!

stamps- Sweet ‘n Sassy- Cozy Friends and Born This Day (sentiment); paper- SU! Riding Hood Red and Gumball Green, black, white, Doodlebug- home for the holidays; ink- Memento Tuxedo Black, Versafine Black; accessories- Spellbinders Circles and Stately Circles, Scor-Pal, SU! Word Window punch and retired Slit Punch, 1/8″ hole punch, 1/2″ circle punch, baker’s twine, Copics, Stickles.

sticky note holder and gift box

Today I have a tutorial over on the Scor-Pal blog.  The DT is updating some of the older tutorials and I recently revised the Sticky Note Holder and Gift Box tutorial with a few alterations in the measurements and directions.

Sticky Note Holder & Gift Box

By Diane Zechman

Adapted from tutorial by Bridgett Owens

Supplies:

Scor-Pal, Scor-Tape

Paper cutter

Scissors

Sticky Note pad

papers, ribbon, etc. to embellish

stamps and ink, if desired (Sweet ‘n Sassy- Winter Girls used here)

Note Holder:

2 pieces of 3 ½” x 3 ½” chipboard

1 piece of 3 ¼” x 6 ¾” cardstock or heavy patterned paper

2 pieces of 4 ½” x 4 ½” patterned paper

Gift Box:

1 piece of 4 ¾” x 10 ¼” cardstock

Sticky Note Holder

Step 1: Align the 3 ¼” x 6 ¾” cardstock along the left fence and score the 6 ¾” side @ 3 ¼” and 3 ½”.  Fold and crease scored lines.  Set aside.

Step 2: Apply Scor-Tape to one side of each of the chipboard pieces.  Center each chipboard square onto the back side of the 4 ½” patterned paper.  Miter the corners and secure the sides down with additional Scor-Tape. 


Step 3: Apply Scor-Tape to one side of your cardstock up to the first score line and center it onto one chipboard square. Repeat this process for the other chipboard cover.

Step 4: Adhere sticky note pad to the inside and decorate as desired.

Gift Box

Step 5: Align cardstock along the left fence and score the 10 ¼” side @ 1/2” and 9”.

Step 6: Slide the cardstock over so the left side is at the 1/8” mark.  Score @ 4 ¼” and 5 ½”.

Step 7: Turn the cardstock 90 degrees and score @ 3”. 

Step 8: Using scissors, cut the vertical score lines up to the horizontal score line.  Remove the small rectangular section at the bottom left.  Then trim the 2 largest flaps to 1 ¼” wide.  This will create the box bottom.  You will now have four flaps.

Step 9: Fold and crease all scored lines.  Adhere patterned paper layers to the front side, if desired.

Step 10: Turn the paper over.  Fold both sides in, adhering together  with Scor-Tape to form the box.

Step 11: Fold bottom flaps in one at a time, applying Scor-Tape to adhere the flaps shut.

Step 12:  Decorate as desired.  The gift box will hold 1 or 2 Sticky Note Holders.

snowman treat box

The Scor-Pal DT is busy updating some of the tutorials on the Scor-Pal site and I recently updated the 2-4-6-8 box tutorial.  It’s a quick & simple, tried & true favorite!

2-4-6-8 Box

By Diane Zechman

Supplies:

Scor-Pal, Scor-Tape

Paper cutter

Scissors

Hole punch

Ribbon

5 1/2 x 8 1/2 piece of cardstock (1/2 sheet) or heavy patterned paper

Stamps and ink, if desired (Sweet ‘n Sassy- Snowy Hello used here)

Step 1: Align paper along left fence and score the 8 ½” side @ 2”, 4”, 6”, and 8”.

Step 2: Turn the paper 90 degrees and score the 5 ½” side @ 2”.

Step 3: Using scissors, cut the vertical score lines up to the horizontal score line.  Remove the small rectangular section at the end.  This will create the box bottom.  You will now have four 2” flaps.

Step 4: Stamp cardstock (or add patterned paper) if desired.  

Step 5: Fold and crease all scored lines.  Apply Scor-Tape to the long tab on the right side; peel off paper backing.

Step 6: Turn the paper over.  Fold both sides in, adhering together to form the box.

Step 7: Fold bottom flaps in one at a time, applying Scor-Tape to adhere the flaps shut.

Step 8: Push the top of two opposite sides in and squeeze the remaining two sides together like a milk carton.

Step 9:  Hold firmly and punch two 1/8” holes near the top.  Thread ribbon through holes and tie shut.

Step 10:  Decorate as desired.

Variations:

Punch or diecut a window in the box before assembling; line the hole with a piece of acetate secured with Scor-Tape.

Instead of a ribbon closure, try using a metal clip to hold it shut.

Make the box from clear acetate for a see-through favor box.

Vary the height of the box by changing the length of the 5 ½” side of the paper.  A full sheet of cardstock will make a tall, skinny box.

Try changing the measurements to create a rectangular box. Start with 11″ wide paper and score @ 2″, 5″, 7″, and 10″.

popping the question

There are lots of unique trends these days in wedding planning.  One of which comes shortly after the soon-to-be bride answers “Yes!” to her groom.  Some brides are choosing to ask their best gals to stand by their side in fun, creative ways…such as a little box with a Ring Pop inside and a question of their own.

I made several of these boxes a few months ago but forgot to share them.  I remembered when I saw Scor-Pal’s theme for their first Challenge (starting today)…Flowers!  Here’s some measurements for my project if you want to make them too.  

For the base: start with a 7 1/2″ square.  Score all sides with a Scor-Pal @ 2 1/2″.

For the lid: start with a 4 9/16″ square.  Score all sides @ 1″.

Cut tabs on each side of base and lid; assemble according to basic box making directions, using Scor-Tape to adhere tabs. 

Now come join our challenge and show us your flowers! 

paper- SU! Tempting Turquoise, Almost Amethyst; accessories- Scor-Pal, Scor-Tape, Prima flower, button, Ring Pops, paper shred. 

a purrrfect gift card box

Each year at Christmas we give our nieces and nephews gift cards to their favorite stores.  This year I made some gift card boxes using this tutorial to place them in.  Unfortunately, I never took a photo of the boxes I made.  With Valentine’s Day approaching next month, I decided to make another box using my Valentine Critters set that will be released later this week.

The main image was simply stamped and colored, with a little Stickles applied around the heart.  The box was easy to make using the Scor-Pal and Scor-Tape.  It stays closed on it’s own but I still added the ribbon as a finishing touch.

I kept the inside simple as well, only adding a matching sentiment. 

Oh, and a gift card too!  😉

Be sure to check out the full release Thursday night in the Splitcoast member company forum and on the Sweet ‘n Sassy website after that.

stamps- Sweet ‘n Sassy Valentine Critters; paper- My Mind’s Eye- Quite Smitten, white, black, SU! Cherry Cobbler; ink- Memento Tuxedo Black; accessories- Scor-Pal, Scor-Tape, SU! Decorative Label punch, circle punch, tracing wheel, Copics, ribbon, Stickles, rhinestones.

quick & easy scoring

Are you working on your Christmas cards?  Need some simple ideas that come together in a snap?  The Scor-Pal team is sharing ideas for Quick & Easy Holiday Cards!  Today I have a scored and framed background on my card.  It really is quick and simple with a few diecuts and scoring with the Scor-Pal!  Here’s my card.

Directions:

1. Start with a 4 1/4 x 8 1/2 piece of white cardstock, scored and folded in half to make a 4 1/4″ square base.

2. Add a layer of 4″ x 4″ patterned paper.

3. Diecut a decorative circle from white cardstock.

4. Align a 3″ circle die inside the decorative circle diecut and cut it again, creating a frame.  Set it aside.

5. Diecut a 3 1/4″ circle from white cardstock.

6. Score lines every 1/2″ on the 3 1/4″ circle.  Turn it 90 degrees and repeat.

7. Adhere the pieces to the cardfront, with the scored circle layered behind the frame.

8. Stamp and diecut the tree and the sentiment flag.  Pop them up with foam tape.

You’re done!  Once I designed my card, I assembled a few rather quickly.

stamps- SU! Scentsational Season and Petite Pairs; paper- white, MME Colorful Christmas; ink- SU! Gumball Green and Soft Suede; accessories- Scor-Pal, Spellbinders Picot Edge Circles and Circle Nestabilities, SU! Holiday Collection Framelits and Bitty Banners, foam tape.

a turkey treat cover

I’m popping in a day early to wish ALL of you a very Happy Thanksgiving!  May your blessings be many!

I’ve been participating with the daily November Facebook posts about what you are thankful for.  We have a LOT to be thankful for!  The list is long!  But for today.. I am thankful for our mail carrier who travels in the good… AND not so good weather to deliver our mail.  So I made her a little chocolatey treat.

Here’s a side view…with the Hershey’s and M&M’s inside.

The turkey is from Sweet ‘n Sassy Stamps and you can find directions for the treat cover here.

Have a wonderful Thanksgiving!

stamps- Sweet ‘n Sassy- Save the Turkeys; paper- white, DCWV Autumn Melody; ink- Memento Tuxedo Black; accessories- Scor-Pal, Scor-Tape, Copics, foam tape, Sweet ‘n Sassy Bookmarks & More dies, twine, cello bag, candy, Crop-A-Dile.

a suspension/tent card

Today I am sharing this card on the Sweet ‘n Sassy blog.  I combined a Suspension Card with a Tent Card to create this snowy hello…

I used the new Sweet ‘n Sassy Spectacular Snowflake dies to cut an opening in the card front.  A large snowflake was stamped through the opening, onto the inside of the card.  Then I borrowed some of my husband’s fishing line 😉 to suspend the smaller die cut and stamped snowflakes.  The fishing line is adhered at the top and bottom with Scor-Tape.  The lighter purple layer was embossed and additional snowflakes were added, along with a sentiment banner (from my Snowy Hello stamp set).

Since there’s no place on the tent cards to write a short message and sign it, I like to add a little something to the back.  Sometimes it’s a pocket with a tag but this time I simply added the negatives from the die cut opening on the front.

Have a great day, friends!

stamps- Sweet ‘n Sassy Spectacular Snowflakes and Snowy Hello; paper- SU! Concord Crush and Wisteria Wonder, white; ink- SU! Concord Crush, Wisteria Wonder, and Cool Caribbean; accessories- Sweet ‘n Sassy Spectacular Snowflakes dies and Small Snowflake dies, Scor-Pal, Scor-Tape, Cuttlebug Kars Snowflakes embossing folder, Stickles, tracing wheel, fishing line, dimensionals.