Category Archives: challenges

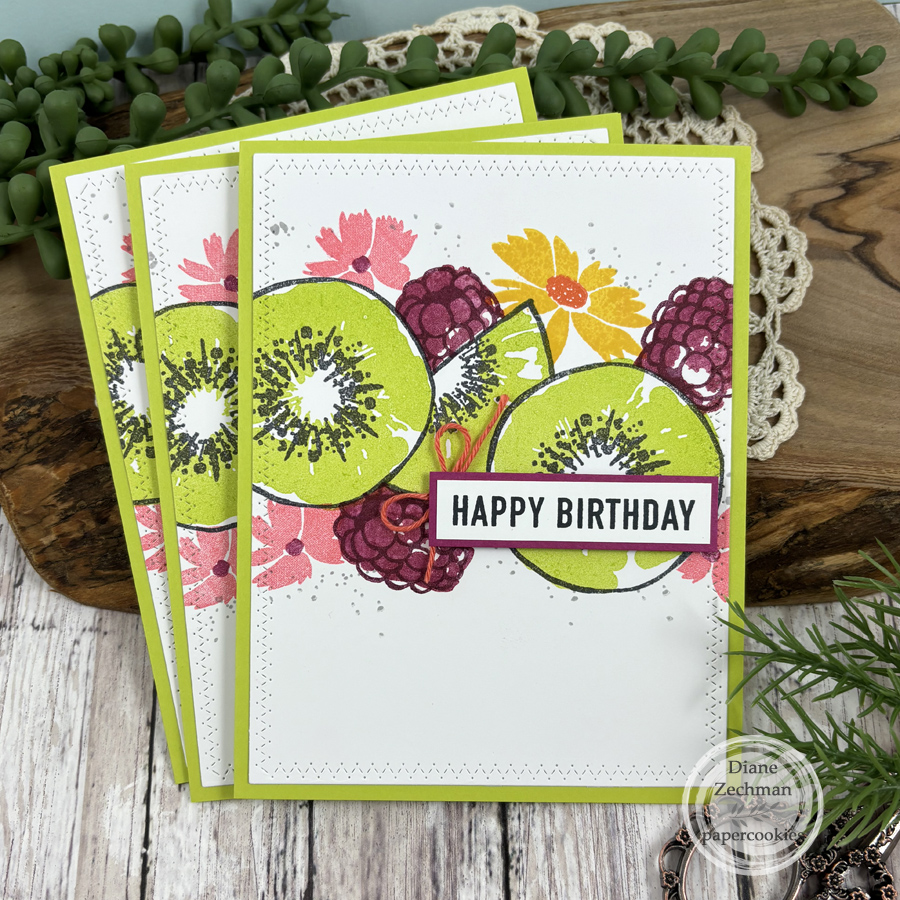
kiwi OSW

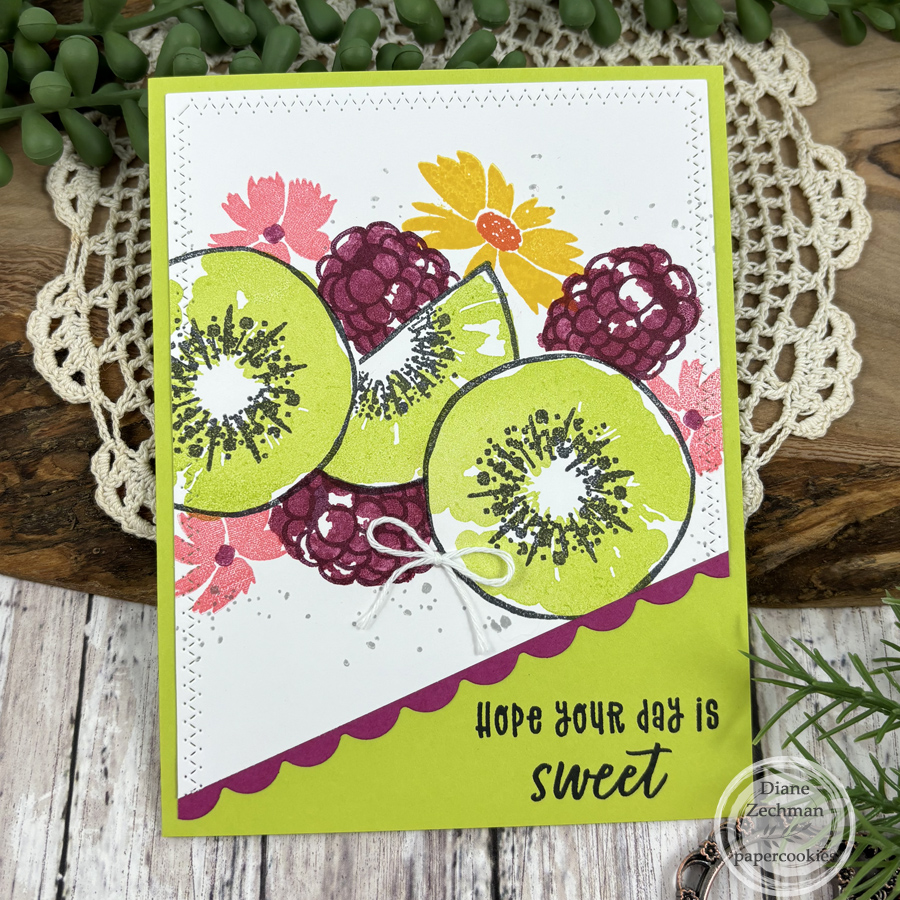
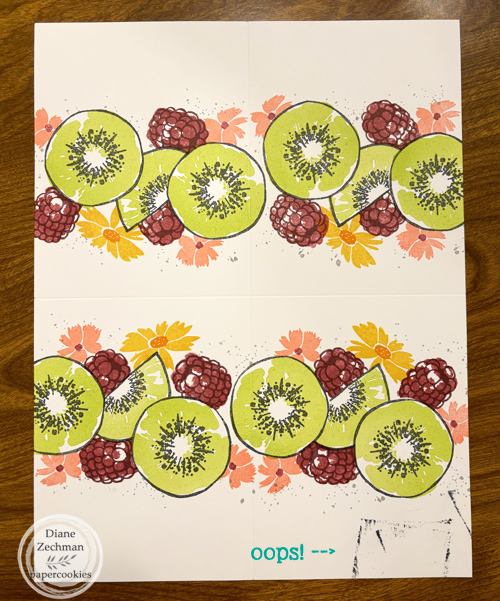
I am sharing an easy OSW (one sheet wonder) today. Our friend, Tina, has been giving us challenges again each week. This week we were to make an OSW into 4 cards, in a style a stamper named Connie Trubey does often. My fourth card was changed up a bit because I accidentally dropped my black inkpad. Oops! I like both styles, though…happy accident. 🙂

Here’s the full sheet (8 1/2 x 11) that I made. I decided to stamp my images in 2 rows.

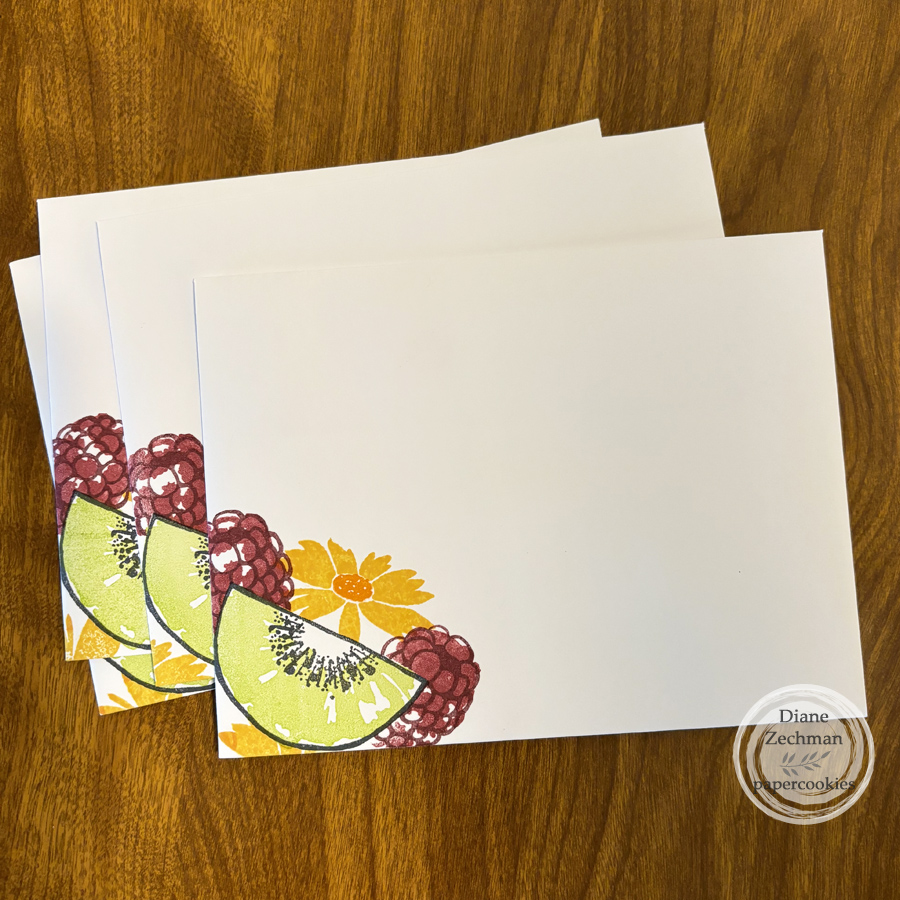
I finally took time to coordinate some envelopes. 🙂

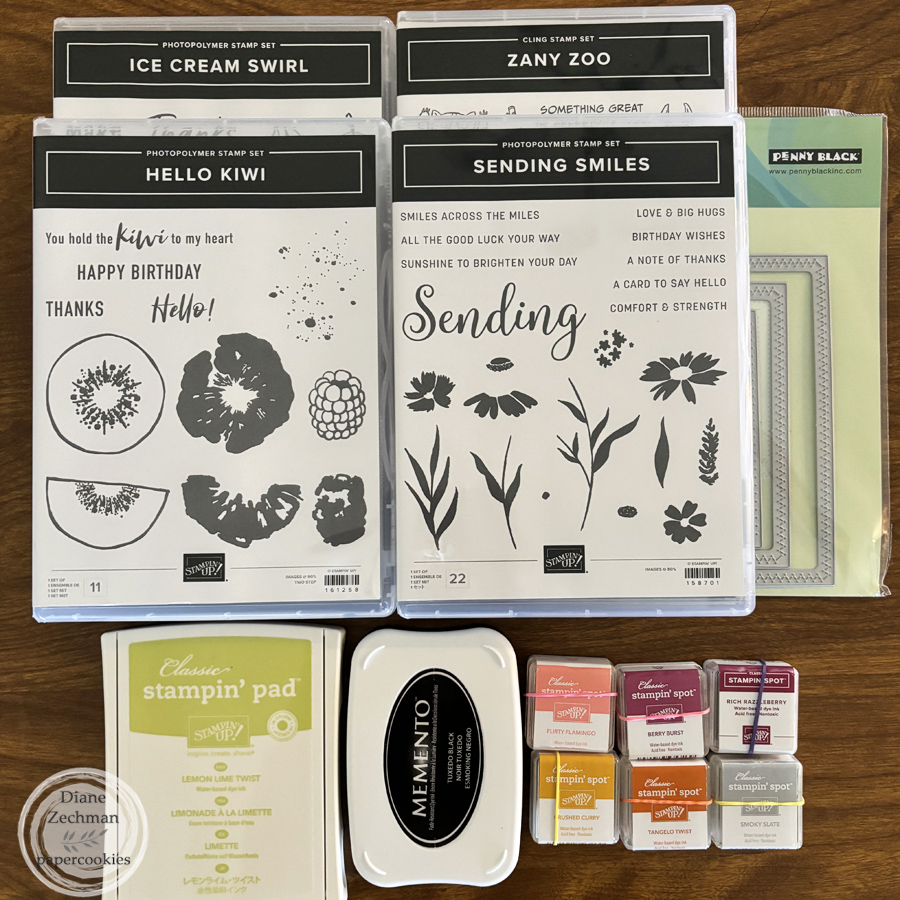
Products used…

Have a great day and stay warm! What happened to our spring weather?

cardinal trifold

Edit: I can only find two cards with this trifold design, and I cannot find a name for it. Since any shape could be added to the top, I am simply calling it a Topper Trifold Card going forward. The other circle shaped Topper Trifold card that I made is here.

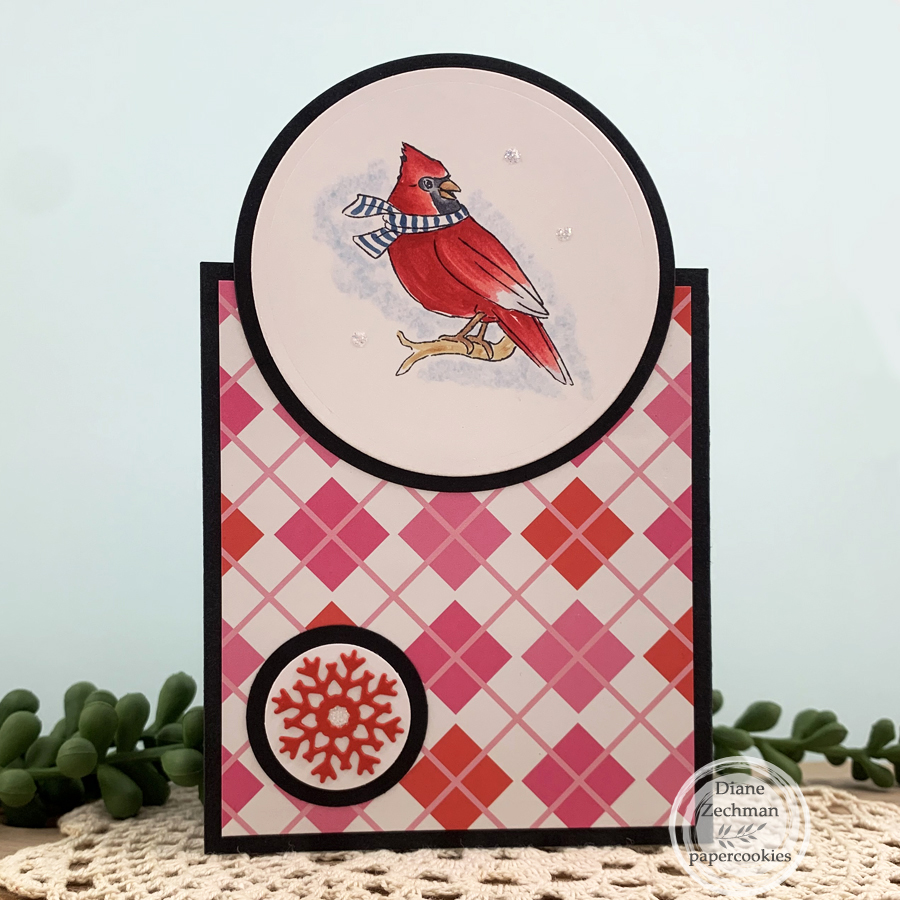
Yesterday I was virtual stamping a bit with some friends and I made a trifold card with the Art Impressions Cardinal freebie stamp. This was some quick coloring, and I kept the card design simple as well. I made it for an Ai challenge to use one of the bird freebies in a 3×3 size.

Products used: Art Impressions– EX5840 Cardinal freebie, 5193 Woodland Holiday Set, 5434HL Greenery Invite Set, and 4804 Snowflake Dies.

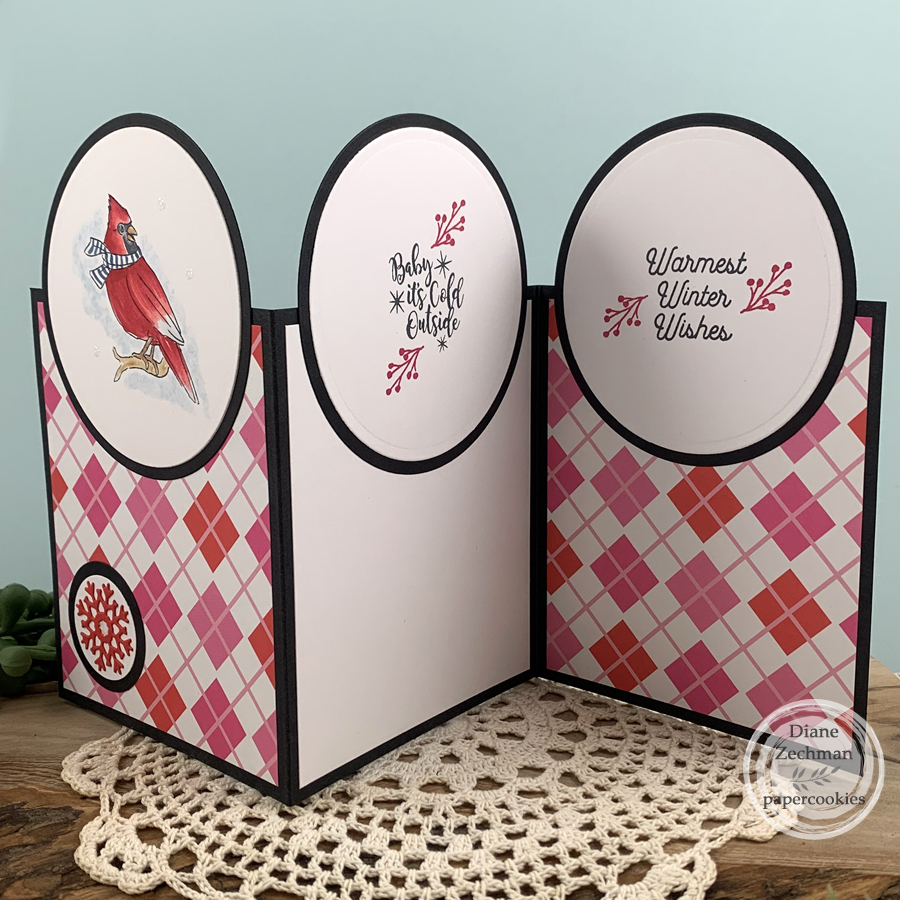
When you open the card, there are two more panels with the same circle top. I originally saw a card with this design by Paula Barin. The base card is 10 1/2 x 4, scored @ 3 1/2 and 7. My circles are approx. 2 3/4″ and 3″. The patterned paper and white cardstock layers are 3 1/4 x 3 3/4.

The strong winds here have us out of power with trees down everywhere. Stay warm!

virtual stamping 8

Hello! I have a few more cards today that I’ve made while stamping “virtually” with my friends. I am splitting them up again and first sharing a few I made with Sweet ‘n Sassy Stamps. I’ll share the others soon.

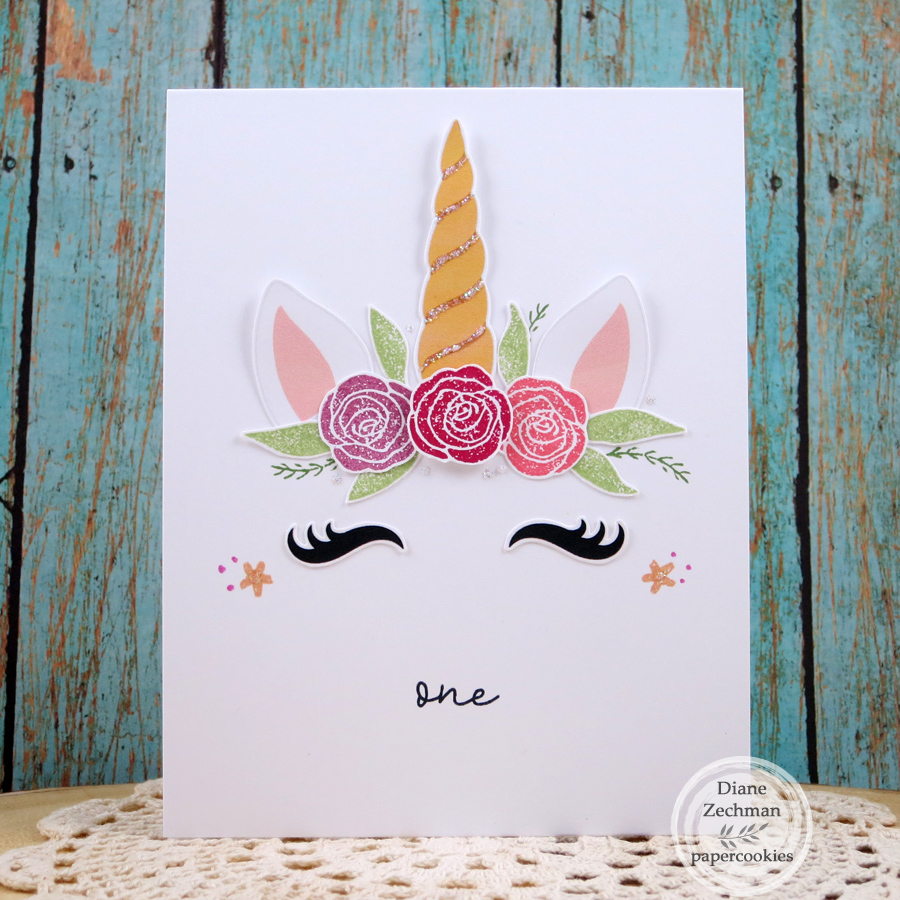
Most of the cards here are holiday cards but the first one was made for a special someone turning one! This was also for a magical challenge (unicorns, fairies, etc.). I just searched the net for a free unicorn face image and printed the horn, ears, and eyes. The rest of the images were stamped with the Genuine Love set.

A monochromatic card for a sketch challenge using  Best Gift Ever and Scene Silhouettes: Jesus Is Born

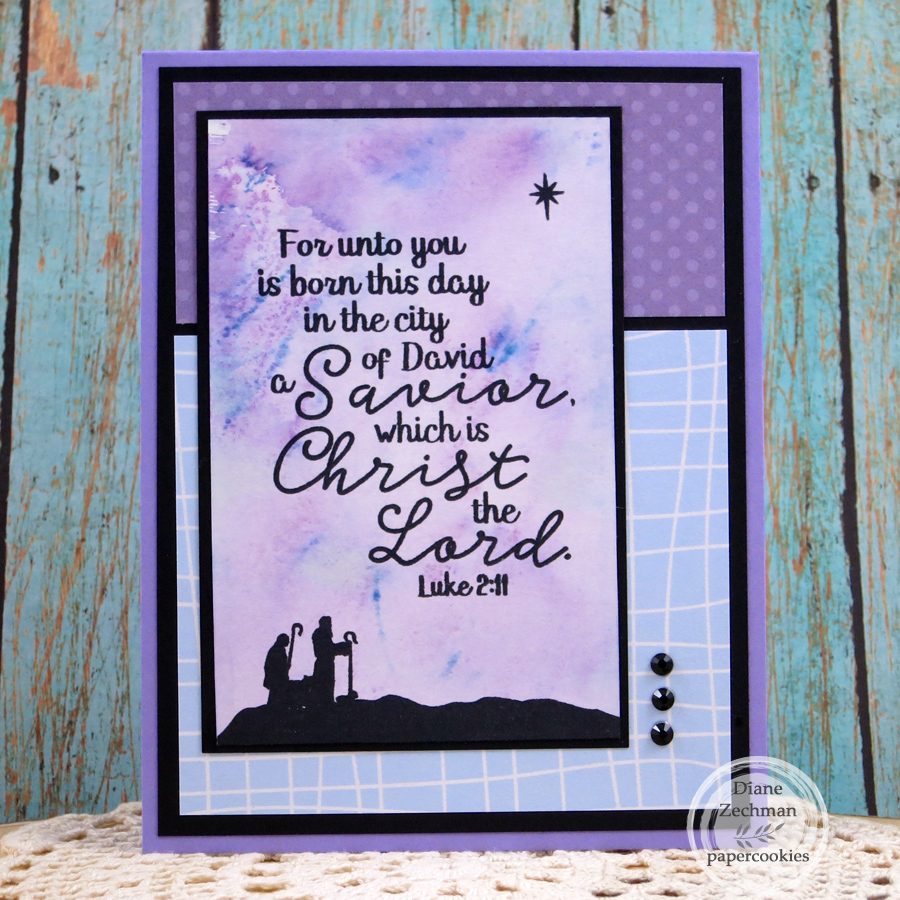
Another card using  Best Gift Ever and Scene Silhouettes: Jesus Is Born but this time in some non-traditional colors. The background is an old piece I found in which I used the Smackin’ Acetate technique.

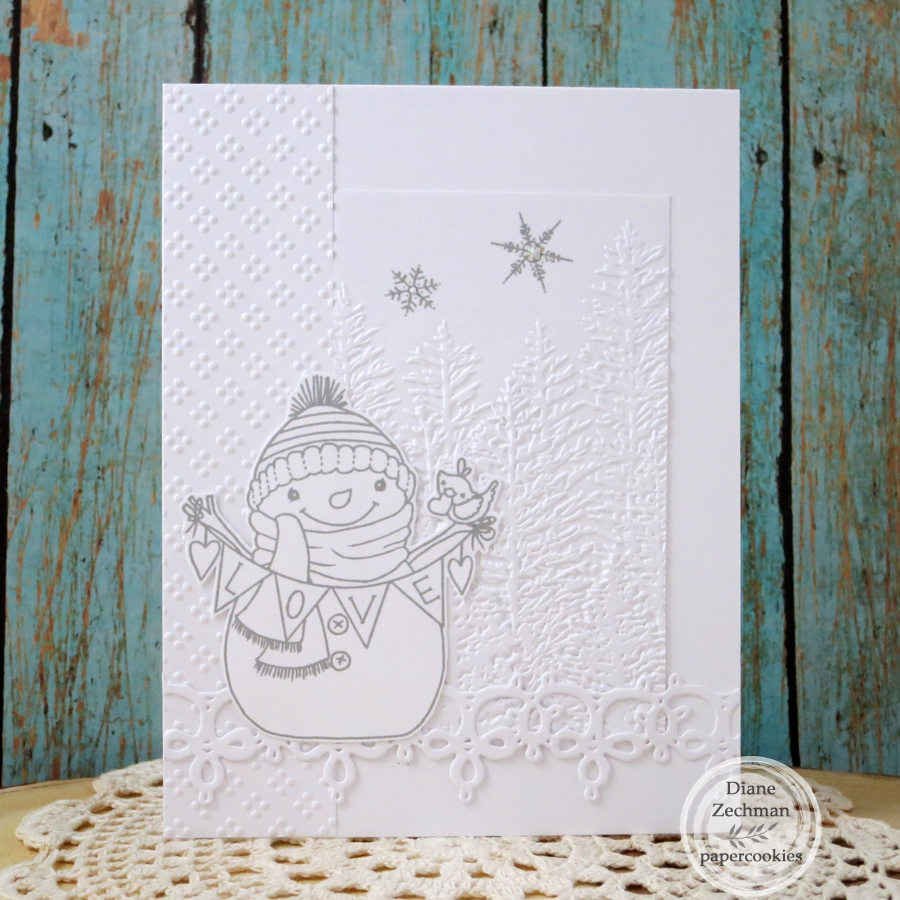
I used the super cute Cheerful Snowmen set on this card for a sketch and “all white” card challenges. The embossing folders are SU! Wrapped in Texture and Evergreen Forest. I also used Sizzix Crochet #2 dies. The snowman and flakes were stamped with SU! Smoky Slate ink (a friend’s idea!).

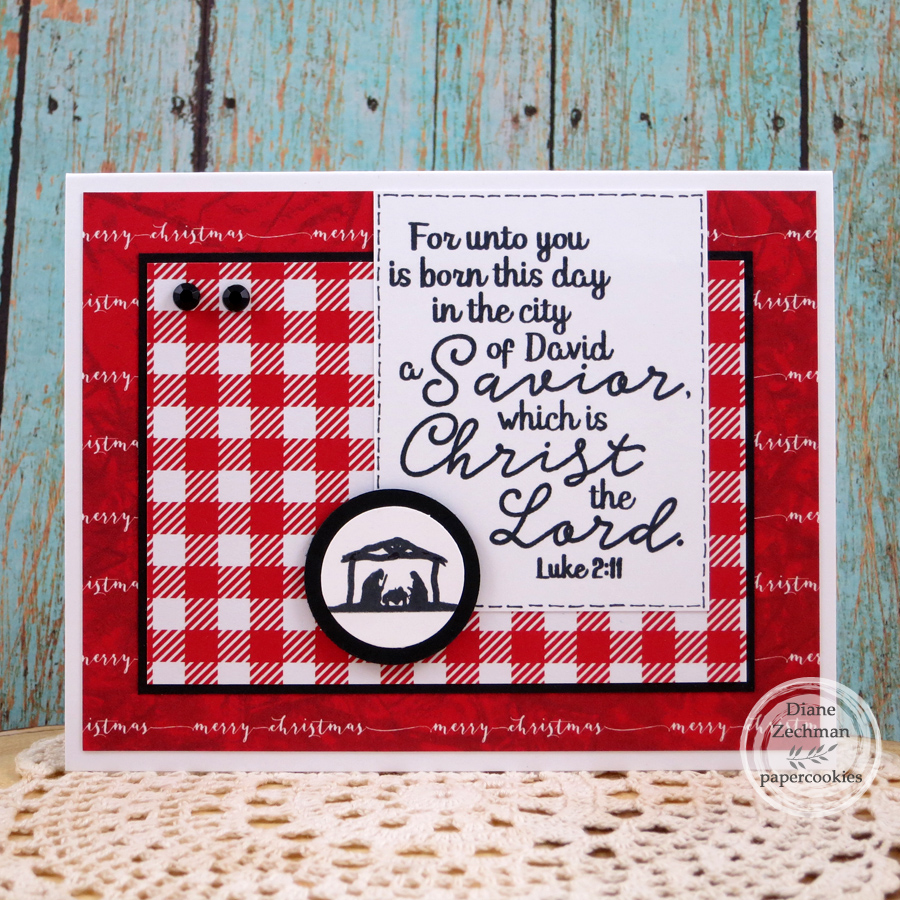
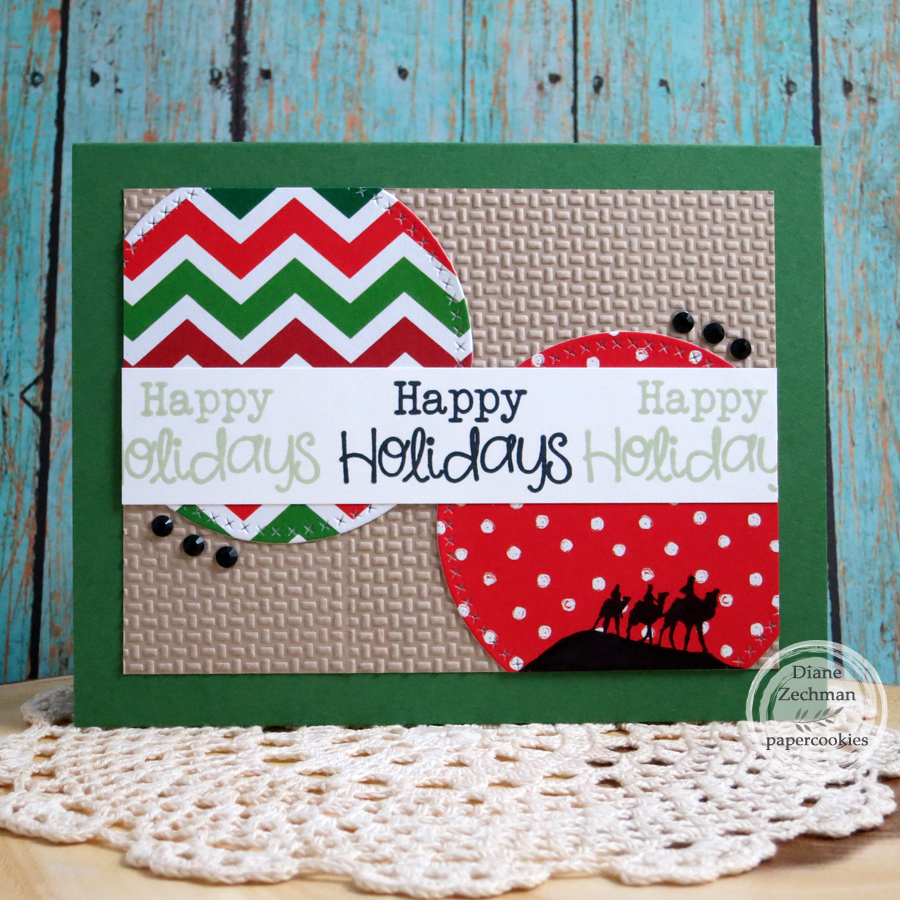
The next card was for a circles challenge and I just love the layout…I’ll be using it again! Stamp sets are SNSS Holiday Greetings and Scene Silhouettes: Jesus Is Born. I also used the SU! Wrapped in Texture embossing folders again.

And my last card today was for another sketch challenge. This one was very popular with the group, easy & fun! I’ve already used it again (will share that card next month). Again, I used the Holiday Greetings stamp set.

Thanks for popping in and have a great day!

Panda PopCard

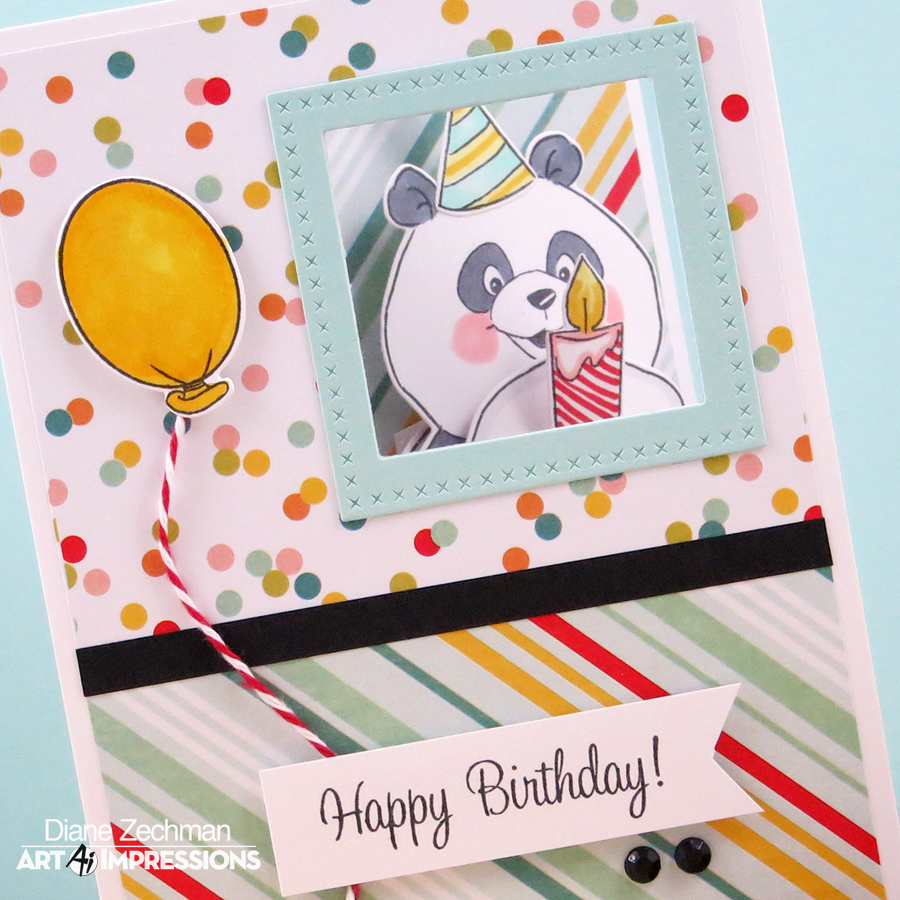
Hello friends!  The current Ai Challenge is “Dots & Stripes” (use dotted or striped pattern paper on your card) and we are featuring the very FUN new Art Impressions PopCards sets!  I was so excited to see these released and I finally got a chance to create with them!

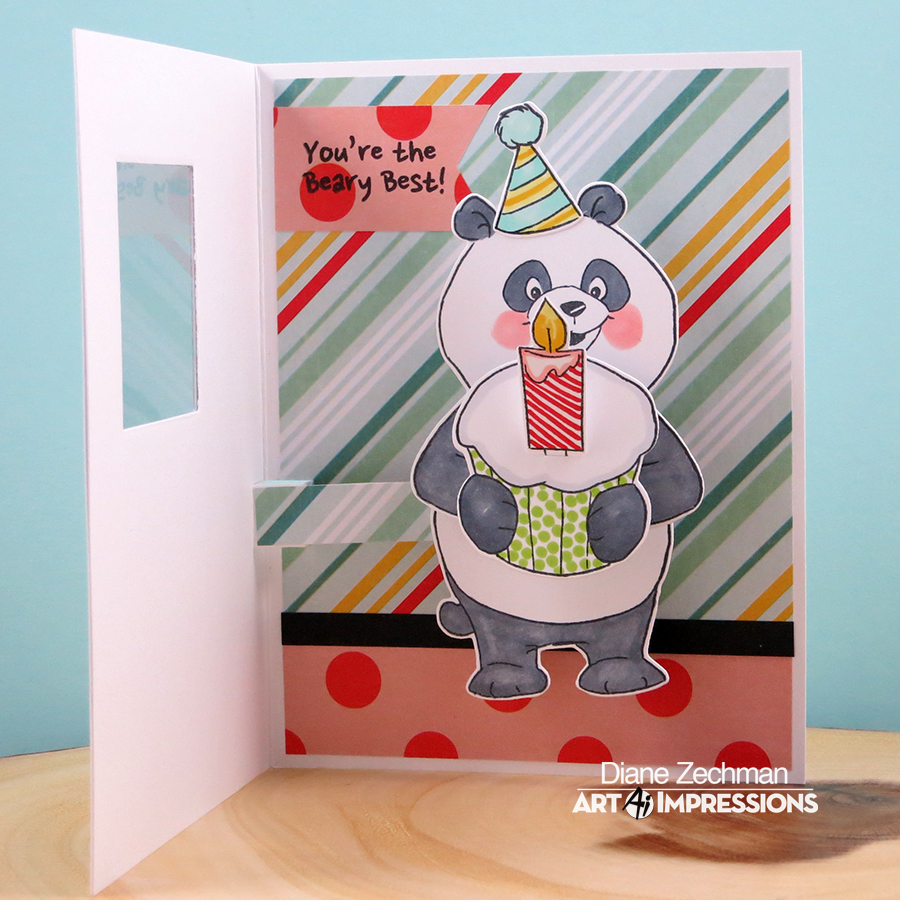
Today I am sharing how I made a fun, interactive card with the new Panda PopCard (4860) stamp set and the PopCard Template.  My sentiment is from the Hobby Lobby AiCS36- Birthday Wishes Set.
Panda PopCard 10 diane zechman

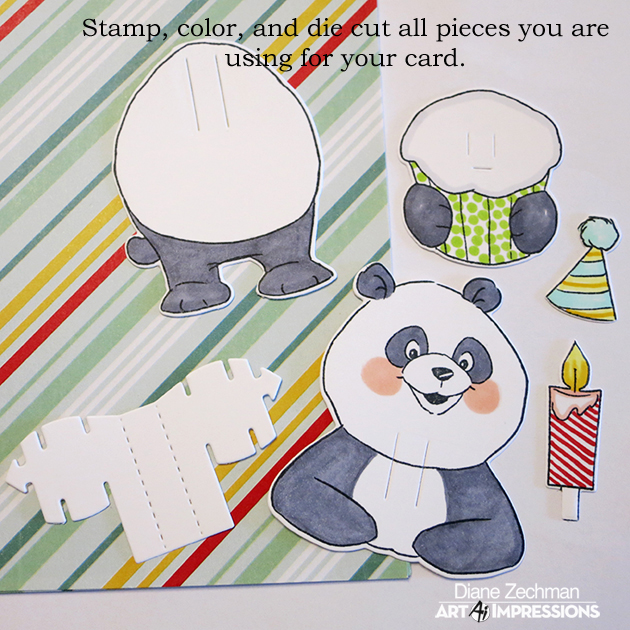
As I was editing the photos of the steps I took in creating this card, I typed some directions directly onto the photos. I hope this helps.  Click on each photo to see a larger view.  (Kate also has a wonderful video HERE showing how to put the PopCards together. Be sure to check it out!).

First I chose some patterned paper I wanted to use and colored my images to match.  The Panda only requires one of each image plus the PopCard Template.
Panda PopCard 1 diane zechman

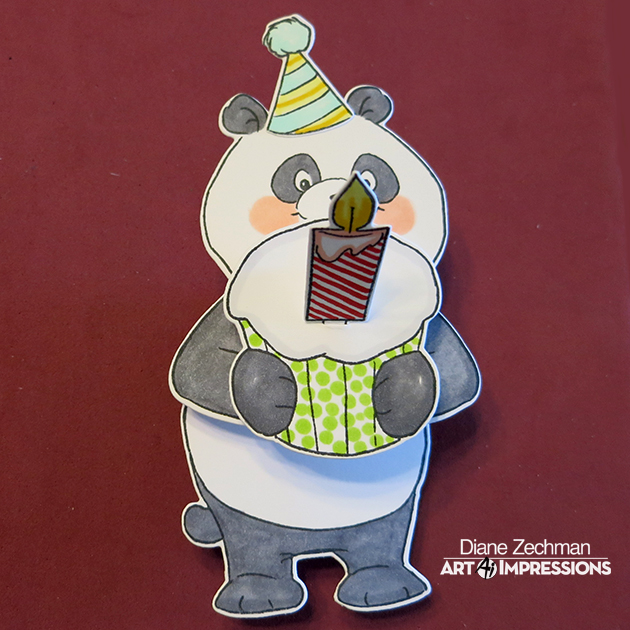
Next up is assembling the mechanism that makes the card interactive!  Just fold the template on the 2 center perforated lines to form a “U” shape. Then slide the “arms” of the template through the die cut slots in each piece.

Panda PopCard 2 diane zechman

Your panda will look like this from the front, with the PopCard Template hidden behind his layers…
Panda PopCard 3 diane zechman

Now adhere the bear to the inside of the card.  Then cut 2 slits in the fold across from his belly.  I marked with a pencil where I wanted to cut and then turned my card inside out to make it easier to cut the slits.
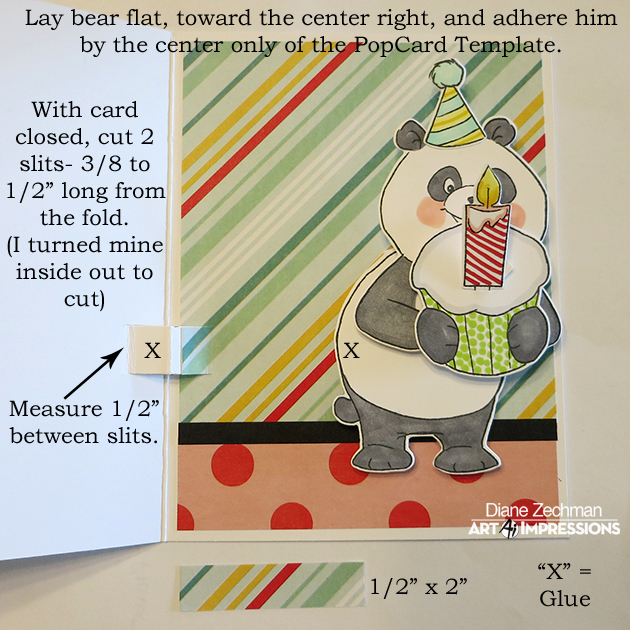
Panda PopCard 4 diane zechman

Bend the little cut section toward the center of the card.  A 1/2″ strip will adhere to the top of it and also to the back of the bear.
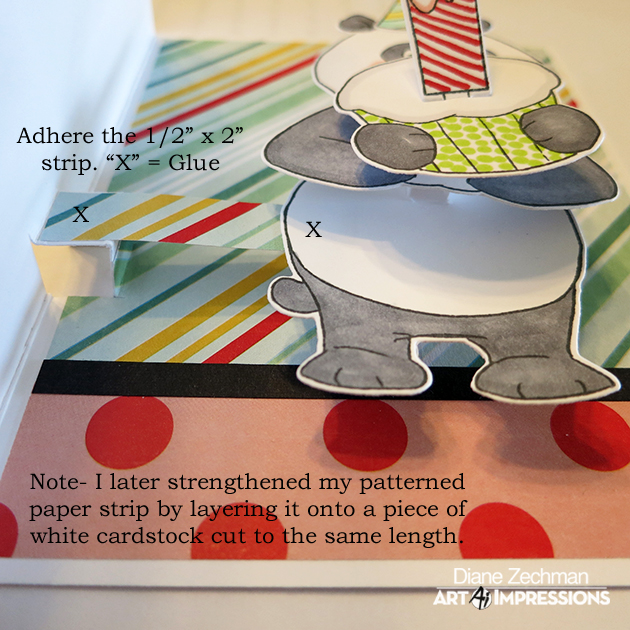
Panda PopCard 5 diane zechman

If desired, you can punch or die cut a window for your bear to peek through!  I added a piece of acetate in the window.
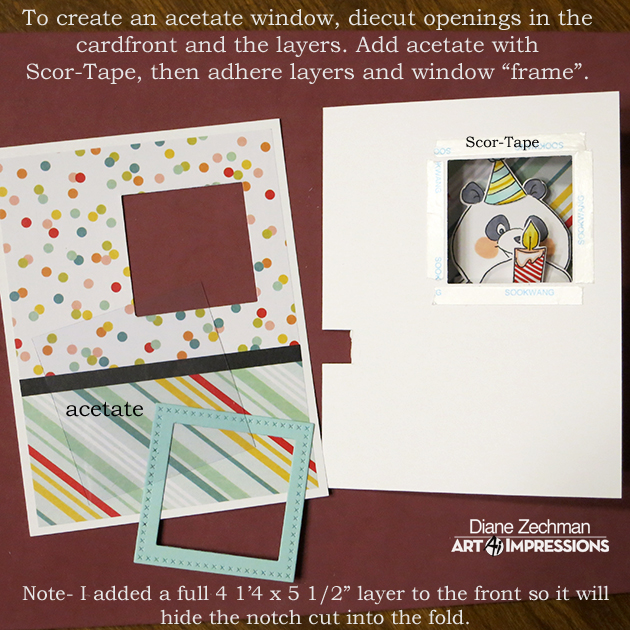
Panda PopCard 6 diane zechman

Assemble layers and finish as desired.  I added a single balloon from the set with some Clear Wink of Stella to make it sparkle.
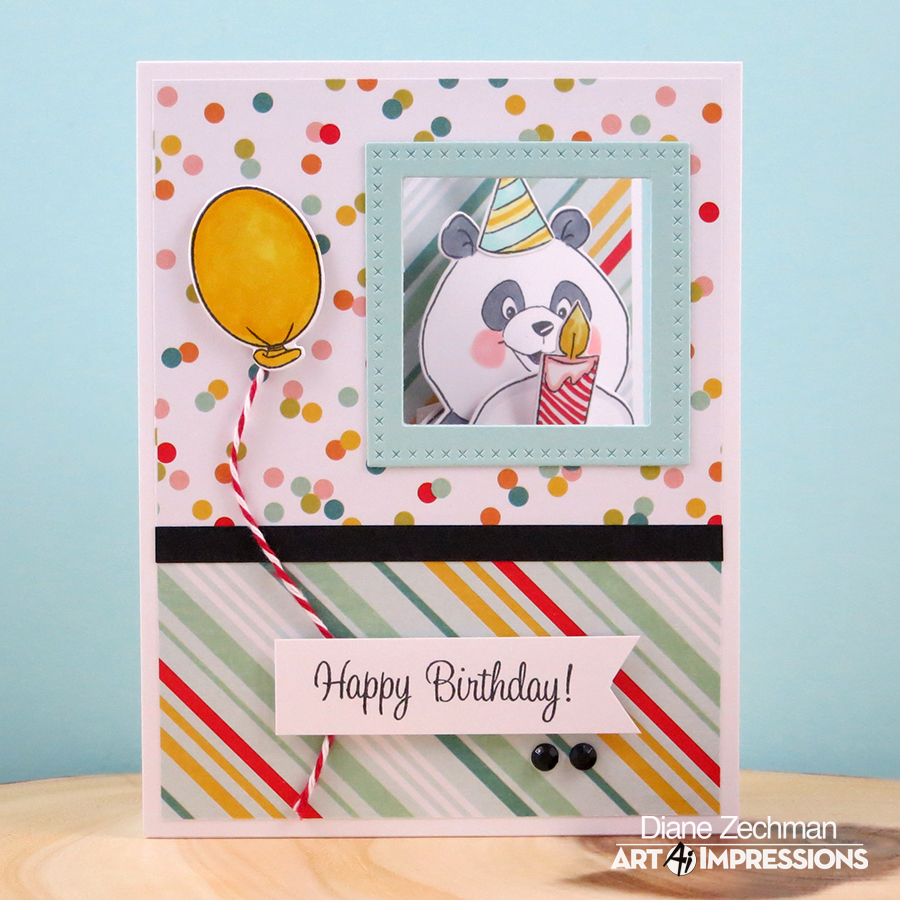
Panda PopCard 7 diane zechman

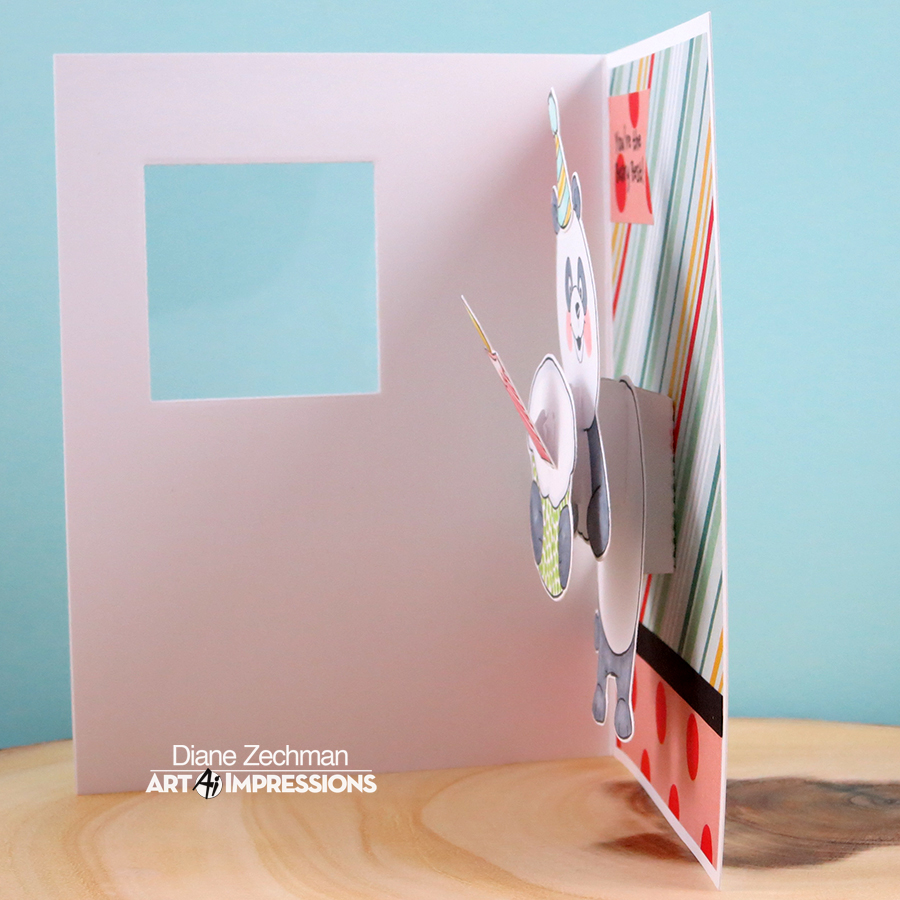
When opened, the Panda pops up!

Panda PopCard 8 diane zechman

A side view…

Panda PopCard 9 diane zechman

Now it’s your turn to break out your favorite Ai stamps, make a card, and join us in the “Dots & Stripes” Challenge!

Happy stamping!

Diane Signature Medium size

stamps- Art Impressions Panda PopCard (4860), Hobby Lobby AiCS36- Birthday Wishes Set; paper- white, black, SU! Pool Party, Colorbok- Carnival 6×6; ink- Memento Tuxedo Black; accessories- Art Impressions PopCard Template, Copics, baker’s twine, rhinestones, Scor-Tape, MFT Cross Stitch Squares, acetate, foam tape, Clear Wink of Stella.

sweet wishes mini trifold

Hello friends!  The current Ai Challenge is “Lots of Love” and we are featuring some of the fabulous new Art Impressions Mini TryFolds (yes, there will be more later! yay!) These new sets are amazing! Love them.

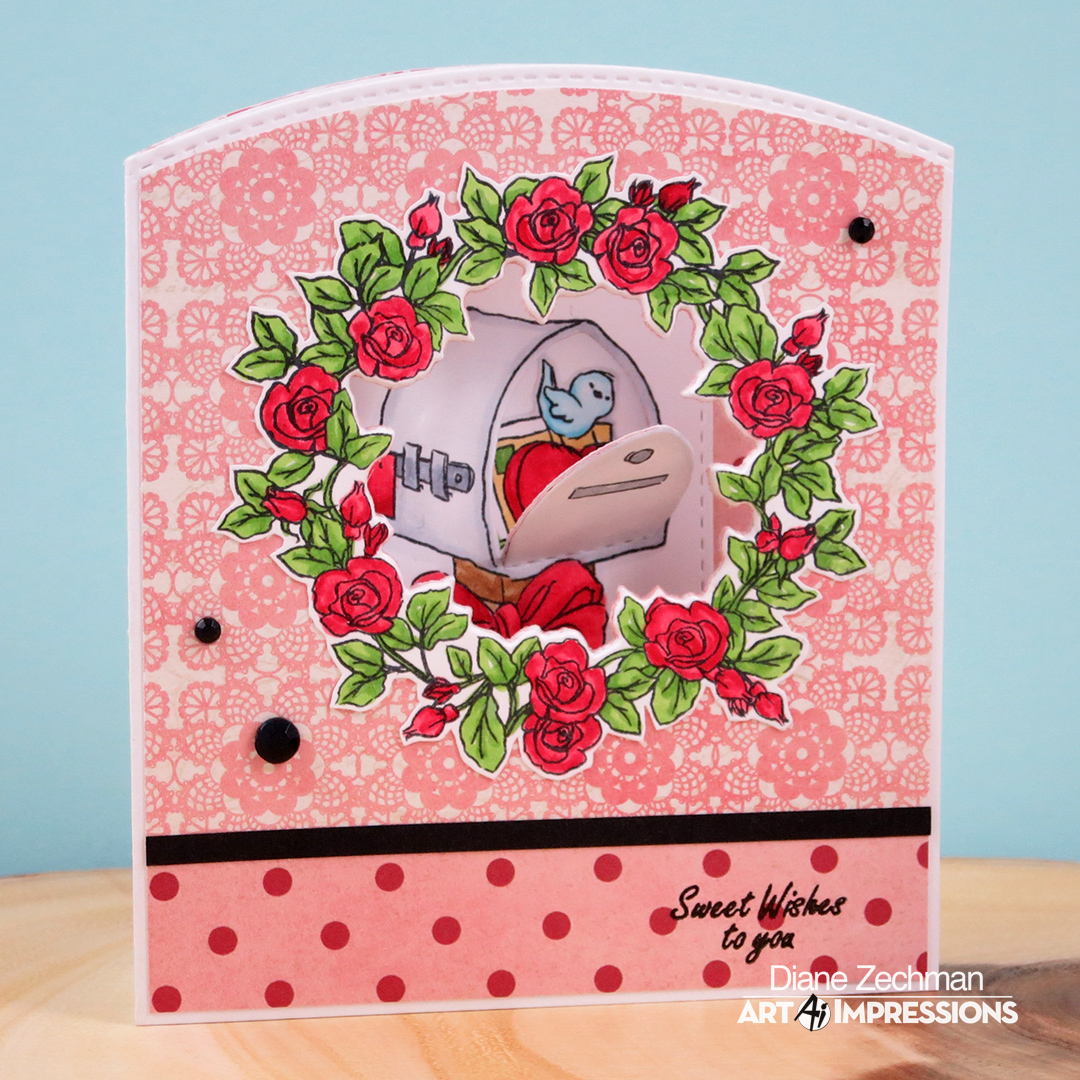
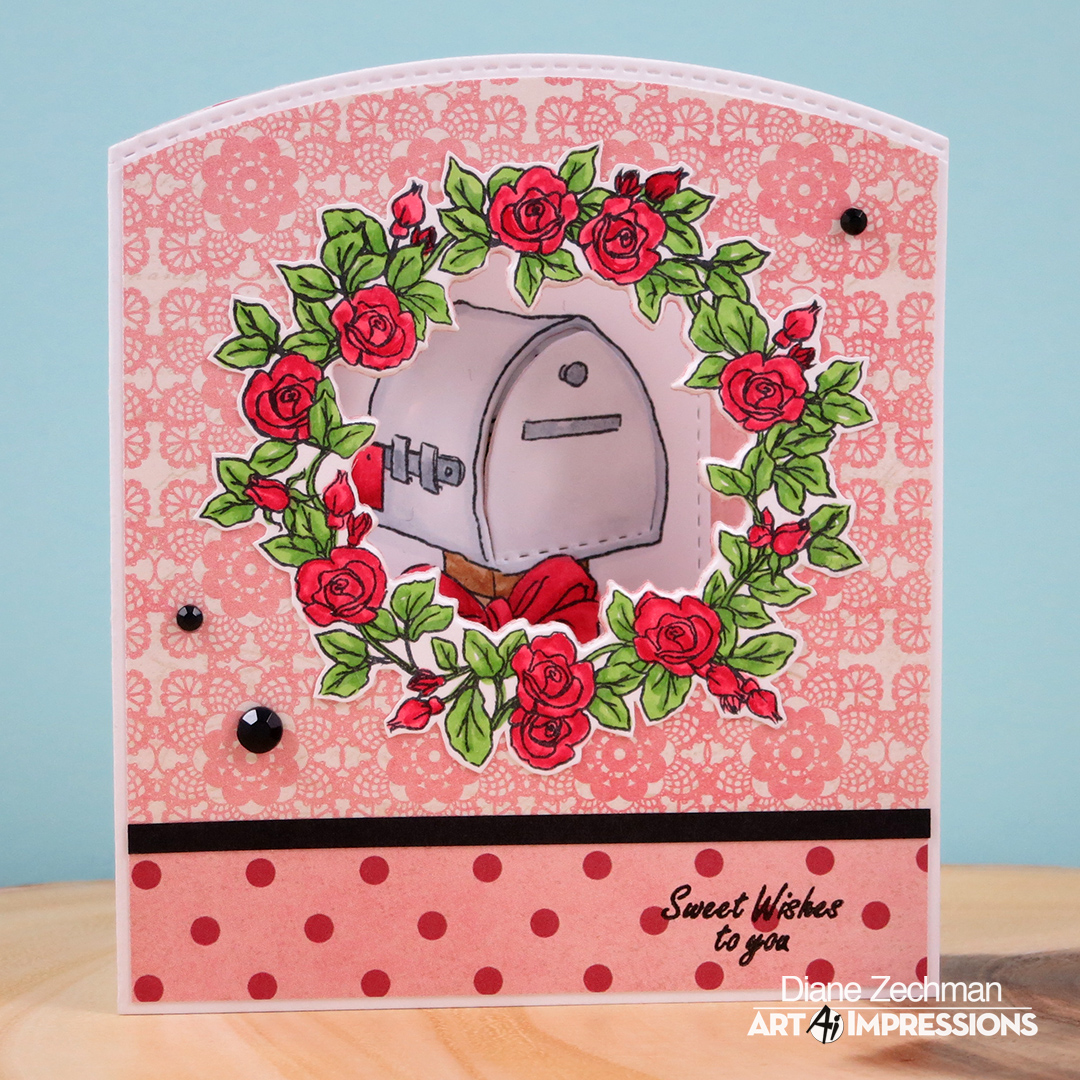
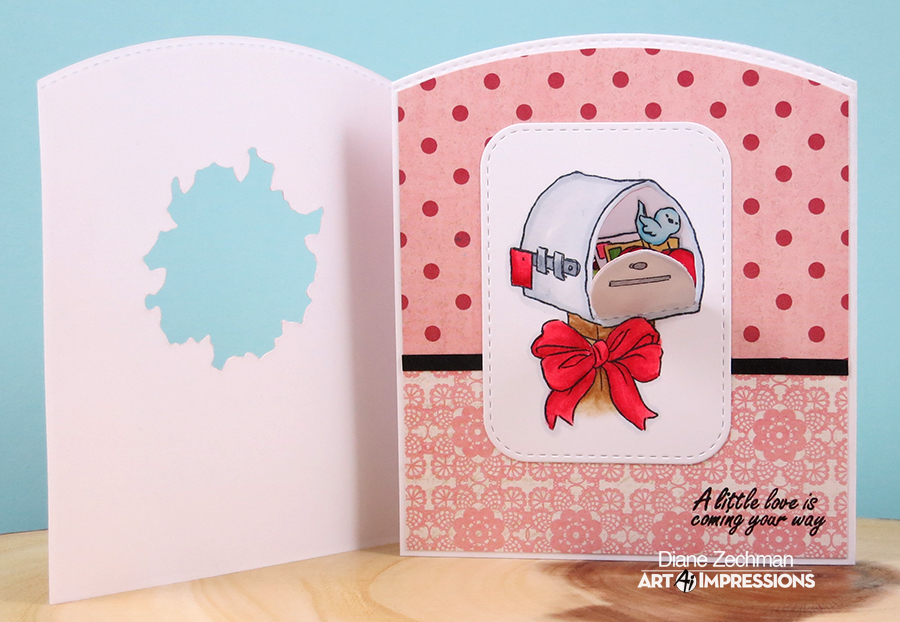
Here I used the Sweet Wishes MTF- 4848 to make my valentine trifold card.  This time I gave it a curved top edge by die cutting while the card was closed.  Then I made sure my die was lined up correctly to cut my patterned paper layers to match.

sweet wishes MTF 1a diane zechman

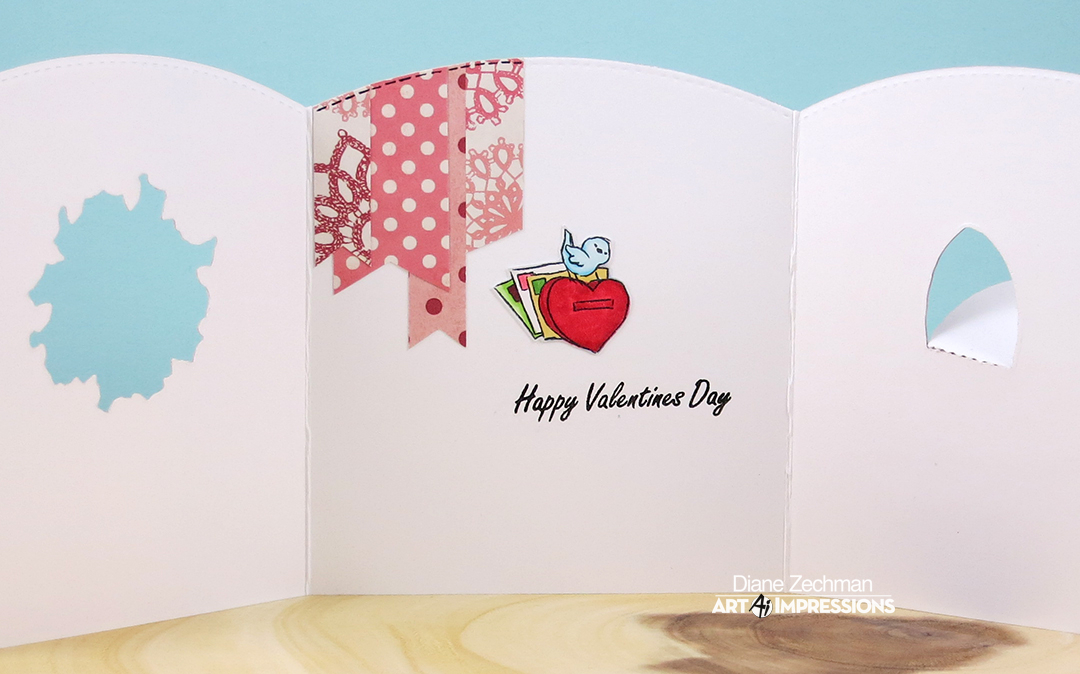
When I make my Mini TryFold cards, I usually start with 4 1/4 x 11 cardstock and score 3 5/8″ in from each end.  The TryFold sets come with 3 images and matching sentiments, plus 2 dies to coordinate so you can peek through the layers to the last image on the inside. So cool!  The largest image (floral wreath here) goes on the card front and I die cut the inside of the wreath.  Instead of stamping the wreath on a panel, I decided to fussy cut the outer edges as well.

sweet wishes MTF 1b diane zechman

When you open the first fold, there’s a mailbox on the second panel.  The inside of this was also die cut.  The door to the mailbox does not completely cut with the die, though…the bottom edge has perforations in the die so it stays attached and opens!  CUTE!  Can you see the bird peeking through?

sweet wishes MTF 1c diane zechman

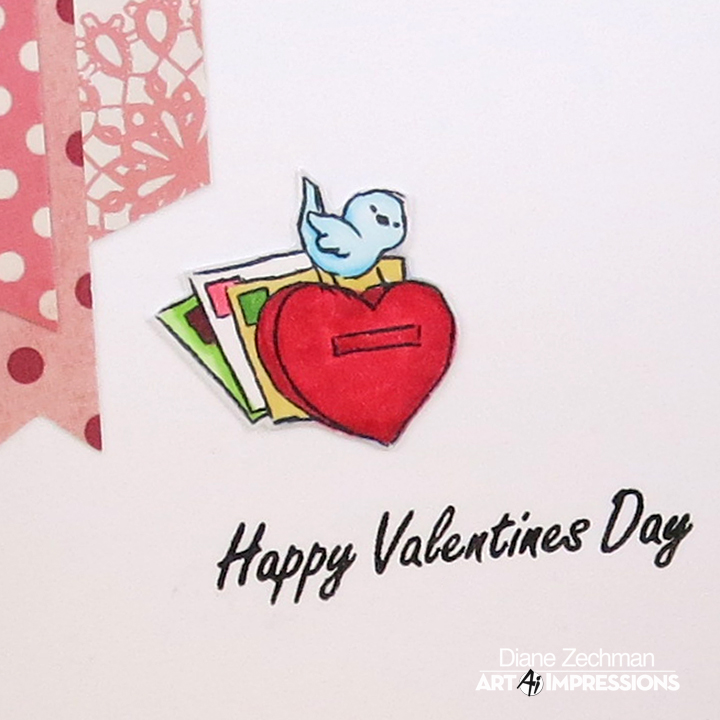
When completely open, the smallest image is on the inside.  This set has a tiny bird with some love letters!

sweet wishes MTF 1d diane zechman

sweet wishes MTF 1e diane zechman

Now it’s your turn to make a card and join us in the “Lots of Love” Challenge!

Happy stamping!

Diane Signature Medium size

stamps- Art Impressions Sweet Wishes MTF- 4848; paper- white, black, MME- Lost & Found- Heirloom; ink- Memento Tuxedo Black, Versafine Black; accessories- Copics, MFT Stitched Basic Edges, Stitched Rounded Rectangles, gemstones.

turning fabulous

Hello friends!  After a short holiday break, the Art Impressions DT is back on the blog and the current Ai Challenge is “Card Resolution” (practice a new technique for 2017!).

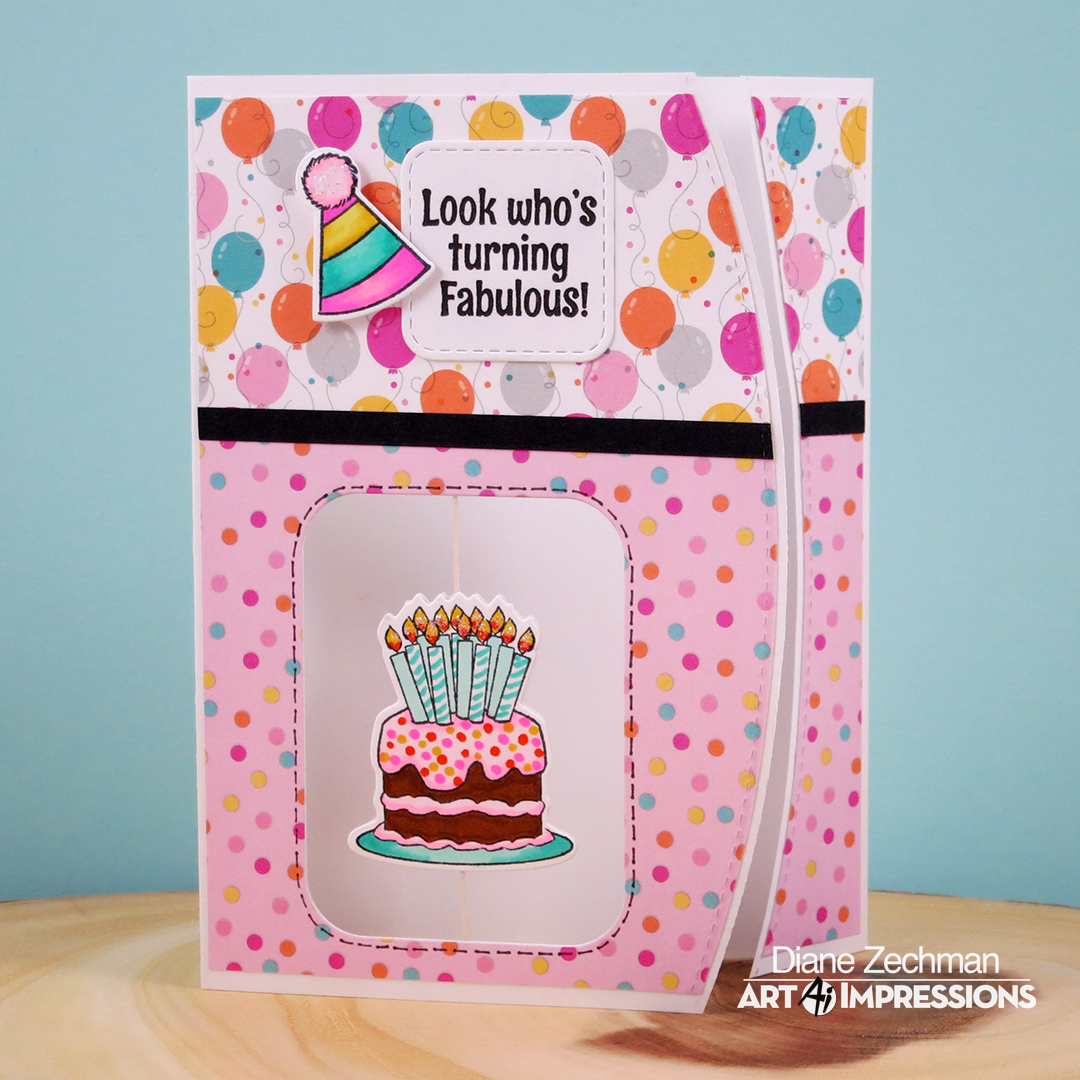
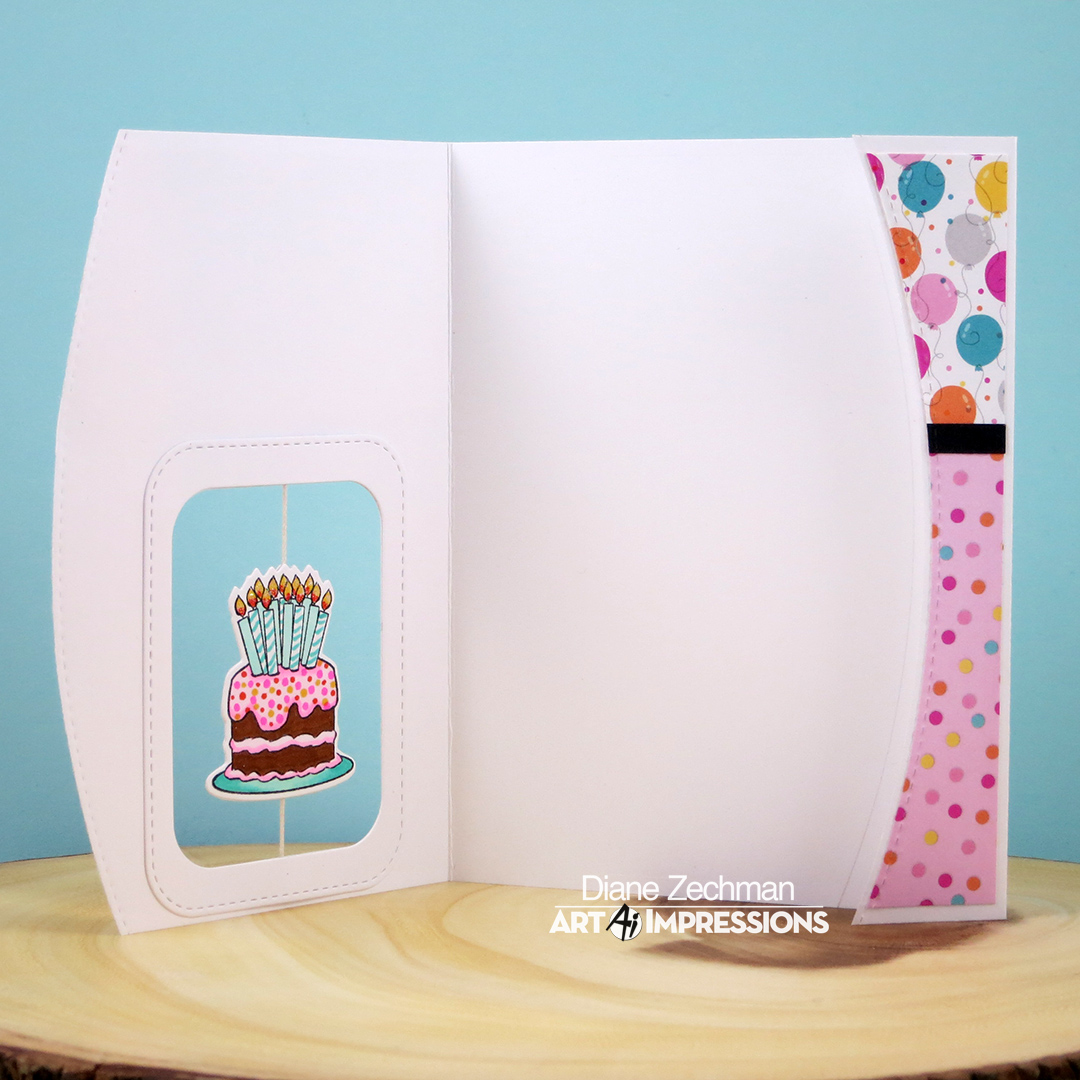
Here I used the Die Cut Gatefold technique with the Ai 4734 – Mini Cake Spinner Set.  I love the sentiment included with these images…so fun! Instead of making a second spinner with the hat, I’ve used it to accent my sentiment.

mini cake spinner 1a diane zechman

I actually forgot to adhere the string between the card base and front layer before I glued it down. But no worries…I just added a die cut frame to the inside to cover the string and I kind-of like it this way!

mini cake spinner 1b diane zechman

Now it’s your turn to make a card and join us in the “Card Resolution- try a new technique” Challenge!

Happy stamping!

Diane Signature Medium size

stamps- Art Impressions 4734 – Mini Cake Spinner Set; paper- white, black, doodlebug- sugar shoppe; ink- Memento Tuxedo Black; accessories- Copics, MFT Stitched Basic Edges, Stitched Rounded Rectangles, and In & Out Stitched Rounded Squares, Scor-Tape, crochet thread, foam dimensionals, Stickles.

thin enough

Hello friends!

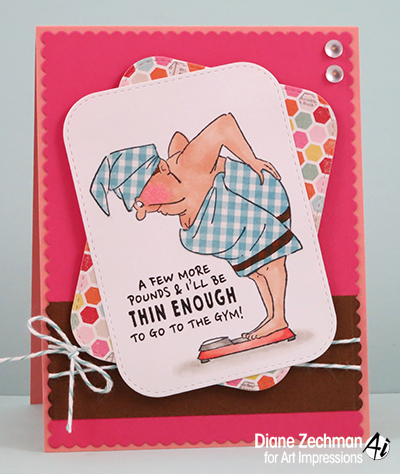
Today I am on the Art Impressions blog with a tutorial for our NEW Challenge… Paper Piecing Party!  I immediately thought of the Thin Enough Set (4670) and wanted to give this gal a fun patterned wrap and towel. 

Ai paper piecing 5 diane zechman   

I have to admit, my favorite technique of all is Paper Piecing.  It’s quick, easy, and so much fun (especially with the Ai images)!  If you’ve never tried it, you will love this… let’s get started!

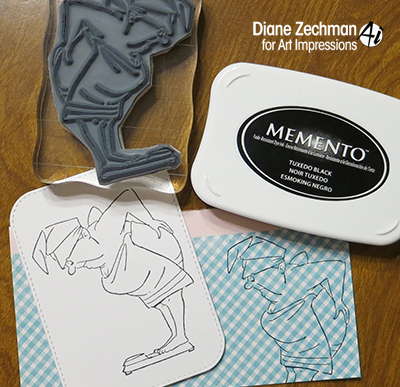
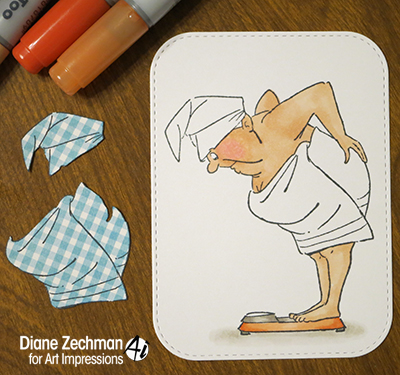
First I stamped my image onto a white die cut panel and then stamped it again onto my patterned paper using black ink.

Ai paper piecing 1 diane zechman

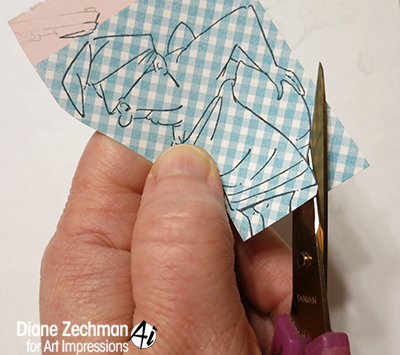
Next, cut out the parts of the image from the patterned paper that you want to have the pattern.  Hint: it is easier to cut with sharp, pointy scissors and by holding the scissors still and moving the paper.

Ai paper piecing 2 diane zechman

Now color the parts of your image that will not be covered with the patterned paper cut outs.

Ai paper piecing 3 diane zechman

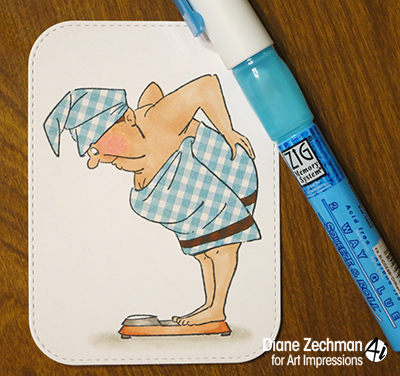
After coloring, glue your patterned paper cut outs to your image.  (I like to use a Zig 2-Way Glue pen to control the amount of glue and be able to get into small spaces).  I also colored the stripe on her wrap here with a brown marker. 

Ai paper piecing 4 diane zechman

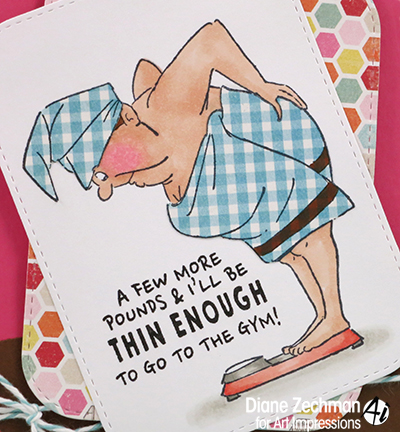
Now add your paper pieced image to your finished card.  That’s it!  So fun.  🙂

Ai paper piecing 5 diane zechman

Here’s a close up.

Ai paper piecing 6 diane zechman

Now it’s your turn to play along in our Paper Piecing Party Challenge!  Happy Stamping!

Diane Signature Medium size

stamps- Art Impressions Thin Enough Set (4670), paper- White, brown, SU! Crisp Cantaloupe and Strawberry Slush, MME- Happy Day; ink- Memento Tuxedo Black, Versafine Black; accessories- Copics, MFT Die-Namics Stitched Rounded Rectangles and Blueprints 20, twine, rhinestones, foam dots, Zig 2-Way Glue pen.

cold noses…

Hello friends and happy Thursday!

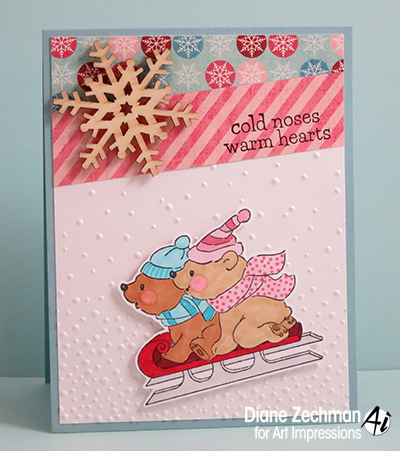
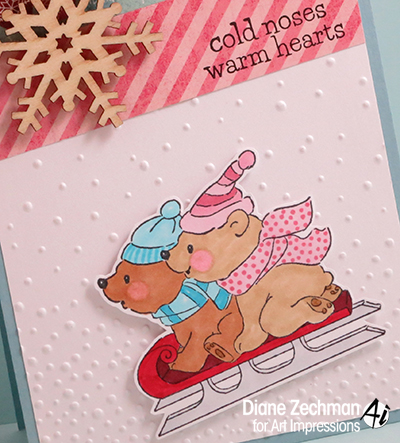
The current Ai Challenge is “Winter Wonderland” and I pulled out this cute sledding duo from the Ai Christmas Cheer Set (4666).  It doesn’t have to only be used for Christmas!

Ai cold noses diane zechman

The sleigh may be a Christmas color but I made the card more pink & blue.  I wanted a boy & girl bear to go sledding.  The card was finished off with a fun wooden snowflake which, by chance, accented the color of the girl bear nicely.

Ai cold noses close diane zechman

Now it’s your turn to make a card or project and join us in the new Ai Challenge!  We would love to see your wintery creation… it can be for any occasion!

Happy stamping!

Diane Signature Medium size

stamps- Art Impressions Christmas Cheer Set (4666), paper- White, SU! Baja Breeze, MME- Merry Little Christmas; ink- Memento Tuxedo Black, Versafine Black; accessories- Copics, SU! Softly Falling embossing folder, wood snowflake sticker (Michael’s), foam dots.

snowy note cube

Hello friends!  It’s time for another Challenge Chicks Challenge!

We’re a small group of friends who post a new challenge on the second Sunday of each month…no stress, no deadlines…just for fun.  And we’d love to have you join us!  This month it is Bev’s turn and her challenge is “Snowy, Frosty, or Glitzy!”  Sound fun?

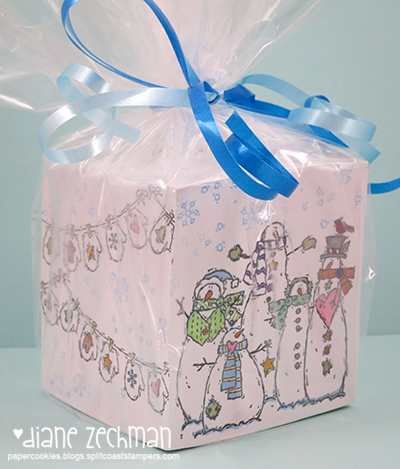
Remember when stamping on the blank note cubes was popular?  How many of you still have some in a closet somewhere?  (raising my hand too!)  I recently got one out and realized once again that it is a fun project to do.  Here I stamped an old SU! snowman set, Flaky Friends, and colored with markers.

note cube 1 diane zechman

note cube 1b diane zechman

The online store where we used to order the blank note cubes is no longer in business.  We may need to find a new source for these!  😉

Please join us and create a card or project… then share it on our Facebook page!  Also, you can upload it to the Splitcoast gallery…and use the keyword CHXJAN16.  Now be sure to click on the links below to check out what the other Chicks created!

challenge chicks logo small


Happy stamping!

clear-ly Christmas

Hello friends!  It’s time for another Challenge Chicks Challenge!

We’re a small group of friends who post a new challenge on the second Sunday of each month…no stress, no deadlines…just for fun.  And we’d love to have you join us!  This month it is Lydia’s turn and her challenge is “Ice, Ice baby – represent ice with a CLEAR element on your card – embossing powder, glaze, acetate, etc.”  Sound fun?

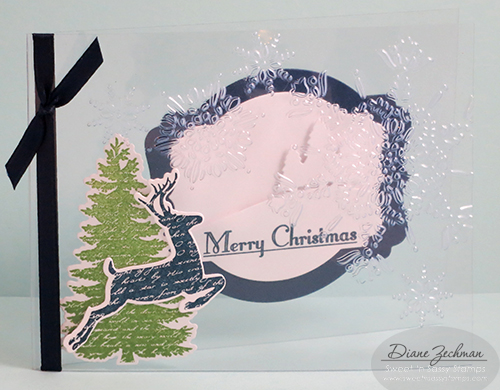
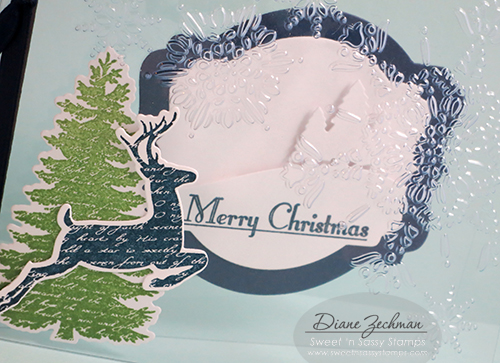
I made a clear card (love these!) with some Sweet ‘n Sassy Stamps Christmas Silhouettes images and the Christmas Silhouettes dies and Hillside Edges dies.

Christmas silhouettes clear diane zechman

It was hard to photograph without getting a glare.  The front of the acetate card was embossed with a snowflake embossing folder.  The reindeer is on the front and the tree is on the inside of the front.  Some deco labels were cut and adhered to the inside back.  Then the hillside edge die was cut and layered with the sentiment stamped on it.

Christmas silhouettes clear 2 diane zechman

An additional white layer was cut and adhered to the card back to hide the tape and provide a place to write a greeting.

Please join us and create a card with a clear element… then share it on our Facebook page!  Also, you can upload it to the Splitcoast gallery…and use the keyword CHXDEC15.  Now be sure to click on the links below to check out what the other Chicks created!

challenge chicks logo small

stamps- Sweet ‘n Sassy Christmas Silhouettes; paper- navy, white; ink- SU! Midnight Muse and Gumball Green; accessories- acetate, Sweet ‘n Sassy Christmas Silhouettes dies and Hillside Edges dies, ribbon, Scor-Tape, SU! Deco Labels Framelits dies and Northern Flurry embossing folder.