Category Archives: OSW (one sheet wonders)

kiwi OSW

I am sharing an easy OSW (one sheet wonder) today. Our friend, Tina, has been giving us challenges again each week. This week we were to make an OSW into 4 cards, in a style a stamper named Connie Trubey does often. My fourth card was changed up a bit because I accidentally dropped my black inkpad. Oops! I like both styles, though…happy accident. 🙂

Here’s the full sheet (8 1/2 x 11) that I made. I decided to stamp my images in 2 rows.

I finally took time to coordinate some envelopes. 🙂

Products used…

Have a great day and stay warm! What happened to our spring weather?

September catch up

Hello! I still have a bunch of cards from the past 6 months that I haven’t shared, so today will be another catch up day. Sorry for the photo heavy post! I’ll share a few more later.

First is a card made with the Altenew Handpicked Bouquet set. After the florals were stamped in black, I used Gina Marie’s Stitched Rectangles to cut out the center. It was then stamped with colored image layers, added to a piece of black cardstock, and adhered back in place. Altenew has some of the best layered florals!

My second card uses the Altenew Fantasy Floral 3D Die Set and SU! Stitched Greenery Die. This was for a wedding card and made to match the bride’s colors. The sentiment is from SNSS Script Sentiments.

Next is a masculine birthday card with an old, retired SU! set, Antique Autos. The background behind the auto was made with Distress cardstock and inks, Tea Dye & Stormy Sky.

Here, I used Simon Says Stamp Blossom Field embossing folder, MFT Die-Namics Stitched Square Scallop Frames, Spellbinders Be Bold Blooms dies, and Gina Marie Drop Pendant Dies. The sentiment is from SU! Shaded Summer. I also made a Mother’s Day version of this card (sentiment from SU! Timeless Tulips).

The next few cards were made with Hobby Lobby’s Eucalyptus paper by The Paper Studio. On the first card, I punched a circle from the paper and layered a Spellbinders die cut, We Bring Happy Wishes, over the opening. The sentiment is from SU! Celebrate Sunflowers and was die cut with Taylored Expressions Stitched Mini Slim Stacklets. I added a few tiny flowers with an Impression Obsession flower die.

Then I used the same paper with a 6×6 OSW by Mary Knabe to create a set of 4 cards. I used SU! Forever Fern and Shaded Summer stamps with Soft Sky and Lost Lagoon paper, Fern embossing folder, Stitched So Sweetly Dies, and the Butterfly Duet punch.

This sweet note card was cased from my friend, Tina. I used a different paper and sentiment (SNSS Everyday Greetings), but the layout is the same.

A birthday card for someone who loves moose…SU! Merry Moose and Simply Sketched with Crumb Cake and Rich Razzleberry. Background is Evergreen Forest embossing folder.

A set of Mystery Cards with some old Graphic 45 Secret Garden paper. Simply turn a sheet of 12×12 paper over and cut into six 4 x 5 1/4 pieces. Turn them over and adhere to a card base, add sentiments. That’s it!

SU! Positive Thoughts & Simply Sketched for a quick sympathy card…

My last card today uses Sweet ‘n Sassy’s Donut Worry, plus SU! Sweet As a Peach & Timeworn Type embossing folder.

Have a great day!

grunge gears

Hello! Today I am sharing two cards featuring a fun, new stencil from the Sweet ‘n Sassy Stamps June release that is great for creating masculine cards and projects.

Product links: Grunge Gears Stencil, Truth Quotes 1, Time Well Spent, Gear Up.

To begin, I made a set of four cards by creating the backgrounds on a full-size sheet of cardstock, 8 1/2″ x 11″. Then I cut it into quarters and layered on a sentiment. Super easy and fun!

First, I randomly inked over the stencil tone-on-tone with kraft colored ink and cardstock.

Then I stamped various images over top in more neutral tones.

Here are the sets I used. After cutting the background into quarters, I die cut each piece before adhering to my card base, but you can skip that step.

I wanted to add a little more color to my second card design, so I pulled out a piece of nice green cardstock and stenciled with a green ink. A few images were stamped in green, and I stamped the pocket watch onto kraft cardstock and layered it on. The sentiment was stamped with black ink.

Have a great day!

stamps- Sweet ‘n Sassy Grunge Gears Stencil, Truth Quotes 1, Time Well Spent, Gear Up; paper- white, SU! Crumb Cake and Certainly Celery, black, kraft; ink- Memento Tuxedo Black, SU! Soft Suede, Crumb Cake, Early Espresso, Old Olive; accessories- MISTIGemini Jr., enamel dots, Gina Marie Slash Stitched Rectangles.

a sheet of sympathy

Hello! I recently made a few sympathy cards with a little spin off from the OSW (One Sheet Wonders). A lady (Connie Trubey) has been making a lot of variations of these and she inspired me to re-visit the OSWs and try it her way. I can’t wait to make more!

Product links: Forever LovedSpread Your Wings Stamp & Die Bundle, and Leaf Branch Stencil. Spread Your Wings is also available separately… Stamp set and Die Set. Forever Loved also has Dies and is available in a Bundle.

I stamped a full sheet, 8 1/2 x 11, of cardstock and then cut it into four A2 size panels, trimming slightly to allow for layers. This creates four cards in a quick and easy way.

Here’s how I stamped the sheet. I didn’t have good lighting for this photo before it was cut but you can see how it was done. I didn’t worry about getting anything perfect and just “winged” it.

Tip: I VERY LIGHTLY scored the sheet halfway in both directions as a little guide to get started. You will be cutting on these lines later so they won’t show in the final card.

Supplies for making the background…

Have a great day!

stamps- Sweet ‘n Sassy Forever LovedSpread Your Wings Stamp & Die Bundle; paper- white, SU! Pool Party and Wisteria Wonder; ink- Memento Tuxedo Black, SU! Pool Party, Wisteria Wonder, Buckaroo Blue, Certainly Celery, and Gumball Green; accessories- MISTIScor-PalGemini Jr.Leaf Branch Stencil, Stickles.

glory one sheet wonder

Happy Monday!  I hope you are enjoying a relaxing day off!

I am sharing how to make a OSW (One Sheet Wonder) card today on the Sweet ‘n Sassy blog for this week’s Design Diva Demo.

glory OSW 6 diane zechman

A One Sheet Wonder is basically filling a sheet of cardstock with stamped images to create your own backgrounds.  It’s a fun and easy way to quickly make multiple cards or a set of different, coordinating cards.

To begin, I started with a 1/2 sheet of vanilla cardstock, a few colors of dye-based ink, and the Sweet ‘n Sassy Leaf Silhouettes stamp set.  (I usually use a full sheet of cardstock but I only used 1/2 sheet today).

glory OSW 2 diane zechman

When using images of various sizes, it is best to stamp your largest image all over the paper first.  Then stamp the next largest, etc. and finish by filling in the empty spaces with your smallest images.  However, the leaves in the set I used today are very close in size so I started by filling in one corner of the cardstock and then worked my way across the sheet.

glory OSW 3 diane zechman

When I was finished stamping my background, it looked like this.

glory OSW 4 diane zechman

There are many diagrams and instructions on the internet for cutting your stamped sheet and creating cards, etc.  I have a few OSW templates on my blog and I think my favorite is this one because it is SO easy to cut up and use!  This diagram is for a full sheet but as you can see…with this template it is also very easy to use half a sheet as I did today.  (I cut it into four 2 1/8″ x 5 1/2″ panels)

OSW#4 diagram diane zechman

Once you have your panels cut, stamp a few extra leaves to add to your card.  The Leaf Silhouettes Dies are perfect for cutting them out!

glory OSW 5 diane zechman

Another thing I love about this OSW template is that it makes 8 cards but I have 16 different layouts to choose from.  You can pick & choose which ones you want to use…make them all the same or create different cards!  You can see the layouts and directions here on my blog where I used the Precious Poppies stamp set.

This time I used my 1/2 sheet and made all 4 of my cards the same (similar to the #2 card on my blog).  Here’s my completed card.  I hand cut the bottom of each panel to a banner shape.  Decorate yours any way you like!  For the words, I stamped the NEW Sweet ‘n Sassy Words of Life- Collection 1 (a new bible journaling set!!) which will be available Friday in the SNSS store!

glory OSW diane zechman

Thanks for stopping by today… happy stamping!

stamps- Sweet ‘n Sassy Leaf Silhouettes and Words of Life- Collection 1; paper- vanilla, brown, SU! Coastal Cabana and Concord Crush; ink- SU! Coastal Cabana, Gumball Green, Crushed Curry, and Concord Crush; accessories- SNSS Leaf Silhouettes Dies, SU! ribbon and Spiral Punch, foam dots, adhesive rhinestones, Bow-Easy.

the easiest One Sheet Wonder ever…

Whew!  I am glad this OSW (one sheet wonder) is done!  I started sketching it 5 years ago…LOL…when I created my last one.  Last week it took me 2 days to find where I placed it.  ha ha.  But I’m glad it is now found…and finished!   

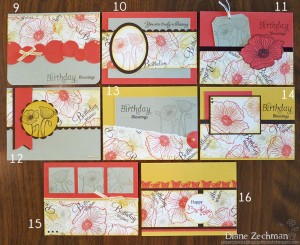
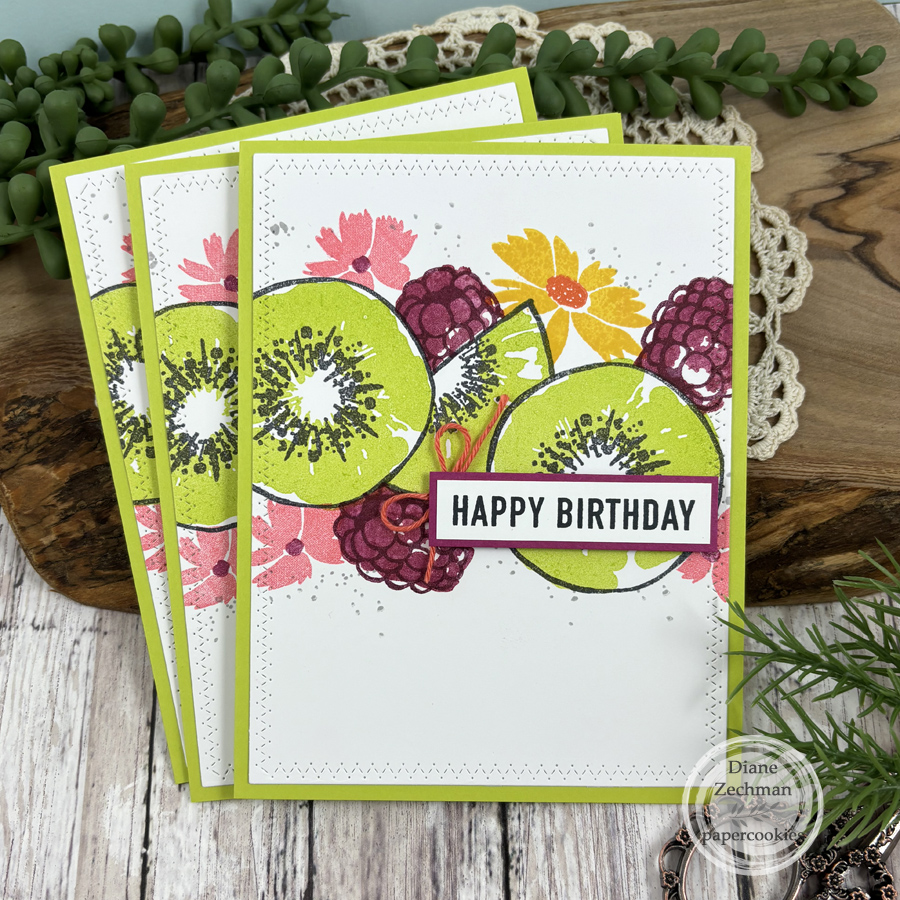
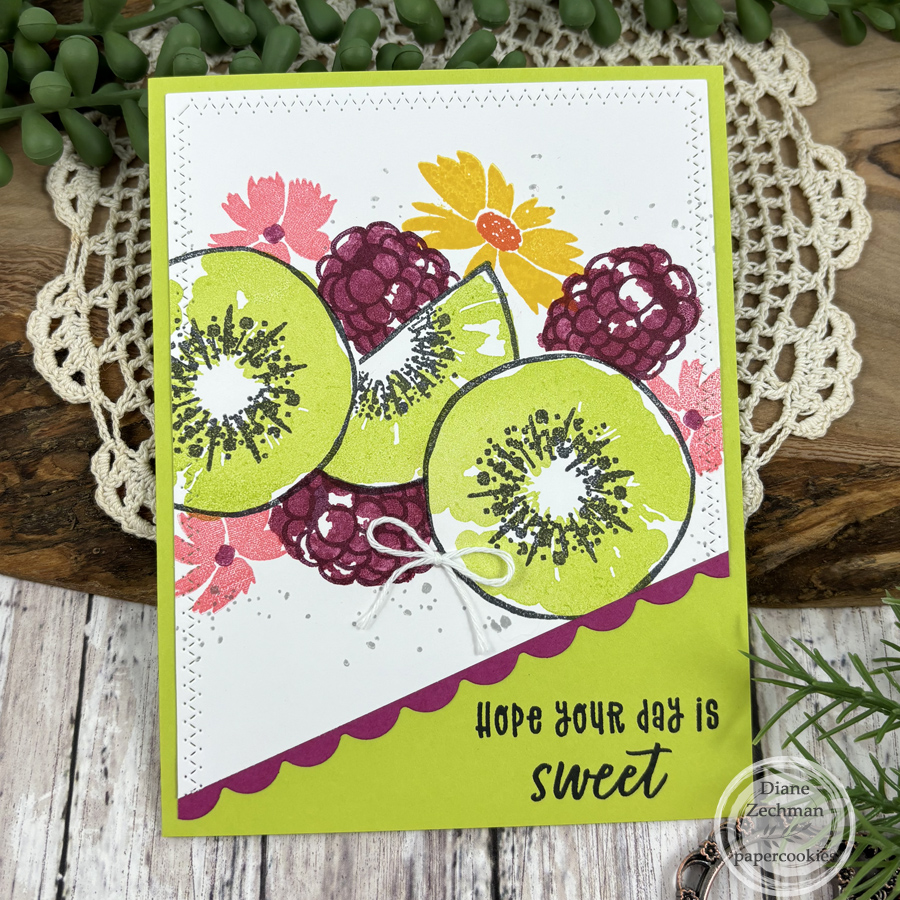
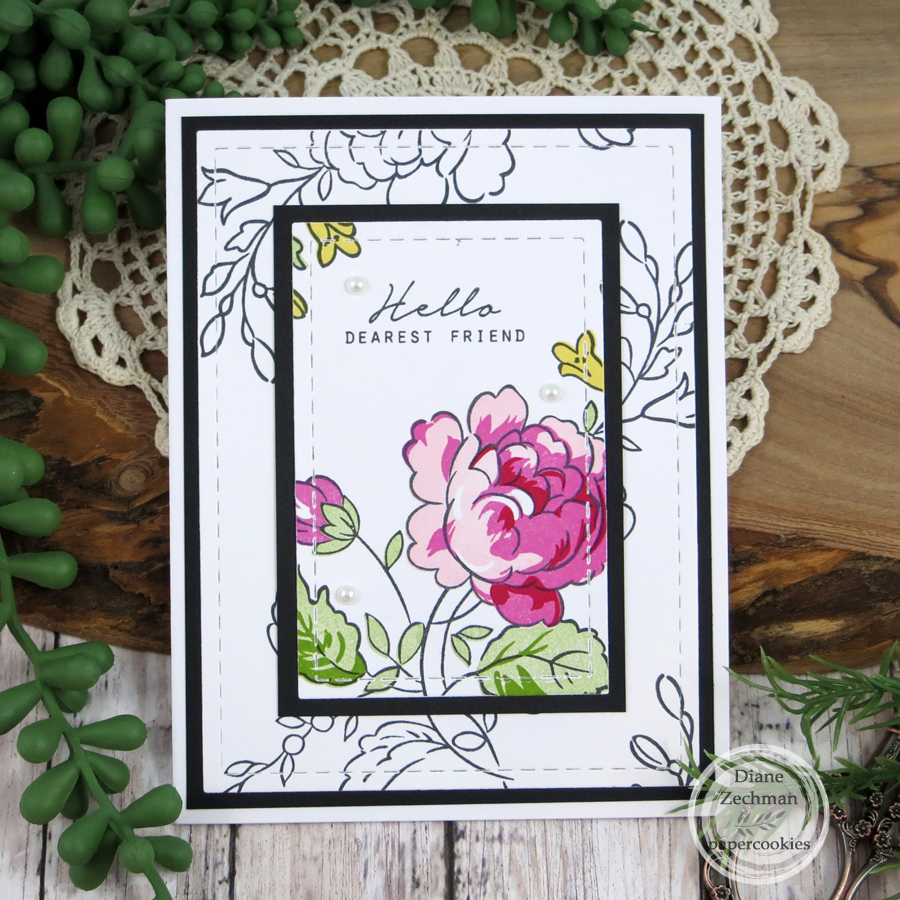
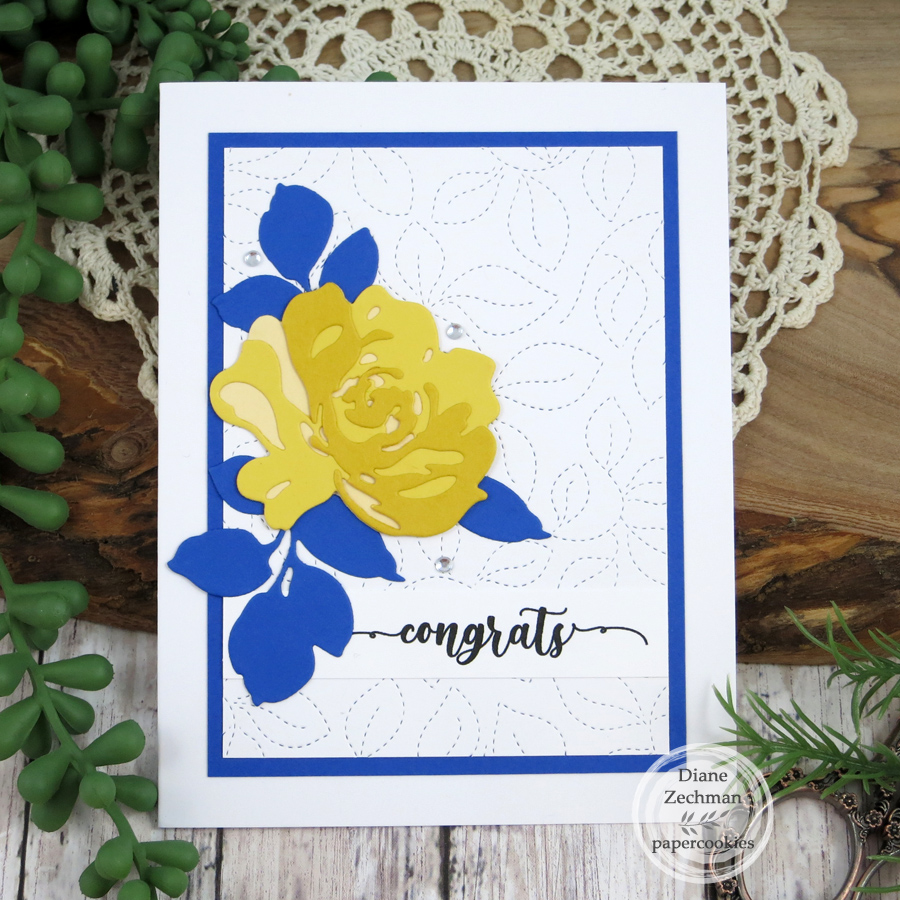
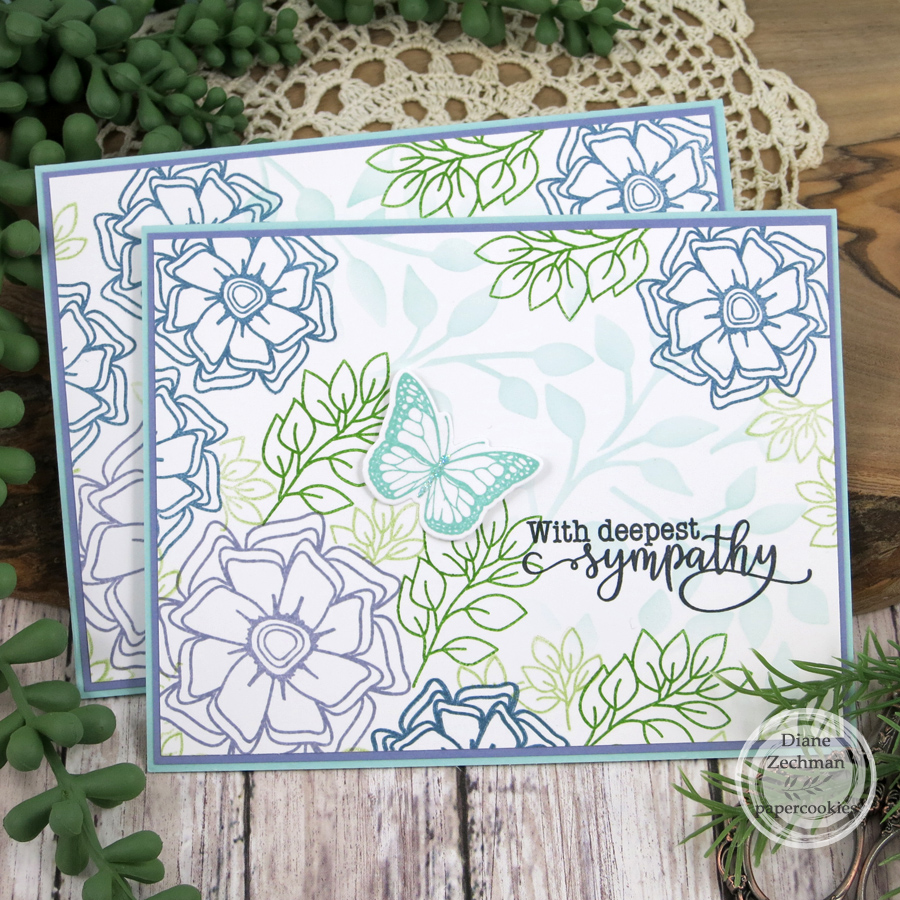
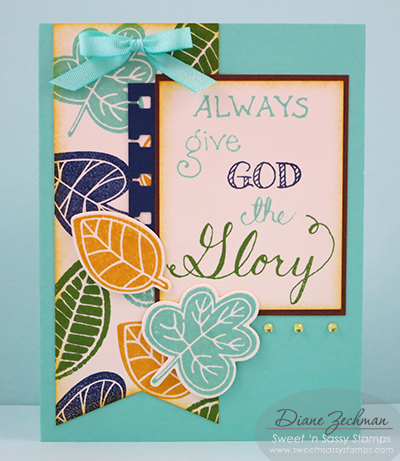
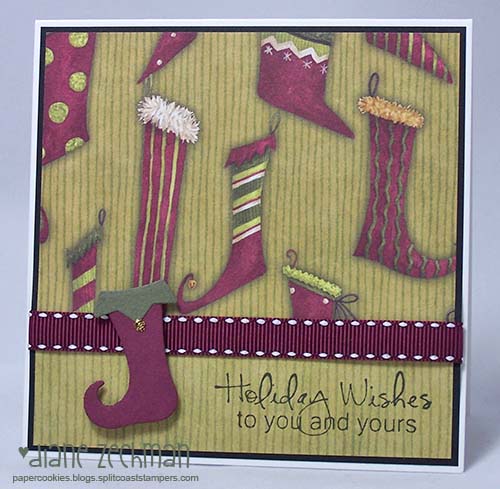
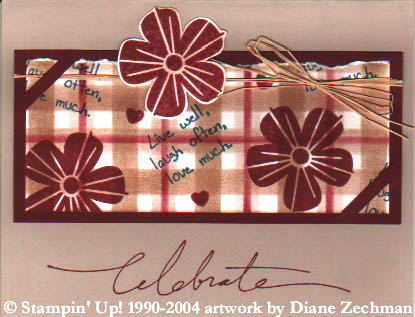
One sheet of 8 1/2 x 11 paper will create 8 cards.  The bonus is…I have 16 different layouts you can choose from!  So if you stamp 2 sheets, you can make 16 different cards.  ALL 16 cards are in 2 photos below.  I did not take individual pics of them all but here’s a few of my favorites…

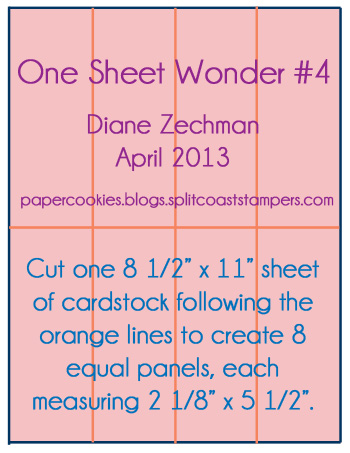
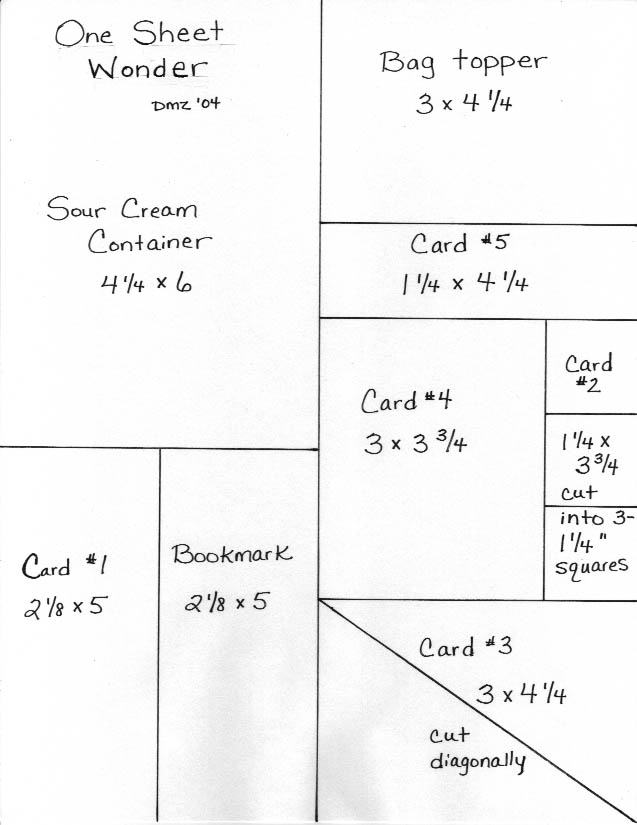
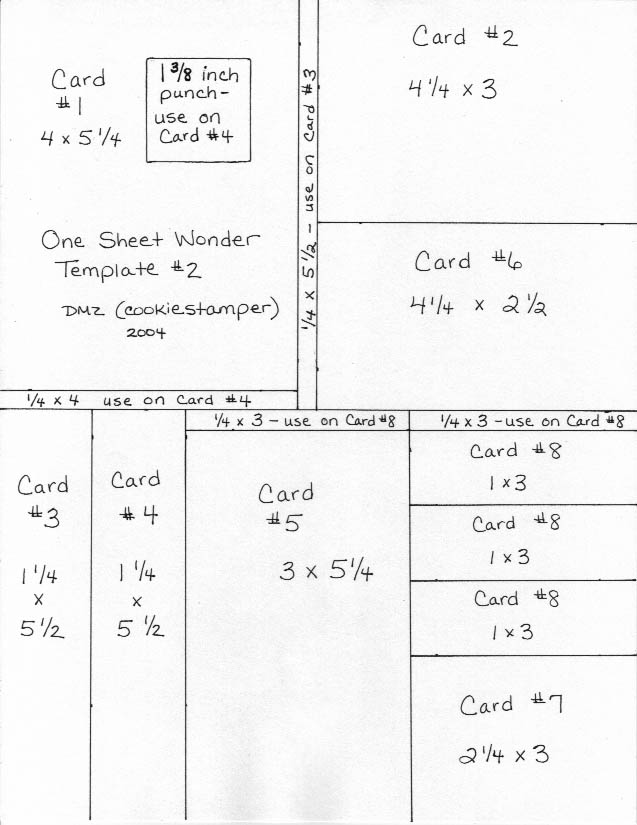
The BEST part is…it is SO simple to cut the sheet up.  Here’s the diagram…simple, huh?  :0)

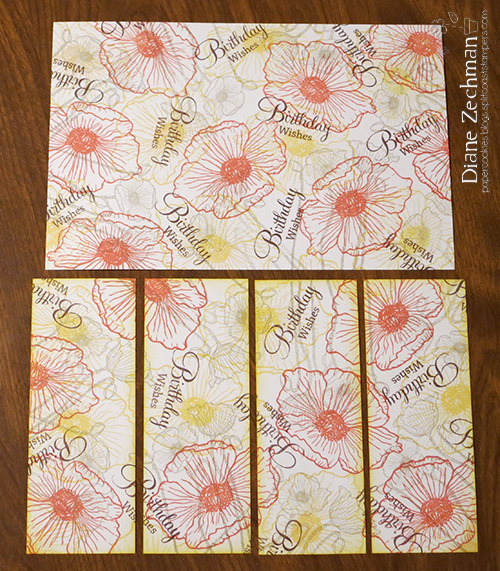
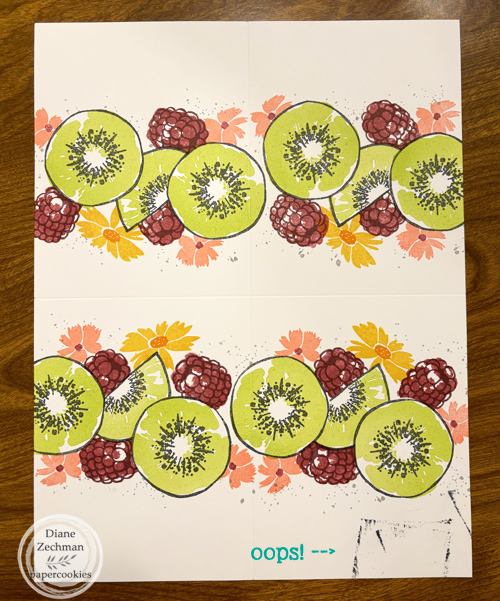
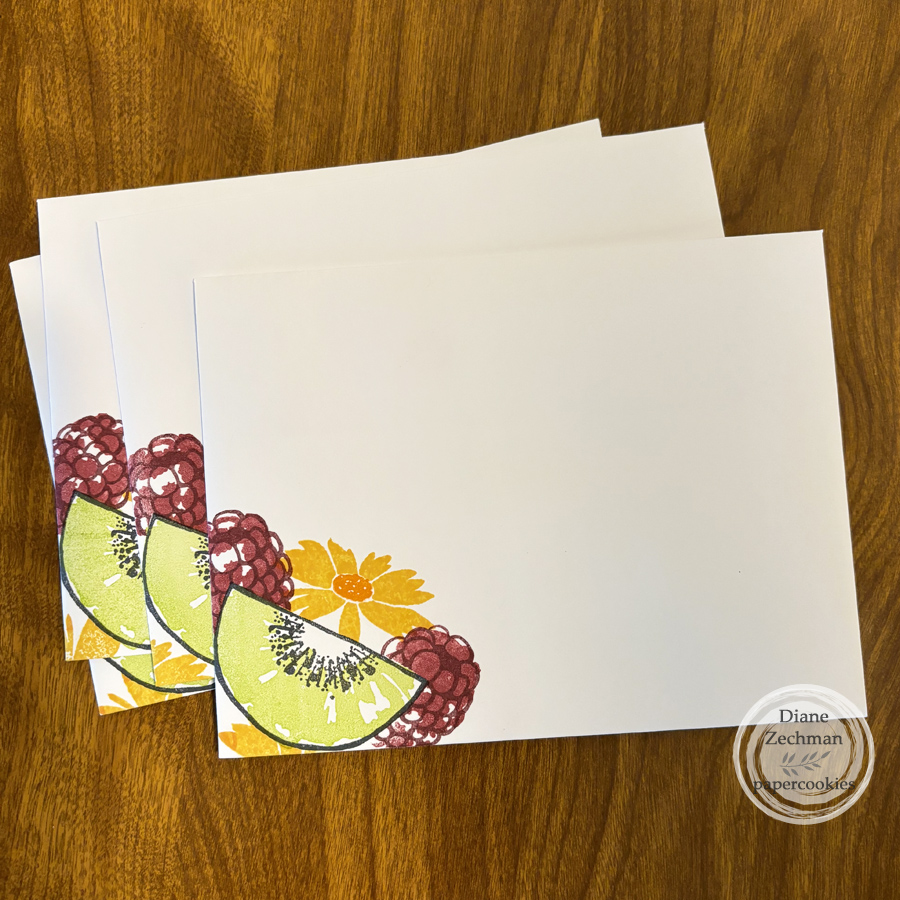
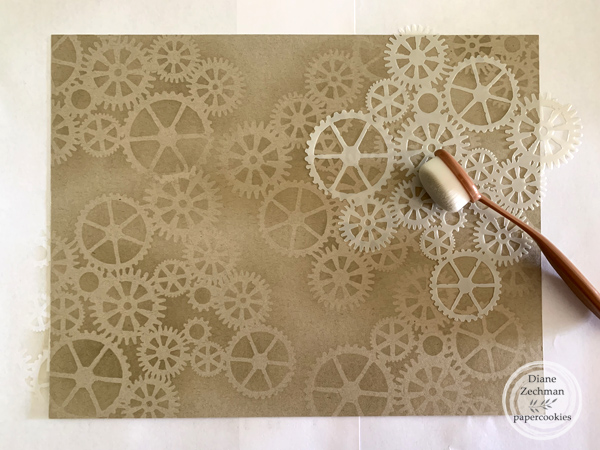
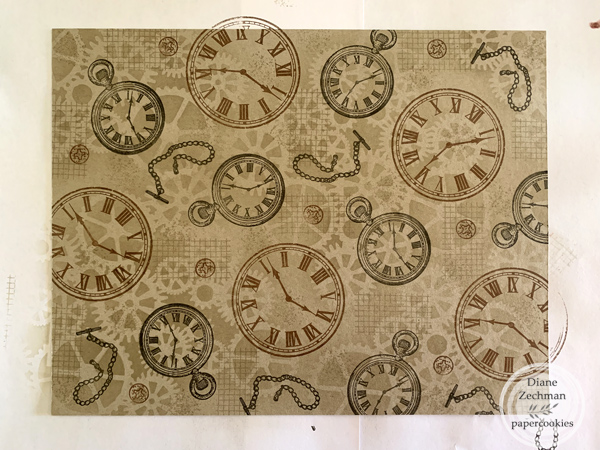
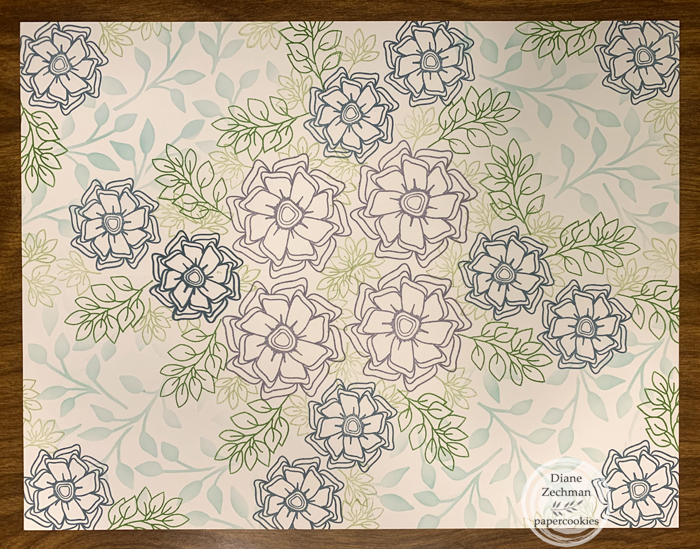
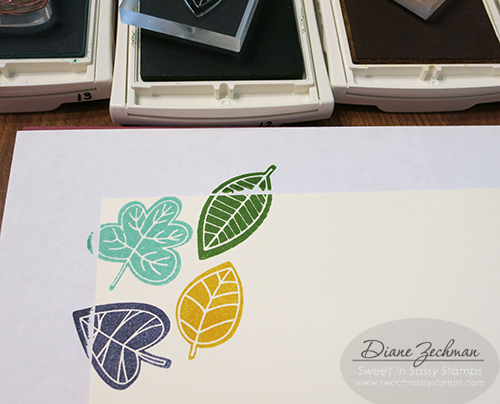
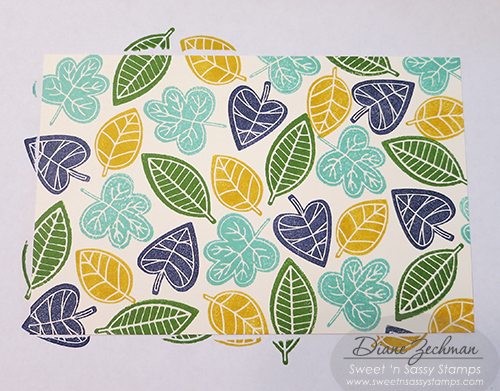
Can’t be any easier!  This is what my sheet started out like.  First, cut in half…then the bottom was cut into the panels.

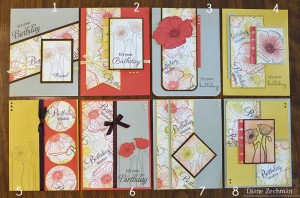
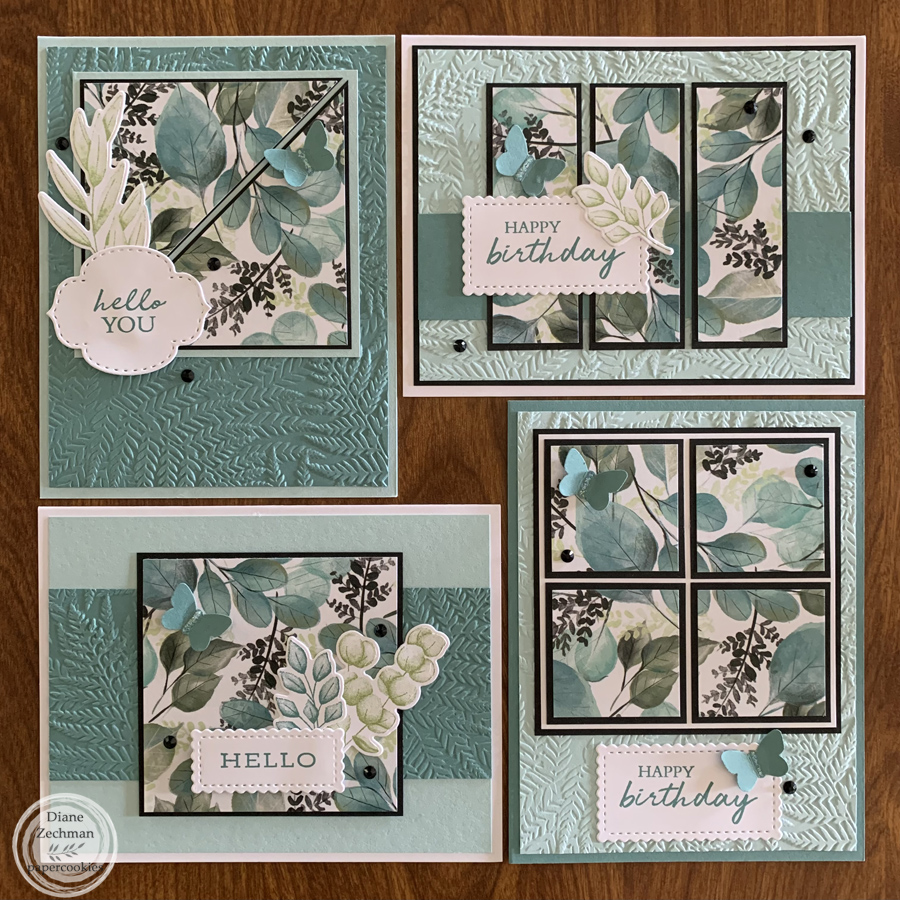
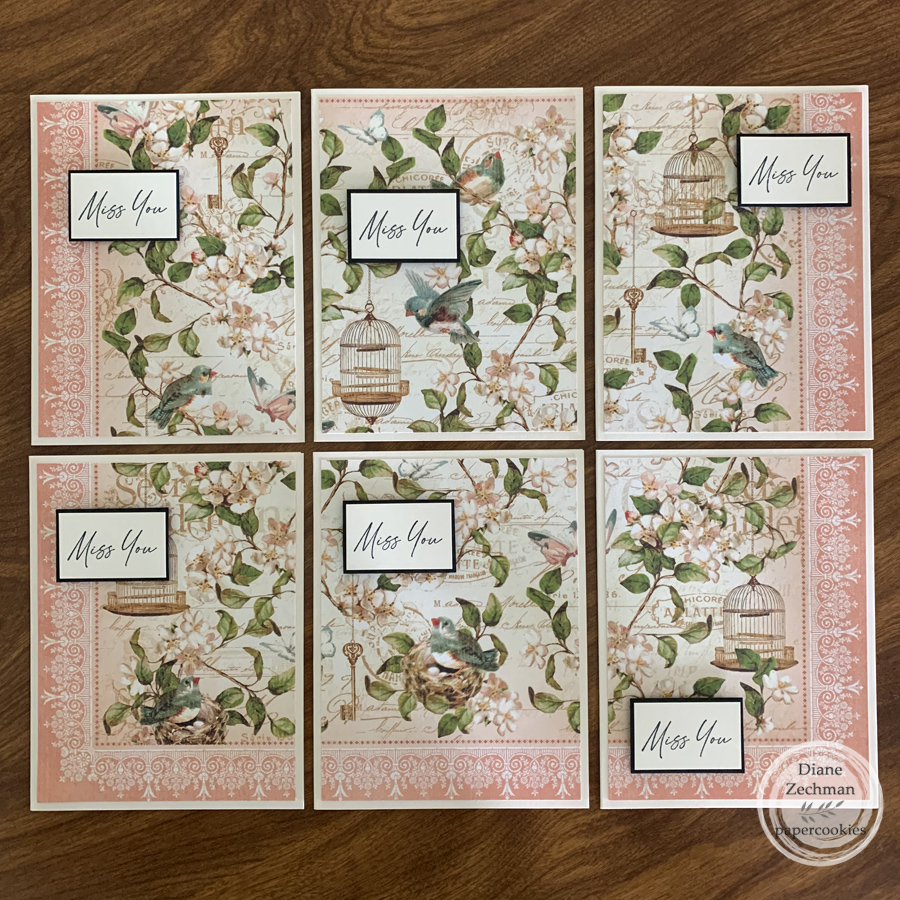
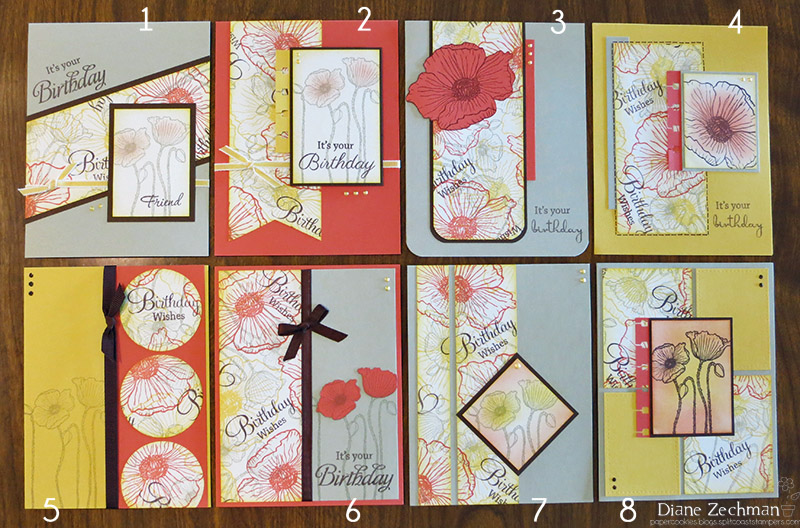
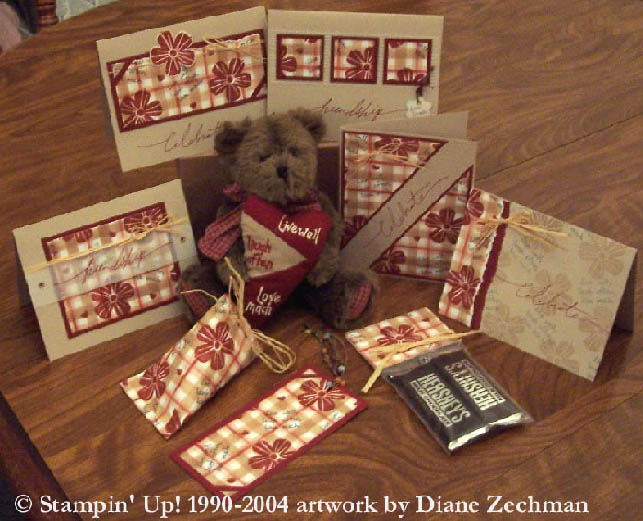
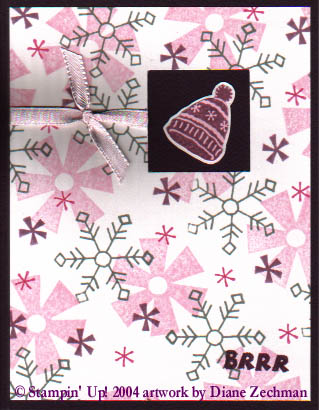
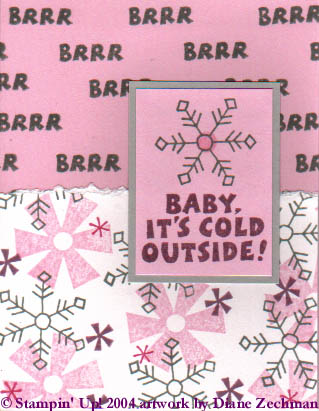
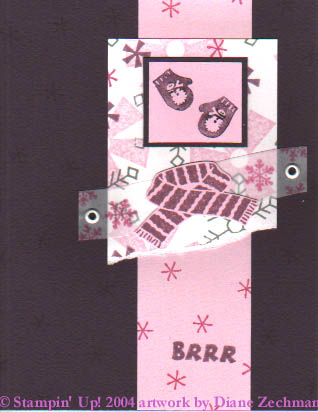
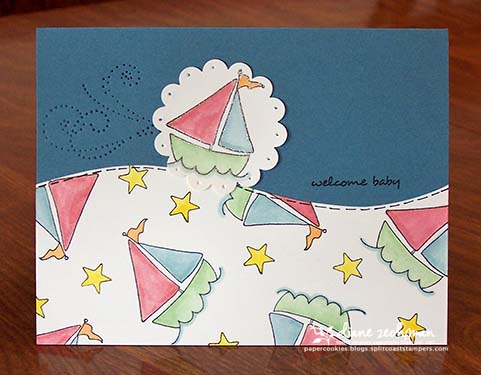
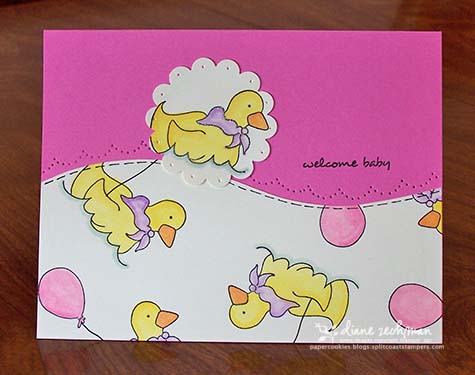
So here’s some pics with all 16 cards…8 vertical and 8 horizontal.  Pick & choose what you want to use!  (CLICK on the photos for larger view)

 And here’s some general guidelines…

OSW #4 Directions    (Numbers below correspond to card number)

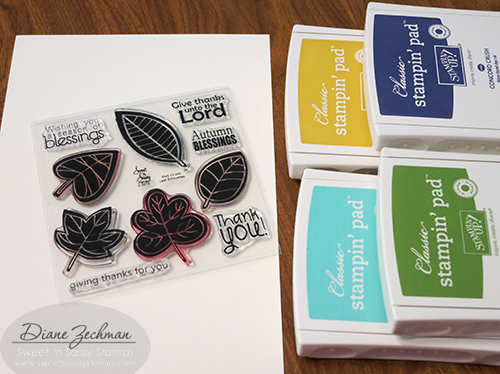
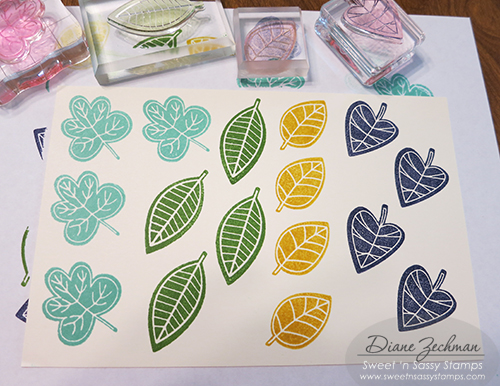
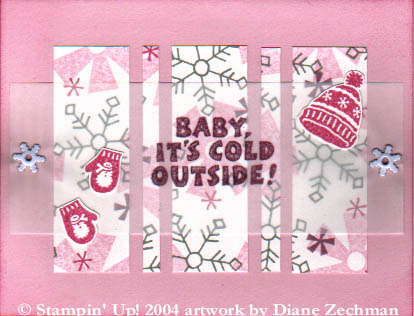
Stamp one 8 1/2” x 11” sheet of cardstock.  Cut into 8 equal panels (2 1/8” x 5 1/2”) according to diagram.  Sponge edges if desired.  Follow pictures of cards for 16 possible layouts (one sheet will make 8 cards).

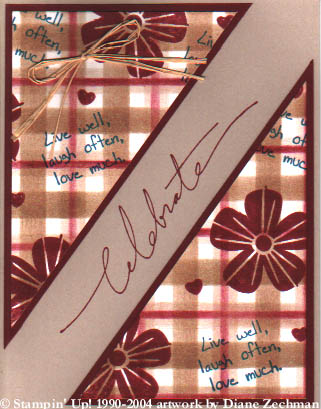
1. Attach OSW panel on a slant, trim.

2. Cut a “v” shape in the bottom of panel, trim the top.  Flag is 5 1/4″ long.

3. Round bottom corners of panel, trim the top.  Panel is 5 1/8” long.

4. Trim panel to 4 ½” in length.

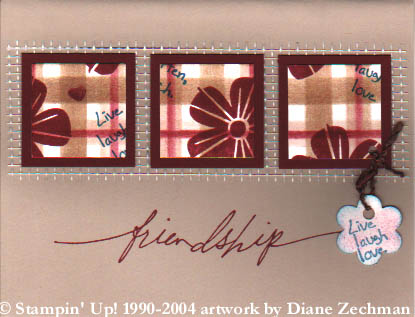
5. Diecut or punch 3 circles (approx. 1 7/8”) from panel.

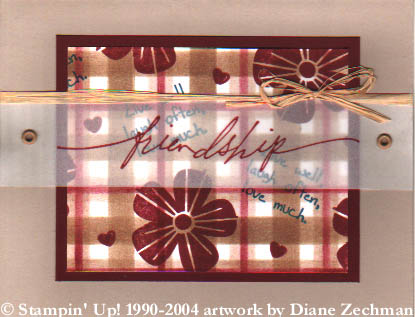
6. Trim panel to 2” x 5 1/4″.

7. Cut a 3/4″ strip from the left side of the panel, attach both pieces with a small space between them.

8. Cut panel in half to make 2 pieces, each 2 1/8 x 2 3/4.  The 2 yellow layers are 1 3/4 x 2 3/8.

9. Cover bottom edge of panel with various sizes of circle punches.  I used 3/4″, 1”, and 1 3/8”.

10. No measurements needed.

11.  My gray tag is 2 1/8” wide.

12. Flags are 1” x 3 5/8”.

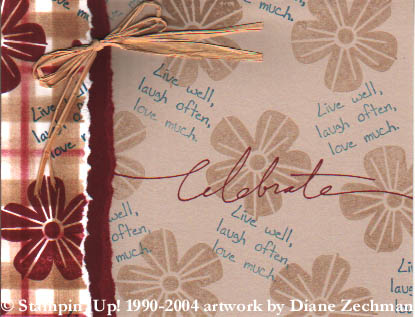
13. Tear top edge of panel on a slant.  Gray layer is 4 3/4″ x 3 5/8”.

14. No measurements needed.

15. 3 gray squares are 1 1/2″.

16. I cut the right side of the panel at 1 7/8”.  Attach both pieces with a space between them, trim left edge.  Circle is 1 3/4″.

Have FUN with it!  And don’t forget to link back so I can see what you create!

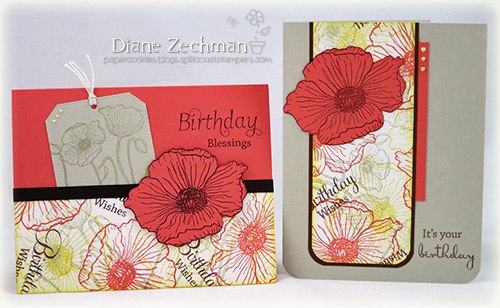
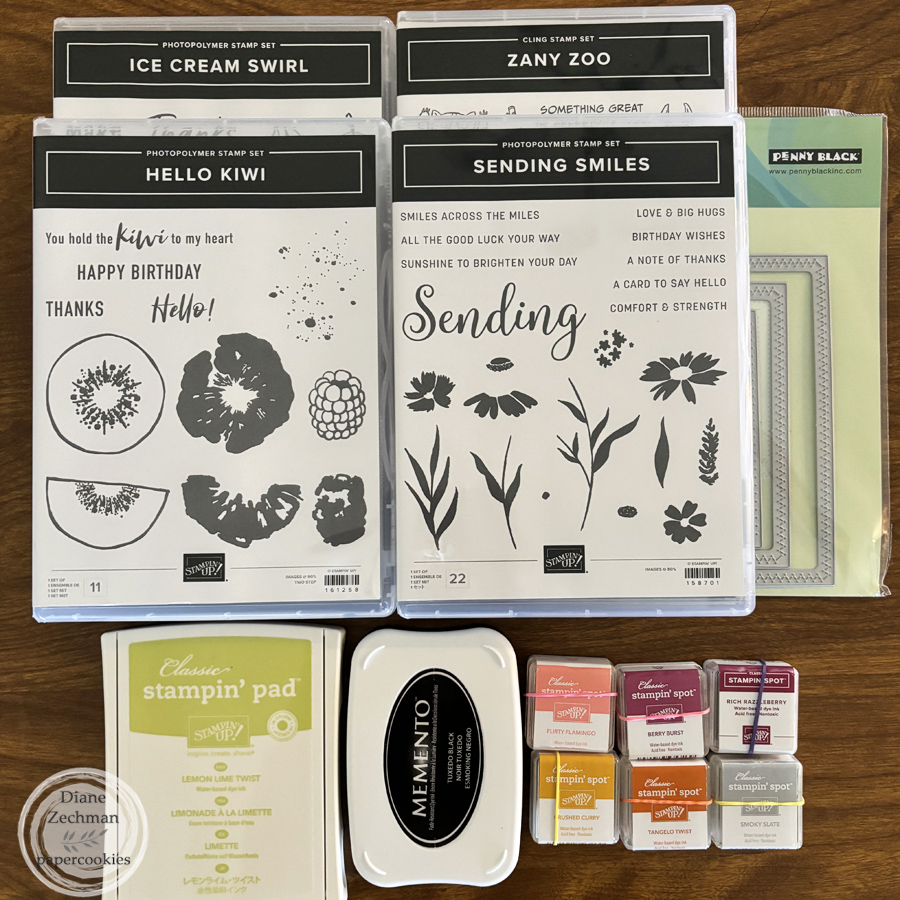
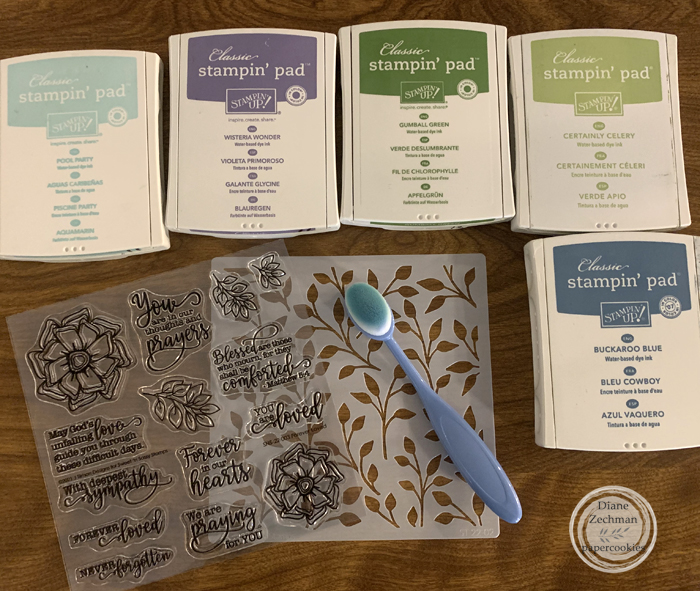
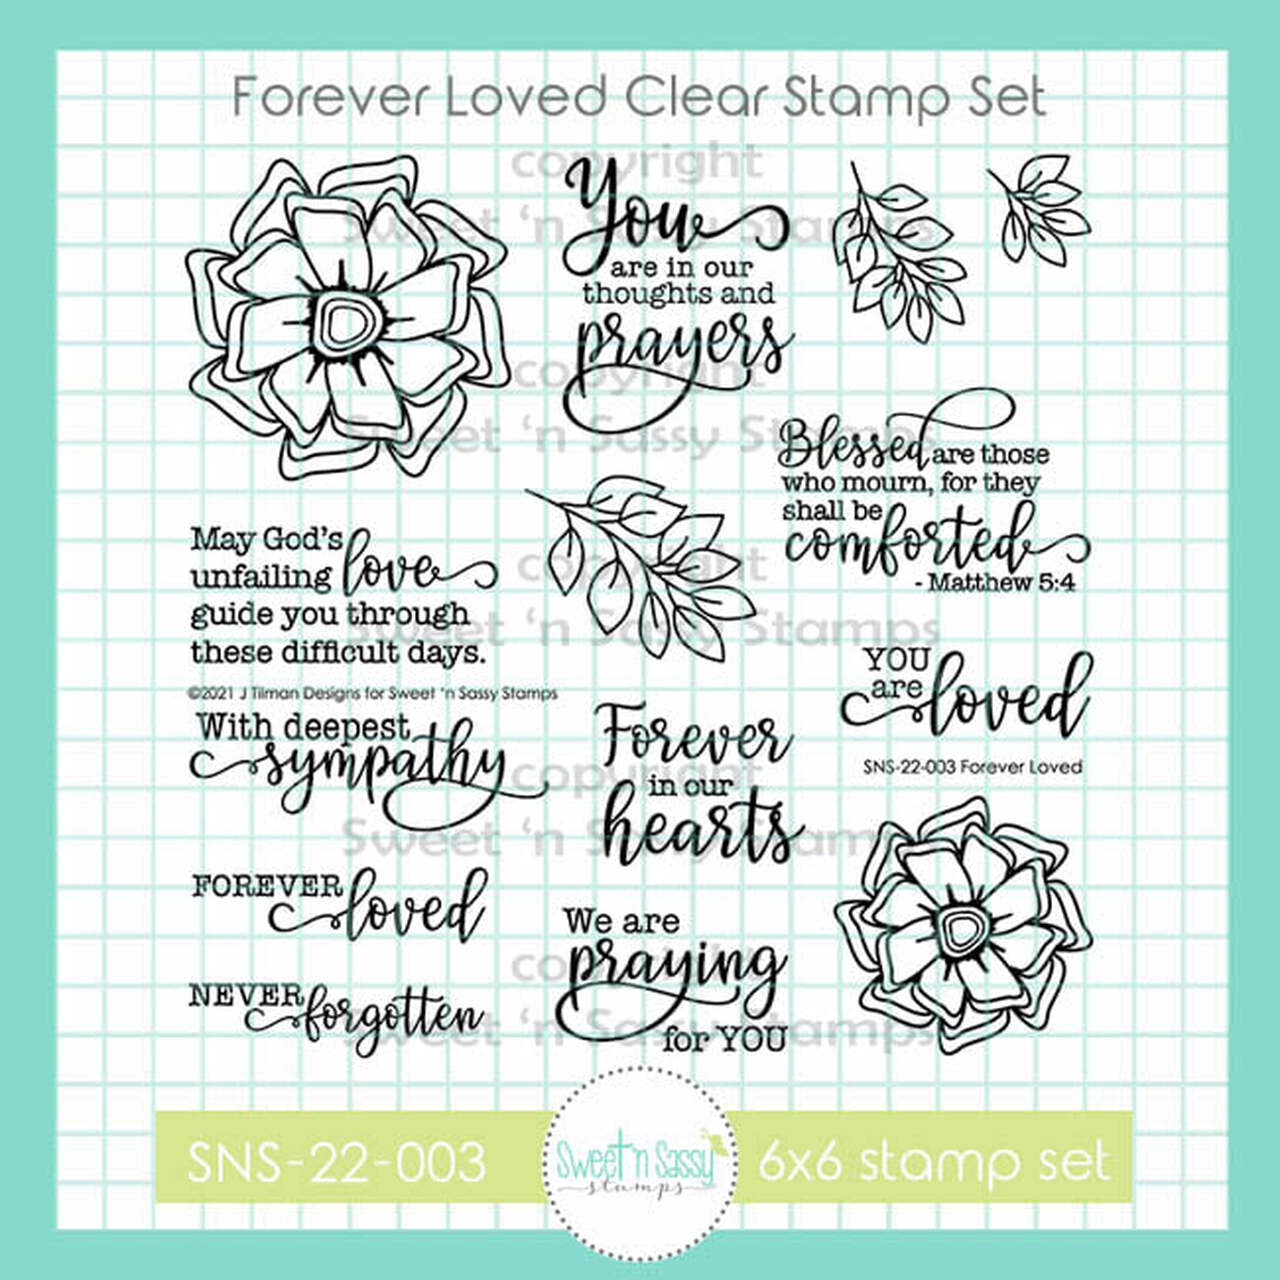
Stamps- Sweet ‘n Sassy- Precious Poppies and Script Birthdays; paper- Whisper White, Daffodil Delight, Sahara Sand, Calypso Coral, brown; ink- Daffodil Delight, Sahara Sand, Calypso Coral, Chocolate Chip; accessories- Oval Nestabilities, Circle Nestabilities and circle punches, brad, ribbon, glue dots, corner rounder, SU! Scallop Edge punch, Tag corner punch, thread, pop dots, Martha Stewart monarch butterfly punch, Stickles, Liquid Pearls.  

snowy Christmas wishes

Here’s another card I recently made with a different sheet of 12×12 patterned paper than I used in yesterday’s post.  Same layout.  Different papers and punches.

The patterned paper was cut into 4 x 3 inch pieces, so I was able to make 12 cards from one sheet.  The sentiments are from AmyR’s Merry & Bright set.  This time I punched a red heart and accented it with a punched snowflake.  Then I used another heart on the inside.  Some red Stickles was applied to the center of each snowflake.

I can’t believe it’s almost December already!  I am glad that I have a jump on my holiday cards and I hope I can finish them soon.  Do you have yours done?

stamps- AmyR Merry & Bright; paper- white, kraft, red, dp- Country Snowmen by The Paper Studio; ink- Memento Black; accessories- ribbon, EK Success heart and snowflake punches, Stickles.

holiday wishes…

clean & simple style! 

I recently made some quick and easy Christmas cards with 12×12 sheets of patterned papers and AmyR’s Christmas sentiment sets.  This piece was cut into 4×4 squares and made 9 cards. 

The plain striped paper on the bottom is the reverse side of the stripe with the stockings.  And the sentiment is from AmyR’s Holiday Greetings.  The QuicKutz boot die was a perfect match, don’t you think?

Tomorrow I’ll have another card to share with a different sheet of paper, using the same layout.  I love when a set of cards comes together quickly and easily!

stamps- AmyR Holiday Greetings; paper- white, black, Bravo Burgundy, Artichoke, dp- Debbie Mumm design by Creative Imaginations; ink- Memento Black; accessories- ribbon, QuicKutz boot die, pop dots, Stickles.

one sheet wonders from 2004

Hello again.  Today I’m back with a flash from the past.  :0)

I was recently thinking about making another one sheet wonder template and I realized that I have only shared my most recent one with you.  I have two more that were posted a long time ago on a different website that I no longer have.  So I thought I’d just quickly post the other ones I did and then they will be available in the archives here for future reference.

If you are unfamiliar with the One Sheet Wonders, it is just a way to quickly make a set of coordinating cards.  You first stamp a whole sheet of cardstock and then cut it up, following the pattern.  The pieces are then used as if you would use patterned papers on your cards.  (you can also just cut up the patterned papers to use).

Now please bear in mind….these first two OSW’s that I created were back in 2004.  I would hope that my stamping has improved in the past 5 years!  LOL!  But I will post the card samples that I created with them anyway.  It helps to have a visual of how to use the pieces and hopefully the samples will give you a starting point.

OK, so here’s my earlier templates and samples.  You can click on each photo for a larger view.  I hope you find them useful…please link back if you use them so I can see your creations!

One Sheet Wonder #1

osw-template-dmz.JPG osw-bear1-dmz.jpg osw-card1-dmz.JPG osw-card2-dmz.JPG osw-card3-dmz.JPG osw-card4-dmz.JPG osw-card5-dmz.JPG

One Sheet Wonder #2

osw2-template-dmz.JPG osw2-card1-dmz.JPG osw2-card2-dmz.JPG osw2-card3-dmz.JPG osw2-card4-dmz.JPG osw2-card5-dmz.JPG osw2-card6-dmz.JPG osw2-card7-dmz.JPG osw2-card8-dmz.JPG

Have a great day!

welcome baby

Wow- has it really been over a week since I posted? Yikes…sorry about that! Sometimes life just gets busy and you need to take a break. The good news is….my taxes are done! yay.gif I also have some news to share…but maybe I’ll save that for another day. (No, today’s cards have nothing to do with it. LOL!)

Here are 2 more cards with Anna Wight’s Bundle of Joy set. I used my One Sheet Wonder template to make these. I didn’t want a whole sheet of one design though, so I cut my sheet in half and made some for a boy and some for a girl. And I still have leftover pieces!
The images in the scallop circles have some glitter added. And I used the Priceless brass template to pierce some holes. The flourish was used to make some “wind” for the sailboat and the scallop edge was used to make some waves for the duckie.

welcome-baby-boy-by-diane-zechman.jpg

welcome-baby-girl-by-diane-zechman.jpg

stamps- Bundle of Joy by Whipper Snapper
paper- Vanilla, Bayou, Pixie
ink- Black, Summer, Pumpkin, Bayou, Cranberry, Pixie, Wasabi
accessories- Scallop circle punch, Priceless brass template, glitter pen