Category Archives: Cookie Crumbs images

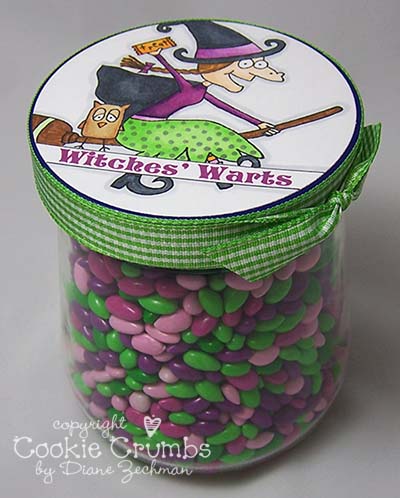
Witches’ Warts

witches-warts-diane-zechman.jpgHi all!  Super quickie post today ’cause I’m exhausted!

Today’s challenge at ATS is to make a Halloween item.  Go check out the new ATS Challenge Blog for all the samples! 

This candy jar was part of my gift swap on Saturday.  I had a package of chocolate covered sunflower seeds but I didn’t know what to call them.  The only thing I could come up with was….Witches’ Warts!  LOL.  So I just had to use Griselda

I had the jar in my stash…I think it may have had something like marshmallow fluff inside?? 

The words were printed from the computer and then masked before I stamped the witch.

Gotta run…have a great day!

stamps- Ollie and Griselda by Cookie Crumbs; paper- white; ink- Memento Black; accessories- Copics, ribbon, jar, Scor-Tape, Chocolate covered sunflower seeds, computer for words.

a stair step ATC

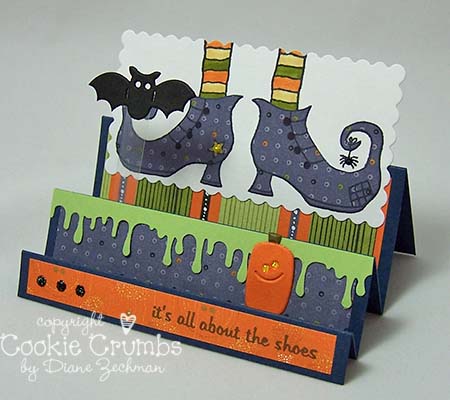
Today I have another project to share from the gathering I went to on Saturday.  This is the ATC I created for our ATC swap.  If you aren’t familiar with ATC’S, it stands for Artist Trading Card.  They are 2 1/2 x 3 1/2 inches. 

I decided to make mine a bit 3D this time and since I had fun creating a stair step card recently, I figured out the measurements to make it a miniature ATC size.  Here’s what I came up with, using my Ollie and Griselda set once again.  The shoes were paper pieced and boy was I tired of cutting out those curly shoes!  LOL. 

stair-step-atc-1-diane-zechman.jpg

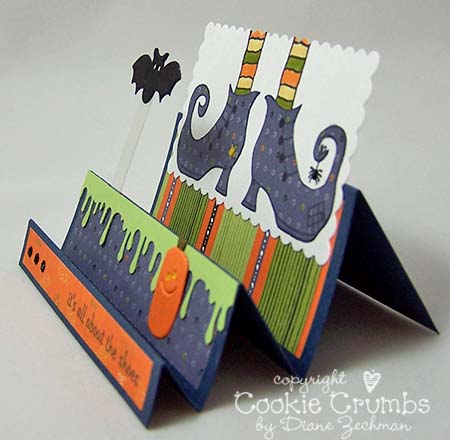
Below is a side view so you can see the folds a little better.  I had to make 24 of these for the swap so I wanted to figure out the best measurements to avoid a lot of waste in scraps.  I pulled out some 12 x 12 cardstock and cut the base of the cards so that I started with a 3 1/2 x 6 piece of cardstock.  Then I scored the 6″ length @ 1 1/2, 3, 4, 5, and 5 1/2.  The scored lines are folded mountain and valley style to create the base.

stair-step-atc-2-diane-zechman.jpg

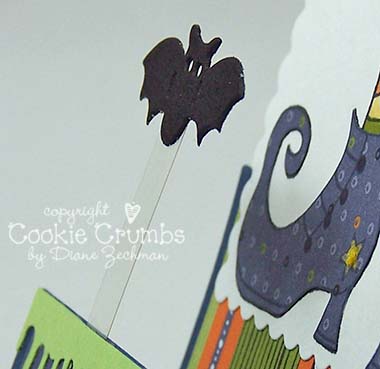
And the last photo shows how the die cut bat was attached with a small strip of clear acetate.  I sandwiched the bottom between the cardstock and the punched border. 

stair-step-atc-3-diane-zechman.jpg

Tomorrow I have one more project I made with this set…and it is yummy!  😉

stamps- Ollie and Griselda by Cookie Crumbs; paper- Navy, White, Celery, Black, Pumpkin, retired SU! dp- Halloween Night; ink- Memento Black, Pumpkin, Saffron, Olive; accessories- Long Rectangle Nestabilities, M.S. Drippy Goo punch, clear acetate, Cuttlebug Halloween die, Scor-Tape, yellow glitter pen, Stickles.

a spooky shoebox

o-and-g-retiform-grid-diane-zechman.jpgHello!  :0)

I hope you had a great weekend!  I sure did.  On Saturday I attended another fun day of stamping with some of my NY and PA friends.  Fun, fun!  I have a few projects from this gathering that I will share with you this week.  And the sneak peeks for the new ATS sets for November start this week too, so be sure to check the ATS blog each day! 

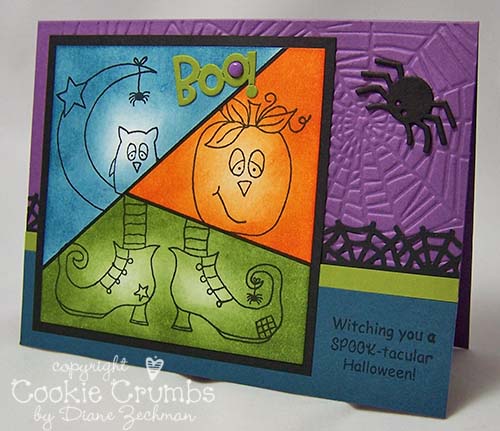
This card was my shoebox project on Saturday that I prepared for everyone at my table to make.  I used my Ollie and Griselda set, along with the Retiform Grid technique that I haven’t done in a long time.  It was fun to try it out again.  I don’t remember where I first learned this technique, but I learned to make it two different ways…one by drawing in the lines with a marker and the other by sponging without drawing the lines.  I forgot to take some pictures as I was making it, so hopefully I’ll explain it well enough to understand.

First I started with a square of white cardstock.  Then I made a pattern for my grids by cutting a second square into 3 random pieces.  You do not need to make a pattern but I needed to be able to make several cards exactly alike so a pattern was very helpful.  Then I traced the pattern pieces with a Sharpie marker to get the black lines. 

Next I masked off each section, one at a time and stamped the images with black ink.  Then I masked them each again, sponging them with 3 different colors of ink.  It really doesn’t matter if you stamp first or sponge first by doing it this way but if you stamp first, then you have a little more control over where your lighter, highlighted areas are.

The second way I learned to do this technique is to not draw in any lines.  In this way, you must do your sponging first.  Mask off a section and sponge it.  Then move your mask and sponge another section.  Your sections may overlap if you want.  Continue until you fill the cardstock.  Then come back and mask the sections again, this time stamping various coordinating images in each one.  By doing it this way, it is sometimes best to choose only 2 colors of ink that blend well together to avoid the sections looking “muddied” where they overlap. 

I hope I explained it well enough and you give it a try!  It is really a fun technique which is quick and easy when you don’t have time to do a lot of coloring.

Have a great day and thanks for stopping by!

stamps- Ollie and Griselda by Cookie Crumbs; paper- Elegant Eggplant, Not Quite Navy, Olive, Pumpkin, Black, White; ink- Memento Black, SU! Not Quite Navy, Pumpkin, Olive; accessories- Cuttlebug Halloween die and Spiderweb embossing folder, Sharpie marker, Martha Stewart Spiderweb Edge punch, brad, sponges. 


remember the reason…

rfts-2-diane-zechman.jpg

TGIF!  :0)

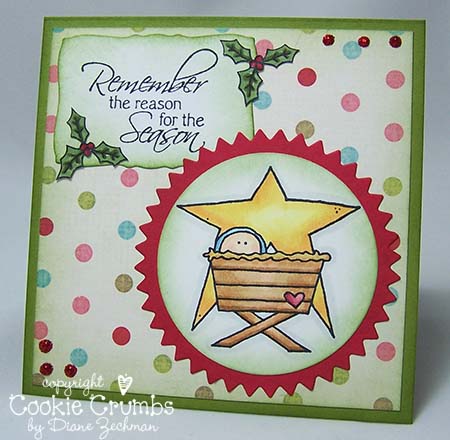
I am late posting this today but I finally had a chance to sit down and share my card for the ATS review of my new set…Reason For The Season.  We are also reviewing the Pond Life set today…you can see the great samples for both sets on the ATS blog.  I hope to play with the pond cuties soon. 

Here’s the deets and I’ll be back tomorrow with another fun project.

stamps- Reason For The Season by Cookie Crumbs; paper- Olive, white, red, dp- Be Merry Sweet Sprinkles by My Mind’s Eye; ink- SU! Olive, Memento Black; accessories- Copics, sponge, Circle/Pinking Circles and Mega Curved Rectangle Nestabilities, Stickles.

JOYful wishes

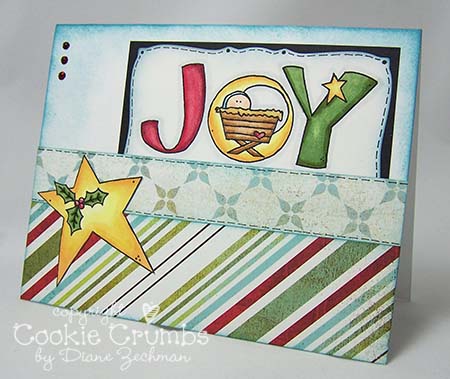
rfts-joy-diane-zechman.jpgAs promised, I have a new card to share today…with a new set!

Today we are previewing my new set at All That Scraps called Reason For The Season.  This set, along with the other new releases, will be available on Monday at 10 pm. 

I chose to use the “joy” image and the star.  I was going to also add one of the sentiments, but I later decided to save that for the inside. 

Be sure to check out the other samples on the ATS blog and enter for a chance to win this set.  😉

stamps- Reason For The Season by Cookie Crumbs; paper- White, Black, Basic Grey Figgy Pudding; ink- Memento Black, SU! Baja Breeze; accessories- Mega Curved Rectangle Nestabilities, Copic markers, Burgundy Stickles.

dirty dinners

6x6-italian-chik-crm-sauce-diane-zechman.jpgWow…it’s another beautiful day again today!  We have had a great weekend weather-wise!  I hope you are enjoying your Sunday wherever you are! 

Today is another challenge day for the SCS Dirty Dozen and Alumni.  Betty (gbedwright) challenged us with the theme of Dirty Dinners!  Yum…I enjoy checking out new recipes so I knew this was one I wouldn’t want to miss!  I also enjoy scrapping our favorite recipes in a 6×6 format and Betty’s challenge was just the incentive I needed to get another one done.  ;0)

Here’s Betty’s info:

Challenge: Dirty Dinner Recipe paper project. Share at least one tried and true prepared entree recipe in decorative paper crafting format of choice.

Restricted Element: There are NO restrictions…bring on the calories, carbs, fat grams, and sugars!!!! We can alter it on our own if need be.

Required Element: It must be something you have cooked and your family LOVED it!!!! Also, share a little bit about the history of this recipe and how it came to be.

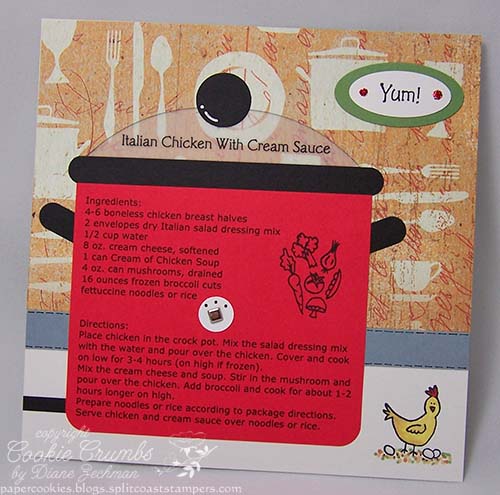
Well, it wasn’t hard to think of which recipe to scrap!  This is one of my family’s favorite dinners.  I think I started cooking it a little over a year ago (can’t remember where it came from) and we have had it so many times that I’m surprised they aren’t sick of it yet.  LOL.  They keep requesting it and it’s so easy.  I wanted to try making the recipe in a Crock Pot shape since that is how the dish is prepared.  So here’s what I came up with…I hope it looks like a slow cooker!  


I tried printing the recipe title onto acetate to resemble the glass lid but it wasn’t turning out very well in my printer.  So I pulled out some cardstock weight vellum instead and I think it worked pretty well.  First I drew a quick pattern and then I printed the recipe on red cardstock in the size I needed.  It was cut out in a rectangle and the bottom corners were rounded.  Then I used the SU! Word Window punch to make the handles and round the edges of the black rim.  Next I traced my lid pattern over the title and cut it out.  The top edge was lightly inked with black and I added a punched circle for the handle.  A smaller circle and a square brad were used for the knob to adjust the temperature.  (I could swear I had some triangle brads but where they are I don’t have a clue!)  To finish it off, I added a small strip to the base which I’m hoping resembles the cord.  The stamped images are from my Create A Recipe and Cupcake Occasions sets. 

Here’s the recipe if you’d like to try it.  I always leave out the mushrooms since I’m the only one who cares for them but someday I might just sneak them in.  ;0) 

Italian Chicken With Cream Sauce

Ingredients:

4-6 boneless chicken breast halves

2 envelopes dry Italian salad dressing mix

1/2 cup water

8 oz. cream cheese, softened

1 can Cream of Chicken Soup

4 oz. can mushrooms, drained

16 ounces frozen broccoli cuts

fettuccine noodles or rice

Directions:

Place chicken in the crock pot. Mix the salad dressing mix with the water and pour over the chicken. Cover and cook on low for 3-4 hours (on high if frozen).

Mix the cream cheese and soup. Stir in the mushroom and pour over the chicken. Add broccoli and cook for about 1-2 hours longer on high.

Prepare noodles or rice according to package directions.

Serve chicken and cream sauce over noodles or rice.

stamps- Create A Recipe and Cupcake Occasions by Cookie Crumbs; paper- red, black, white, Wasabi, Bordering Blue, vellum cardstock, dp by Flair Designs; ink- Memento Black; accessories- SU! Word Window punch and Oval punches, circle punches, corner rounder, square brads, Copic markers, Stickles, gel pen.
elf shoes?

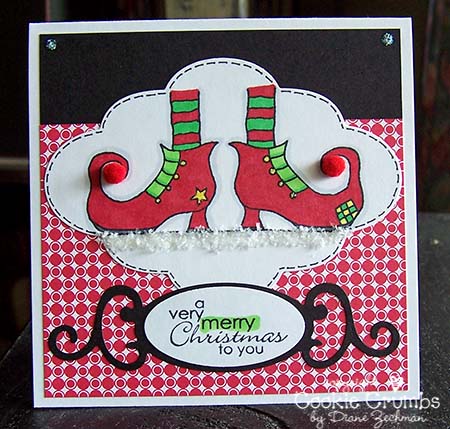
elf-shoes-2-diane-zechman.jpgDo these look like elf shoes to you?  I’m trying to decide.

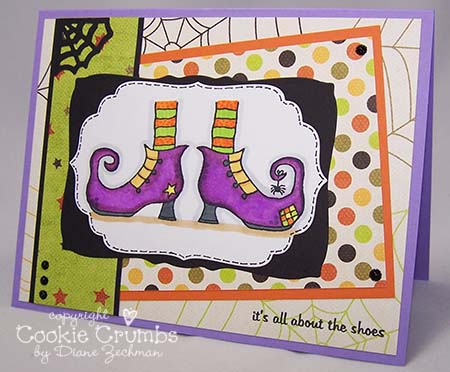
Tonight at 10 pm is the release of the September stamp sets at All That Scraps!  So I thought I’d share one more quick sample from my Ollie and Griselda set.  I stamped the witchy shoes again but this time I masked off the tiny spider and colored them red and green.  :0)

I also used some new Spellbinders dies…Labels 6 and Fancy Tags.  After I die cut the tag I was curious if it would layer well with the large SU! oval punch.  And I was surprised how well it did!

So what do you think?  elf shoes?  yes?  no?

If you aren’t busy with holiday plans, be sure to stop by the ATS message board at 8 pm for a pre-release chat.  And check out the complete images of all the new sets at the ATS store at 10 pm!

stamps- Ollie and Griselda by Cookie Crumbs, SU! Best Yet; paper- white, black, SU! Patterns Pack; ink- Memento Black; accessories- Copic markers, Spellbinders Labels 6 and Fancy Tags, SU! Oval punch, Stickles.

EDIT:  I uploaded a new pic to this post….I added some pompoms and Polar White Flower Soft.  Look better? 

meet Ollie and Griselda…

Today we start some new set previews for the September release at All That Scraps.  And this month is chock full of fun fall and Halloween images!  Just wait till you see them! 

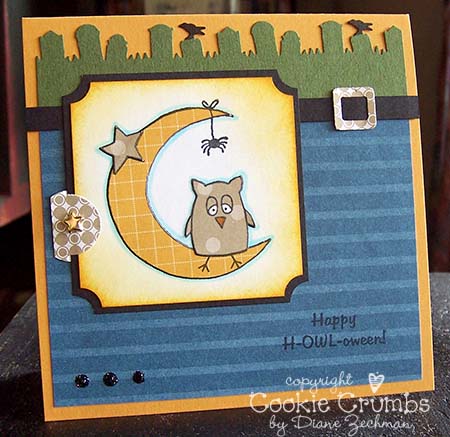
The first sneak peeks are of my own new set called Ollie and Griselda!  This set includes 6 images and 8 sentiments.  Below are 2 samples…on the first one I paper pieced the main image.  Since Ollie’s eyes were paper pieced to a kraft color, I went over them with a white gel pen to make them white again.  Then I dotted the center with a black Sharpie marker.  The Sharpie was also used to color the crows on the punched tombstone border.

o-and-g-1-diane-zechman.jpg

The second card was colored with Copic markers and I used some fun new papers by My Mind’s Eye.

o-and-g-2-diane-zechman.jpg

Would you like to win this set?  Just hop on over to the ATS blog and enter for a chance to win! 

first card: stamps- Ollie and Griselda by Cookie Crumbs; paper- Mustard, white, black, green, SU! Patterns Pack; ink- Mustard, Memento Black; accessories- circle punch, Slit punch, Ticket Corner punch, sponge, gel pen, Sharpie, Stickles, Martha Stewart Graveyard punch, star brad, EK Success buckle punch.

second card: stamps- Ollie and Griselda by Cookie Crumbs; paper- Lavendar Lace, Pumpkin, white, black, My Mind’s Eye Boo To You; ink- Memento black; accessories- Labels 4 and Mega Curved Rectangle Nestabilities, Copic markers, Martha Stewart Spiderweb punch, Stickles.

the dog days of summer

aug-09-dd-challenge-diane-zechman.jpgToday’s the 20th and that means….

it’s time once again for the Dirty Dozen and Alumni challenge at Splitcoast!

This month Valerie (11Valerie11) challenged us with the theme of The Dog Days of Summer.  Here’s the rules we were given:

Required Element: Dog images or sentiments and heat of summer color scheme (so think orange, red, mustard, etc.)

Restricted Element: Flock, or any fuzzy type embellishment

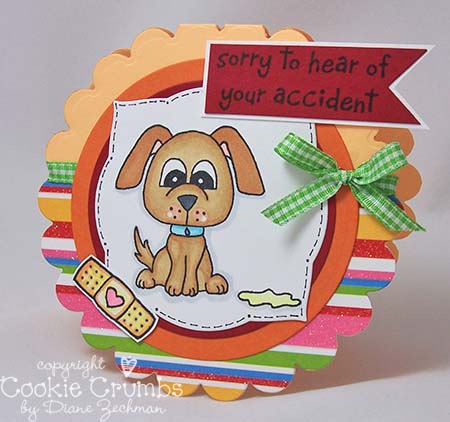
I couldn’t decide on which dog image to use…I am really loving the new Helz Cuppleditch images from Stampavie!  But I settled on my own puppy from my Get Well Critters set.  :0)

I decided this time to make a shaped card and cut it out with my scalloped circle Nestabilities.  After I had my image in place though, I didn’t have room for the sentiment.  So I added it on with a little flag.  This will still fit into a regular A2 envelope.

You can check out all of the DD submissions here.  Have a great day!

stamps- Get Well Critters by Cookie Crumbs (available at All That Scraps); paper- Apricot, Pumpkin, Red, white, DCWV Summer Glitter Stack; ink- Memento Black; accessories- Copic markers, ribbon, Circle and Labels 3 Nestabilities.

a VSN challenge card

car-feeling-fowl-vsn-diane-zechman.jpgHappy Sunday all!

I made this card last night for my friend, Diane617‘s VSN challenge on the Splitcoast site.  We had a picnic today (in this heat- yikes!) so I am just now getting around to posting it. 

Diane’s challenge was called Foil Dinner and it was inspired by her Girl Scout activities.  You can read all about it and participate here

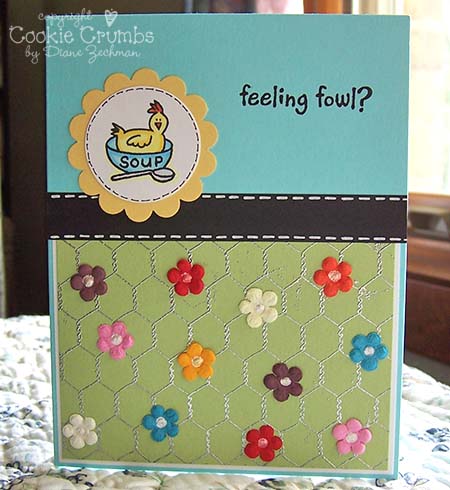
Basically, we were supposed to use a metallic embossing powder.  I chose to use silver and I pulled out my long neglected (but fun to use!) SU! Chicken Wire background stamp.  It is still one of my favorites.  I paired it with an image from my Create A Recipe set and words from my Get Well Critters set to make a get well card.

I have to say this truly was a challenge because you are on a time limit (going on the honor system) and my embossing was just not cooperating!  LOL.  I guess I was so tired from having company for dinner and canning peaches last night.  Maybe that was the problem…but I kept dropping the cardstock back onto the stamp inked with Versamark and therefore getting stray marks of EP where I didn’t want them.  Ugh.  I finally gave up and decided to cover up the worst spots with some tiny Prima flowers!  Do they look like they were put there on purpose?  LOL.

Thanks for a fun challenge, TOD!  (we call her TOD for The Other Diane)  :0)  I did enjoy it…even if my clumsy hands were not cooperating!

Stamps- Create A Recipe and Get Well Critters (words) by Cookie Crumbs (at All That Scraps), SU! Chicken Wire; paper- Caribbean, Celery, Black, White, Saffron; ink-  Memento Black, Versamark; accessories- Circle punch, Scalloped Circle punch, Copics, Silver embossing powder, Primas, Liquid Pearls, gel pen.