Category Archives: Inky Antics

locker tags

Happy first day of Spring!  And we are celebrating with….drumroll please….MORE SNOW….ugh!  It looks like tomorrow the temps will be in the upper 40’s but colder again after that.  I neeeed some flowers.  ;^)

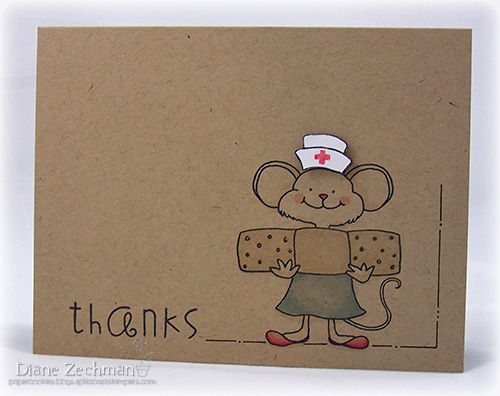
A few months ago my daughter asked if I could make some locker tags for her and a few friends at work.  They all said what colors and theme they liked.  I forgot to take a pic of the first one before I gave it to her friend so here it is hanging on the locker.  (They are nurses, hence the medical tape to hang it…lol!)

locker tag jill diane zechman

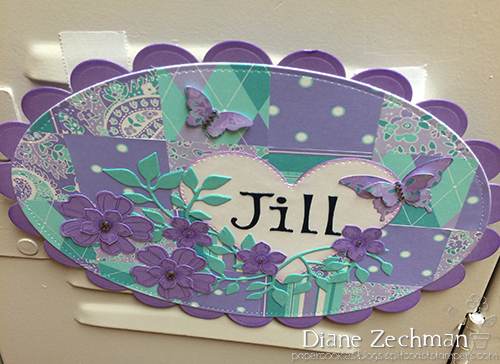
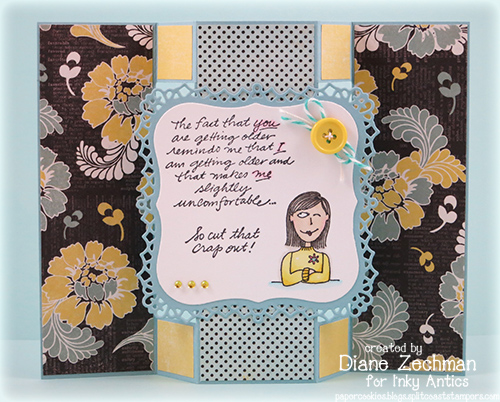
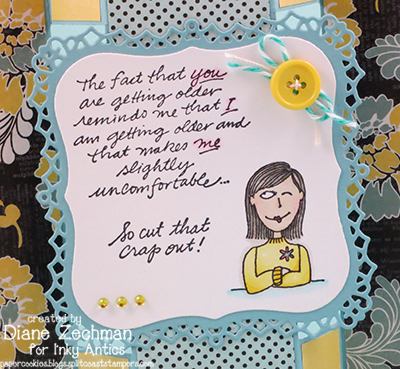
I cut squares of patterned paper for a quilted look on Jill’s.  She likes purple so I used an old pack of paper by Making Memories.  Nice purples are hard to find!

locker tag diane diane zechman

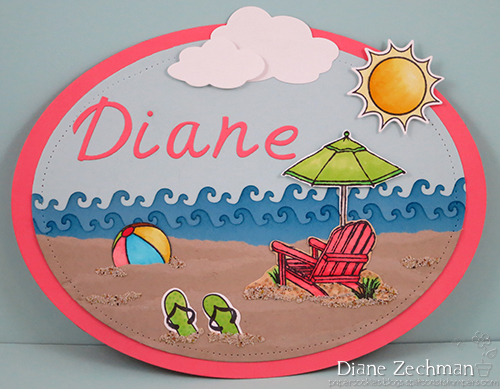
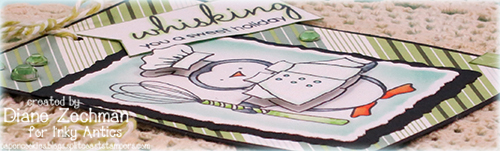
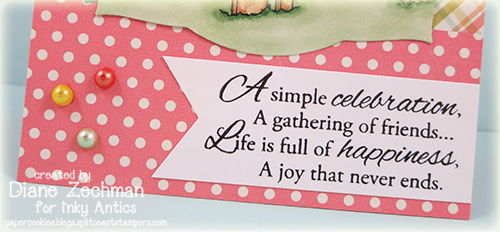
This was not for me…but I like Diane’s request for the color coral and a beachy theme!  Stamps are by Sweet ‘n Sassy…linked below.

locker tag kayla diane zechman
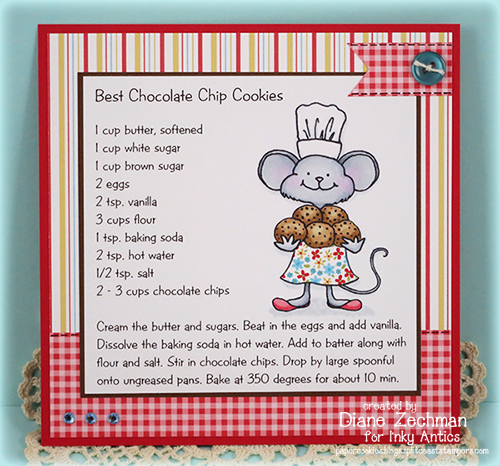
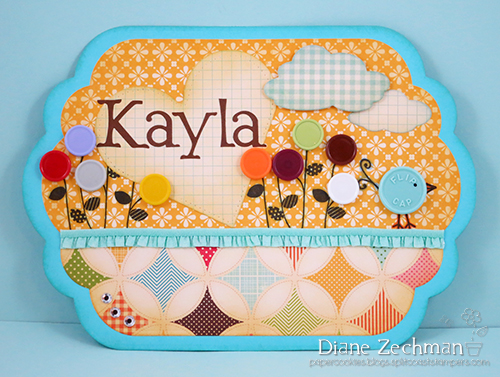
Kayla didn’t request a theme but I know she likes the color!  She brought me a bunch of medicine caps so I added a few to the PTI Everyday Button Bits set (instead of using buttons).

locker tag linda diane zechman

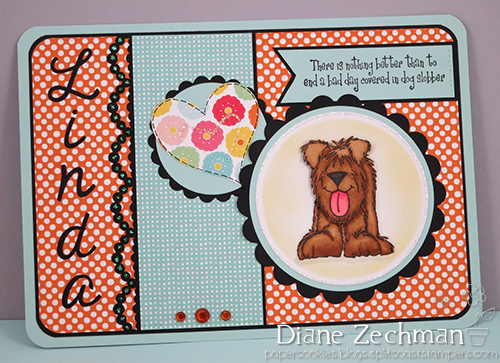
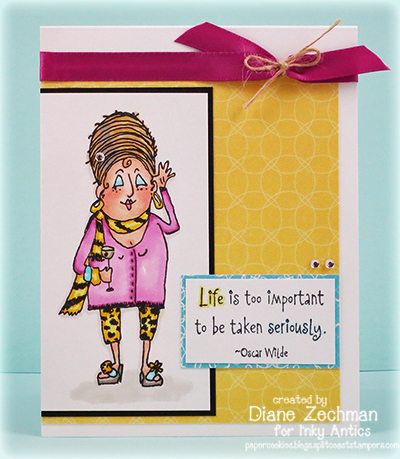
Linda likes dogs and wanted orange & blue.  I thought this sentiment would be perfect…because a nursing shift can get pretty stressful!

locker tag linda 2 diane zechman

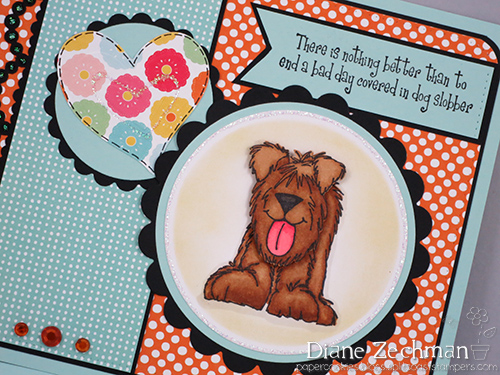
Doggie kisses make all the yuckies go away!  😉

Jill:  stamps- SU! Flower Shop and Petite Petals; paper- SU! Lavender Lace and Coastal Cabana, navy, white, Making Memories- Meg; ink- Lavender Lace; accessories- tracing wheel, Heart Nestabilities, Cuttlebug Olivia alphabet, SU! butterfly punches, Pansy, and Petite Petal punches, rhinestones.

Diane:  stamps- Sweet ‘n Sassy’s Ocean Paradise and Wish You Were Here; paper- SU! Cameo Coral, Crumb Cake, Soft Sky, Marina Mist; ink- SU! Pacific Point; accessories- Grand Ovals Nestabilities, Fiskars boundary waters punch, tracing wheel, Cuttlebug alphabet, Copics, Sweet ‘n Sassy Beach dies and Clouds dies, clear Wink of Stella, Summer Mudd Puddles, foam dots.

Kayla:  stamps- PaperTrey Ink EverydayButton Bits; paper- October Afternoon Fly A Kite, aqua; ink- Versafine Black, SU! So Saffron, Certainly Celery, Pumpkin Pie, Pool Party; accessories- Sweet ‘n Sassy Clouds & Raindrops dies, Heart Nestabilities, Grand Nestabilities, medicine caps, ribbon, Scor-Tape, Cuttlebug Olivia, glue dots, tracing wheel, gemstones.

Linda:  stamps- Inky Antics M5-0791, American Art Stamp- Dog Slobber; paper- SU! Pool Party, white, American Crafts- Hip Hip Hooray; ink- Memento Tuxedo Black, SU! Daffodil Delight; accessories- corner rounder, Copics, Martha Stewart beaded ruffle punch, circle Nestabilities, foam dots, tracing wheel, Stickles, gemstones, Cuttlebug Harmony alpha, Sizzix double heart.


cut that out! ;)

Recently I needed a birthday card for a friend and I remembered two Inky Antics stamps that would be perfect to use!  Our group of stamping friends calls ourselves “The Gigglers”, which can be quite fitting.  lol.

I also wanted to try the Modified Tri-Shutter card tutorial on Splitcoast.  I was curious why the directions say to cut two sections from the sides instead of just leaving them uncut.  But I do have to say that after creating the card, removing the two sections does give the card some added interest.  I used my paper trimmer to cut them out instead of a ruler and craft knife.

Here’s the card folded, with the Inky Antics images on the main panel.  I used Thinking A Bit and Cut That Out from the My Friend Ronnie collection.

When the sides are pulled out, the card will stand on it’s own.

It’s difficult to see, but I traced over the words “you”, “I” and “me” with a light pink marker to give them added emphasis.  Then I used a yellow marker to color the clear rhinestones so they matched my card.

This sentiment really cracks me up…I’m sure I will use it again and again!  Jackie is also sharing my card on the Inky Antics blog today…go say hello!

stamps- Inky Antics- Thinking A Bit and Cut That Out; paper- white, SU! Baja Breeze, Authentique- Renew; ink- Memento Tuxedo Black; accessories- Labels 1 and Decorative Labels 1 Nestabilities, Copics, baker’s twine, button, thread, rhinestones.

6×6 best chocolate chip cookies

Today is my last post as the Inky Antics September Guest Designer and I would first like to thank Jackie for having me!  It was a lot of fun!

Those of you who know me, know that I have a weakness for cookies.  I like all kinds of yummy foods, though, and I enjoy trying new recipes.  When I have favorite recipes, I also like to scrap them.  Sometimes I swap them with my friends which is a great way to not only trade recipes, but also share our craftiness.  I always make extra recipe pages for my girls which is a fun way to hand down my recipes.

I used the Inky Antics Millie Mousie Clear Set to create this 6×6 page for the Best Chocolate Chip Cookies.  Yum!

I use 3 cups of chocolate chips but you can use less if you like  (are you crazy? 😉  )…or you could substitute some nuts for part of the chips.  We don’t care much for nuts in them so I use all chips.

I also like to use a silicone baking mat on top of my cookie sheet.  Just increase the time you bake them by one minute and they come out perfect with nicely browned edges!  The baking mats keep them from sticking to the pan and makes clean-up a breeze!

Millie’s dress was paper pieced in a fun matching print.  There are several items to choose from in this set to place in her hands but of course, I chose the cookies.

If you like this stamp set as much as I do, hop over and let Jackie know.  She is giving it away to one of the lucky commenters!  🙂

Have a “micey” nice day, friends!

stamps- Inky Antics Millie Mousie; paper- white, brown, SU! Poppy Parade, SU! Pawsitively Prints II dsp; ink- Memento Tuxedo Black; accessories- Copics, button, crochet thread, rhinestones.

Portia

It’s time for another Sunday post with an Inky Antics guest DT project.  This one is clean & simple (CAS).  I purchased these stamps quite a few years ago but they are timeless!  It was fun pulling them back out!

Portia just cracks me up!  She was just perfect to create a birthday card for one of my stamping friends.  😉  I was sort-of happy with the layout of this card.  I’ve been thinking that I should draw up some sketches that I’ve used lately.  Would that be helpful to you?  Let me know what you think.

I added a few gemstones to the card and couldn’t help but to add some bling in her hair…as if it doesn’t draw enough attention by itself.  lol.

I hope you have a light-hearted, fun week!  ♥   Don’t forget to stop by the Inky blog.

stamps- Inky Antics Portia and Life Too Important; paper- white, black, DCWV Citrus Stack; ink- Memento Tuxedo Black; accessories- gemstones, Copics, ribbon, twine.

ornament birdy

Today I’m sharing the other birdy HoneyPOP card I designed for Inky Antics this week.  This one is a Christmas card using Ornament Birdy.   Here’s the front…

I adore this bird’s sweet little winter cap!  So cute!

Here’s the inside with matching images and a cute honeycomb tree…

Love this little Christmas birdy!

I hung an extra ornament on the sentiment panel…

And here’s a close up of the tree.  I added some Stickles to the star (and the ornaments in the pics above) to give just a bit of sparkle.

Don’t forget that the Honeycomb papers are on sale this month!  😉

stamps- Inky Antics Ornament Birdy HoneyPOP; paper- white, brown, Tina Wenke Winter Collection; ink- Memento Tuxedo Black, brown Marvy LePen; accessories- Inky Antics Honeycomb paper, Scor-Pal, SU! Scallop Edge punch, paper doily, Copics, Stickles.

cupcake birdy

I have another fun Inky project to share today.  Jackie posted it on the Inky Antics blog this morning (along with another card that I’ll share tomorrow).

I have just fallen in love with the honeycomb papers…they are so fun!  Here’s the front of my Cupcake Birdy card.

When it is opened, the coolest cupcake is inside!

What a “tweet” cupcake!

I love how the HoneyPOP stamps make it so easy to match the front of your card with the inside.  I also decorated my envelope to match…

When coloring a stamped image on your envelope, place a scrap piece of cardstock inside the envelope while coloring so your ink won’t bleed through to the back.

How fun to open the mailbox and see a pretty envelope!  I love to decorate them and I need to do that more!

Now head on over to Inky Antics and say hi… you could win a stamp set that Jackie is giving away!   🙂

stamps- Inky Antics Cupcake Birdy HoneyPOP, Baking Penguins (to:); paper- white, brown, SU! Ice Cream Parlor dsp & stickers; ink- Memento Tuxedo Black; accessories- Inky Antics Honeycomb paper, Circle Nestabilities, Copics, PaperTrey Ink Doily Details B die, gemstones, button, crochet thread.

baking penguins

I’m back with another Sunday post as September guest designer for Inky Antics.  Today my project is a small gift jar with cookie mix inside using the Whisk Penguin image from the Baking Penguins clear set.

I created a tag and added a layer with the penguin.  He was colored with Copics  and I sponged a bit inside the diecut shape.  Here’s a close up.

His hat and shirt were popped up with dimensionals.

A strip of patterned paper was attached around the side of the lid.  Inside the jar I layered the ingredients from the recipe for the cookie mix that I found here.  I used M&M’s that I had on hand for this project.  The colors of the candy didn’t quite match my patterned papers so I added an additional strip of paper around the top of the jar to conceal the colored candy inside.  If you have candy to match your project, though, it is pretty to see that layer of candy at the top of the jar!

“Whisking” you a very happy Sunday.  Go say hello to Jackie on the Inky Antics blog and have a great week, friends!

stamps- Inky Antics Baking Penguins; paper- white, black, SU! Wintergreen; ink- Memento Tuxedo Black, SU! Pool Party; accessories- Spellbinders Large & Small Deckled Rectangles, Copics, dimensionals, SU! Tag Corner punch, baker’s twine, rhinestones, 12 oz. jar and lid, cookie mix ingredients.

coffee mouse

*this is my second post today…please scroll down for the Sweet ‘n Sassy blog hop*

Coffee….blech!  Don’t like it…at all.  I will not pour it in a mug.  I think I’d rather eat a bug.  (well…maybe not)  I will not brew it here or there.  I will not drink it anywhere!

But…..I will get crafty and make a little coffee treat for a sweet friend.  ;^)

I mean…seriously…who could resist this cute Coffee Mouse?

This is my second project as I guest design for Inky Antics this month.  I wanted to make something 3-D with this coffee set and I found this purchased gable box in my stash.  It was the perfect size to fit 2 Keurig K-Cup pods inside!

I thought decorating the outside with the Inky Antics Honeycomb papers would be a fun change from the normal placement on the inside of a card.  (Those Honeycomb papers are fun to create with and they are on sale this month!)

Note: The ribbons are only tied to the front flap so they won’t need to be untied when opening the box.

I hope you liked my coffee treat.  Check back for more Inky projects this month.  Now go say hello to Jackie on the Inky Antics blog!

stamps- Inky Antics Coffee Mouse HoneyPOP; paper- DCWV Citrus Stack; ink- Memento Tuxedo Black; accessories- Inky Antics Honeycomb paper, purchased Gable Box, Copics, Keurig K-cup pods, Scor-Tape, ribbon, Stickles.

gettin’ inky with Inky Antics!

Eep!  It’s September already!  I am looking forward to cooler days (I love the fall weather) but I am also excited because….I was asked to Guest Design for Inky Antics this month!  Woot!  It has been a lot of fun making some Inky projects and I can’t wait to share them all with you.

Jackie has my first project in her post on the Inky Antics blog today so be sure to hop on over there to check it out.  There just might be a little BLOG CANDY!  :^)

It’s a funny coincidence that Jackie chose the project I made with this stamp set to share…we are actually having a family picnic here today and one of my sister-in-laws is bringing cake.  I just wish I had a pretty plaid tablecloth like this one…

I love to paper piece images and that tablecloth was just perfect to do it with!

A simple hand cut banner was used for the sentiment.

And here’s the full card I made with the Garden Party clear stamp set.

Now go tell Jackie hello and answer her question… you might just win this Garden Party stamp set!

Today is also the day for our Challenge Chicks challenge!
This month Jeanne asked us to use diecuts!  When I framed the image with a larger teal diecut, it was just too much teal.  So I opted to use a teal diecut the same size as my image and offset it instead.  Want to play along?  If you are linking to an online gallery use the Keyword CHXSEPT13.
Now go see what the other Chicks created!


stamps- Inky Antics Garden Party; paper- white, SU! Regal Rose and Bermuda Bay, Simple Stories- Vintage Bliss; ink- Memento Tuxedo Black, brown Marvy LePen; accessories- adhesive pearls, Labels 3 Nestabilities, Copics.

Millie Mousie

This past weekend I was asked to make a thank you card for a nursing instructor.  With little time to make one, I knew it had to be a CAS card.  I’ve also been wanting to use this cute Inky Antics set that I got from my friend, Tracy.  With a little coloring and stamping on kraft cardstock, I was able to pull off a quick & easy card.

Look ma…no layers!  I did pop up the nursing cap though.  The “thanks” was done with the Paper Smooches alphabet called Alphadot.  Then I just drew some lines to tie the mouse and sentiment together.  This would be great with a get well sentiment too.  I might just have to make a few more.  :^)

stamps- Inky Antics- Millie Mousie, Paper Smooches- Alphadot; paper- kraft, white; ink- Memento Tuxedo Black, SU! Ruby Red marker; accessories- Copics, dimensional.