Category Archives: envelopes

they’re back… with fun folds!

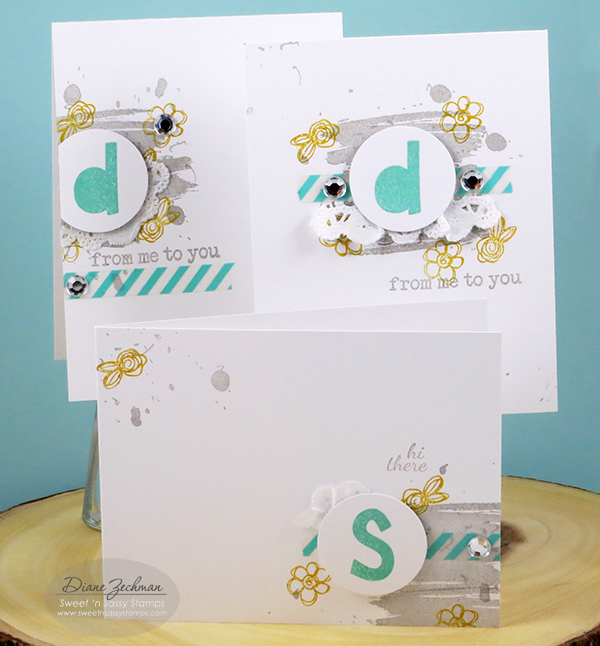
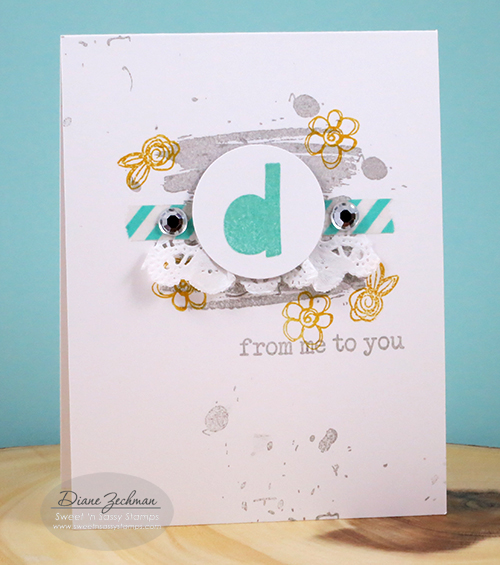
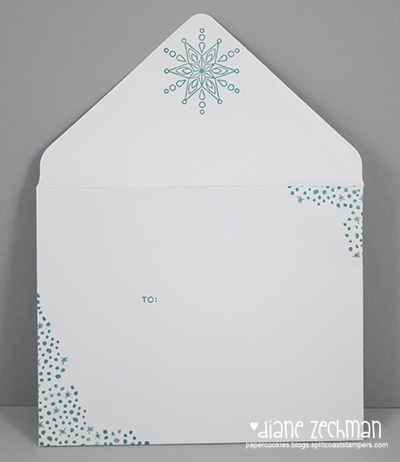
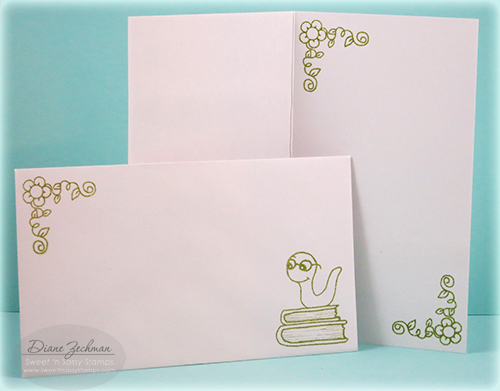
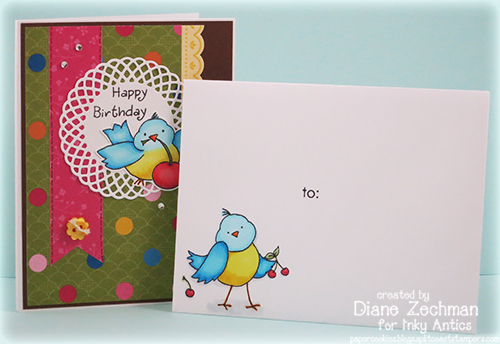
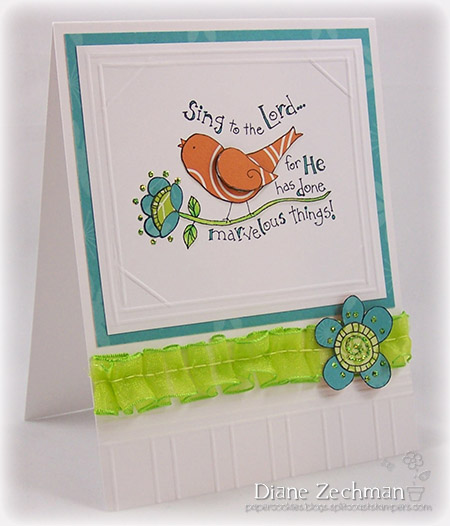
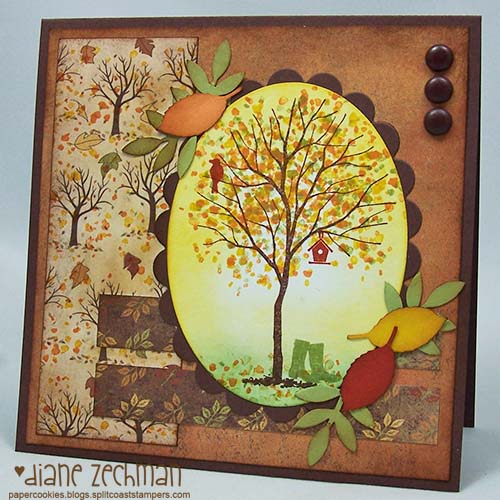
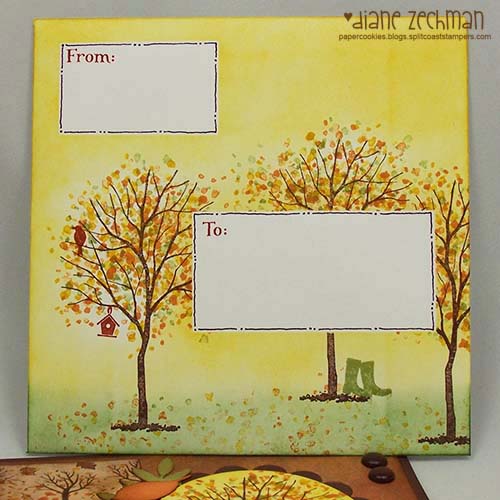
Hello! I’ve been having fun with two of my retired stamp sets that were brought back in stock… Special Blend and Get Well Critters at Sweet ‘n Sassy Stamps. I’ve always loved different card folds and recently have been trying a few more. I don’t know who updated this fun fold but it’s a variation of Beate’s Buckle Card from many years ago on SCS. The teacup is popped up on the front flap that tucks into the punched slot. I stamped a matching envelope for this one too.

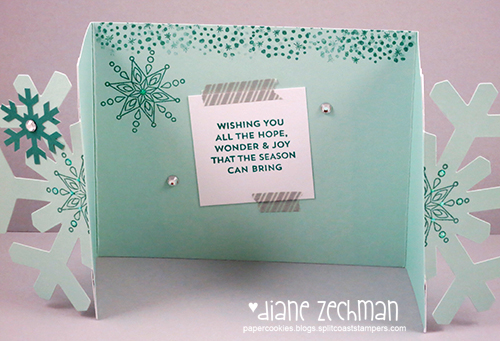
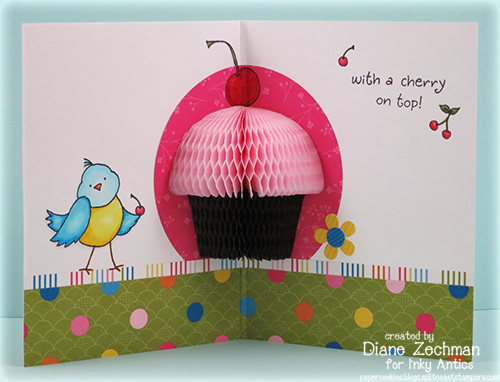
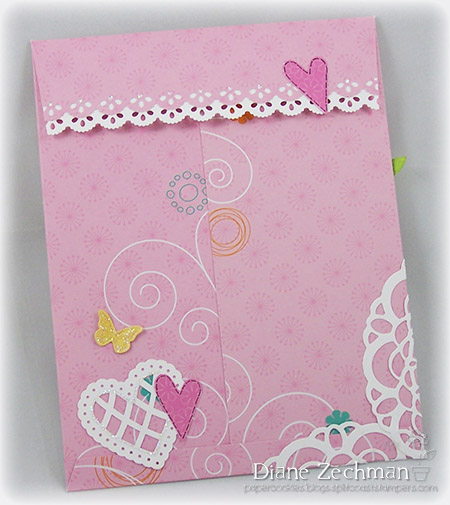
Here’s the card open.

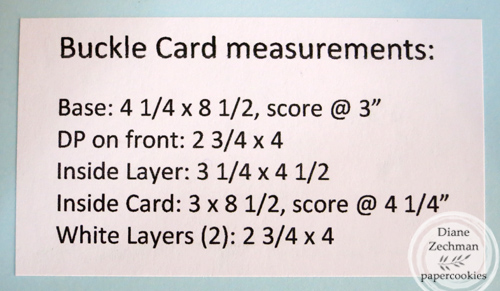
And here’s the measurements I typed up to save. I replaced one of the white layers with the yellow patterned paper on the front.

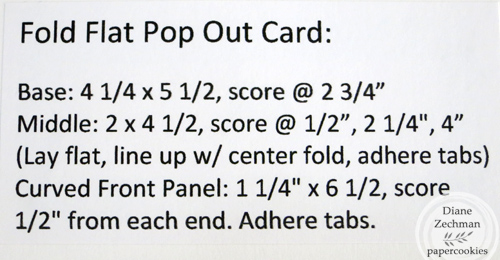
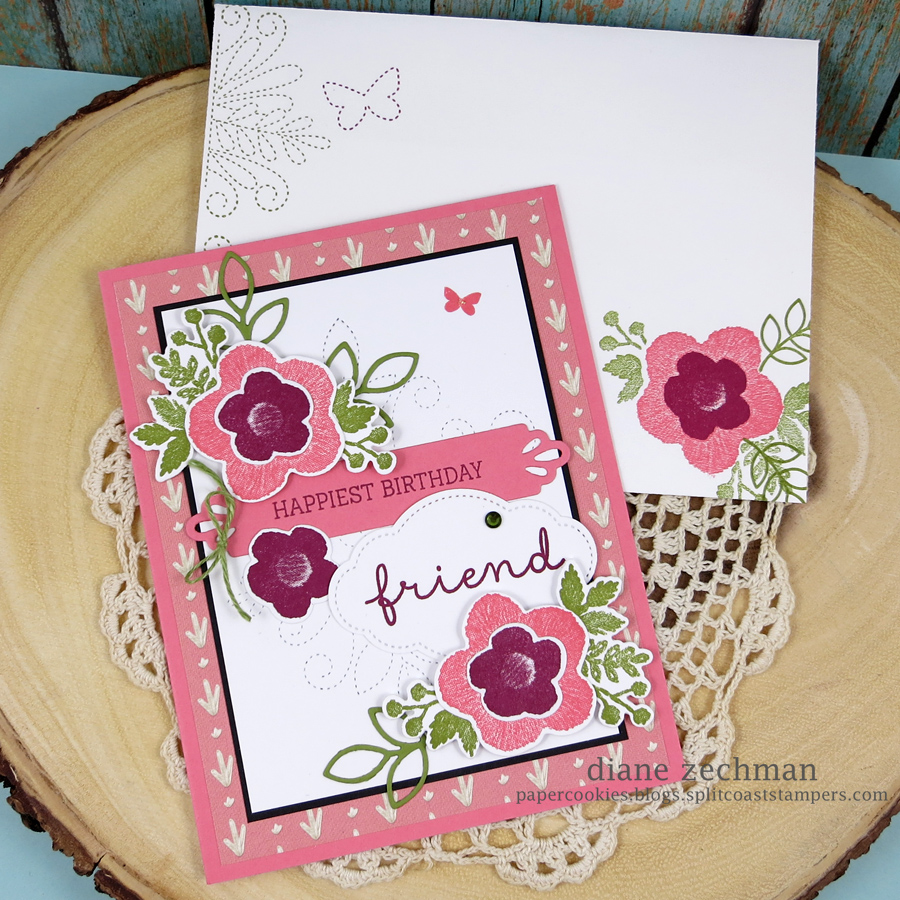
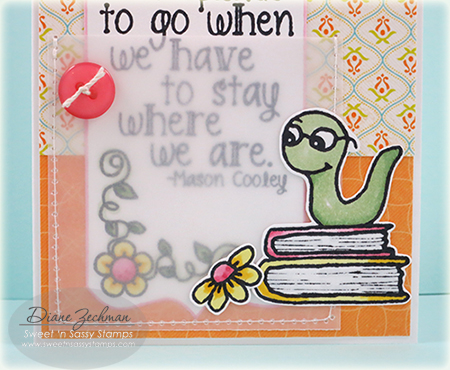
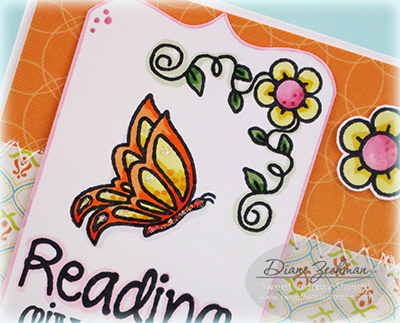
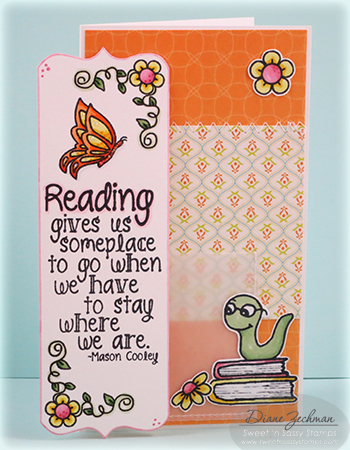
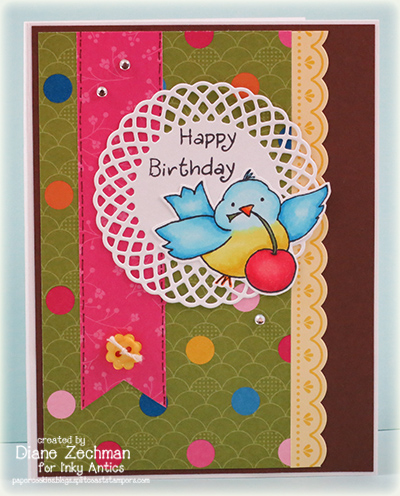
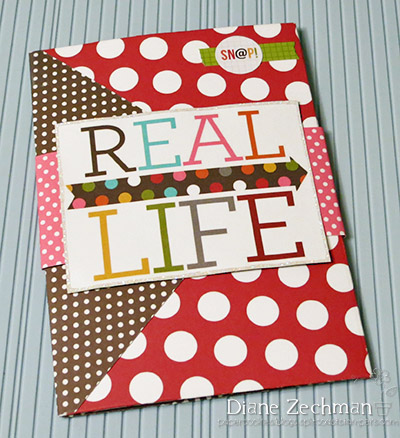
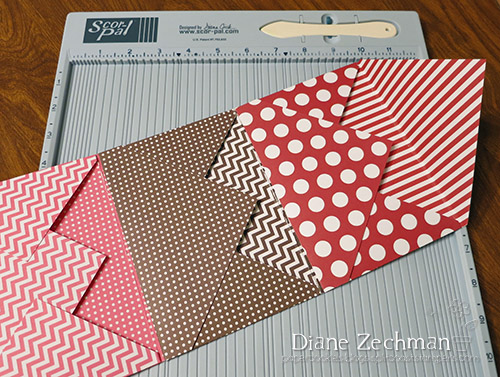
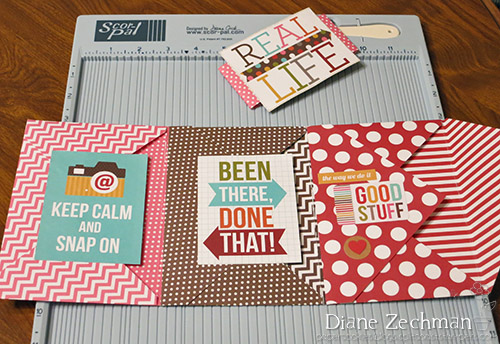
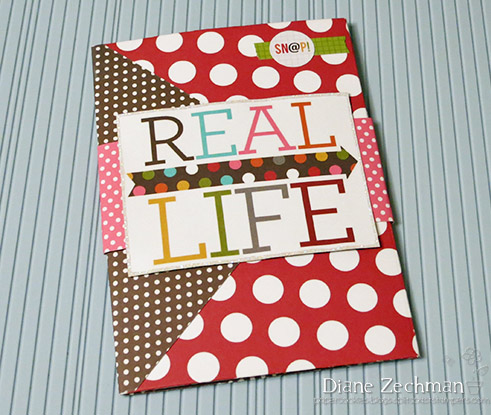
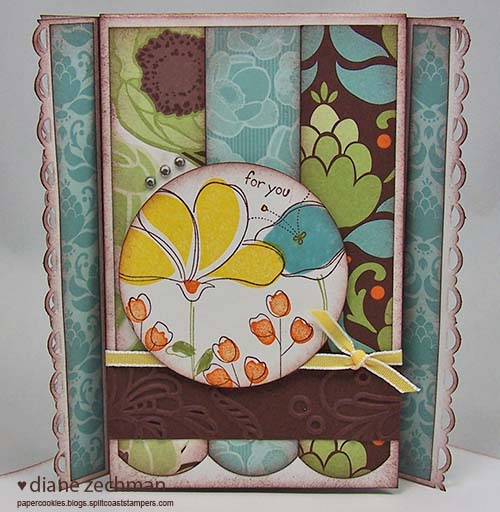
Here’s a new fold that lays flat and fits in an A2 envelope for mailing. The original creator of this fold is Emma Goddard. She didn’t have a name for it when I asked but decided on Fold Flat Pop Out Card! I love how the middle layer is scored and the front strip is curved!

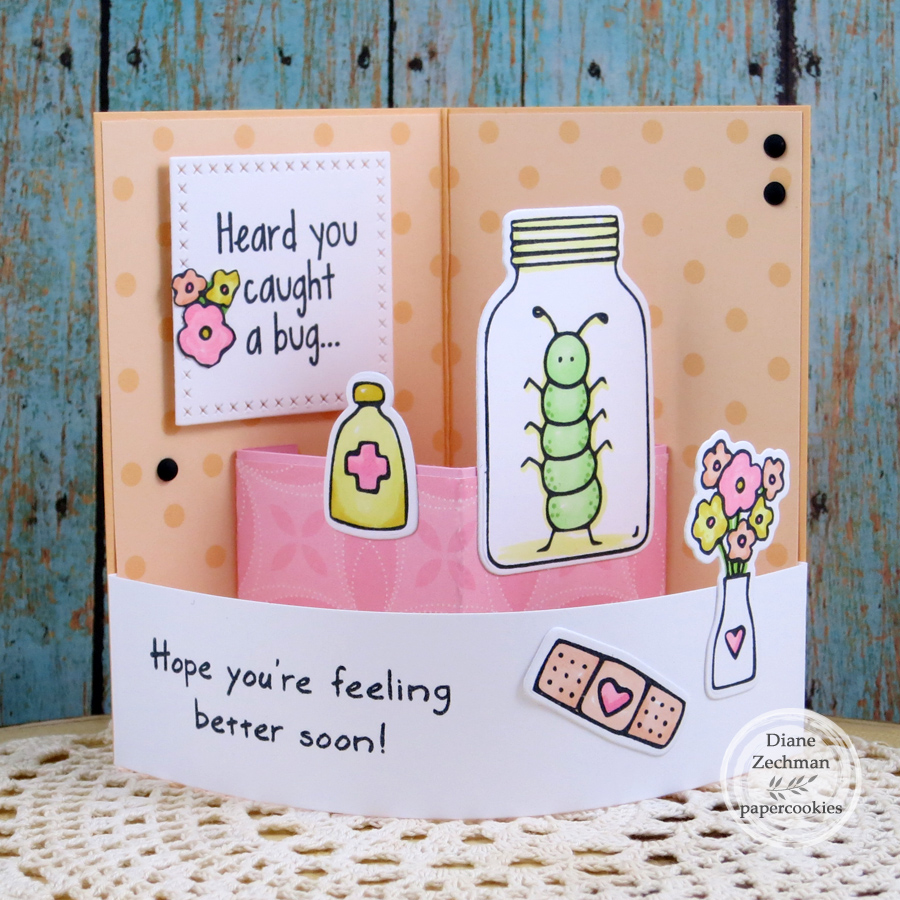
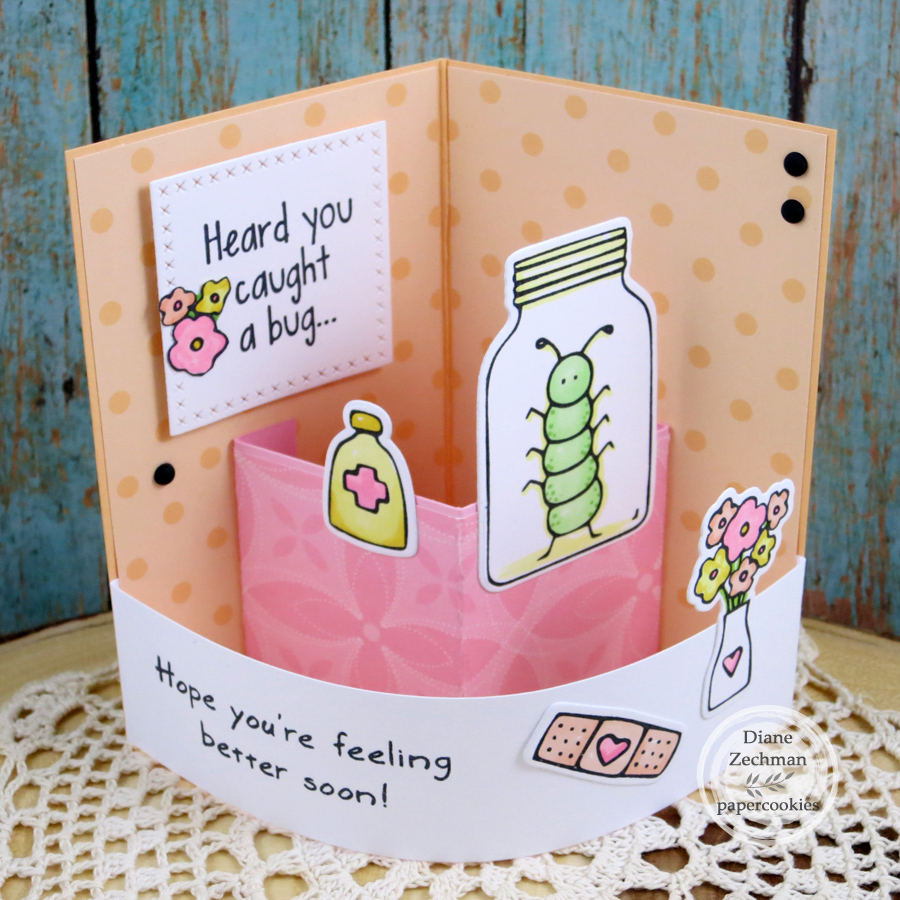
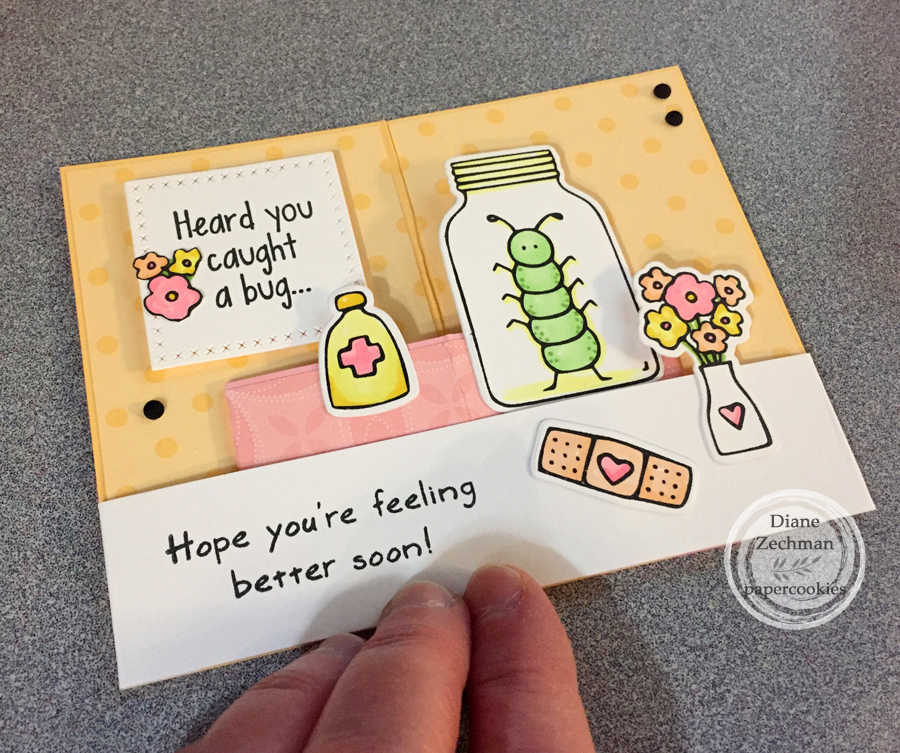
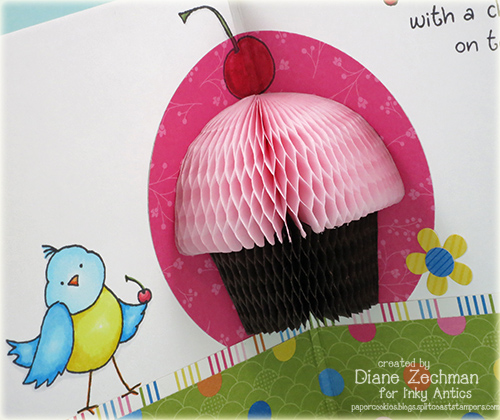
I was curious at first about how this card goes flat without wrecking the curved piece. Let me see if I can explain…it folds flat like an open book, not closed. Does that make sense? So the front curved piece is flattened out, not folded. The card stays “open”.

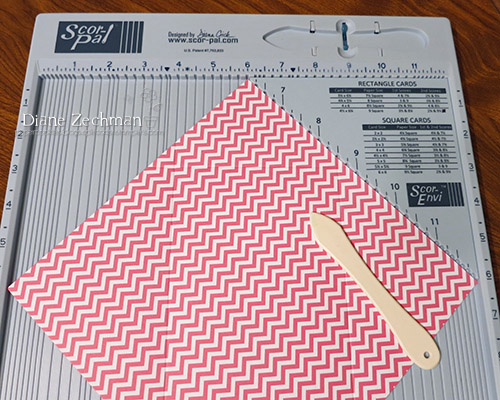
Here’s the measurements for this card. I tucked the tabs for the curved front panel behind my apricot patterned paper.

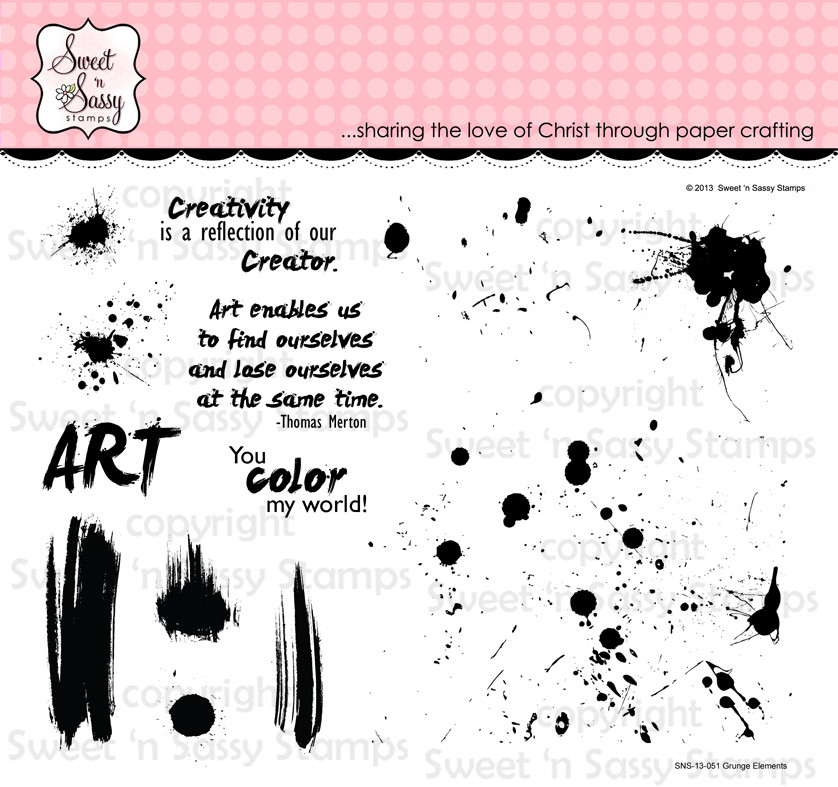
And here’s my two stamp sets…go check them out!

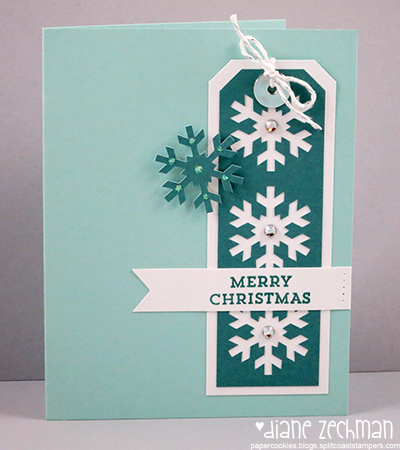
stamps- Sweet ‘n Sassy Special Blend and Get Well Critters; paper- white, black, SU! Bermuda Bay, Pretty in Pink, Apricot Appeal, MME- Unforgettable and SU! Prints Pack; ink- Memento Tuxedo Black, Bermuda Bay, Crushed Curry; accessories- MISTI, Copics, foam dimensionals, Die-Namics Cross Stitched Squares, Enamel Dots, SU! Classic Label punch.

needle & thread

Hello! Once again I am behind on sharing some of the “just for fun” cards I’ve made. Here’s one that I made this week using the SU! Needle & Thread stamp set and the Needlepoint Elements coordinating dies. I used a piece of patterned paper from the Needlepoint Nook pack of dsp and started my card off with that Flirty Flamingo color.

I also added some flowers in Berry Burst and some leaves in Pear Pizzazz. A little Old Olive twine was added to the die cut sentiment.

I love decorating the envelopes to match but most of the time I forget to! I think I might keep a few handy in my tool caddy to help me remember. Anyway, this time I did pull an envelope out and stamped it to match.

Have a great night!

monogram notecards

Good morning!

Today I am sharing some monogram note cards on the Sweet ‘n Sassy blog using the Shake it Off Lowercase Alpha, Grunge Elements, and Scribble Flowers stamp sets.  These come together pretty quickly once you decide on your design and you can easily make multiples for a set (perfect for last minute Christmas gifts)!  I ended up with 3 layouts that I liked.

SNSS monogram 1a diane zechman

The first card was inspired by this one. Then I made two more versions with the same supplies, yet different layouts.  I got a bit carried away with the flowers here…lol…so the rest of the cards I made with this layout had less.  😉

SNSS monogram 1b diane zechman

SNSS monogram 1c diane zechman

SNSS monogram 1d diane zechman

Each one was embellished with some bling and bits of paper doilies.  The monogram letter circles are popped with foam dimensionals.

Don’t forget some matching envelopes!

SNSS monogram 1e diane zechman

Thanks for popping in and… happy stamping!

stamps- Sweet ‘n Sassy Shake it Off Lowercase Alpha, Grunge Elements, and Scribble Flowers; paper- white; ink-  SU! Smoky Slate, Crushed Curry, Coastal Cabana; accessories- 1 1/2″ circle punch, foam dimensionals, washi tape, paper doilies, rhinestones.

.

November Paper Pumpkin projects

It has been a while since I got to create with the SU! Paper Pumpkin kits.  Most of my time this year was spent enjoying the preparations of my daughter’s wedding.  (I still need to share those pics too!)  Now that things have settled down, I want to catch up on those little boxes of fun.  And I was thrilled that this month had a kit to help me get moving on my Christmas cards and tags!

I usually like to put my own spin on the projects but this time I mostly followed the instructions… with just a few slight changes.  Then I created some extras with the leftover pieces.  This kit creates 8 Christmas cards plus 12 tags.  I made an extra 9 cards and 9 tags for a total of 17 cards and 21 tags!  🙂

Here’s the card that is in the kit.  The instructions say to add that blue punch-out snowflake to the envelope but I want these to be mailable so I added them to the front of the card instead.

paper pumpkin nov 2014 a

On the inside, I tilted the sentiment panel and added a stamped snowflake.

paper pumpkin nov 2014 b

Since I didn’t add the blue flake to the envelopes, I stamped them.  Much more postal friendly!

paper pumpkin nov 2014 c

These layered tags in the kit are so cute!  I stuck with the plan but added a stamped snowflake to the inside.

paper pumpkin nov 2014 d

When I was finished with the directions there were still PLENTY of leftover pieces so I kept going.  I only had to add some extra cardstock, a few extra rhinestones, etc.

I didn’t throw away the cardstock negatives from the silver and blue punch-out snowflakes.  I cut the blue piece into strips and got 5 cards in this design…

paper pumpkin nov 2014 e

I only made one of this one but I think this might be my favorite.  I can’t believe I STILL have extra Washi tape left…

paper pumpkin nov 2014 f

Here I added some green and brown and got 3 cards of this design.

paper pumpkin nov 2014 g

The leftover piece of silver from the silver snowflakes was cut into squares and I got 7 of these cute tags!

paper pumpkin nov 2014 h

And lastly, I threw together these 2 tiny tags.  The blue flake fit perfectly into the silver negative piece.

paper pumpkin nov 2014 i

I hope these have inspired you to use your leftover pieces to create more fun Paper Pumpkin projects!

stamps- SU! Simply Snowflake Paper Pumpkin; paper- white, brown, SU! Pool Party, Gumball Green, Crumb Cake, Simply Snowflake Paper Pumpkin kit; ink- SU! Lost Lagoon, Crumb Cake; accessories- SU! Simply Snowflake Paper Pumpkin kit, Decorative Dots embossing folder, gemstones, Stickles, tracing wheel, Scalloped Tag Topper punch, Tag Corner punch, hole punch, foam dots.


a bookmark card

It’s back-to-school time for the Ribbon Carousel Crew as we share our school themed projects all month long.  The Week 4 crewmates have cards to share on the Ribbon Carousel blog today.  I decided to use the Sweet ‘n Sassy Bookmark Bits & Pieces and coordinating Bookmarks & More dies to make a bookmark card.

I actually got out my sewing machine and stitched a little vellum pocket to the front to slip the bookmark into.  Some crochet thread was added to the button.

The butterfly on the bookmark has some Stickles to make the card a bit sparkly.

E-readers are so popular now, but I still like to hold a book and turn the pages by hand.  And you can’t use a cute bookmark with an E-reader.  😉

I even stamped the inside of the card…and the front of the envelope…

In case you noticed that this is not an A2 sized card, you are right.  I used a standard #6 3/4 business envelope so my card is 3 1/2″ x 6 1/4″ (start with 6 1/4 x 7).  If you normally use 12″ paper, you could make a 3 1/2 x 6 card to fit this size envelope.

Come join our challenge and you may win a Ribbon Carousel of your own!

stamps- Sweet ‘n Sassy Bookmark Bits & Pieces; paper- white, vellum cardstock, DCWV Citrus stack; ink- Memento Tuxedo Black, Pear Pizzazz; accessories- SNSS Bookmarks & More dies, Copics, sewing machine, Stickles, button, crochet thread.

cupcake birdy

I have another fun Inky project to share today.  Jackie posted it on the Inky Antics blog this morning (along with another card that I’ll share tomorrow).

I have just fallen in love with the honeycomb papers…they are so fun!  Here’s the front of my Cupcake Birdy card.

When it is opened, the coolest cupcake is inside!

What a “tweet” cupcake!

I love how the HoneyPOP stamps make it so easy to match the front of your card with the inside.  I also decorated my envelope to match…

When coloring a stamped image on your envelope, place a scrap piece of cardstock inside the envelope while coloring so your ink won’t bleed through to the back.

How fun to open the mailbox and see a pretty envelope!  I love to decorate them and I need to do that more!

Now head on over to Inky Antics and say hi… you could win a stamp set that Jackie is giving away!   🙂

stamps- Inky Antics Cupcake Birdy HoneyPOP, Baking Penguins (to:); paper- white, brown, SU! Ice Cream Parlor dsp & stickers; ink- Memento Tuxedo Black; accessories- Inky Antics Honeycomb paper, Circle Nestabilities, Copics, PaperTrey Ink Doily Details B die, gemstones, button, crochet thread.

envelope album

Hi!  Today I have an envelope album that I made with my Scor-Pal, Scor-Tape, and the Scor-Envi

These are super simple to create and I’ve taken a few pictures along the way.  First, I started with some Simple Stories Snap! double sided papers.  I wanted to create my own envelopes but you can start with pre-made ones if you like.  Using the chart printed directly on the Scor-Envi, choose the size you desire for your project.  I wanted the envelopes to be able to hold 4×6 photos so I started with three 8 1/2″ squares.  Follow the measurements on the Scor-Envi to score all 4 sides.  Then remove the corners as shown in the directions.

Next assemble each with Scor-Tape, leaving the top flaps open.

Line them up in the order you want them and attach as shown below.  Make sure they have a little room so they easily fold (roll) up when attached together.

I decorated each envelope with Snap! cards and stickers, then made a belly band with a 2″ x 12″ strip and an additional Snap! card.

“Roll” it up and slip the band over to hold it shut.

Have fun creating envelope albums of all sizes with the Scor-Pal and Scor-Envi!

paper- Simple Stories- Snap!; accessories- Scor-Pal, Scor-Tape, Scor-Envi, 3×4 Snap! Cards and Stickers.

Sing to the Lord

This week the Scor-Pal team hopped with the gals from Really Reasonable Ribbon…what fun!  Today I will be sharing my projects that were featured on the Scor-pal blog.  Of course, if you missed this project or any of the other great projects from the Scor-pal team you’ll want to hop on over there and see what’s been going on. Be sure to leave comments on each post from this week for a chance to win some great prizes. Entry deadline in 8am Monday, July 16, so there’s still time.

I made two projects using the Scor-Pal and the fabulous ribbon.  First, a card…

I wanted the image and the ribbon to stand out so I did some simple scoring to accent them.  The top was scored with lines to create a double border, and then diagonal lines were scored on each corner.  The bottom has both vertical and horizontal scored lines.

The bird was paper pieced and his wing was popped with a dimensional.  I love the sheer box pleats ribbon and I think it sort of mimics the flower stem.  The ribbon was attached with a thin strip of Scor-Tape.

Next, I was just playing around with my Scor-Pal and came up with a flat envelope.  The finished size is 5 1/2″ x 7″.  It could be used to tuck a card, note, or gift inside (maybe a Hershey bar or two would be nice?)

I started with a piece of 9 x 12 paper.  (I saved the 3 x 12 piece to flip over and layer onto the top of the front).  Score the 12″ side @ 3 and 8 1/2.  Score the 9″ side @ 1/2 and 7 1/2.  Cut away the shaded areas as shown below.  (Click on the image for a larger view).

Fold the sides in and attach back with Scor-Tape.  Fold the bottom up and attach with Scor-Tape.  Die cut or punch the edge of the top flap if desired.  Fold top flap down and secure with sticky-back velcro.  Decorate.

The back will look like this:

The big lace circle on the front was wrapped around to the backside.  I used a Magnolia image from the Magnolia-licious store…she’s so cute with her butterfly!

I also used some more awesome ribbon from the Really Reasonable Ribbon store.  The layered paper on the top was hand cut in a wavy pattern and a thin strip (half the width of the 1/8″ Scor-Tape) of tape holds the Lime Green Leaves ribbon in place.  Love those leaves!  I also punched a circle, applied 1/2″ Scor-Tape to cover it, and attached some Yellow Plaid Ruffle ribbon to create a flower.

Check out all the projects from this week on the Scor-Pal and Really Reasonable ribbon blogs!

card: stamps- Inky Antics Groovy Nature; paper- white, Momenta Kaleidoscope; ink- Memento Tuxedo Black; accessories- Copics, Scor-Pal, Scor-Tape, Really Reasonable Ribbon- Sheer Box Pleats Parrot Green, dimensionals, Stickles.

flat envelope: stamps- Magnolia Tilda with Hawaii Flower, SU! Itty Bitty Banners; paper- white, Saffron, Momenta Kaleidoscope; ink- Memento Tuxedo Black, SU! Celery; accessories- Scor-Pal, Scor-Tape, Really Reasonable Ribbon- Yellow Plaid Ruffle and Lime Green Leaves, SU! Bitty Banners Framelits and Butterfly embosslit, sticky-back velcro, Sizzix Large Paper Doily die, 1 3/4″ circle punch, SU! Epoxy brad, Copics, Stickles, Martha Stewart pinking scallop and lace scallop heart punches, EK Success heart punch, adhesive pearls.


branch out with DTGD challenges

Hello!  Have you been playing along with the Dare To Get Dirty challenges on Splitcoast?  We’re in the middle of a week long schedule of challenges created especially for the Fan Club members.  If you’re not a fan club member, you can find all the info, including how to join, here:

I have samples for two challenges today.  The first one is a card for Suzanne J. Dean’s challenge…

The designer paper with the trees was a pretty good match to the stamp set I used but the colors were a bit off from my inks.  It also had a mostly white background and seemed to compete with the main image.  So I stamped the “leaves” over the dp with the peach and yellow inks, then sponged the piece with Chocolate Chip ink to soften it.

For my own challenge, I started with a plain white envelope and masked off two rectangles with Post-It Notes.  Then I stamped and sponged the entire front to match my card.  Gotta love getting something pretty in the mail!

You can check out these two challenges as well as all the others in the Master Challenge Thread.  Be sure to check back each day as new challenges are posted!

stamps- SU! Branch Out, Tina Wenke Happy Holidays by Stampavie (To & From); paper- white, Choc. Chip, Cajun, Curry, Peach, Pear, dp- The Paper Loft; ink- Choc. Chip, Cajun Craze, Crushed Curry, Peach Parfait, Pear Pizzazz, brown Marvy Le Pen; accessories- Oval Nestabilities, Martha Stewart Rose Leaf and Frond punches, brads.

awash and bored

Hi friends!  I am sitting at the airport…and bored!  So here I am online and I thought I’d post a card I recently made for a stamp camp I attended.  It was held in a church and the organizers requested that a card be donated that the church could use in their ministry…I was happy to oblige!

I used the SU! set Awash With Flowers…this is such a pretty flower set!  I enjoyed getting it out again.  The card that I created was called a Magic card but there’s really no magic to it.  I keep thinking of it as a “Wing Card”…LOL…because it reminds me of wings that spread out on each side.  I first saw this type of card when my DT friend Anne created one.  You can find the basic directions here, but I sized it down to fit into a 5 1/2″ square envelope. 

*The measurements for the three pieces of cardstock that I used are as follows:

1st base piece-  5 1/4 x 5 inch, scored at 7/8″ from both sides and punched with a border punch.

2nd base piece-  5 1/4 x 5 1/4 inch, scored at 1 inch from both sides and punched with a border punch.

front piece-  3 1/4 x 6 3/4 inch, scored at 5 1/4 and 5 3/8  

Here’s how it looks from the front when standing up…

As you can see, I did a LOT of sponging.  LOL.  And here’s a view of the card from the top so you can see how the sides fold out.

The front panel lifts up to reveal the inside…

And…I even decorated the envelope.  I punched a circle in scrap paper to make a reverse mask for the front…

stamps- SU! Awash With Flowers, Happy Moments (for you), and Sincere Salutations; paper- white, Choc. Chip, SU! Greenhouse Gala; ink- Choc. Chip; accessories- SU! punches- Border Scallop Trim, 1 3/4 circle, 2 1/2 circle, and 2 3/8 scallop circle, SU! Elegant Lines embossing folder, Daffodil ribbon, rhinestones, foam dimensionals. 

Have an awesome day!