Category Archives: tutorials and templates

Susan’s birthday tag

Morning!

I don’t have a card today…this time I made a tag.  My stampy friends and I have dinner together once a month to celebrate birthdays. This month we had two birthdays and our friend Susan’s was one of them. She likes to make tags and has blessed everyone this year with one so I thought it fitting to create one for her.

touches of texture tag diane zechman

I started with a large manila tag and sponged it with Distress Tea Dye, then stamped an old SU! background (By Definition) with the Tea Dye ink.

Then I cut a piece of 3 1/4 x 7 1/4 white cardstock (just winging it here, lol) and sponged it with SU! Certainly Celery and Coastal Cabana inks. It was stamped with those same inks, plus Lucky Limeade, and the SU! Touches of Texture stamp set.  Then I cut each side @ 1″, leaving the center strip 1 1/4″ wide.  The three strips were then cut lengthwise @ 1 1/4″ intervals.

After adhering the pieces to the base tag, I added some burlap tape (1″ wide, cut in half) and glitter ribbon.  It was finished off with Prima flowers, ribbon, a button, and adhesive pearls.

Have a great day!

Halloween mansion with tea light

Hello friends and happy Monday!

Today I am on the Art Impressions blog with a Halloween card using the Ai 4926- Holiday Mansion Set, 4927- HM Accessory Set, and 4784- Old Bat Set (for the moon!).

CHA 6c diane zechman

When we were making samples of the new releases for display at the trade show, I was asked if I could make a Halloween version of the mansion in an easel type card with a battery operated tea light behind it.  What a fun challenge!

Since the mansion is quite tall, I kept the normal size of the card (4 1/4 x 5 1/2).  To create the base for it to sit on, I added a piece of 4 1/4 x 9 inch cardstock, scored at 5 1/2.  The 4 1/4 x 5 1/2 section of this piece was layered onto the card back (I just doubled the thickness of it).  The smaller section folds to the inside when closed and has the die cut wooden boards image popped up to hold the card front when the card is opened.

CHA 6d diane zechman

To create tinted windows and an eerie glow inside, I sponged purple ink onto both sides of a piece of vellum.  The windows and doors of the mansion were diecut and then it was held in place on the front with temporary tape so the openings could be traced. Once it was removed, the dies were lined up and cut a second time through the front layers.  The vellum was adhered to the back of the mansion and then the mansion was lined back up to the diecut openings on the card base.

CHA 6 diane zechman

Smaller elements from the 4927- HM Accessory Set were added and the moon is from the 4784- Old Bat Set.  Additional images and a sentiment were placed on the inside, along with the tea light.

CHA 6b diane zechman

Have a great Monday and… happy stamping!

stamps- Art Impressions 4926- Holiday Mansion Set, 4927- HM Accessory Set, and 4784- Old Bat Set; paper- white, black, SU! Smoky Slate, vellum, Recollections- Midnight Magic Halloween; ink- Memento Tuxedo Black, Distress- Dusty Concord; accessories- Copics, battery operated tea light candle, MFT Blueprints 20, MFT Sheltering Tree & Leaf Trio, Stickles.

New Ai Hobby Lobby Halloween

Hello friends!  The current Ai Challenge is “Orange & Purple” and we are featuring the new Art Impressions Halloween blocks in the Hobby Lobby stores! Today I am sharing how I made a little treat bag with the new 4783- Haunted House block.  The Ai images turn a simple bag into one that is totally unique and fun to give (or receive!).

HL Haunted House bag 1 diane zechman

First, cut TWO 6×6 squares of double-sided patterned paper.  Then score each @ 1/2, 1 1/2, and 2 1/2″.  Turn it 90 degrees to the right and score again at 1 1/2″.

HL Haunted House bag 3 diane zechman

Cut the small rectangle from the bottom left corner and discard.  Then cut the 2 1/2″ vertical scored line up to the 1 1/2″ horizontal line.

HL Haunted House bag 4 diane zechman

Turn it 180 degrees and mark the bottom of the bag @ 1″ and 2 1/2″. Score from each mark to the corner of that rectangle.

HL Haunted House bag 5 diane zechman

Flip the paper over and fold those scored lines to create the bottom flap.  (It helps to tape or glue the flaps down.)  *Now repeat those first steps on the second piece.

HL Haunted House bag 6 diane zechman

Fold all scored lines and apply strong tape to the 1/2″ flaps on each piece. (place the tape on the side which will be the outside of the bag)

HL Haunted House bag 7 diane zechman

Adhere each 1/2″ flap to the opposite side of the other 6×6 piece to assemble the bag.  Fold in the bottom flaps and adhere.

Note- you can cut a 2 x 3 1/2″ piece of cardstock to place inside the bottom of the bag to make it nice & sturdy.

HL Haunted House bag 8 diane zechman

Next, mark both sides 1/2″ down and 1/2″ in from each top corner.  Use these marks as a guide to adhere ribbon handles with eyelets or brads.  Cut two pieces of 10″ to 12″ of ribbon for the handles.  If using eyelets, slip the ribbon through and knot each end.

HL Haunted House bag 9 diane zechman

Now the bag is assembled.  Stamp, color, and cut out your favorite Ai images to add to the front!

HL Haunted House bag 2 diane zechman

The finished bag is 3 1/2 x 4 1/2 x 2″ deep.

HL Haunted House bag 1 diane zechman

Now it’s your turn to break out your favorite Ai stamps, make a card, and join us in the “Orange & Purple” Challenge!

Happy stamping!

Diane Signature Medium size

stamps- Art Impressions Hobby Lobby 4783- Haunted House; paper- white, black, K & Company KP Halloween; ink- Memento Tuxedo Black; accessories- Copics, Scor-Tape, Scor-Pal, We R Memory Keepers Black Jumbo Eyelets, Crop-A-Dile, ribbon trim, Large & Small Oval Nestabilities, Black Stickles, Clear Wink of Stella.

two great reasons

Hello friends and happy Thursday!

Today I am on the Art Impressions blog with a card using the 4901- Teachers Rule set.  This clear set is perfect for this time of year to thank all of our teachers for their dedication throughout the year and wish them a great summer!

two reasons diane zechman

I used a piece of 5 1/2 x 12 double-sided patterned paper to make a Double Diagonal Gate Fold Card and added a belly band to keep it closed.  The teacher and flower are attached to the band which slips off to open and reveal the rest of the sentiment inside…

two reasons open diane zechman

The paper was scored at 2, 4, 8, and 10. Then I marked both 5 1/2″ sides @ 2 3/4 and cut diagonally from the 4 and 8 inch scored lines.  The triangles cut off were flipped and adhered to the opposite lower corners.

My inside layers are 3 3/4 x 5 1/4 and 3 1/2 x 5. The belly band was cut to 1 1/4 x 8 1/2.

Have a great day and… happy stamping!

Diane Signature Medium size

stamps- Art Impressions 4901- Teachers Rule set; paper- white, black, SU! So Saffron, Bo Bunny- a Gift of Love; ink- Memento Tuxedo Black, SU! Crushed Curry; accessories- Scor-Tape, Copics, EK Success Retro Flower punch, button, glue dot.

Isaiah 40:8

Good afternoon! Today I journaled these two pages in my bible. A lot of people have been sharing pages done with pretty paper napkins lately…an old technique that has come around again.  It brought back memories of doing the napkins on cards years ago….and I remember even decoupaging napkins onto wicker baskets! Anyone else do that?

Isaiah 40 8 diane zechman

I picked up this pack with a pretty floral design in TJ Maxx a few weeks ago.  Then I decided that Isaiah 40:8 would be a good page to use them on. The verse reads “The grass withers and the flowers fall, but the word of our God endures forever.” Our earthly things may be beautiful and good, but they can be gone in a moment.  But God will guide us and always be with us. We need to keep Him as our foundation and keep our eyes fixed on what will stand forever.

Isaiah 40 8 close diane zechman

I used various Sweet ‘n Sassy stamp sets for the words… Rebecca Script, Words of Life- Collection 1 and Common Words 1, God Is Good, Message of Hope. They were stamped with Archival Black.

There’s a bit of a learning curve with the napkin technique in figuring out how much gesso to apply. I just “winged it” as I tend to do, but you may want to practice on something else first if you are unsure. I made sure I had a craft sheet under the page I was working on. I brushed clear gesso on the page with a foam brush but you might like using a regular brush or other applicator tool.  Just apply your gesso, adhere your napkin to it, and dry it with a heat tool. Then apply another coat of gesso on top.

Some TIPS:

  1. Be careful not to overwork the second coat of gesso or it will tear the napkin away. If you do have small spots that rip away, you can tear off a small scrap of napkin and fill it in if the pattern on your napkin is forgiving. (I patched two small spots here!)
  2. If you are covering the whole page with a piece of napkin as I did here, I found it helpful to adhere the napkin in two sections. I held it in place where I wanted it, then folded the top half down. While holding it with one hand, I applied gesso to the top with the other hand. Then I laid it back down and smoothed it out and pressed it a bit with an old credit card. Then I folded the bottom up and repeated this on the lower part of the page.
  3. Keep a paper towel handy to wipe your fingers, brush, or credit card if needed.  (The brush may pick up color from the napkin)
  4. Keep scraps of your napkin ready in case you need to patch tears.
  5. To highlight the verse: Before I started, I held the napkin in place  and used a pencil to draw a box on the napkin around the verse. Then I used my scissors to cut it out. Line it back up on the page and apply your gesso in sections as described above.

I hope this was helpful! Have a great weekend!

Panda PopCard

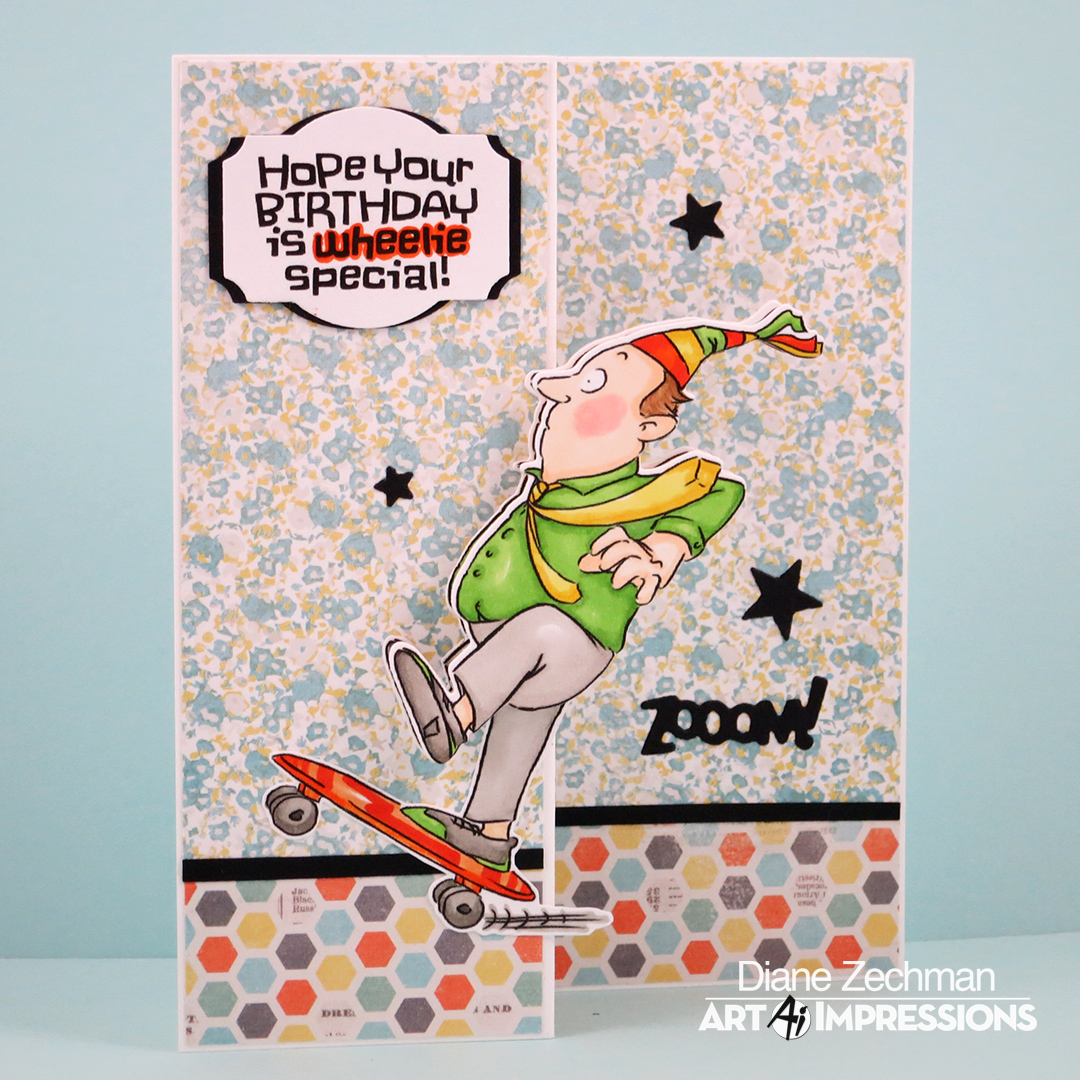
Hello friends!  The current Ai Challenge is “Dots & Stripes” (use dotted or striped pattern paper on your card) and we are featuring the very FUN new Art Impressions PopCards sets!  I was so excited to see these released and I finally got a chance to create with them!

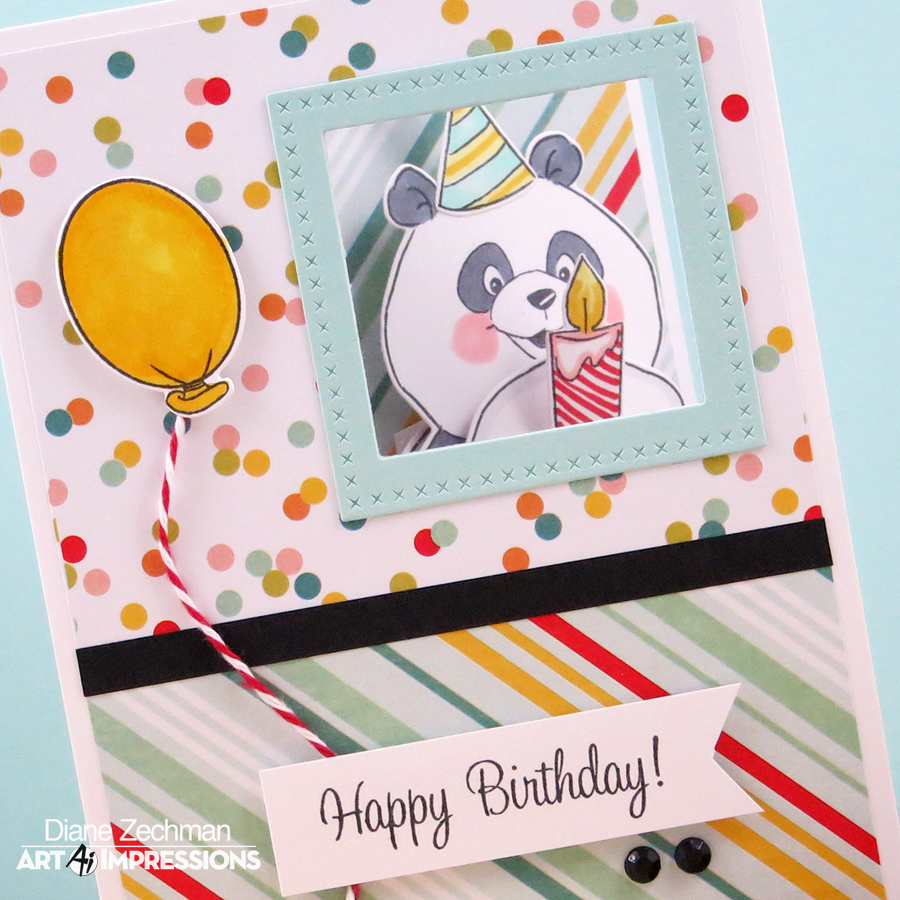
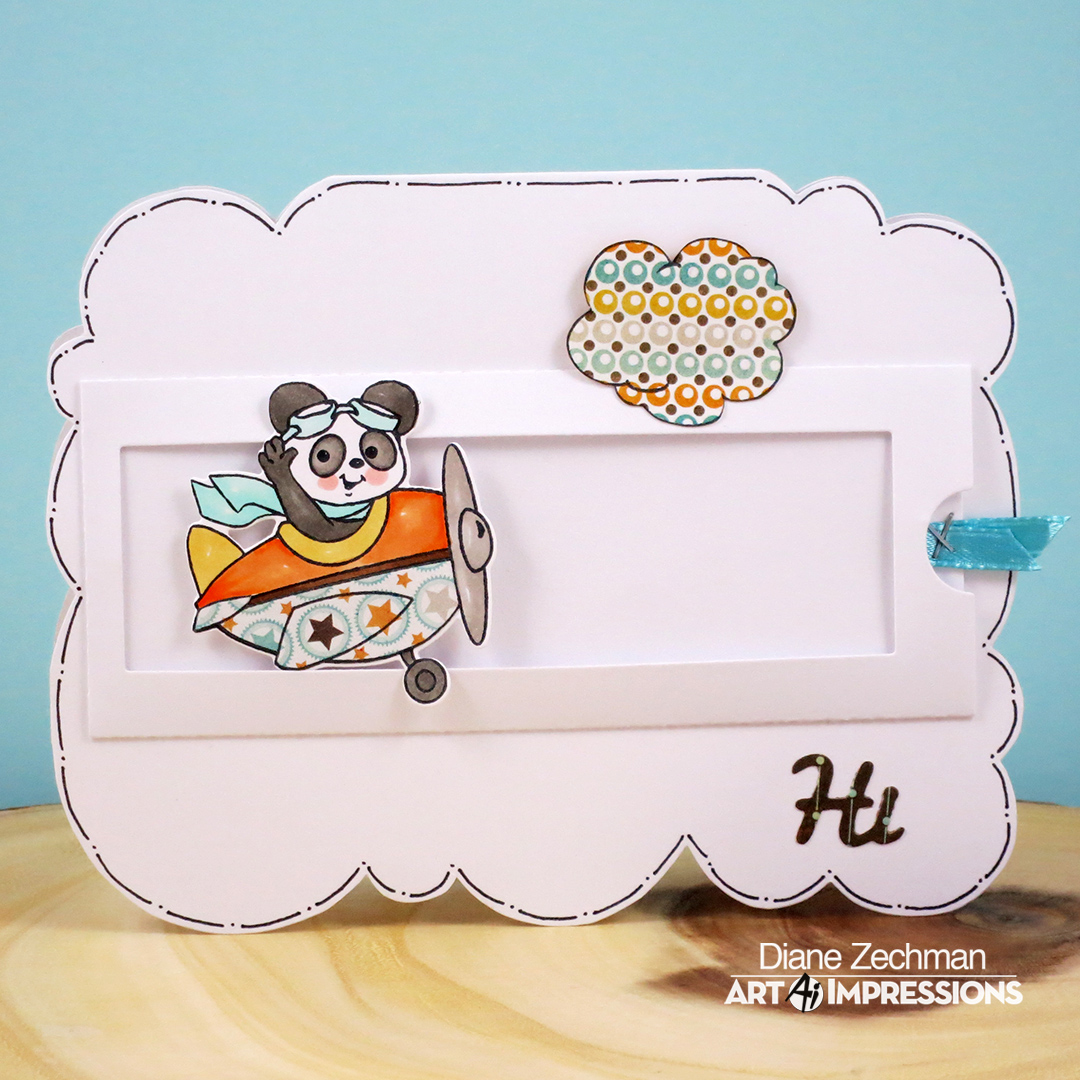
Today I am sharing how I made a fun, interactive card with the new Panda PopCard (4860) stamp set and the PopCard Template.  My sentiment is from the Hobby Lobby AiCS36- Birthday Wishes Set.

Panda PopCard 10 diane zechman

As I was editing the photos of the steps I took in creating this card, I typed some directions directly onto the photos. I hope this helps.  Click on each photo to see a larger view.  (Kate also has a wonderful video HERE showing how to put the PopCards together. Be sure to check it out!).

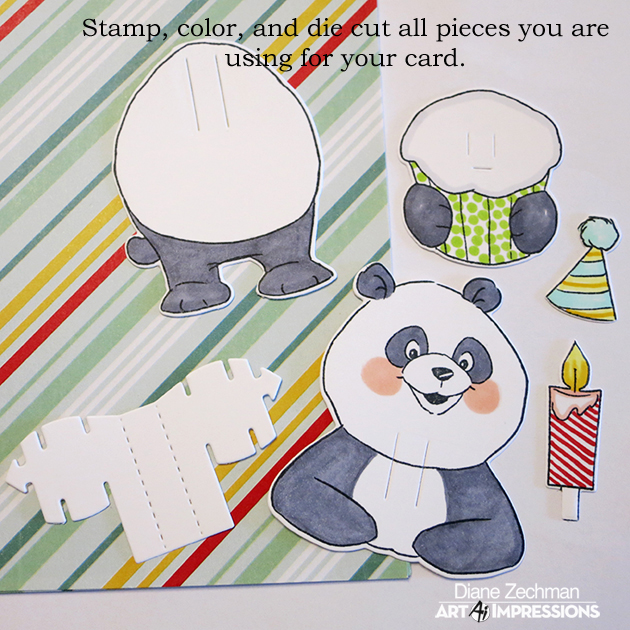
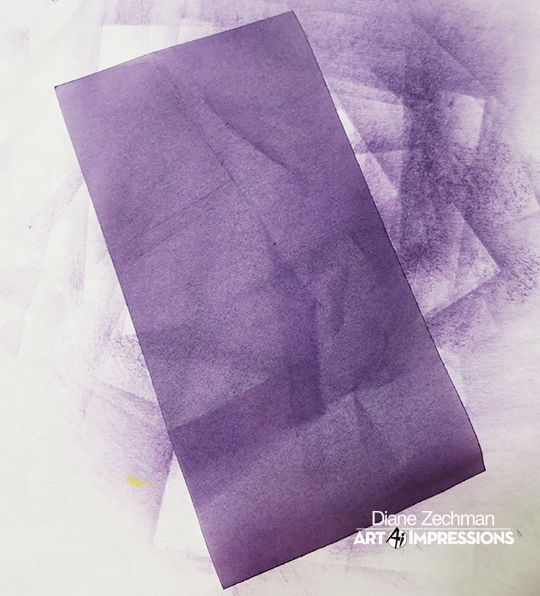
First I chose some patterned paper I wanted to use and colored my images to match.  The Panda only requires one of each image plus the PopCard Template.

Panda PopCard 1 diane zechman

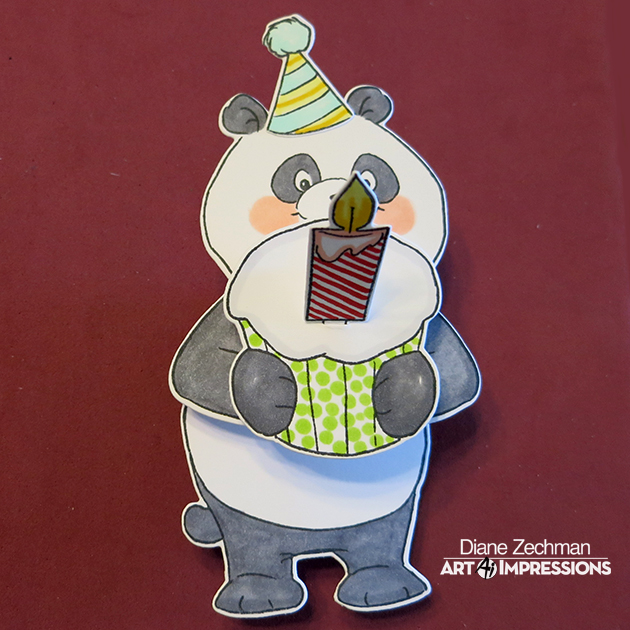
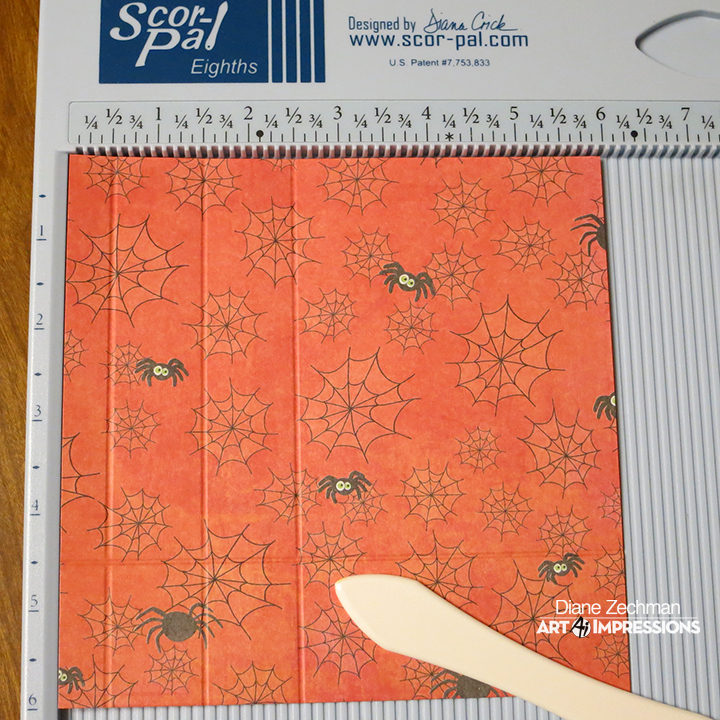
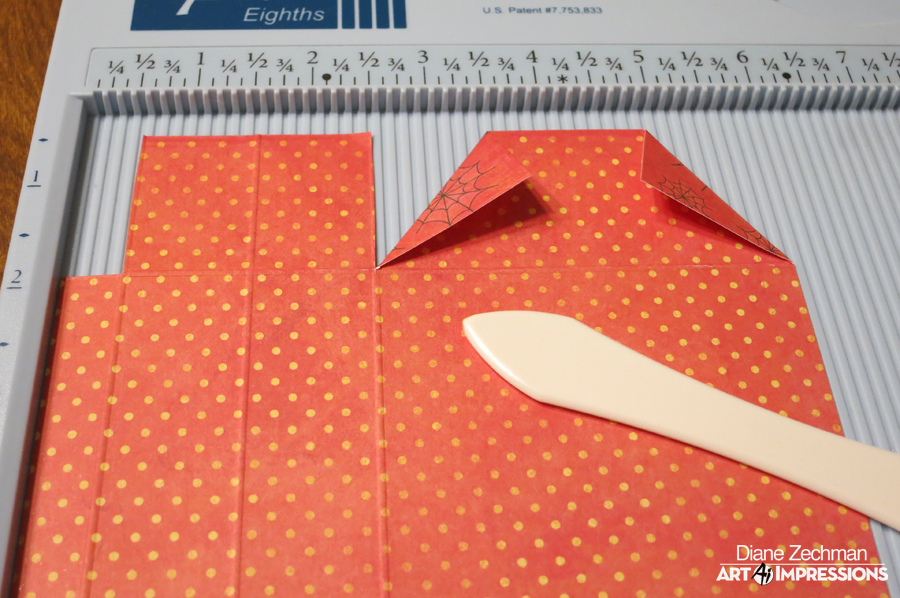
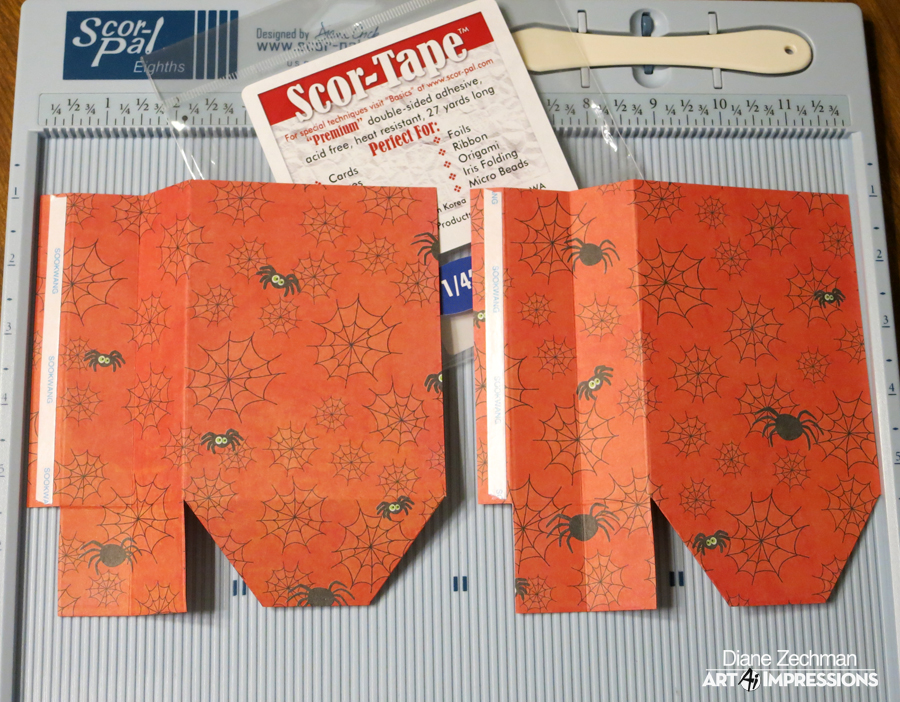
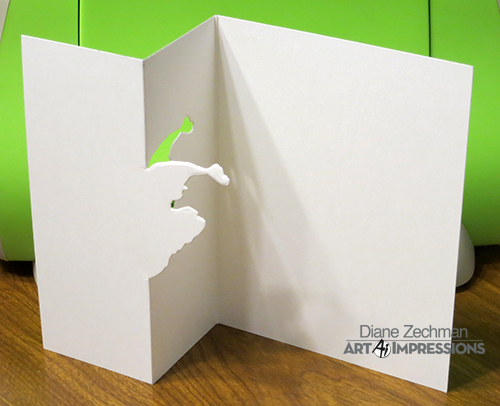
Next up is assembling the mechanism that makes the card interactive!  Just fold the template on the 2 center perforated lines to form a “U” shape. Then slide the “arms” of the template through the die cut slots in each piece.

Panda PopCard 2 diane zechman

Your panda will look like this from the front, with the PopCard Template hidden behind his layers…

Panda PopCard 3 diane zechman

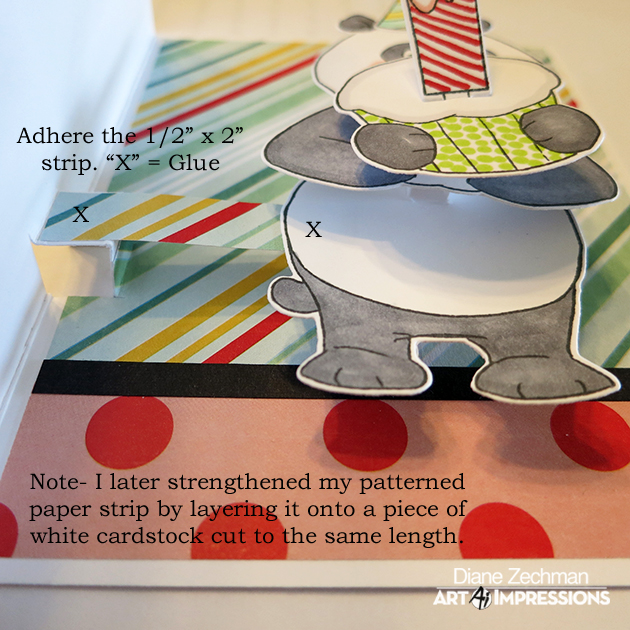
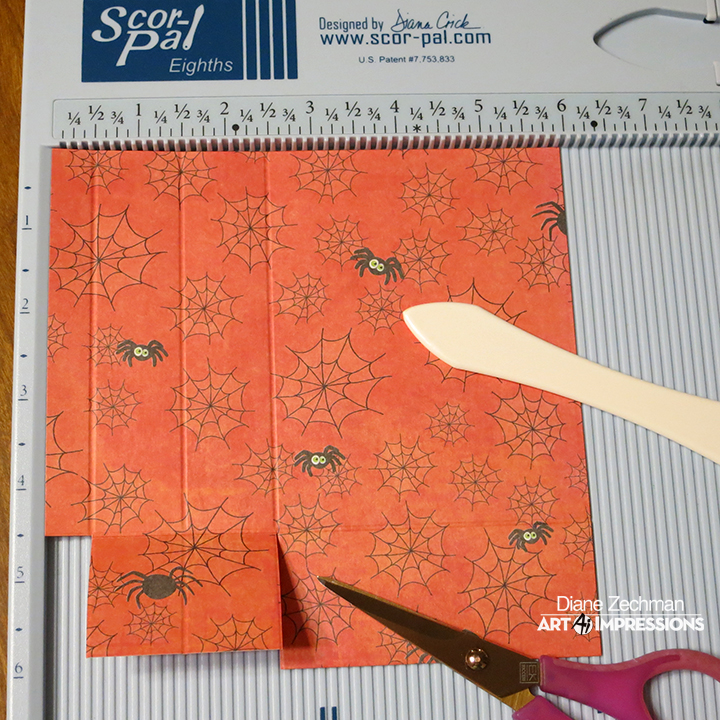
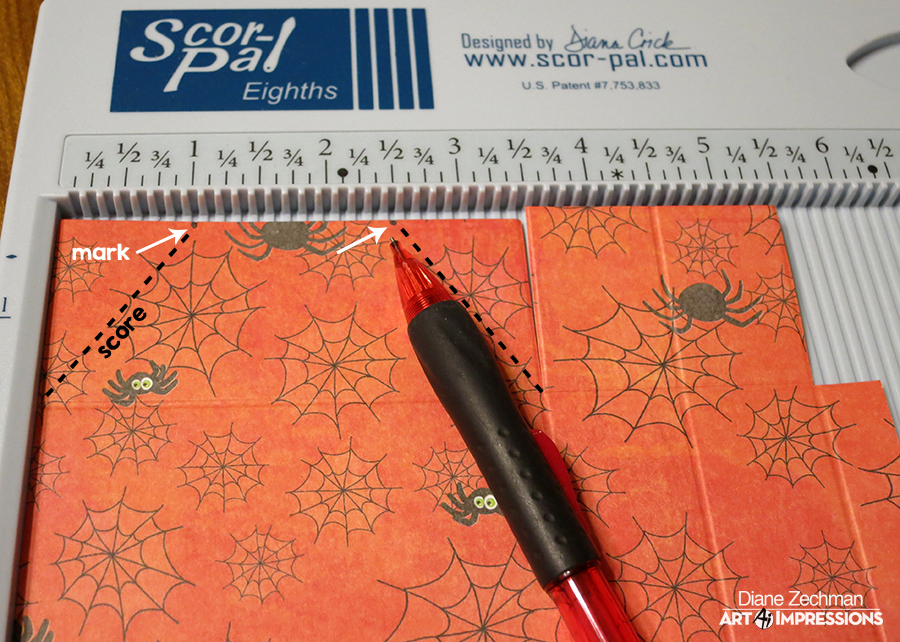
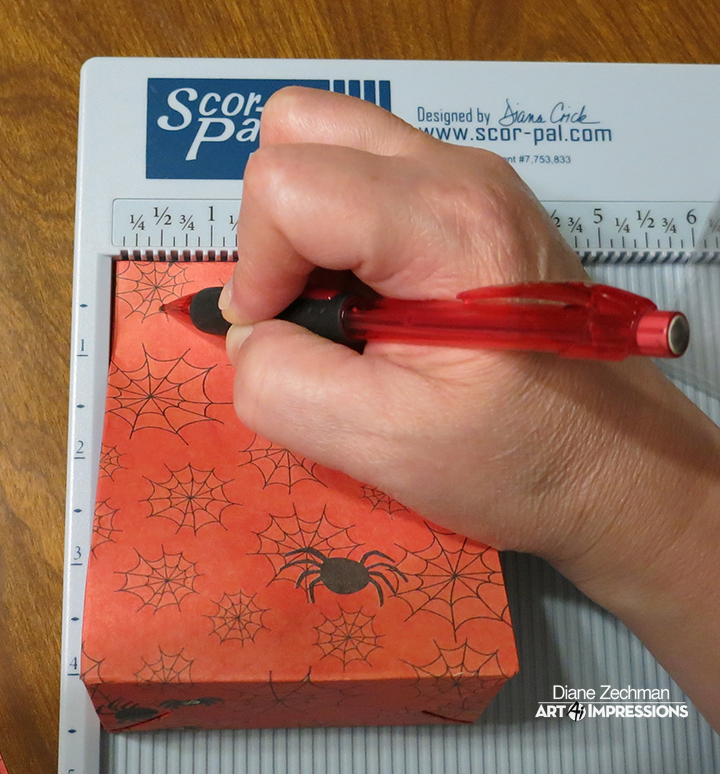
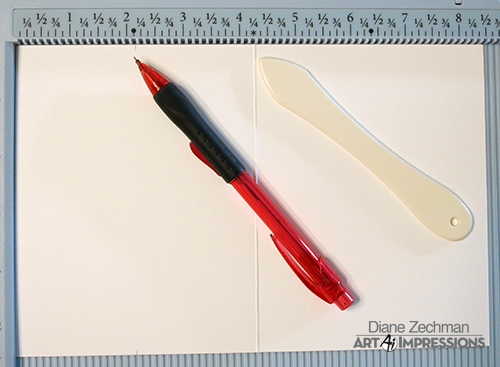
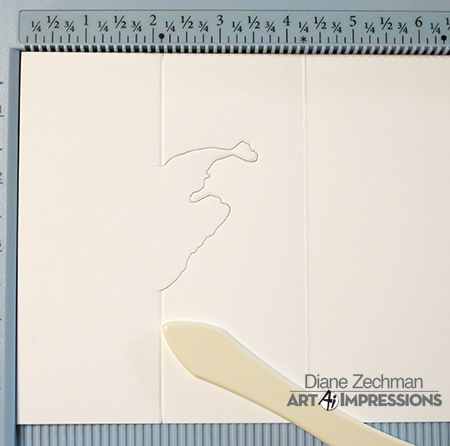
Now adhere the bear to the inside of the card.  Then cut 2 slits in the fold across from his belly.  I marked with a pencil where I wanted to cut and then turned my card inside out to make it easier to cut the slits.

Panda PopCard 4 diane zechman

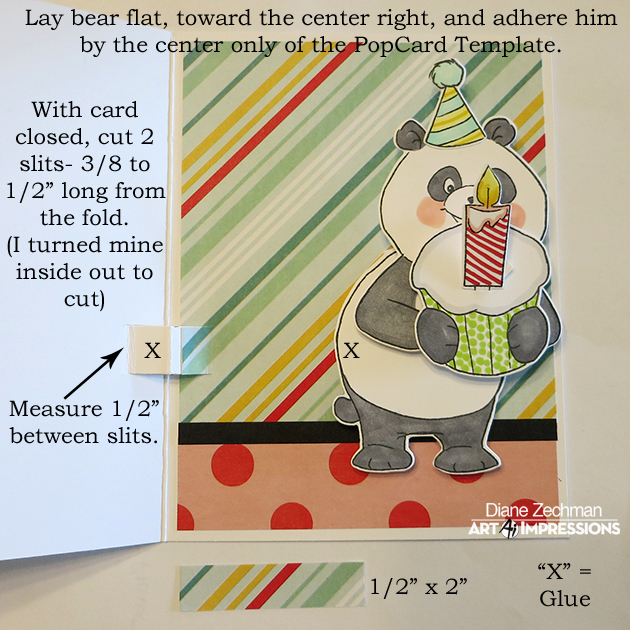
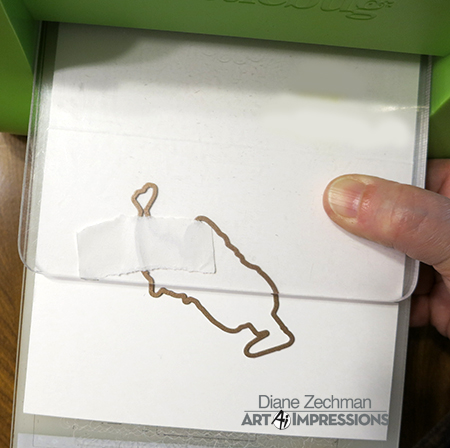
Bend the little cut section toward the center of the card.  A 1/2″ strip will adhere to the top of it and also to the back of the bear.

Panda PopCard 5 diane zechman

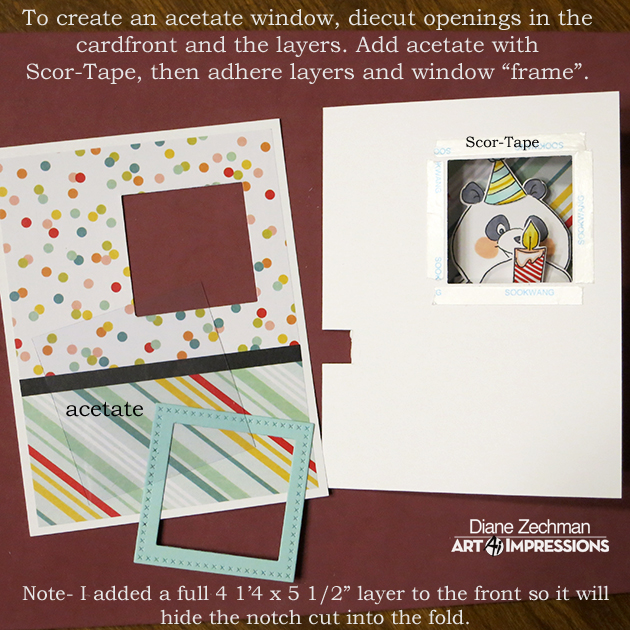
If desired, you can punch or die cut a window for your bear to peek through!  I added a piece of acetate in the window.

Panda PopCard 6 diane zechman

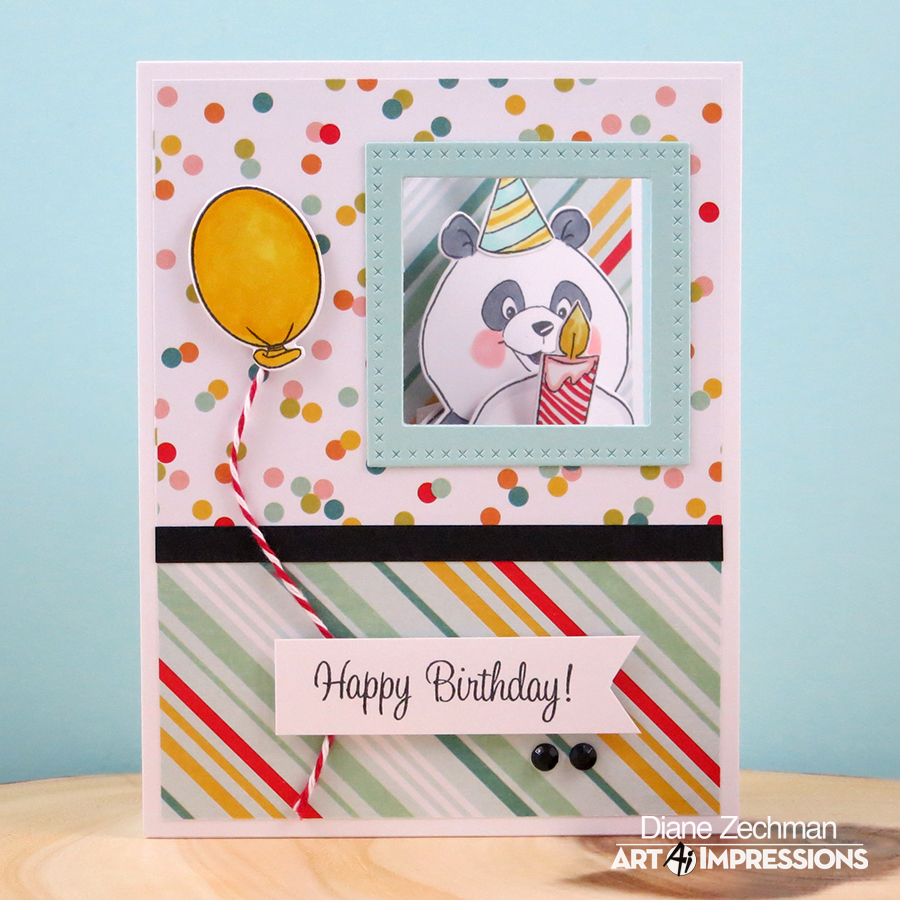
Assemble layers and finish as desired.  I added a single balloon from the set with some Clear Wink of Stella to make it sparkle.

Panda PopCard 7 diane zechman

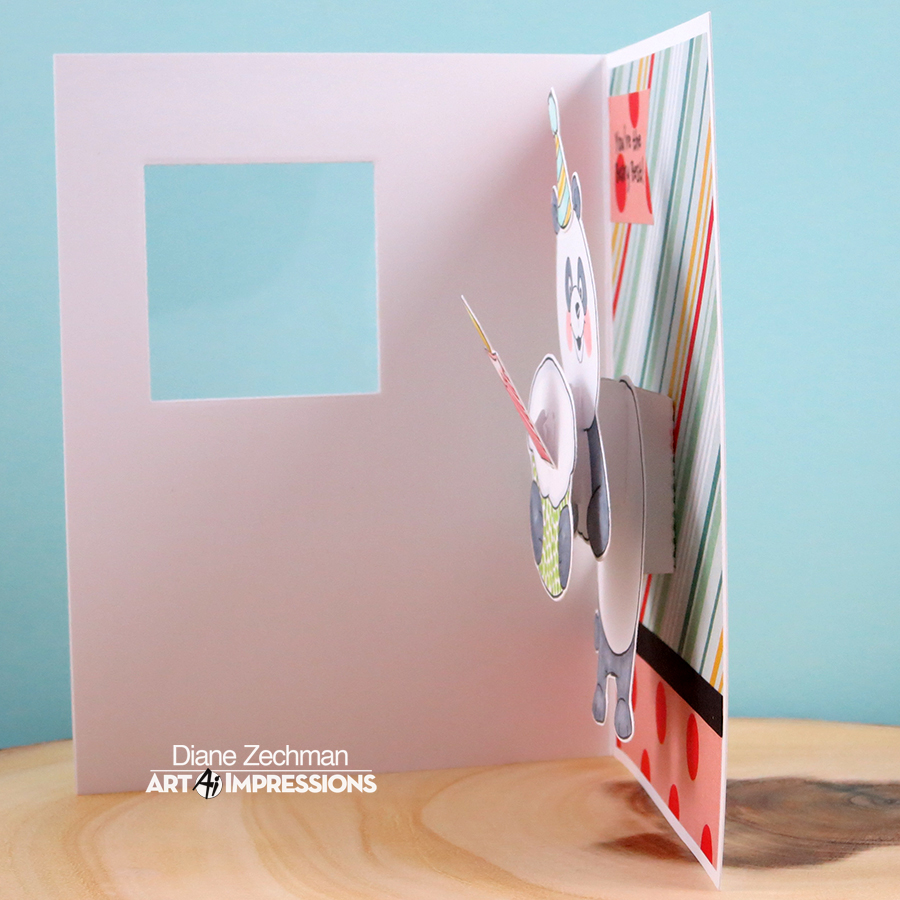
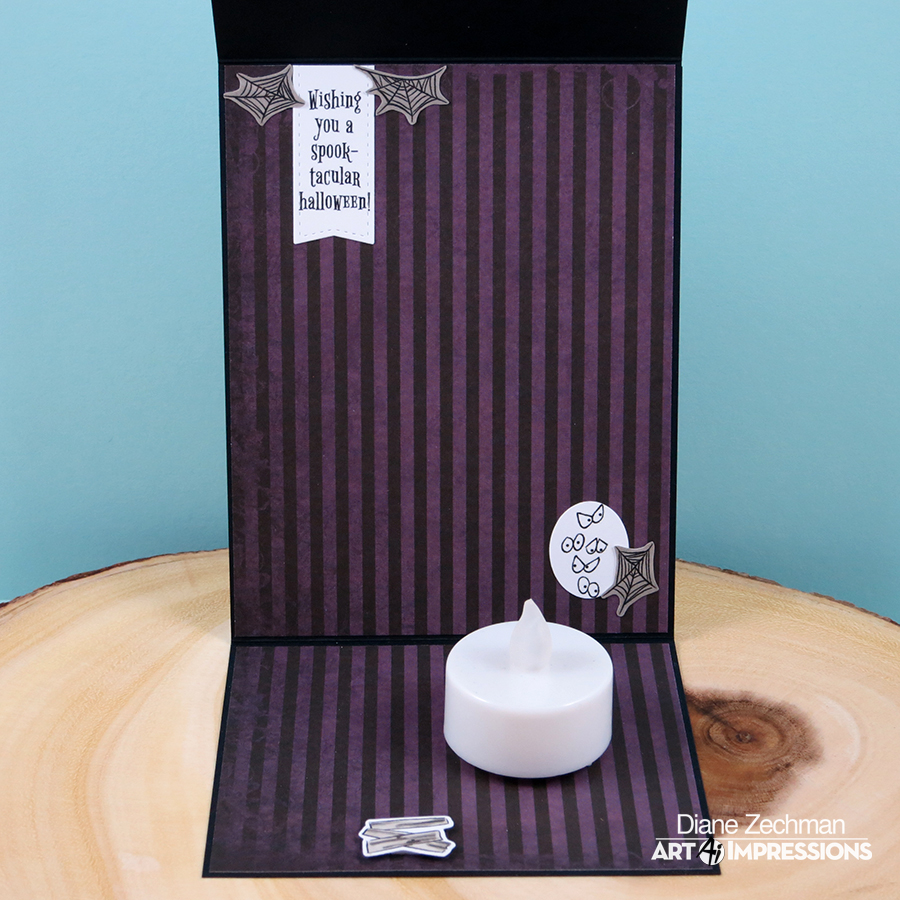
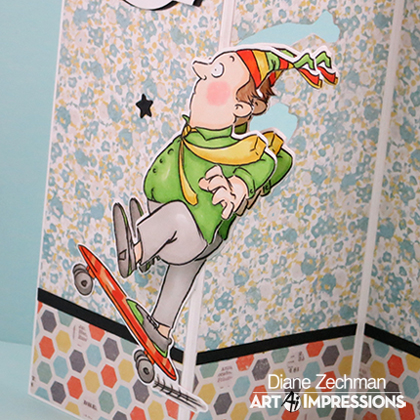
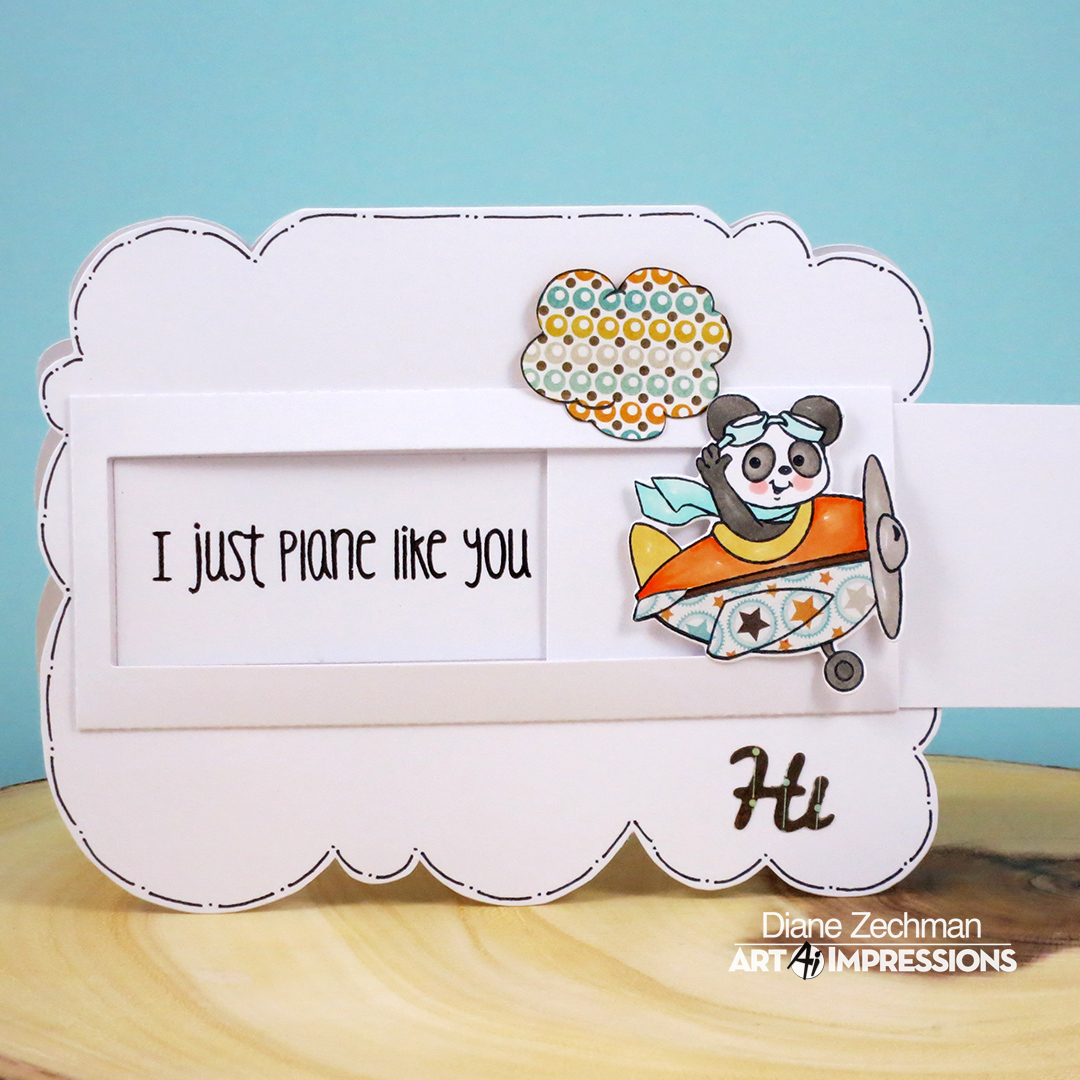
When opened, the Panda pops up!
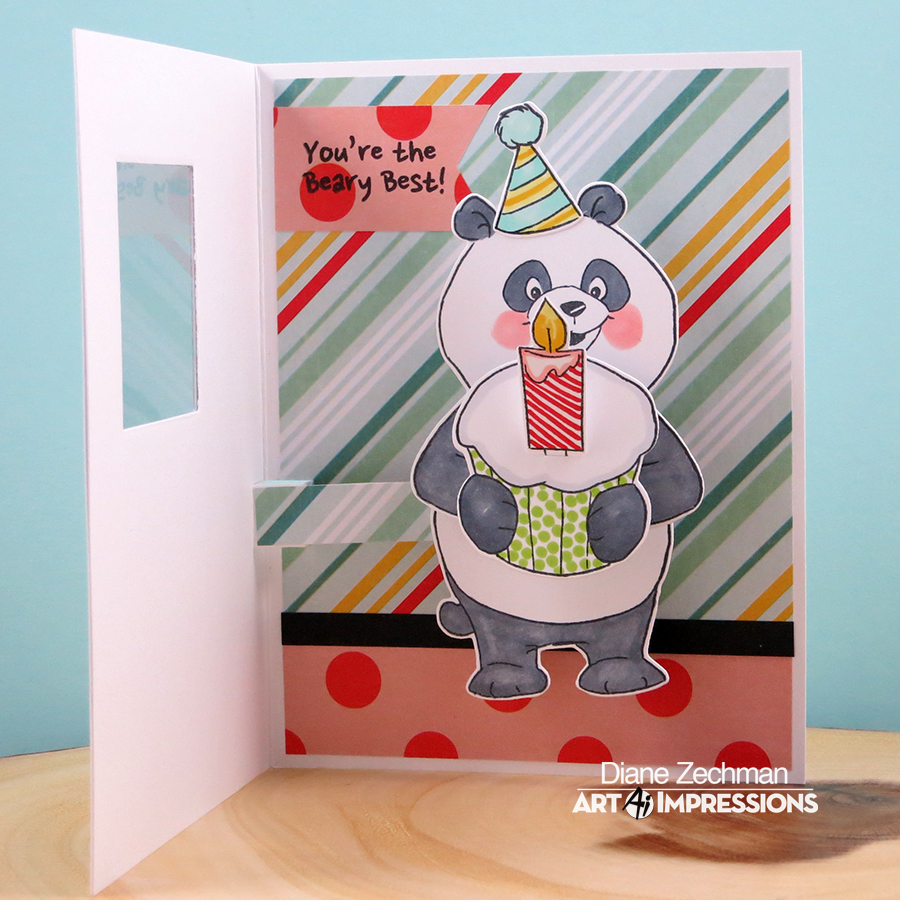
Panda PopCard 8 diane zechman

A side view…

Panda PopCard 9 diane zechman

Now it’s your turn to break out your favorite Ai stamps, make a card, and join us in the “Dots & Stripes” Challenge!

Happy stamping!

Diane Signature Medium size

stamps- Art Impressions Panda PopCard (4860), Hobby Lobby AiCS36- Birthday Wishes Set; paper- white, black, SU! Pool Party, Colorbok- Carnival 6×6; ink- Memento Tuxedo Black; accessories- Art Impressions PopCard Template, Copics, baker’s twine, rhinestones, Scor-Tape, MFT Cross Stitch Squares, acetate, foam tape, Clear Wink of Stella.

just down the hall

Hello friends and happy Thursday!

Today I am on the Art Impressions blog with a card using one of the new Art Impressions Work & Play line of clear stamps…this one is 4899- Proud Nurse Set.  I’m sure many of us know a nurse who can totally relate to this!

down the hall diane zechman

I made a Gate Fold card and added some layers to the front…the top layers are attached to the left side and the bottom layers are attached to the right.  I started with 5 1/2 x 8 1/2 cardstock and scored @ 2 1/8 and 6 3/8.

My top layers are 1 3/4 x 4, 1 1/2 x 3 3/4, and 1 1/4 x 3 1/2.

My bottom layers are 3 1/2 x 4, and 3 1/4 x 3 3/4.

down the hall 2 diane zechman

Have a great day and… happy stamping!

Diane Signature Medium size

stamps- Art Impressions 4899- Proud Nurse Set; paper- white, SU! Crumb Cake and Rich Razzleberry, Basic Grey- Eva; ink- Memento Tuxedo Black, Versafine Black; accessories- Copics, Scor-Pal, paper flowers, adhesive pearls.

blessings ornament

Sooo…the big question this time of year is always… “Are you ready for Christmas?”.  Umm…No. We finally got our tree up Sunday night. I still have baking and shopping to do. But on Christmas Eve, I hope I can say “Yes, I’m ready.” ha.

I was playing around, though, with some salt dough ornaments using my Poinsettias & Candles stamp set and one of my Christmas cookie stamps.

salt dough ornament 4 diane zechman

salt dough ornament 3 diane zechman

I mixed my dough and rolled it out on freezer paper, then cut the hearts by hand.  I used 1/2 cup flour, 1/4 cup salt and 1/4 cup warm water but my mixture was sticky and needed more flour. Next time I’ll add more salt or less water. Use a toothpick or straw to make a hole.

salt dough ornament 1 diane zechman

The hearts were stamped with Versafine ink.

salt dough ornament 2 diane zechman

I baked them in a toaster oven at 200 degrees and flipped them a few times (not sure how long) but my toaster oven runs hot so next time I’ll use the regular oven.  The toaster oven browned them a bit…so I sponged some Distress Vintage Photo on to “age” them.

This might be my last post before the holiday so I hope you all have a blessed Christmas!

wheelie special birthday

Hello friends!  The current Ai Challenge is “Shake A Little (use a wobble)” and we are showcasing the NEW Non-Holiday Mini Shakers!  There are three new sets, each designed to use with the Mini Action Wobbles and boy are they fun!  I am sharing today how I made this Partial Die-Cut Z-Fold Card with the new Wheelie Mini Shaker (4794) stamp set.

2016 s cha 2a diane zechman ai

The upper body and left leg on this guy are die cut and layered on a Mini Action Wobble. I know if I were on that skateboard, I would be super wobbly! Lol. The word “zoom” and the stars are dies which are also included in the set!

Here you can see the part of the image that wobbles…

2016 s cha 2c diane zechman

With careful placement of the die, he hangs out over the fold.

2016 s cha 2d diane zechman

To create my Partial Die-Cut Z-Fold Card, I started with a 5 1/2 x 8 1/2 piece of cardstock and scored it at the 4 1/4″ mark.  Then I used a pencil to mark the top and bottom of the card front (to the left of the fold) at 2 1/8″.

2016 s cha 2e diane zechman

Next I positioned the die for his body so the left side of it, including his leg, was to the left of my pencil marks. It is held in place with low-tack tape.  Then I placed the top plate so the edge of the plate was in line with my pencil marks. (By doing so, the die will only cut the area underneath the top plate.  Now run it through the machine.

2016 s cha 2f diane zechman

The die cut area will be cut as shown below. I then scored at the 2 1/8″ mark, above and below the cut.

2016 s cha 2g diane zechman

Mountain and Valley fold your card and the base will look like this.

2016 s cha 2h diane zechman

Add layers, your image with the Action Wobble, and embellish as desired.

2016 s cha 2b diane zechman

Now it’s your turn to make a card and join us in the “Shake A Little” Challenge!

Happy stamping!

Diane Signature Medium size

stamps- Art Impressions Wheelie Mini Shaker (4794); paper- white, black, MME- Happy Day; ink- Memento Tuxedo Black; accessories- Copics, Art Impressions Mini Action Wobble, Scor-Pal, SU! Designer Label punch.

panda slider

Hello friends!

The current Ai Challenge is “Slide on By” …and we are featuring three new super cute Slider Sets (to use with the Slider Die) plus two new Stackers Sets (which also coordinate with the Slider Die)! 

Here I used the Panda Slider Set (4801) to create a cloud shaped card.

panda slider 1 diane zechman

I love making shaped cards and thought he’d be cute on a big cloud so I kept my card base and slider pieces all white.  I did add a smaller patterned paper cloud, though, for a whimsical accent.  Part of the plane was paper pieced with some matching paper.  The little “hi” is a cute die included in this set (there’s also a balloon)!

When the slider piece is pulled, the plane slides across the card and reveals the sentiment.

panda slider 2 diane zechman

I just quickly sketched my cloud card and cut it by hand.  Here’s the pattern if you would like to make one too.  Click on the photo and then right click to save.

cloud shaped card diane zechman copy

Now it’s your turn to make a card and join us in the current Ai Challenge!  We would love to see your creations!

Happy stamping!

Diane Signature Medium size

stamps- Art Impressions Panda Slider Set (4801); paper- white, MME fine and dandy boy; ink- Memento Tuxedo Black, Versafine Black; accessories- Art Impressions Slider Die (4764), Copics, foam dimensionals, ribbon, staples, Scor-Tape.