Category Archives: video tutorials

Snowman Soup pocket card (with Envelope Notcher and video!)

Brrr!  We were spoiled with a few extra days of nice temps but now it has gotten cooler.  I am not especially fond of the cold but today I have a card to help warm someone up.

I recently purchased the We R Memory Keepers Envelope Notcher which compliments their Envelope Punch Board.  And I wanted to use it for a Make & Take for some dear friends who came to visit at my friends Lisa & Lou Ann’s store.  But I thought it would be fun to notch something else besides an envelope… because we can all read & follow the directions on the package, right?  lol.  But when I did a quick search, I soon realized that there aren’t any tutorials using this tool for projects other than making a notched envelope…or maybe I’m not looking in the right place??

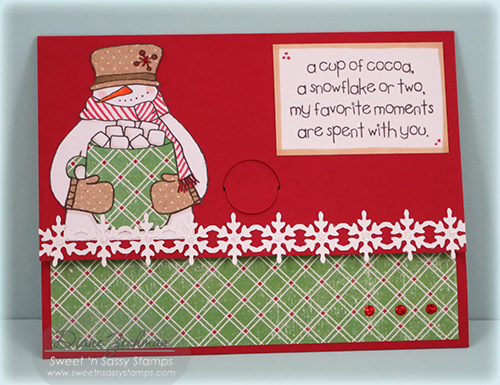
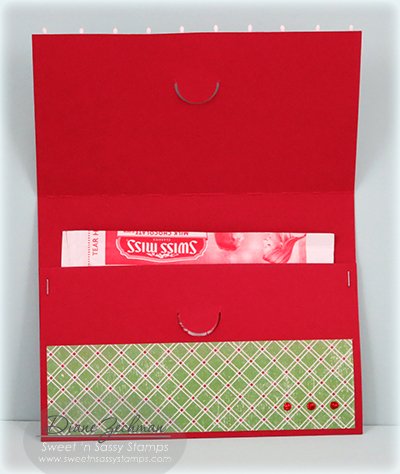
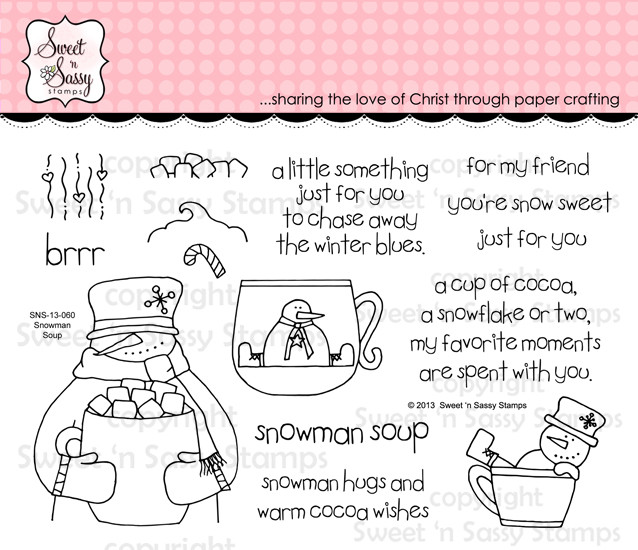
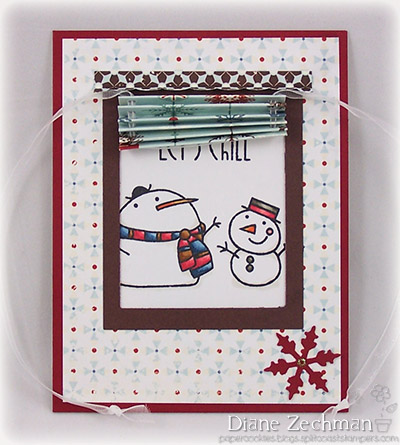
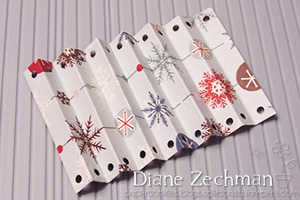
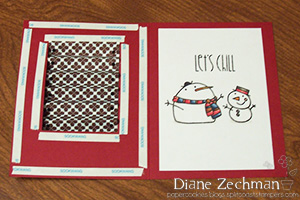
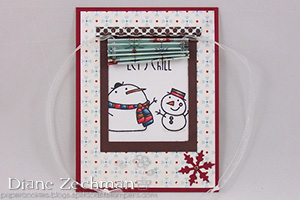
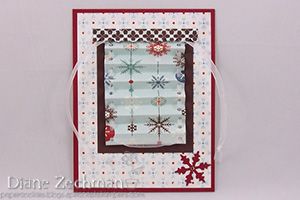
Anyway, I first decided to create a tri-fold card so I figured out the measurements for cutting and scoring.  Then I changed it up a bit and turned my tri-fold into a pocket card… so you can tuck in whatever you wish.  Mine has a hot cocoa packet.  And I used my Snowman Soup stamp set by Sweet ‘n Sassy Stamps.  🙂

IMG_3515

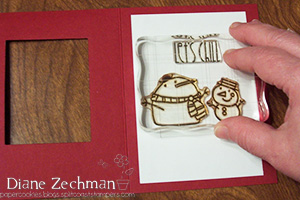
And here it is open…with hot cocoa inside…

IMG_3519

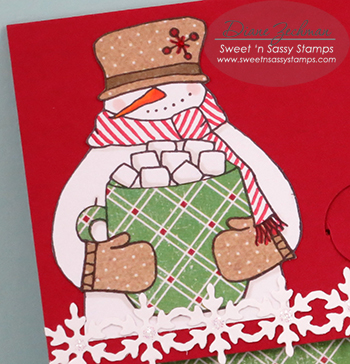
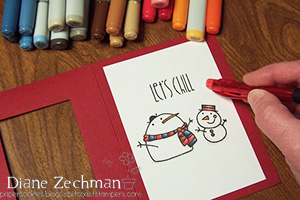
My snowman was paper pieced (still one of my fave techniques!).  A marker was used on his scarf though.

IMG_3516

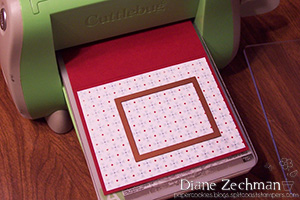
To create the Tri-fold card base, I started with a 5 1/2″ x 10 1/4″ piece of cardstock.  Using my Scor-Pal, I scored the length at 3″ and 7 1/4″.  (Or you can just score each end at 3″)  Crease scored lines.

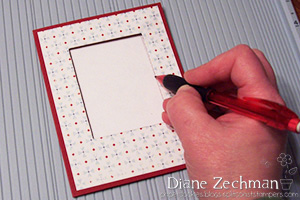
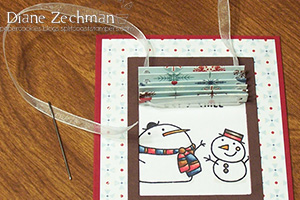
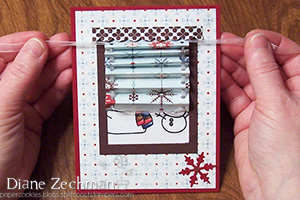
Next, centering the Envelope Notcher in the middle section both horizontally and vertically, fold and punch each end (the top and the bottom).

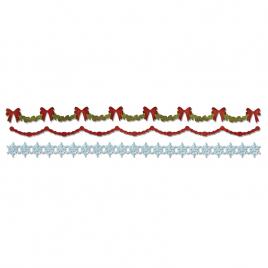
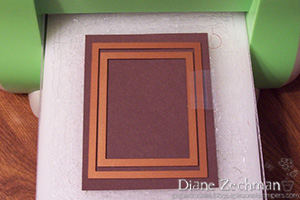
Then staple, tape or glue each side of the pocket and decorate your card as desired.  The snowflake border was diecut from white cardstock using the Sizzix Decorative Strip Die – Holly, Beaded & Snowflake Garland.  I dotted this with a little Stickles.

Here’s a quick video with a few hints on using the envelope notcher and making this project…


[youtube]https://youtu.be/x6JXLHWLJzE[/youtube]

Hope this helps you have a little more fun with this cool tool!

stamps- Sweet ‘n Sassy Snowman Soup; paper- white, red, ?dsp; ink- Memento Tuxedo Black; accessories- Scor-Pal, Copics, Sizzix Decorative Strip Die – Holly, Beaded & Snowflake Garland, We R Memory Keepers Envelope Notcher.
snowman soupsizzix holly beaded snowflake
envelope notcher

Mini Blind card tutorial with video

Today on the Splitcoaststampers website, I was asked to do a tutorial for my Mini Blind card.  You can check it out in the tutorial section of the SCS site here.  You can also see my original tutorial and card here.

Here’s my card with the blind closed and also open.  * Video tutorial is at the end of this post.

Supplies:

card base- 5 1/2 x 8 1/2 piece of cardstock (SU! Cherry Cobbler)

layer- 4 x 5 1/4 piece of cardstock or patterned paper (Echo Park)

inside layer (optional)- 3 1/2 x 5 piece of neutral cardstock (white)

blind- 2 3/8 x 4 7/8 piece of patterned paper (Echo Park)

valance- 3/4 x 3 1/8 piece of cardstock or patterned paper (E.P.)

window frame- 3 1/2 x 4 1/2 scrap of cardstock (Choc. Chip)

Stamps- Paper Smooches Swanky Snowdudes

Ink- Memento Tuxedo Black

Scor-Pal, Scor-Tape, glue, 18” ribbon, Crop-A-Dile, Large Rectangle Nestabilities, die cutting machine, SU! Scallop Edge punch, EK Success snowflake punch, Stickles, large-eyed needle (optional).

Step 1:  Adhere the layer to the cardfront. Using the next to the largest size of the Large Rectangle Nestabilities, die cut an opening in the card front only.

Hint: If you don’t have Rectangle Nestabilities, simply cut a 2 3/8 x 3 opening in the card front with a paper trimmer or craft knife.

Step 2:  Using the same die, along with the largest die, diecut a piece of brown cardstock to create a window frame. Use a little tape to hold them in place if necessary. Attach this frame to the card front.

Step 3:  Score the 4 7/8″ side of the blind every 3/8″.

Hint: To do this on the Scor-Pal- first align the paper against the left fence and score @ 3/8″, 3/4″, 1 1/2″, 2 1/4″, 3″, 3 3/4″, and 4 1/2″.

Step 4:  Next, move the paper over so the left edge is aligned at the 1/8″ groove. Score @ 1 1/4″, 2″, 2 3/4″, 3 1/2″, and 4 1/4″.

Step 5:  Starting with a valley fold at the top, accordian fold the blind. Then, holding it folded up, punch each end with the smallest hole of the Crop-A-Dile.

Step 6:  Unfold.  It should now look like this…

Step 7:  Lightly trace the window opening onto the inside of the card with a pencil.  Hint: If using a colored cardstock base, first adhere a neutral layer of cardstock to the inside.

Step 8:  Open the card and stamp images as desired using the pencil lines as a guide.

Step 9:  Color your stamped images, if needed, and erase the pencil lines.

Step 10:  Attach the top section of the blind to the inside of the card front, aligning the first (top) scored line with the top of the window opening.

Step 11:  Apply Scor-Tape or glue to the inside of the card front as shown. Adhere the front to the back. (The finished card will not open like a normal card.)

Step 12:  Thread ribbon through the holes in the blind, starting and ending at the top. A large-eyed needle may be used to thread the ribbon through if needed. Knot ends of ribbon.

Step 13:  To create a valance, score the 3/4” side at 1/4″.  Then punch the other side with a scallop edge punch.  Attach valance to the top of the window and finish card as desired.

Step 14:  Pull both ribbon tails at the same time, in opposite directions, to make the blind go up.

The finished card open…

And closed…

Variation:  Try using a window die instead of the rectangle dies to create the opening.  Adjust the width of the blind as necessary.

Also…sometimes we like to add a little “instructions” with our interactive cards, so I made a sheet with multiple copies.  This can be printed out and cut up so one can be included with the Mini Blind card when mailed. Click on it for a larger pic and “right click” to save to your computer.

VIDEO:  SORRY my camera cut off the end…as I was saying…the blind unfolds flat and the card will fit into a standard A2 envelope.

[youtube]https://www.youtube.com/watch?v=3YZ77hF-sB4[/youtube]

a critter challenge

Hello!  I have a few fun shaped cards today AND a short video.  :^)  My friends, Anna (SweetMissDaisy) and Jeanne (Jeanne S), and I are having a critter challenge today…making animal shaped cards.  I love, love, love shaped cards and I can’t wait to see what they created…be sure to check out their blogs too!

Jeanne has been making some awesome owls (it’s all her fault that I bought the die! lol)  and I had a lot of fun creating one of my own.  (It won’t be my last!!)  I made some puppy cards too…

Jeanne has pics on her blog to show how to make these dies into cards.  Just keep the fold of your card base slightly below the ears when cutting.  Easy!  For my owl, I added a heart shaped belly and some eyelids (the circle for the eye cut in half).  I think he looks a bit sleepy…or annoyed.  lol.

Then I made 2 puppy dogs.  The first one (on the right) was made just like the owl…with the fold kept just below the top of the ears.

Then I had a different idea and made the second one (on the left, above) with a bobble head!  I made the fold of my card about the height of his nose and trimmed the sides.  Then I diecut a separate head and attached it with a spring!

This was too fun and I think it’s way cuter in person, so here’s a quick video to see the bobble head.  Sorry my table was so slippy…it was hard to hold him and the camera at the same time.

[youtube]https://www.youtube.com/watch?v=uEtCtOQHSMQ[/youtube]

Now don’t go away…I’ve got some chickens too!  I am a long time fan of Anna’s artwork and a few years ago another friend, Michele (mitchygitchygoomy), created a chicken shaped card which was inspired by Anna.  You can read all about it here.  Ever since then I have been wanting to try these so I knew my critter challenge wouldn’t be complete without some of mitchy’s chickens!

Did you notice the “straw” on the bottom?  :^)  These could be addicting.  Just sayin’.  edit: you can find a pattern for the chickens here.

Thanks for reading this far!  Have a great Sunday!

Owl: paper- birch, MME- Dolled Up; ink- Distress Tea Dye; accessories- Sizzix Owl #2, adhesive rhinestone, Marvy Scallop Heart Punch.

Puppy: paper- birch, kraft, MME- Dolled Up; ink- Distress Tea Dye; accessories- Sizzix Puppy Dog, adhesive rhinestone, Close To My Heart adhesive spring.

Chicken: stamp- sentiment from Paper Smooches Green Acres; paper- birch, kraft, MME- Dolled Up; ink- Distress Tea Dye, Memento Rich Cocoa; accessories- Heart Nestabilities, Judikins Straw Speckles, button, crochet thread, SU! small oval punch.

another tissue box cover and video tutorial

Last month I shared a snowy tissue box cover that I made with a Stampavie image for a square box of tissues.  (Thanks for your comments…I’m glad you liked it!)  Soon after, I was asked to do a tutorial for SCS with the tissue box, so here’s another sample I came up with.  This one was made for a friend’s daughter’s wedding so I kept it pretty much white on white.  I love that look…so elegant!

I used 2 different embossing folders and added a bunch of pearls.  Just a tiny bit of black helped to make their initials stand out.

Here’s a view of the top.  It’s hard to see, but I added some Stickles to the edge of the die-cut opening and around the punched heart.  I also added Stickles to the initials on the front.

Below is the You Tube video tutorial, but be sure to check out the Splitcoast site for step by step pictures and directions.  You can see the tutorial herein the SCS resources.

[youtube]https://www.youtube.com/watch?v=k60I-Hoj9ZM[/youtube]

Thanks for stopping by!

paper- black, white; accessories-Cuttlebug Meadow Lark & Preserves folders, pearls, Sizzix Endless Love alpha dies, Stickles, Martha Stewart Lace Scallop Heart punch, Spellbinders Oval and Labels 13 dies.

my first video tutorial!

Hello friends!  Today I am sharing another card with the “Out Of The Box With Nestabilities” technique.  

This time I have a little video for you (It’s for today’s SCS tutorial).  This is my first one so please excuse the fact that it’s far from professionally done!  ha!  When Beate first asked me to make the video I think I went into a bit of panic mode…but in the end it was kinda fun.  lol.

Here’s the card I made…I used my Time For Cake stamp set. 

outoftheboxwithnestiesstep7.jpg

And here’s the video…like I said, it is my first one so please check out the picture tutorial on Splitcoast as well.  A link can be found in the resources section as well as in today’s Weekly Inkling newsletter.  The Weekly Inkling is a free e-mail, so be sure to sign up for that on the SCS homepage if you haven’t already!

[youtube]https://www.youtube.com/watch?v=hgiWWUTkknM[/youtube]

card recipe:

stamps- Time For Cake by Cookie Crumbs; paper- Going Gray, Black, Saffron, White, DCWV Blossoms & Butterflies; ink- Memento Black; accessories- Labels 9 Nestabilities, SU! Photo Corner punch, brads, square punch.