Category Archives: 3D and altered art

box in a bag

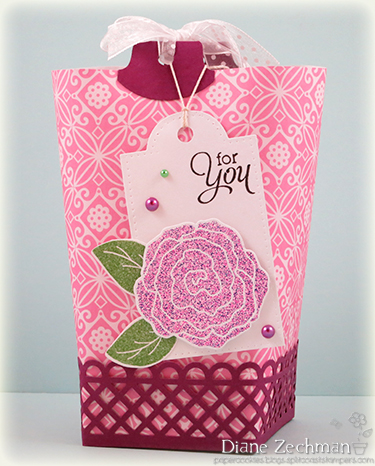
It’s the first of the month, which brings a new challenge on the Scor-Pal blog.  This month we are using a stamped image on our cards and projects.  Here’s my sample with a stamped and embossed flower and sentiment by Sweet ‘n Sassy Stamps. 

I used my Scor-Pal and Scor-Tape to follow the Box in a Bag tutorial on the Splitcoast site.  It was fun re-visiting this technique!  The tag was cut with a bookmark die and I attached the flower to the tag with foam dots.  Yesterday I shared a coordinating card… you can scroll down to see it.

Come join us on the Scor-Pal Blog for the May Challenge!

stamps- Sweet ‘n Sassy- Thankful Blooms and Delightful Doilies (sentiment); paper- white, SU! Rich Razzleberry, Me & My Big Ideas d.p.; ink- Versamark; accessories- Scor-Pal, Scor-Tape, Sweet ‘n Sassy Thankful Blooms dies and Bookmarks & More dies, Berry Bliss embossing powder, SU! Wild Wasabi embossing powder, Martha Stewart Garden Trellis punch, SU! Round Tab punch, hole punch, May Arts ribbon, foam dots, tracing wheel, adhesive pearls.

Elaina name frame

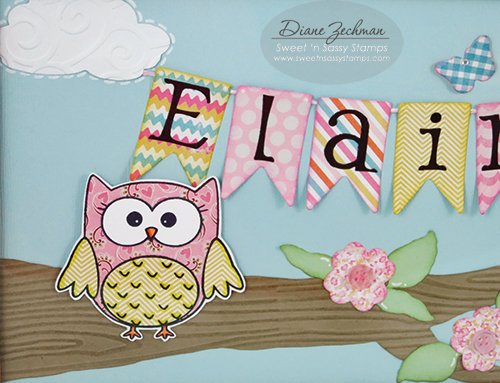
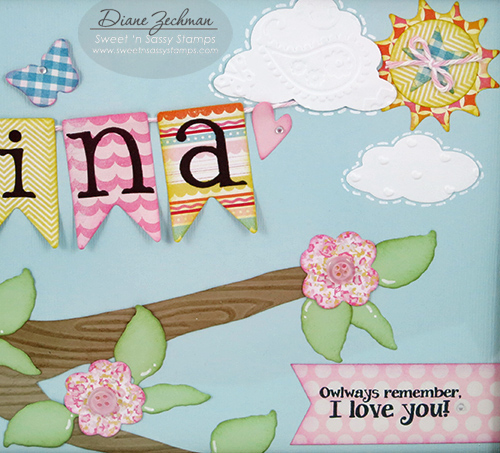
Good morning! Today it’s my turn to post on the Sweet ‘n Sassy blog.  We are gearing up for another new release so be sure to check the store on Friday.  I think you’ll like it!  Today, though, I have a project to share that I recently made for a baby shower gift.  I used lots of Sweet ‘n Sassy products to create a fun name frame to match the baby’s nursery décor. 

This is one of those projects that looks much cuter in person!  It’s so hard to photograph without getting a glare from the glass and it’s difficult to see the dimension with embossing and foam dots.  I have a few close ups to see it better.

The nursery is decorated with owls, so I used the Owl Be Here stamp set.  I didn’t have a die large enough for the size of branch I needed so I cut my own.  Then I embossed it with a woodgrain embossing folder and sponged it with ink.

The flowers were diecut with the SNSS Kindness dies and accented with the Small Leaves.  I also diecut the Clouds and Sun with SNSS dies and the sun was accented with one of the Stars Dies.  The butterfly is from the Majestic Monarchs dies and the banner flags are from the Pennants & More dies.  Lastly, I added a single heart from the Heart Dies.

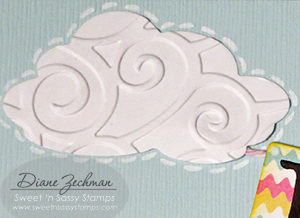
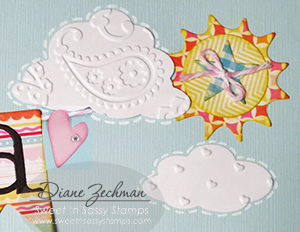
One of my favorite parts is the embossed clouds!

Besides owls, the nursery has some paisley so I made sure to add a paisley cloud.  I couldn’t help but to sneak in some tiny embossed hearts too!

I hope this inspires you to create some framed art of your own.  I sure had fun creating this one!  I almost changed my name so I could keep it.  😉

Have a blessed week, friends!

stamps- Sweet ‘n Sassy- Owl Be Here; paper- white, SU! Crumb Cake, Pistachio Pudding, Early Espresso; Bazzill- Sea Salt, Basic Grey- Bittersweet, MME- Happy Day; ink- SU! Crumb Cake, Pear Pizzazz, Crushed Curry, Pixie Pink, Memento Tuxedo Black, Versafine Black, SU! Chalk marker; accessories- SU! Woodgrain embossing folder, Copics, Cuttlebug D’vine Swirl, Perfectly Paisley, and Love Language embossing folders, Cuttlebug Olivia dies, baker’s twine, Scor-Tape, dimensionals, buttons, adhesive rhinestones. Sweet ‘n Sassy dies: Clouds & Raindrops, Stars, Wish You Were Here, Hearts, Pennants & More, Small Leaves, Kindness, Majestic Monarchs.

sticky note holder and gift box

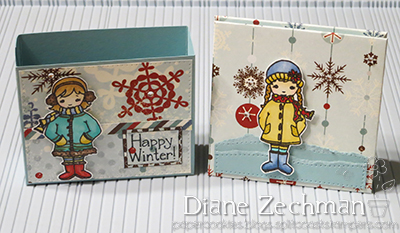
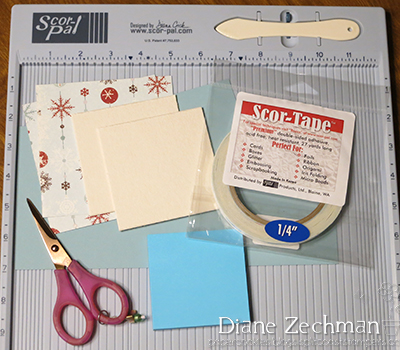
Today I have a tutorial over on the Scor-Pal blog.  The DT is updating some of the older tutorials and I recently revised the Sticky Note Holder and Gift Box tutorial with a few alterations in the measurements and directions.

Sticky Note Holder & Gift Box

By Diane Zechman

Adapted from tutorial by Bridgett Owens

Supplies:

Scor-Pal, Scor-Tape

Paper cutter

Scissors

Sticky Note pad

papers, ribbon, etc. to embellish

stamps and ink, if desired (Sweet ‘n Sassy- Winter Girls used here)

Note Holder:

2 pieces of 3 ½” x 3 ½” chipboard

1 piece of 3 ¼” x 6 ¾” cardstock or heavy patterned paper

2 pieces of 4 ½” x 4 ½” patterned paper

Gift Box:

1 piece of 4 ¾” x 10 ¼” cardstock

Sticky Note Holder

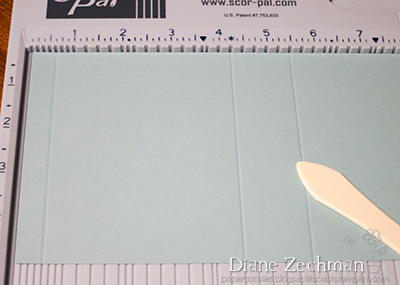
Step 1: Align the 3 ¼” x 6 ¾” cardstock along the left fence and score the 6 ¾” side @ 3 ¼” and 3 ½”.  Fold and crease scored lines.  Set aside.

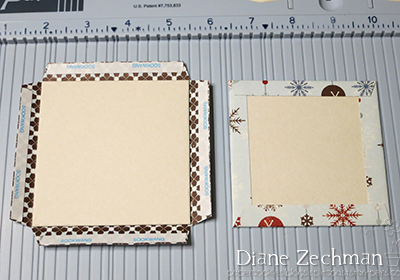
Step 2: Apply Scor-Tape to one side of each of the chipboard pieces.  Center each chipboard square onto the back side of the 4 ½” patterned paper.  Miter the corners and secure the sides down with additional Scor-Tape. 


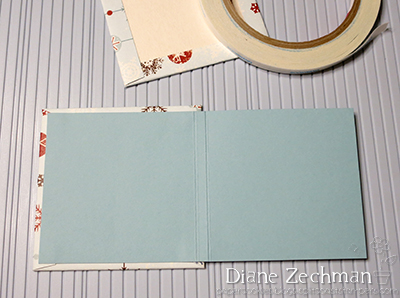
Step 3: Apply Scor-Tape to one side of your cardstock up to the first score line and center it onto one chipboard square. Repeat this process for the other chipboard cover.

Step 4: Adhere sticky note pad to the inside and decorate as desired.

Gift Box

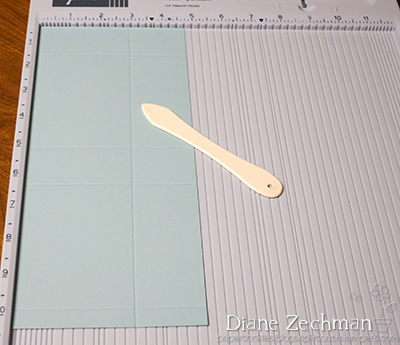
Step 5: Align cardstock along the left fence and score the 10 ¼” side @ 1/2” and 9”.

Step 6: Slide the cardstock over so the left side is at the 1/8” mark.  Score @ 4 ¼” and 5 ½”.

Step 7: Turn the cardstock 90 degrees and score @ 3”. 

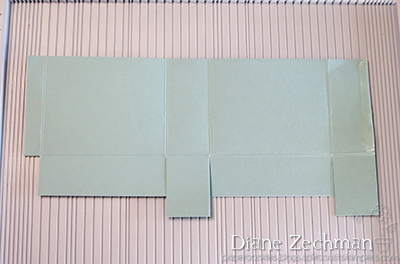
Step 8: Using scissors, cut the vertical score lines up to the horizontal score line.  Remove the small rectangular section at the bottom left.  Then trim the 2 largest flaps to 1 ¼” wide.  This will create the box bottom.  You will now have four flaps.

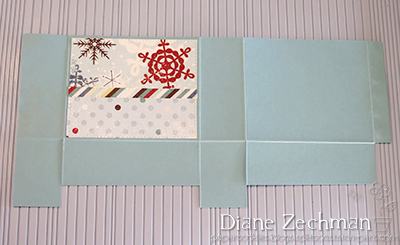
Step 9: Fold and crease all scored lines.  Adhere patterned paper layers to the front side, if desired.

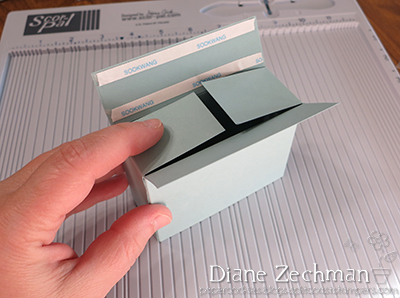
Step 10: Turn the paper over.  Fold both sides in, adhering together  with Scor-Tape to form the box.

Step 11: Fold bottom flaps in one at a time, applying Scor-Tape to adhere the flaps shut.

Step 12:  Decorate as desired.  The gift box will hold 1 or 2 Sticky Note Holders.

Stamping with Shrink Plastic

♥ Happy Valentine’s Day! ♥

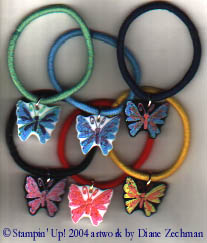
I don’t have a valentine to share today but I have something else fun. I’ve been stamping on shrink plastic again…it’s been a little while since I played with it.  I wish I could find the charms I made years ago but apparently I tucked them away pretty safely because I can’t seem to locate them.  lol.  The first charms I made were 10 years ago and I will add the pics I found at the end.  Here’s some more projects I’ve done.  And this week I made a few water bottle charms…
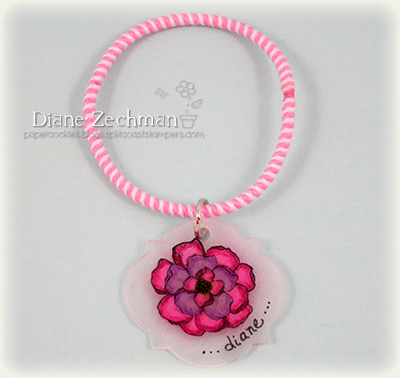
There seemed to be a lot of interest in the charm I made last week so I typed up some tips on using the shrink plastic.  I hope you try it…it’s a lot of fun!  (and easy too!)  Hopefully this will help:

Stamping With Shrink Plastic

Shrink plastic comes in white, almond, brown, black, clear, frosted (Rough & Ready), and Ink Jet (printable). I have had good results with the Shrinky Dink brand. Other brands may have additional colors but I have read reviews that they do not shrink as evenly/consistently.  I bought my plastic at Michael’s.

For best results the side of the shrink plastic you work on should be slightly roughened or sanded. Some shrink plastic comes with one side already roughened. Use a fine sanding block or rubbing two pieces together will also lightly sand it. The rough surface gives it some “tooth” to grab color from the pencils and it is difficult to get some inks to set on the shiny side.

Die cut, punch or cut shrink plastic with scissors to desired shape.  If fussy cutting the image after stamping, be careful not to smear the ink if it’s not dry.

When choosing your rubber stamp, consider the size and style of the image. Don’t choose an image too small or detailed as it may not turn out well after it is shrunk. The plastic will shrink up to about 1/3 of its original size.

Stamp the image on the shrinkable plastic. StazOn is perfect, but other inks such as Brilliance will also work if they are heat set.  If you don’t plan to color the image, you can set it and shrink it at the same time! You may need to experiment with various inks. Some will not dry even if you shrink the plastic.  Acrylic paints are also supposed to work well, although I’ve never tried them.

Color the image with regular colored pencils (even Crayola work fine). Keep in mind that colors become deeper and more saturated when the shrink plastic has been shrunk. Use a shade or two lighter than desired. StazOn and Copic inks or Sharpies cannot be used together. However, if you use clear shrink plastic, you can stamp on one side and color on the other. That way, your inks never touch. Keep in mind that you cannot blend Copics on the plastic like you can on paper. Trying to blend them may smear, puddle and remove the ink.

Remember to punch any desired holes before baking!  Use a 1/4″ hole punch for charms.

Shrink the image in the oven according to the manufacturer’s instructions or use a heat tool to shrink the image. When the plastic shrinks, it will curl. Make sure to heat the image completely… the piece of plastic will return to a flat shape. Shrink plastic is very light so when using a heat tool, it is a good idea to shrink it inside a shallow box lined with foil or use a stylus tool inside a punched hole to keep the hot air from blowing the pieces away.

When it is completely shrunk I like to press down on the plastic with a wood block or other flat object to flatten it even more as it cools.  It will cool quickly!

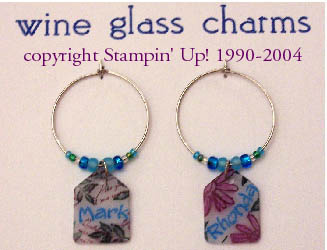
Attach shrink charms to an “Ouchless” elastic hair band or a wine glass charm ring (found in craft and jewelry supply stores) with a jump ring to create Water Bottle Charms or Wine Glass Charms. Write names on them with ultra fine point permanent markers before shrinking. Add beads to wine glass charm rings.

Use a Krylon pen on the edges if desired to finish your embellishments beautifully.

As I mentioned, I couldn’t find a lot of the pieces I made years ago but here’s a few pics from 2004.  Sorry for the poor quality photos!  The first two are water bottle charms.

Thanks for visiting and let me know if you try them!

Today’s pic: stamps- SU! Secret Garden; ink- Stazon black, ultra fine point Sharpie; accessories- SU! Window Frames dies, hole punch, colored pencils, jump ring, pliers, “ouchless” hair band.

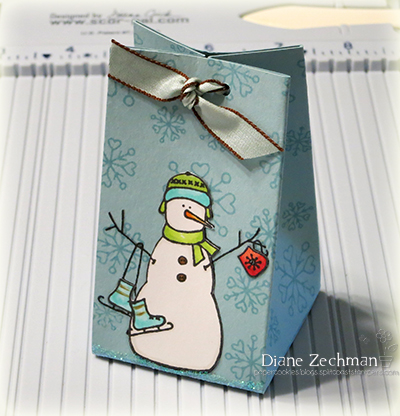
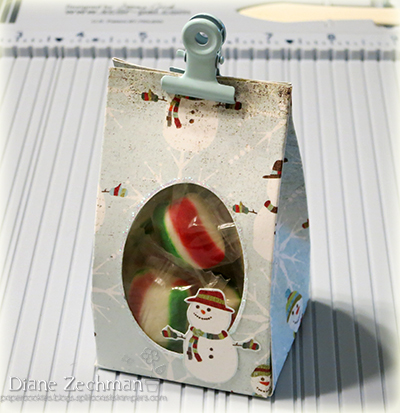
snowman treat box

The Scor-Pal DT is busy updating some of the tutorials on the Scor-Pal site and I recently updated the 2-4-6-8 box tutorial.  It’s a quick & simple, tried & true favorite!

2-4-6-8 Box

By Diane Zechman

Supplies:

Scor-Pal, Scor-Tape

Paper cutter

Scissors

Hole punch

Ribbon

5 1/2 x 8 1/2 piece of cardstock (1/2 sheet) or heavy patterned paper

Stamps and ink, if desired (Sweet ‘n Sassy- Snowy Hello used here)

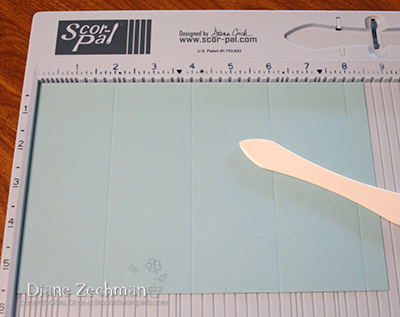
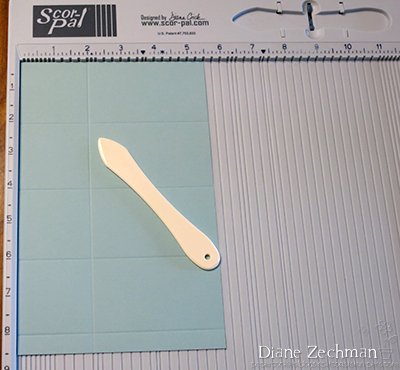
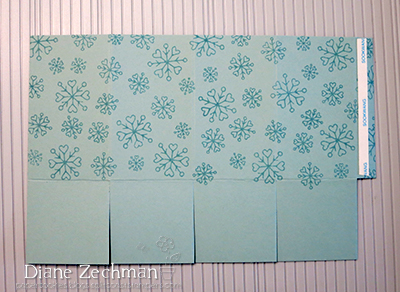
Step 1: Align paper along left fence and score the 8 ½” side @ 2”, 4”, 6”, and 8”.

Step 2: Turn the paper 90 degrees and score the 5 ½” side @ 2”.

Step 3: Using scissors, cut the vertical score lines up to the horizontal score line.  Remove the small rectangular section at the end.  This will create the box bottom.  You will now have four 2” flaps.
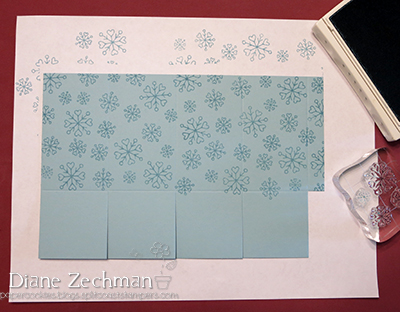
Step 4: Stamp cardstock (or add patterned paper) if desired.  
Step 5: Fold and crease all scored lines.  Apply Scor-Tape to the long tab on the right side; peel off paper backing.
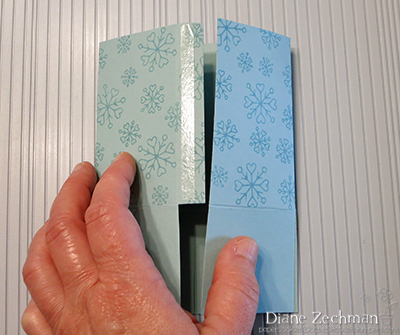
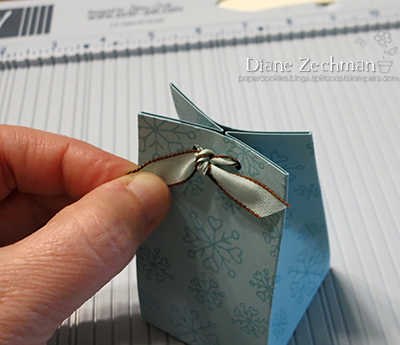
Step 6: Turn the paper over.  Fold both sides in, adhering together to form the box.

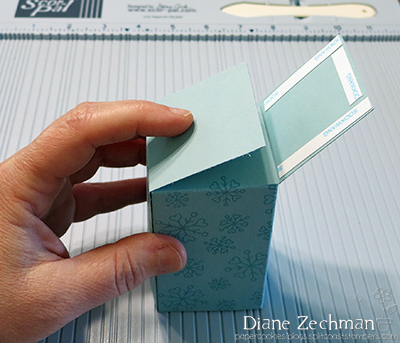
Step 7: Fold bottom flaps in one at a time, applying Scor-Tape to adhere the flaps shut.

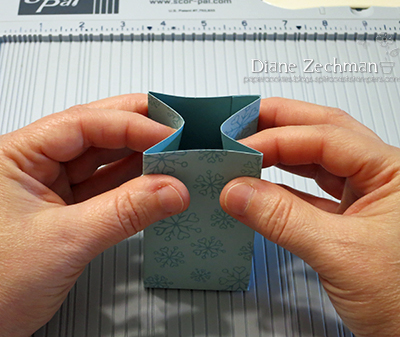
Step 8: Push the top of two opposite sides in and squeeze the remaining two sides together like a milk carton.

Step 9:  Hold firmly and punch two 1/8” holes near the top.  Thread ribbon through holes and tie shut.

Step 10:  Decorate as desired.

Variations:

Punch or diecut a window in the box before assembling; line the hole with a piece of acetate secured with Scor-Tape.

Instead of a ribbon closure, try using a metal clip to hold it shut.

Make the box from clear acetate for a see-through favor box.

Vary the height of the box by changing the length of the 5 ½” side of the paper.  A full sheet of cardstock will make a tall, skinny box.

Try changing the measurements to create a rectangular box. Start with 11″ wide paper and score @ 2″, 5″, 7″, and 10″.

my furry valentine

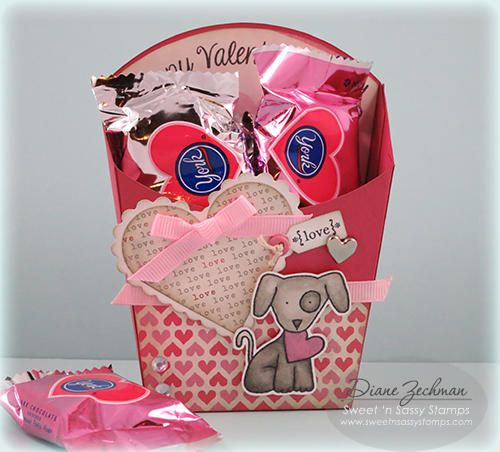
Hello friends!  It’s time once again for another Challenge Chicks Challenge!  We’re a small group of friends who post a new challenge on the first Sunday of each month…no stress, no deadlines…just for fun!  This month it is my turn and my challenge theme is “My Furry Valentine”…use any kind of animal to make a Valentine!  I was going to make a card and then I changed my mind and decided on a treat box.   Here’s my furry valentine…

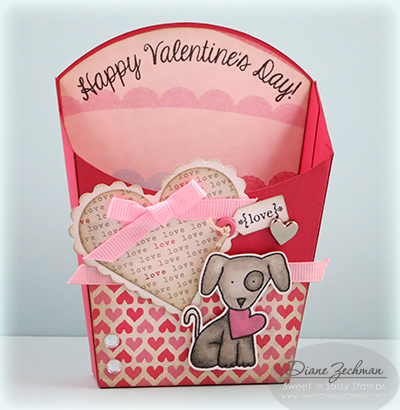
I used the puppy from my Sweet ‘n Sassy Valentine Critters and popped him up on the front.  The “Happy Valentine’s Day” sentiment was placed on the acrylic block in a curve so it could be stamped across the top of the back and align to the curved shape of it.

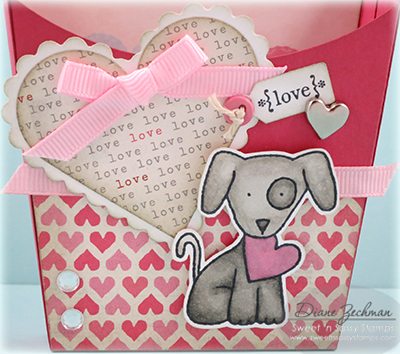
A close up…

I love the Sizzix XL dies and this Fry Box is one of my faves.  I see it is now only $7.99 on the Sizzix site…wow!

Please join us and create a Furry Valentine… then share it on our Facebook page!  Also, you can upload it to the Splitcoast gallery…please use the keyword CHXFEB14.  Now be sure to click on the links below to check out what the other Chicks created!

stamps- Sweet ‘n Sassy Valentine Critters, SU! Tiny Tags; paper- white, SU! Primrose Petals, MME- Love Me; ink- Memento Tuxedo Black, SU! Sahara Sand; accessories- Sizzix XL French Fry Box die, Heart Nestabilities, Scor-Tape, Copics, ribbon, rhinestones, SU! Jewelry Tag punch, heart brad, button, thread.

Have a great week, friends!  I hear Ol’ Phil saw his shadow.  And there’s more snow is in the forecast.  🙁

popping the question

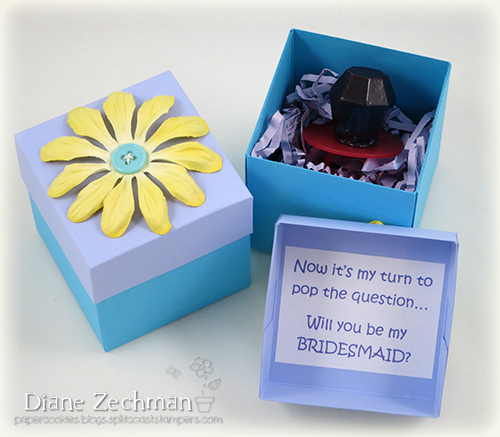
There are lots of unique trends these days in wedding planning.  One of which comes shortly after the soon-to-be bride answers “Yes!” to her groom.  Some brides are choosing to ask their best gals to stand by their side in fun, creative ways…such as a little box with a Ring Pop inside and a question of their own.

I made several of these boxes a few months ago but forgot to share them.  I remembered when I saw Scor-Pal’s theme for their first Challenge (starting today)…Flowers!  Here’s some measurements for my project if you want to make them too.  

For the base: start with a 7 1/2″ square.  Score all sides with a Scor-Pal @ 2 1/2″.

For the lid: start with a 4 9/16″ square.  Score all sides @ 1″.

Cut tabs on each side of base and lid; assemble according to basic box making directions, using Scor-Tape to adhere tabs. 

Now come join our challenge and show us your flowers! 

paper- SU! Tempting Turquoise, Almost Amethyst; accessories- Scor-Pal, Scor-Tape, Prima flower, button, Ring Pops, paper shred. 

a purrrfect gift card box

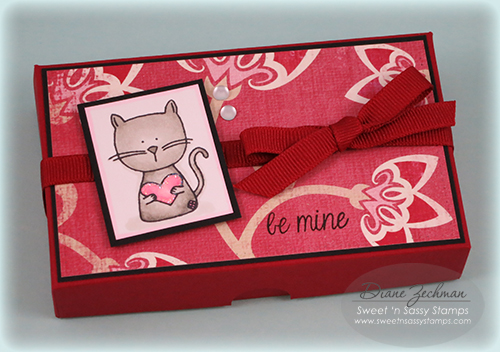
Each year at Christmas we give our nieces and nephews gift cards to their favorite stores.  This year I made some gift card boxes using this tutorial to place them in.  Unfortunately, I never took a photo of the boxes I made.  With Valentine’s Day approaching next month, I decided to make another box using my Valentine Critters set that will be released later this week.

The main image was simply stamped and colored, with a little Stickles applied around the heart.  The box was easy to make using the Scor-Pal and Scor-Tape.  It stays closed on it’s own but I still added the ribbon as a finishing touch.

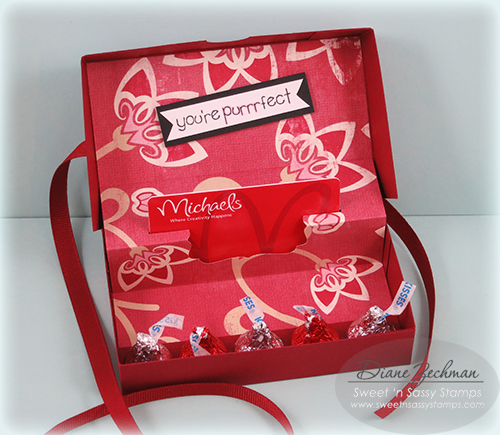
I kept the inside simple as well, only adding a matching sentiment. 

Oh, and a gift card too!  😉

Be sure to check out the full release Thursday night in the Splitcoast member company forum and on the Sweet ‘n Sassy website after that.

stamps- Sweet ‘n Sassy Valentine Critters; paper- My Mind’s Eye- Quite Smitten, white, black, SU! Cherry Cobbler; ink- Memento Tuxedo Black; accessories- Scor-Pal, Scor-Tape, SU! Decorative Label punch, circle punch, tracing wheel, Copics, ribbon, Stickles, rhinestones.

a turkey treat cover

I’m popping in a day early to wish ALL of you a very Happy Thanksgiving!  May your blessings be many!

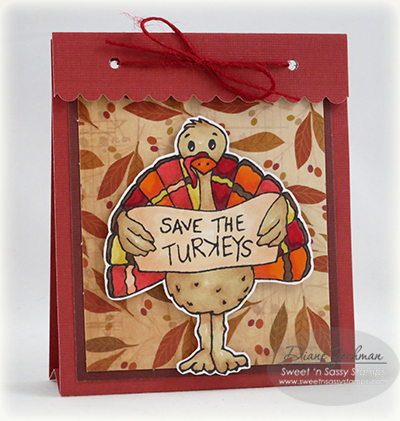
I’ve been participating with the daily November Facebook posts about what you are thankful for.  We have a LOT to be thankful for!  The list is long!  But for today.. I am thankful for our mail carrier who travels in the good… AND not so good weather to deliver our mail.  So I made her a little chocolatey treat.

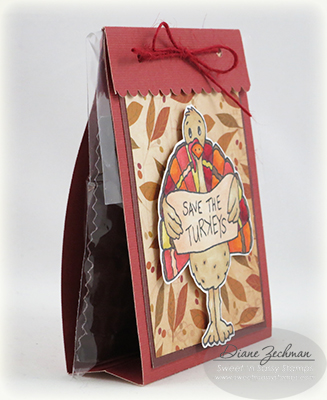
Here’s a side view…with the Hershey’s and M&M’s inside.

The turkey is from Sweet ‘n Sassy Stamps and you can find directions for the treat cover here.

Have a wonderful Thanksgiving!

stamps- Sweet ‘n Sassy- Save the Turkeys; paper- white, DCWV Autumn Melody; ink- Memento Tuxedo Black; accessories- Scor-Pal, Scor-Tape, Copics, foam tape, Sweet ‘n Sassy Bookmarks & More dies, twine, cello bag, candy, Crop-A-Dile.

a holiday hop with Scor-Pal and Magnolia-Licious

Hello!  Today the Scor-Pal team was invited to hop along with the Magnolia-licious team in their Holiday Blog Hop.  We’ve created lots of projects to get you in the holiday spirit!  More details and challenge info can be found on the Magnolia-licious Challenge Blog.

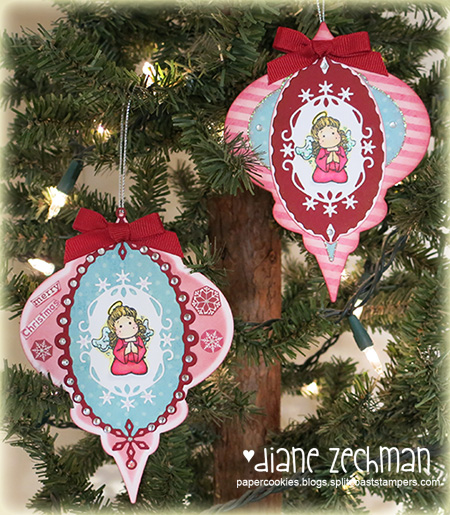
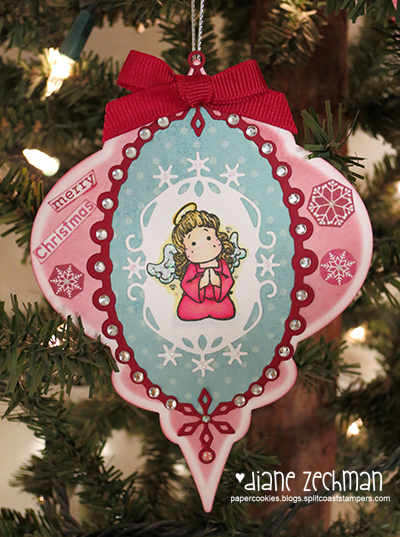
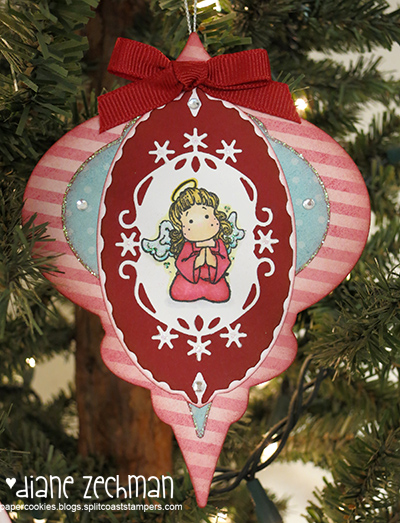
I created 2 ornaments with the Magnolia Mini stamp called Angel Tilda.  I also used the Memory Box Peaceful Snowflake Frame Set of dies, found in the Magnolia-licious store.  My Scor-Tape was used to attach the silver cord to the ornaments (between the front and back layers) and adhere the ribbon bows to the top.

These Memory Box dies are the perfect complement to the Mini Magnolias!  I love the red frame diecut and chose to add small rhinestones to each circle.

I didn’t want to throw away the center of the diecut that was cut from the red cardstock so I created a second ornament with it.  I think they go together nicely!

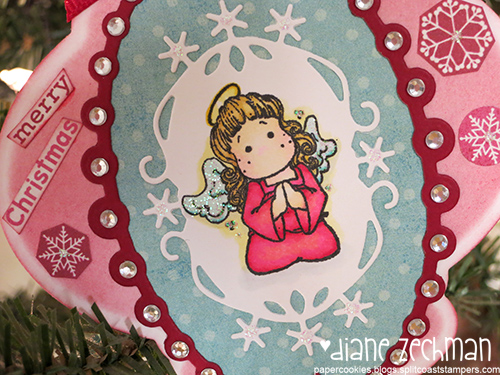
I colored Tilda with Copics.  Here’s a closer view.

Now, here’s how to Hop/Play/Win…

There’s TWO WAYS TO WIN for HOPPERS/Three Winners in Total:

#1 – Gather the letters and clues on each blog, then unscramble the letters to complete a phrase.

When you think you have it correct, email the finished phrase to the email listed on the Challenge Blog…do not leave a comment here with your answer! One winner will randomly be chosen from those that get it CORRECT to win a Surprise Gift Package (value $50) from Magnolia-licious.

#2 – For the month of December (deadline runs thru the 31st) you can enter a HOLIDAY/WINTER themed project at the Challenge Blog in the InLinkz….First Place winner will win a Surprise Gift Pack (value $100) & a Runner Up winner will be chosen randomly from those entries for a Surprise Gift (value $50) from Magnolia-licious.

You should have arrived at my blog from Dena Concienne’s blog

And now you will hop on over to Karen Stark’s blog.

BUT…before you go….HERE’S the letter you need to gather from my blog:  r

Enjoy the hop and good luck!

stamps- Magnolia Mini- Angel Tilda; paper- white, SU! Cherry Cobbler, MME- Merry Little Christmas; ink- Memento Tuxedo Black, SU! Cherry Cobbler; accessories- Spellbinders 2010 Heirloom Ornament die, Memory Box- Peaceful Snowflake Frame Set dies, Copics, Scor-Tape, Stickles, rhinestones, ribbon, silver cord.