Category Archives: 3D and altered art

Winter Girls

Welcome to day 4 of the Sweet ‘n Sassy November feature Blog Hops!

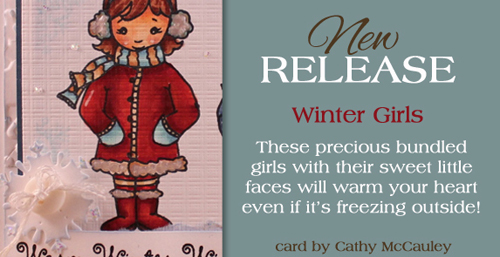
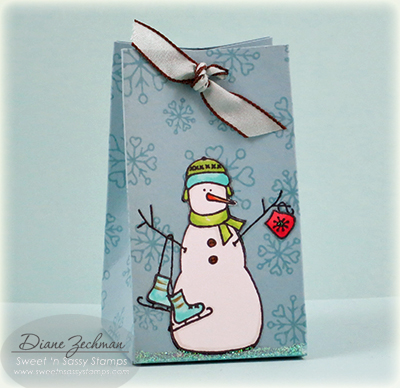
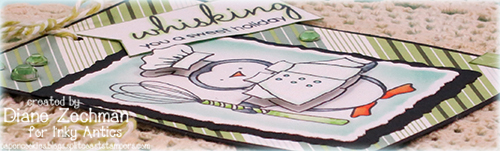
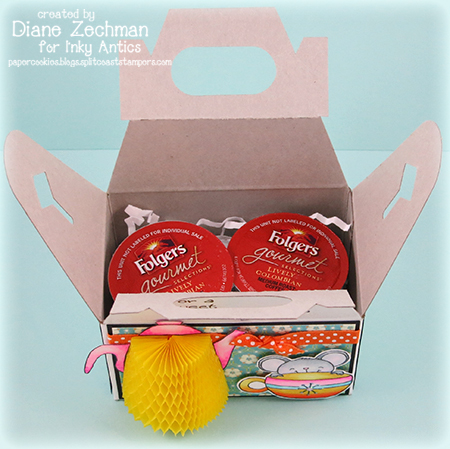
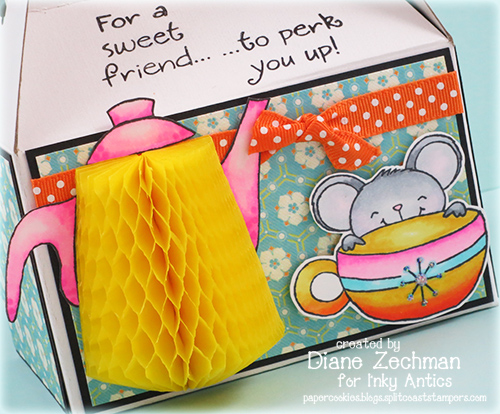
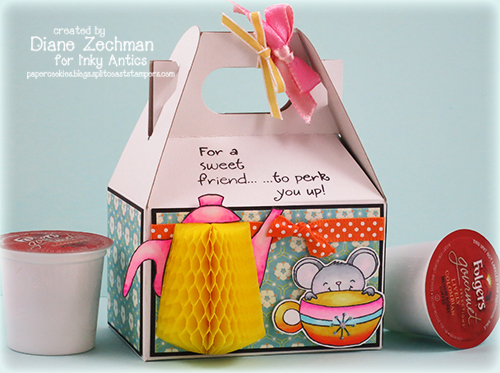
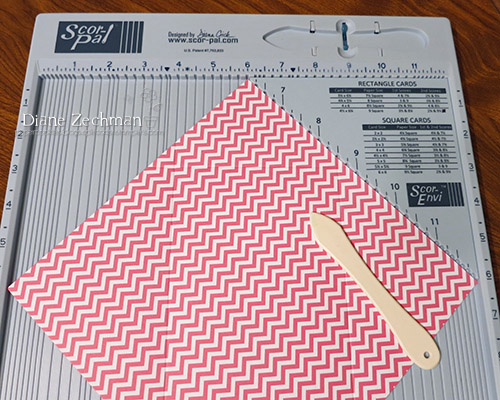
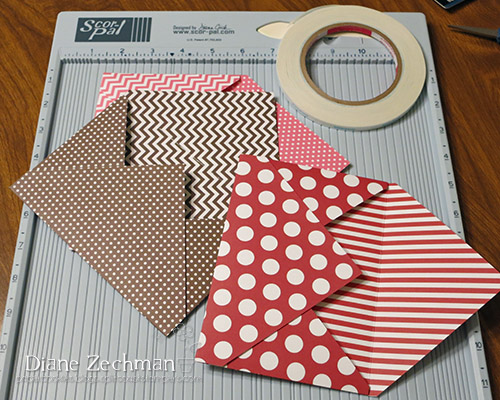
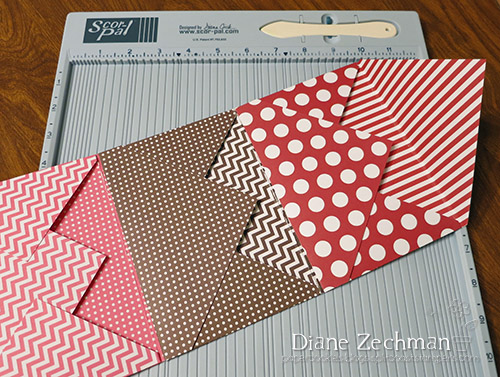
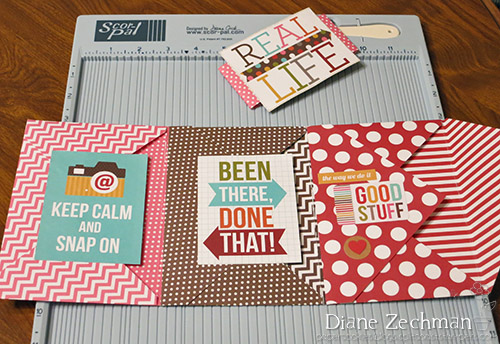
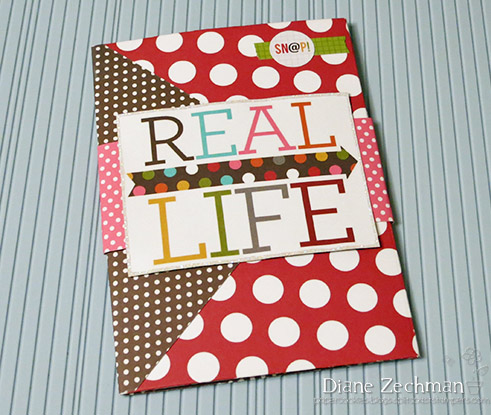
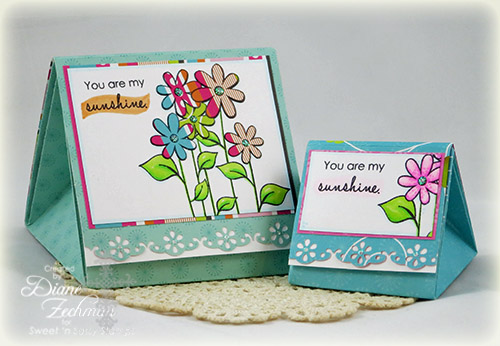
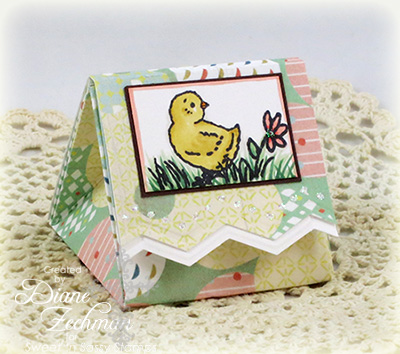
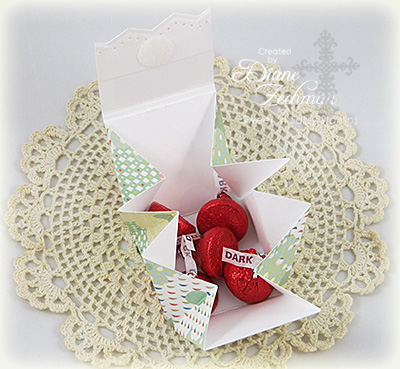
Today we’re featuring Korin’s precious new Winter Girls stamp set.  Instead of a card, I made a post-it note holder and little gift box for it to sit inside.  Check back…I will post a tutorial for this soon!

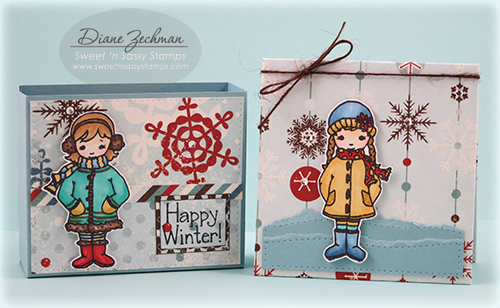
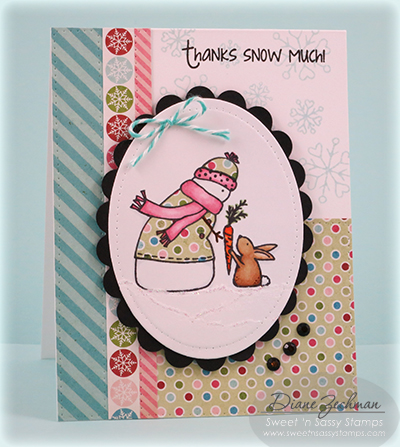
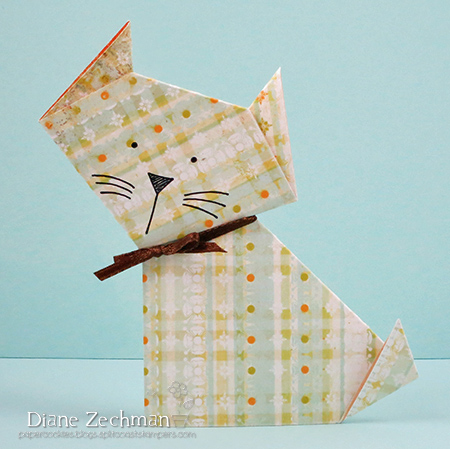
These sweet girls are perfect for your wintertime cards and projects.

Check out more samples made by our DT on the Sweet ‘n Sassy blog.

Be sure to leave a comment on each of the blogs along your journey because YOU could be a lucky winner!  We’re giving away (6) $15 store credits (1 winner will be chosen from each of the 6 blog hops).

The deadline to comment for a chance to win is midnight EST Friday, November 15th.  The list of winners will be announced on our website homepage by Monday, November 18th.

Thanks so much for joining us!  Enjoy the hop!

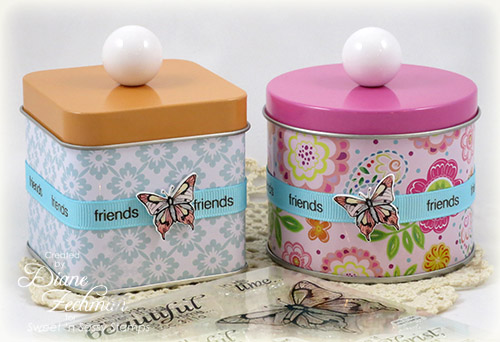
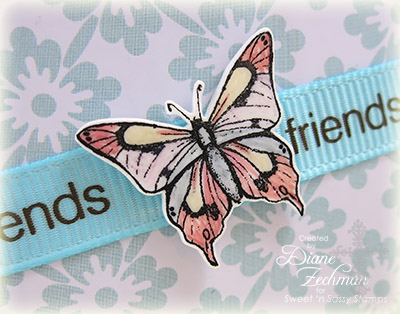
stamps- Sweet ‘n Sassy Winter Girls; paper- white, SU! Baja Breeze, Echo Park- Wintertime; ink- Memento Tuxedo Black; accessories- Scor-Pal, Scor-Tape, chipboard coasters, post-it note pad, Copics, rhinestones, dimensionals, tracing wheel, twine.

Snowy Hello

Welcome to day 2 of the Sweet ‘n Sassy November feature Blog Hops!

Today we’re featuring my new Snowy Hello stamp set!  Squeee!  I am LOVING all the cards that the DT has made!  Be sure to hop around and see them all.

I made a card and a sweet little 2-4-6-8 treat box to share with you today.  First, here’s the CAS card in gray and red with one of the snowmen…

Next, I used the same snowy image to make a little wintery treat…

And if you missed the card I posted last week, here it is again.  You can find details on this one here.

Here’s the full set!!!

Check out more samples made by our DT on the Sweet ‘n Sassy blog.

Be sure to leave a comment on each of the blogs along your journey because YOU could be a lucky winner!  We’re giving away (6) $15 store credits (1 winner will be chosen from each of the 6 blog hops).

The deadline to comment for a chance to win is midnight EST Friday, November 15th.  The list of winners will be announced on our website homepage by Monday, November 18th.

Thanks so much for joining us!  Enjoy the hop!

Card: stamps- Sweet ‘n Sassy Snowy Hello; paper- SU! Going Gray, Basic Gray, white; ink- SU! Basic Gray; accessories- Sweet ‘n Sassy Bookmarks & More dies (scallop border), SU! Cherry Cobbler ribbon, Scor-Tape, snowflake brad, Copics, tracing wheel.

Treat Box: stamps- Sweet ‘n Sassy Snowy Hello; paper- SU! Baja Breeze, white; ink- SU! Baja Breeze, Memento Tuxedo Black; accessories- Scor-Pal, Scor-Tape, Copics, hole punch, ribbon, Stickles.


baking penguins

I’m back with another Sunday post as September guest designer for Inky Antics.  Today my project is a small gift jar with cookie mix inside using the Whisk Penguin image from the Baking Penguins clear set.

I created a tag and added a layer with the penguin.  He was colored with Copics  and I sponged a bit inside the diecut shape.  Here’s a close up.

His hat and shirt were popped up with dimensionals.

A strip of patterned paper was attached around the side of the lid.  Inside the jar I layered the ingredients from the recipe for the cookie mix that I found here.  I used M&M’s that I had on hand for this project.  The colors of the candy didn’t quite match my patterned papers so I added an additional strip of paper around the top of the jar to conceal the colored candy inside.  If you have candy to match your project, though, it is pretty to see that layer of candy at the top of the jar!

“Whisking” you a very happy Sunday.  Go say hello to Jackie on the Inky Antics blog and have a great week, friends!

stamps- Inky Antics Baking Penguins; paper- white, black, SU! Wintergreen; ink- Memento Tuxedo Black, SU! Pool Party; accessories- Spellbinders Large & Small Deckled Rectangles, Copics, dimensionals, SU! Tag Corner punch, baker’s twine, rhinestones, 12 oz. jar and lid, cookie mix ingredients.

coffee mouse

*this is my second post today…please scroll down for the Sweet ‘n Sassy blog hop*

Coffee….blech!  Don’t like it…at all.  I will not pour it in a mug.  I think I’d rather eat a bug.  (well…maybe not)  I will not brew it here or there.  I will not drink it anywhere!

But…..I will get crafty and make a little coffee treat for a sweet friend.  ;^)

I mean…seriously…who could resist this cute Coffee Mouse?

This is my second project as I guest design for Inky Antics this month.  I wanted to make something 3-D with this coffee set and I found this purchased gable box in my stash.  It was the perfect size to fit 2 Keurig K-Cup pods inside!

I thought decorating the outside with the Inky Antics Honeycomb papers would be a fun change from the normal placement on the inside of a card.  (Those Honeycomb papers are fun to create with and they are on sale this month!)

Note: The ribbons are only tied to the front flap so they won’t need to be untied when opening the box.

I hope you liked my coffee treat.  Check back for more Inky projects this month.  Now go say hello to Jackie on the Inky Antics blog!

stamps- Inky Antics Coffee Mouse HoneyPOP; paper- DCWV Citrus Stack; ink- Memento Tuxedo Black; accessories- Inky Antics Honeycomb paper, purchased Gable Box, Copics, Keurig K-cup pods, Scor-Tape, ribbon, Stickles.

chocolate chunk- yum!

I’m back again today with another sample project for the Dare to Get Dirty challenges.  Today I made a card for Angela’s (ArizonaMaine) challenge.  You can see all the details for her challenge here.

What would be better than fries in the Sizzix French Fry Box?  Why a chocolate chunk cookie from Sam’s Club, of course!  😉  I dressed it up with a cute Penny Black critter.  It had a little ladybug on the bottom which I didn’t want on this project so I added another flower instead.

Thanks for the fun challenge, Angela!

stamps-Penny Black- Greetings, SU! Pretty Petites (yum); paper- SU! Parisian Breeze, white; ink- Memento Rich Cocoa & Tuxedo Black; accessories- Sizzix French Fry Box, Scor-Tape, ribbon, Copics, adhesive pearls, SU! Petite Curly Label punch.

origami kitty

I LOOOVE shaped cards.  Love ’em!  So a few days ago I thought it would be fun to make a kitty card.  Not sure why.  Just for fun.

I thought it might be fun to see how difficult an origami kitty would be so I googled and found a super EASY one.  You gotta try it.  Here’s a diagram.

And here’s the kitty I made…

You can start with any size squares you want.  I started with two 4″ squares of Fancy Pants Hopscotch paper.  (A Scor-Pal helps to get nice folds if you have one.)

Have a great holiday weekend!  Thanks to all who serve our country!

envelope album

Hi!  Today I have an envelope album that I made with my Scor-Pal, Scor-Tape, and the Scor-Envi

These are super simple to create and I’ve taken a few pictures along the way.  First, I started with some Simple Stories Snap! double sided papers.  I wanted to create my own envelopes but you can start with pre-made ones if you like.  Using the chart printed directly on the Scor-Envi, choose the size you desire for your project.  I wanted the envelopes to be able to hold 4×6 photos so I started with three 8 1/2″ squares.  Follow the measurements on the Scor-Envi to score all 4 sides.  Then remove the corners as shown in the directions.

Next assemble each with Scor-Tape, leaving the top flaps open.

Line them up in the order you want them and attach as shown below.  Make sure they have a little room so they easily fold (roll) up when attached together.

I decorated each envelope with Snap! cards and stickers, then made a belly band with a 2″ x 12″ strip and an additional Snap! card.

“Roll” it up and slip the band over to hold it shut.

Have fun creating envelope albums of all sizes with the Scor-Pal and Scor-Envi!

paper- Simple Stories- Snap!; accessories- Scor-Pal, Scor-Tape, Scor-Envi, 3×4 Snap! Cards and Stickers.

more triangle boxes

Yesterday I shared a triangle box I made with a slight variation of Deb Felt’s directions.  I also mentioned that I made 2 larger boxes…(See yesterday’s post for the measurements)

They are quick and easy to make with a Scor-Pal.  I paper pieced the Sweet ‘n Sassy flowers on the left and colored the one on the right with Copics.

stamps- Sweet ‘n Sassy- Happy Place; paper- Momenta- Kaleidoscope, white; ink- Memento Tuxedo Black; accessories- Martha Stewart Floral Lace edge punch, velcro dots, Copics, Stickles, Scor-Pal.

tiny triangle box

The Scor-Pal team has created Bunches of Beautiful Boxes and today I am sharing my Tiny Easter/Spring Triangle Treat Box.  The tutorial for this was done here by Deb Felts and you can also find it here on the Splitcoast site.  I’ve altered the design slightly so I included my own template below.

Instead of cardstock, I used patterned paper to create the box and then punched a decorative zigzag edge on the flap.  It is held shut with sticky-back velcro. 

The finished box has a 2″ base and is almost 2″ high…a very sweet little size!  It holds a few Hershey kisses or any other small treat or gift.  I didn’t have the chocolates in pretty spring colors, so I’ll switch out the red foil wrapped candies when I’m ready to give it away.  😉  Here it is open…

It is quite easy to make with a few scored lines using the Scor-Pal.  I didn’t want the bulkiness of all the folds on the inside of my box, so I also cut each corner off before attaching the cover.  Here’s my template showing where to cut/score.

I followed Deb’s instructions for this box, starting with a 6″ square and scoring at 2″ and 4″ in each direction.  Then I added the additional score lines and attached the 2×4 cover, scored in half.  After scoring the cover in half, I added an additional score line 1/8″ from the first to allow for bulk at the top of the box.

I also made 2 more boxes which are a little larger.  For one I started with a 7 1/2″ square and scored it at 2 1/2″ and 5″.  The cover is 2 1/2 x 5, scored in half.  For the other, I started with a 12″ square and scored at 4″ and 8″.  The cover is 4 x 8, scored in half.  I also scored an additional line 1/8″ from the first on each of those covers.

These boxes are a quick and easy project…I hope you try it!  

stamps- Sweet ‘n Sassy- Springtime Babies; paper- Basic Grey- Hopscotch, Chocolate Chip, white; ink- Memento Tuxedo Black; accessories- Scor-Pal, Copics, velcro, Martha Stewart zigzag punch, Stickles.

butterfly tin

Have you seen the Friday Feature set on the Sweet ‘n Sassy blog?  This week only the New Creature stamp set is on sale!  I just happened to be playing with this stamp set last night and made some quick & easy embellishments to add to some tins that I purchased at Michael’s.

It’s been a while since I stamped on shrink plastic so these little charms were fun to make.  I stamped the butterfly on white shrink plastic with Stazon ink.  You can see the size of the butterfly stamp in the photo.  Then I colored it in with colored pencils.  You may not see all the color very well but it will intensify and show up more after shrinking.  When using colored pencils, it also helps to lightly rub a piece of paper or fine sandpaper over the plastic to give it some “tooth” to pick up the pencil color.  Cut your image out and punch a hole at this point if you want to hang it from something.  Then I shrink it in my toaster oven.  A heat tool will work too but use a stylus or something to hold it and keep it from blowing away.  Here’s a close up…

I added the ribbon and charm with some Scor-Tape to hold them in place.

stamp- Sweet ‘n Sassy- New Creature; ink- Stazon Black; accessories- white shrink plastic, colored pencils, toaster oven, ribbon, Scor-Tape.