Category Archives: MFT

quick and simple thank yous

Happy Thursday! Today I am sharing some thank you cards that I was behind on getting in the mail. I wanted them to be company/product-specific, so I kept the designs simple to easily make them all with different supplies. My first card uses Avery Elle’s Be Zesty and coordinating dies.

Next, I used Gina K Designs retired Hygge Time for a sweet snowy card.

Here I used Lawn Fawn’s Cerealsly Awesome set & Dies. You can see the ATC that I previously made with these Here.

Nic Magnuson from Magnuson Custom Stamps is the best to work with for custom stamps! He did the cute snowman here for our Stamp & Swap event’s theme and I designed the sentiment.

I love MFT stamps and their Alpine Friends and Alpine Friends Die-namics are adorable!

I used Pink & Main’s Pocket of Sunshine (retired) and Layered Scallops A2 Rectangle Dies for the next card. These layered scallops are fun!

I used some rainbow striped paper to coordinate with the sentiment and image from the Prickley Pear Scalloped Oval stamp set.

And last, I used the Inked & Tiled stamp set that I purchased through Amy K, SU! demonstrator to create the following thank you card.

We appreciated each of these donors, plus My Sweet Petunia and Scor-Pal, for helping us to have a successful event!

birthday bunch

Happy Friday! Today I am catching up with nine of my favorites from the past year that were hanging out in my files…a bunch of birthday cards! These cards were not made for a company design team and just hadn’t been shared yet. It’s another photo heavy post today!

My first card was for a dinosaur-loving girl who turned 7. I used MFT‘s A-roar-able Friends and Lawn Fawn’s Platform Pop-Up Dies. The platform card folds flat for placing into an envelope. Strips of clear acetate were used to attach a few of the elements.

For the mini slim birthday cake card, I used… Spellbinders Stitched Fringe Cake Dies, Taylored Expressions Happy Birthday Banner and Skinny Mini Party Borders Dies, Sizzix Bold Flora Dies, and SU! Scattered Sequins embossing folder. Each cake layer was stitched by hand with white thread.

My next two cards were made in the same style, with the top half of the card front cut away. (Cut the top of the card front @ 2 3/4″) This piece is then turned 1/4 turn and adhered to the bottom front. So, for the center front layers on the first card… the black is 2 3/4 x 4 1/4, the green is 2 1/2 x 4, and the white is 2 1/4 x 3 3/4. The inside white layer is 2 1/2 x 4. Add additional cardstock and patterned paper layers as desired. Here I used SU! Artistically Inked Bundle, and Expressions in Ink dsp and Ephemera (gold foliage), plus a gold bee charm.

The masculine version was made the same way, using SU! Seaside Bay and coordinating papers.

A beautiful paper napkin was applied to the following card front for a pretty floral background. Then I used Lawn Fawn’s Pop-Up Bee Dies and You’re a Keeper stamp set to create this sweet pop-up card. LOVE the bee dies!! This card is so cute in person. I only wish I had made those wings sparkly!

Another masculine card, this one’s for a sushi lover. I used Lawn Fawn’s Let’s Roll and Sizzix Tropicool Slider Card Dies. The Sushi pops up and reveals the greeting inside as the top is pulled.

How cute are these two from the MFT Sweater Weather- In the Woods set? I kept this card CAS and spot-lighted them with some plaid circles. I followed the MFTWSC498 sketch.

Pink & Main has some terrific stamps…this is from the Beach Unicorn set. I also used the Waves Border Dies. You can see some of the glitter sparkle in the second photo.

And last for today, I was asked to make a strawberry themed birthday card for a little girl turning one. I used the Altenew Mega Number 1 die and SU! Sweet Strawberry bundle.

Have a great weekend!

2023 Stamp & Swap projects

Last month we had our 8th annual NEPA (Northeast PA) Stamp & Swap and today I’m finally sharing the projects that I made for it. Be sure to read all the way to the end for a really cool project we did!

The first one I made was for our 6×6 Recipe Swap. I used Angie Blom’s Coolest Chicks Ever digital images, which are also available as physical stamps through Unity Stamp Co.

For the ATC swap, I wanted to create a shaped ATC. This retired MFT Milk Carton Die was the perfect size. I also used Lawn Fawn’s Cerealsly Awesome set & Dies, which was a cerealsly awesome gift from a friend! 🙂 How cute! I couldn’t decide what color to make the bowl, so I did several and let the participants choose.

Several weeks prior, I found the event theme in a sentiment set of scrabble tile letters at Hobby Lobby. They already had an adhesive backing, so I just formed them in the shape of a tree and added brads for the trunk & star. I embossed the background and added a frame and ribbon.

The Mini Slimline Swap was one of the most popular. I made mine a gatefold card using my favorite Christmas plaid paper from Hobby Lobby and SU! Snow Wonder Bundle. My base is 3 x 12, scored @ 3 and 9.

For my shoebox card, I used the retired Spellbinders Sharyn Sowell Winter Friends die set, Simon Says Stamp Pine Landscape embossing folder and die set, and SnSS Christmas Sentiments. The large bunny and sentiment circle are popped up with foam tape.

A new swap that I came up with for this year’s event was a Sketch & Card Front Swap. I used the SU! Penguin Place Bundle and coordinating papers on the card here. Below is my sketch that I started with. Participants swapped both of these together…the card front & it’s coordinating sketch.

The last project that I’m sharing is the favor that we made for everyone who attended the swap. We decided this year to make the tools to use on the MISTI or other stamping platforms, but to also PERSONALIZE them. Someone from our committee (I can’t remember who) named them our NEPA tool. 🙂

We purchased mini candles from the Dollar Tree and used the glass tops, making sure to pick out the ones with a large clear space in the center of the lid. My friend, Lou Ann, and I had several hours LOL trying to get our swap words in a circle with each name inside but when we were finished, it was so worth the effort (Don’t ask me how we did it lol)! They were then printed onto colored copy papers and punched out with a circle punch. Lou Ann’s husband cut wood circles for us to place on the bottom of the glass for stability, and then we covered the base with felt. So, there’s the glass candle lid (with a plastic covering on the bottom of it), then a wood circle which we painted white, and two layers of felt circles. Each attendee was asked their favorite colors without knowing what we were making.

We used several glues and adhesives with trial & error until we figured out the right combination! Lou Ann used her Xyron sticker maker with the punched circles, so they had adhesive on top. Then I carefully adhered them in place inside the lid using tweezers to get them inside. Our committee got together and working quickly, Mod Podge was applied inside the entire lid and chunky glitter was dumped inside. Next, a fine glitter was added to fill in the empty spaces. It’s hard to capture the glitter in the photos below! When dry, E6000 glue was used to adhere the wood circle to the candle lid. Again, they were left to sit as the glue dries. Aleene’s Felt and Foam Tacky Glue worked great to adhere two felt die cut circles to the base. We finished them off by adding some ribbons with Scor-Tape. Whew! It was a lot of work but so fun!

Thanks for reading all the way through! LOL. Have a great day!

pop-up cards

Hello! Interactive cards are so much fun to create (and receive), and I have two to share with you today using the Lawn Fawn Scalloped Box Card Pop-Up Dies, Platform Pop-Up Dies, and Platform Pop-Up Add-On Dies.

First, I used the Platform Pop-Up and Add-On dies, and MFT’s retired Ride or Die stamps & dies to create a cute birthday card. The background (add-on) was cut with a fun polka dot patterned paper. There are several cute critters on wheels in this set…so hard to choose!

I was inspired by this card by Karen Amidon when I needed a masculine birthday card. I LOVED her idea of placing the lightbulb inside a sun…brilliant! 🙂 I used an old retired QuicKutz sun and a circle punch for mine. The lightbulb and test tube are attached with acetate strips. I always loved this Paper Smooches Great Chemistry set and was thrilled when I found one online to purchase! The seller shipped it immediately and it arrived just in time to finish my card! Yay!

Note: since this was for a masculine card, I simply trimmed the tiny, scalloped edge off of the box card diecuts.

Have a great day and keep warm!

lots of thanks

Today I am sharing a bunch of thank you cards that I made for the companies who donated to our all-day stamping event, the 7th annual NEPA Stamp & Swap. These companies were all SO very generous and helped to make our event a fun, successful one! Since we had quite a few donations this past year, I kept the cards pretty simple. I’ve added the cards in ABC order…lol, I can’t choose a favorite!

The first card was for Art Impressions, using one of their sweet freebie stamps. Bonnie designs the cutest images for those! I placed him on a gate-fold card with some MFT paper.

My second card is using the Altenew Extra Special Stamp & Die Bundle. Altenew has the BEST florals!

Next, I used the Avery Elle Cherry on Top stamp set. (I also purchased the dies to match!) Instead of coloring the cherries, I paper pieced them! The background embossing folder is by SU!

This sweet, little mouse is from Colorado Craft Company. I placed her onto a gate-fold card and made a few duplicates which were sent to Scor-Pal and Marci Snee (Stamp Junkies).

Here I used a Clearly Besotted set with Christmas crackers. I also paper pieced the candy on this card and covered it with Stickles.

Next is a flamingo stencil by Erin Lee Creative. I need to check out her store some more, this is a fairly new to me company. Looks like some fun things over there!

I purposely offset the stamping on these silhouettes in Gina K Designs Friendly Silhouettes. Such beautiful stamps…I am anxious to use them again!

A small window was cut from the front of this card so that the little sloth from Lawn Fawn Slow Down and Enjoy. could peek through. His backside is on the inside of the card…so cute! (I forgot to take an inside pic).

Nic from Magnuson Custom Stamps is completely awesome to work with! He helped design a set just for our event to coordinate with the theme. Go check out his site and let him help you create the stamp of your choice! Tell him I sent you. 🙂 This sweet embossing folder (Park Lane- Bloom) used on the background is one that I picked up from JoAnn’s some time ago.

MFT Stamps Backyard BBQ and the picnic table dies from their Picnic in the Park Die-namics were used on my next card. The sentiments in this set match perfectly! The grass is retired MFT dies.

Here I used Pink and Main Glossy Dots and a free Pink and Main flower image from this Digi Stamp Bundle. The window was cut with MFT Square Peek-a-Boo Window Die-namics.

Last one! I colored the sweet Chillin’ image by Unity Stamp Company to resemble a cranberry drink with orange slices. It will make an awesome glass of lemonade, too!

Stay warm and happy crafting!

more recent cards

Good morning! This is a very image heavy post today but I have quite a few cards to share. Thanks for sticking with me! I’ll try to keep the text short. 🙂

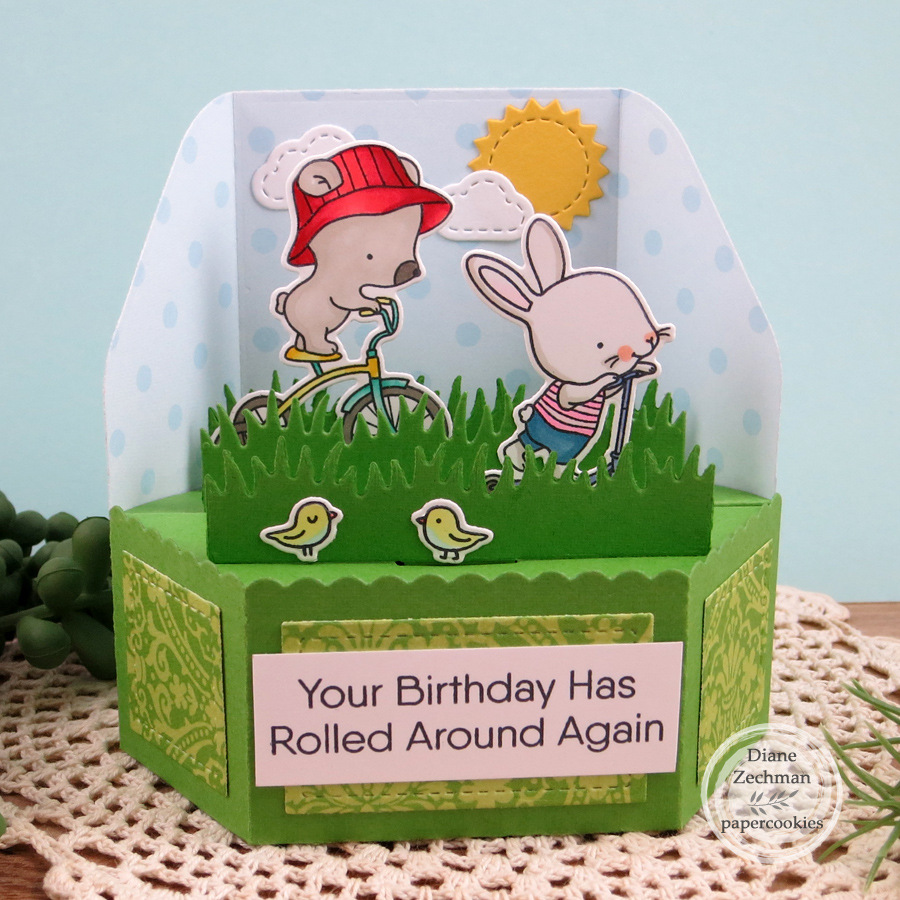
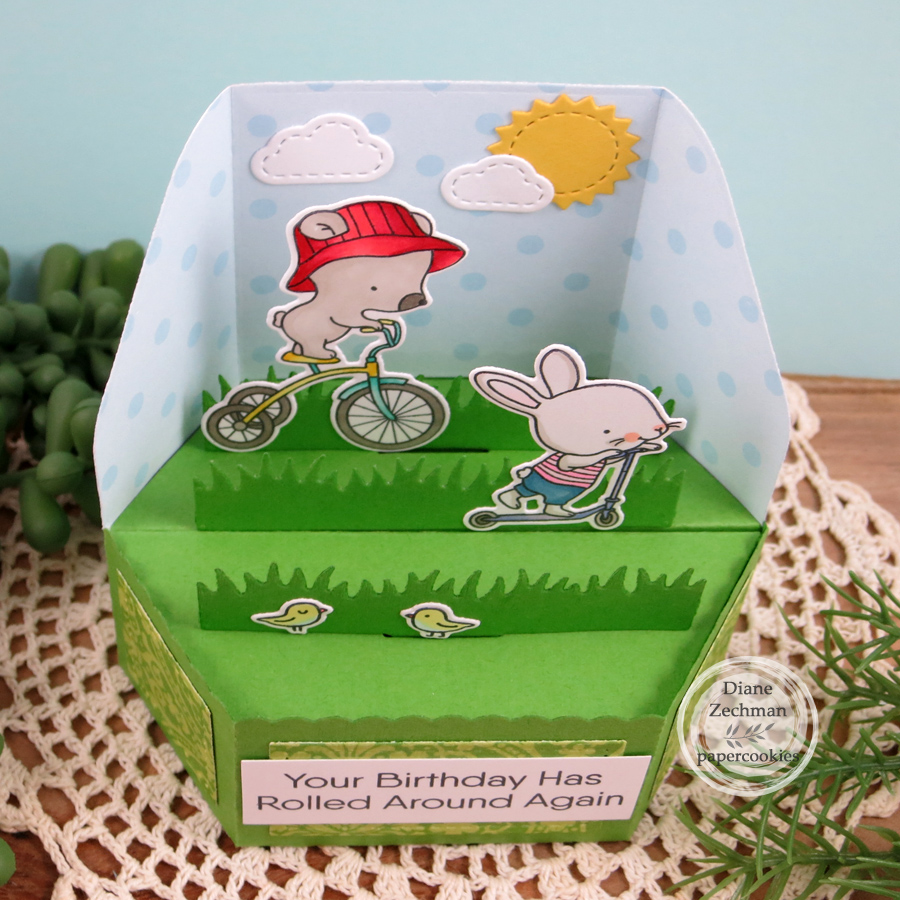
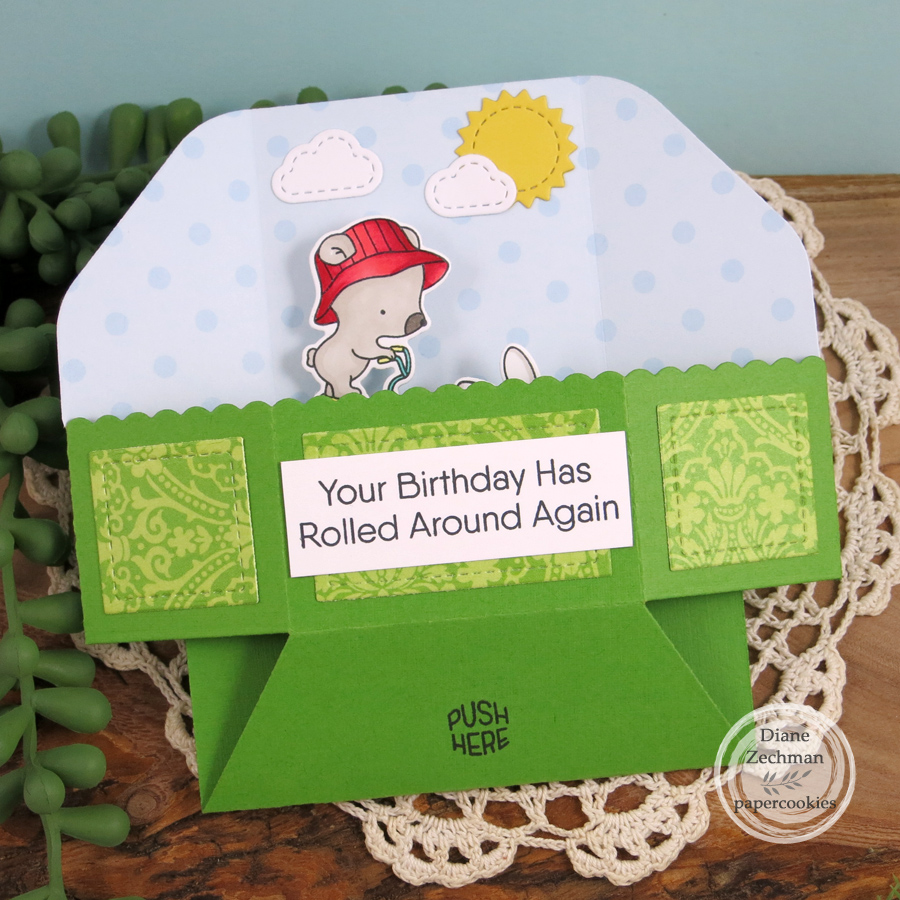
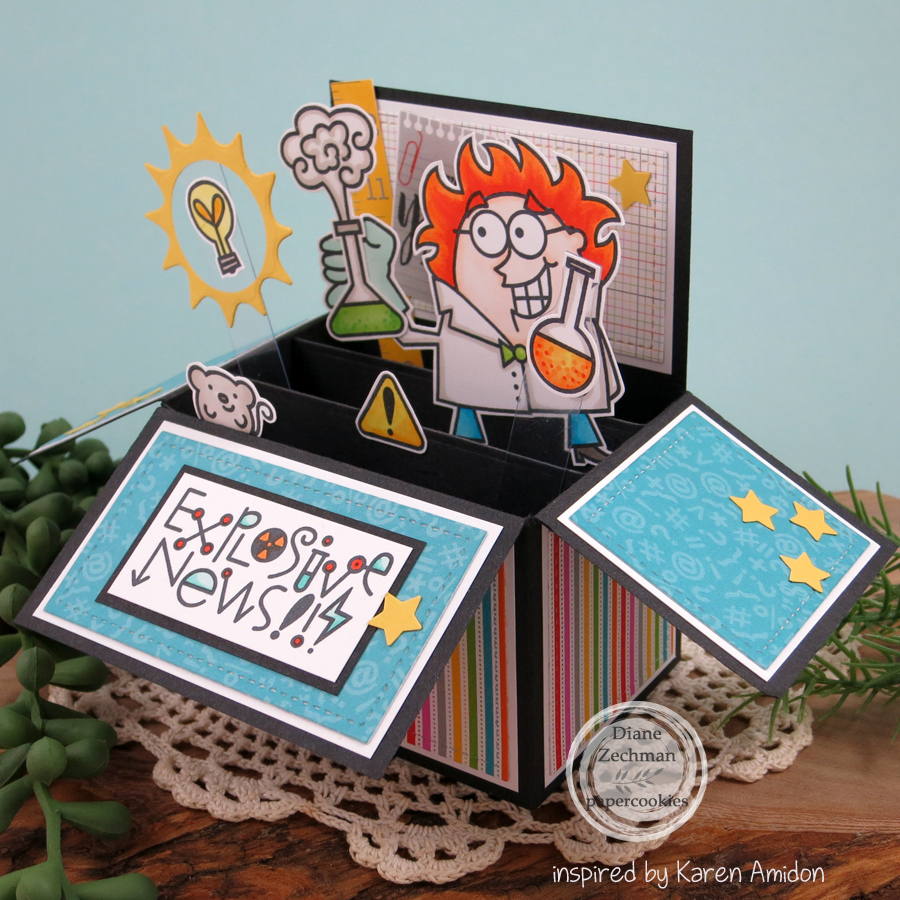
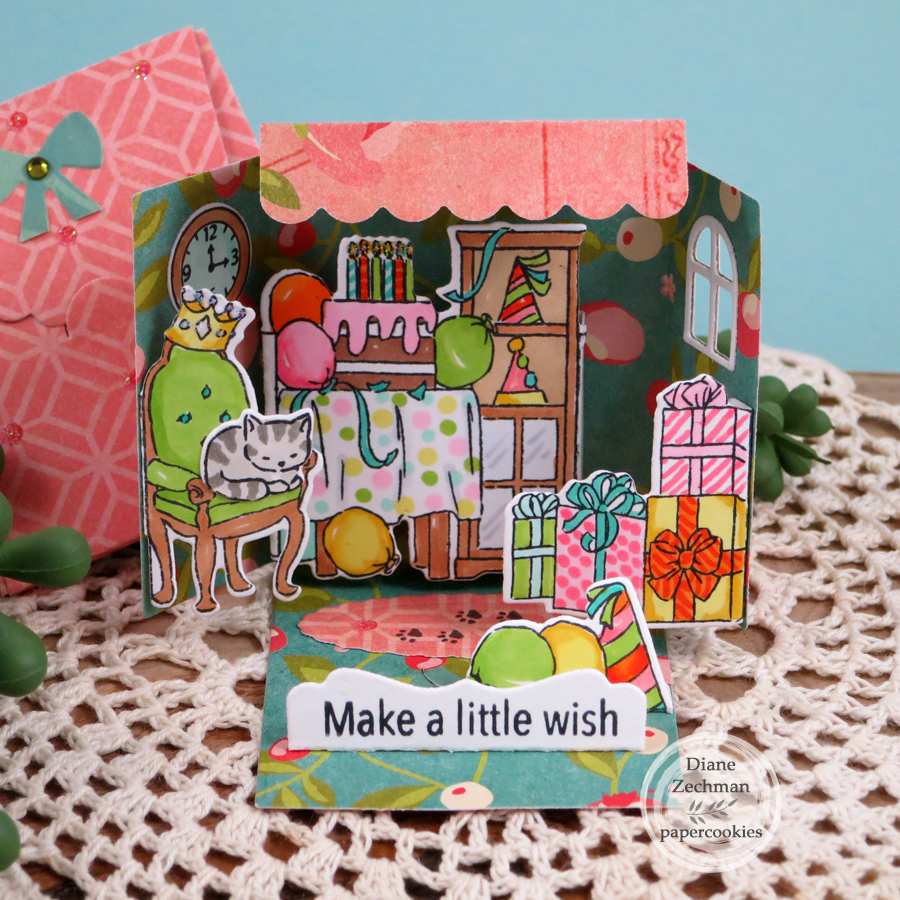
The first card uses the Art Impressions 5319- Birthday Set, 5317- MB Template Dies, 5318- MB Envelope Dies, 5323- MB Wall Accessories, and 5324- MB Cat Accessories. I made this one a few months ago and overlooked it in my files. These are so fun to create and fold up so tiny!

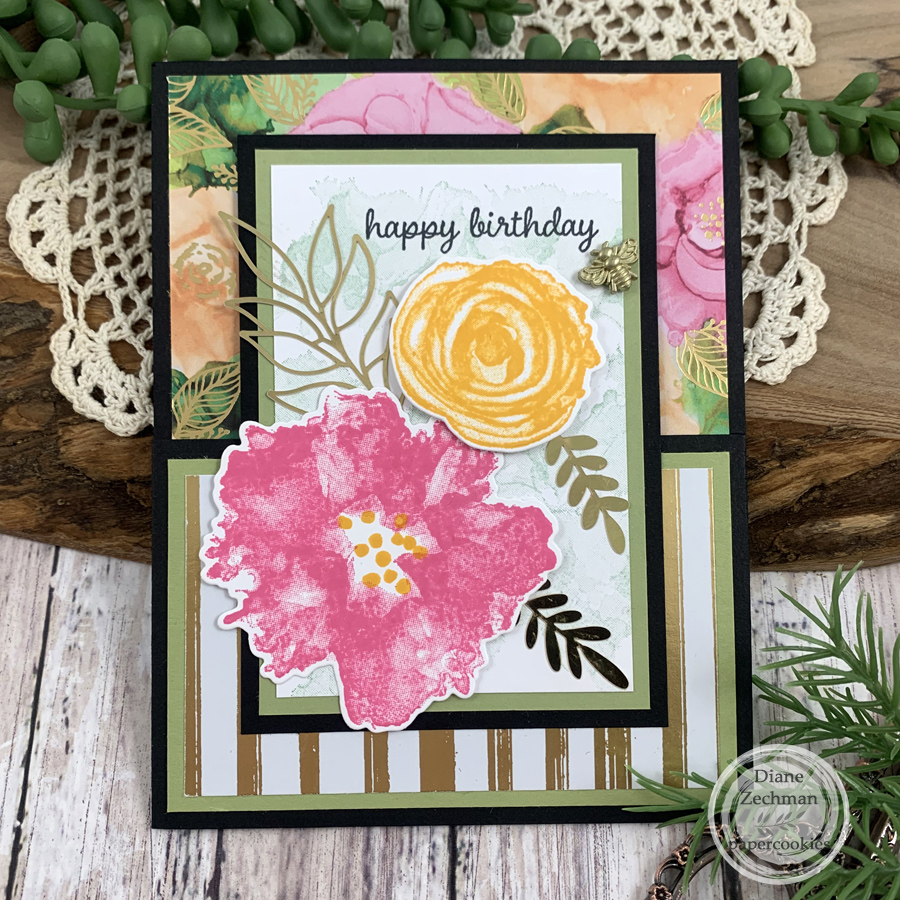
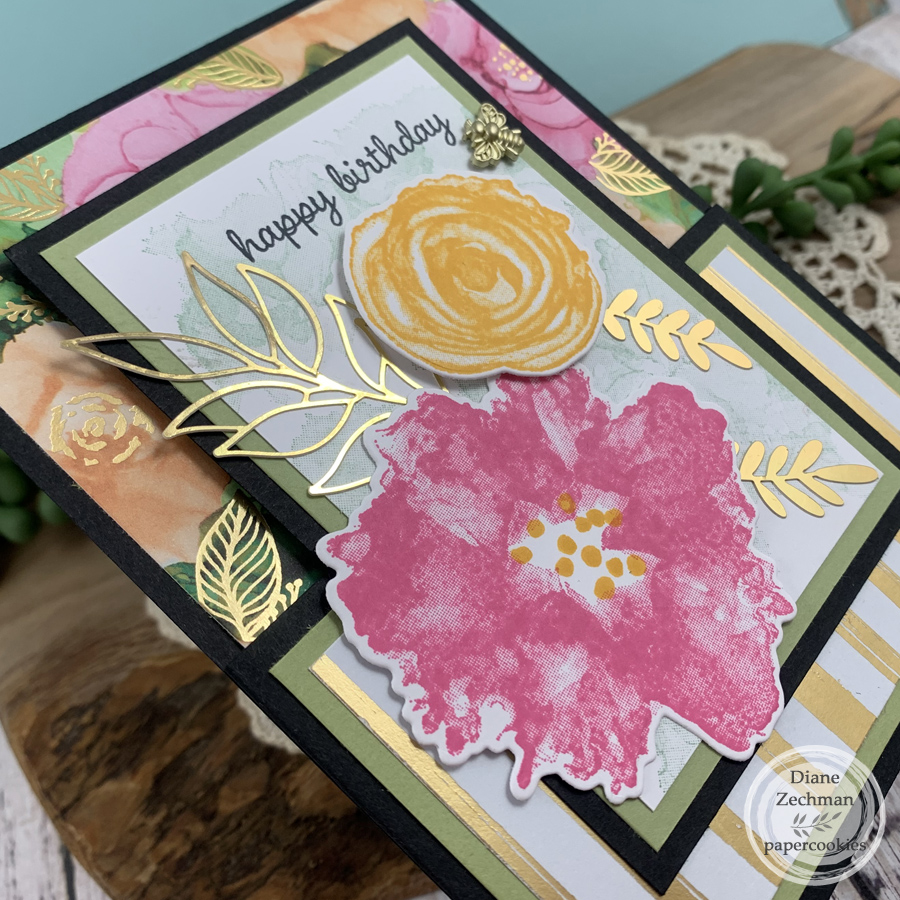
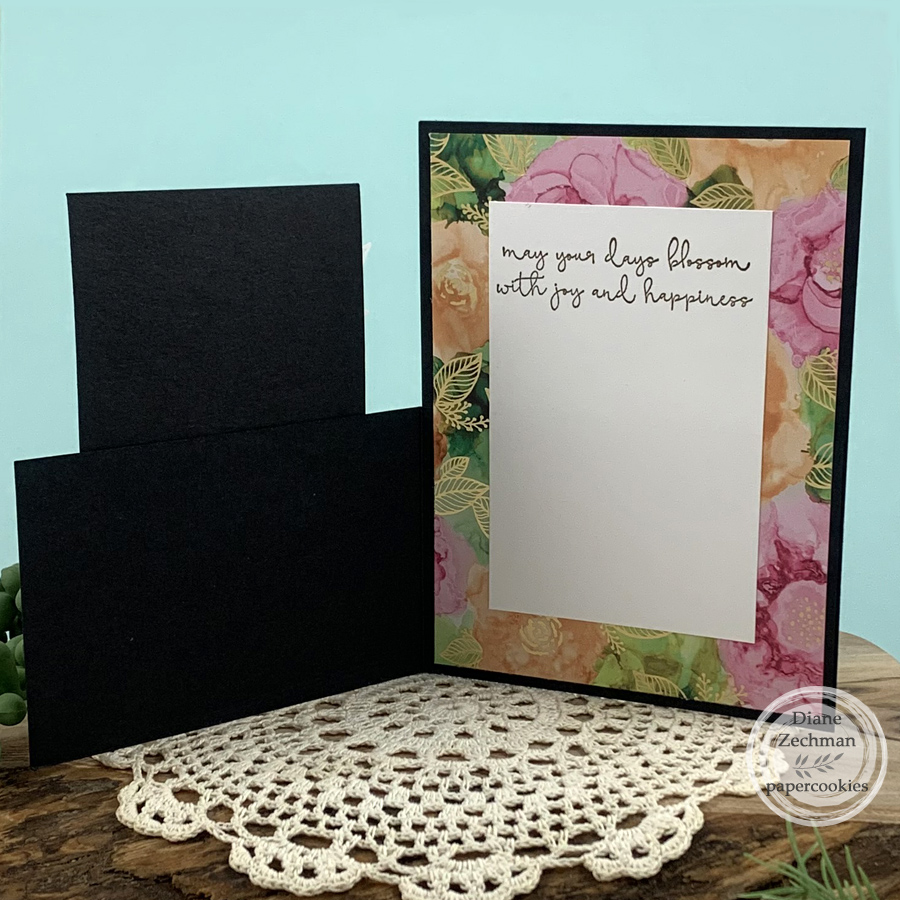
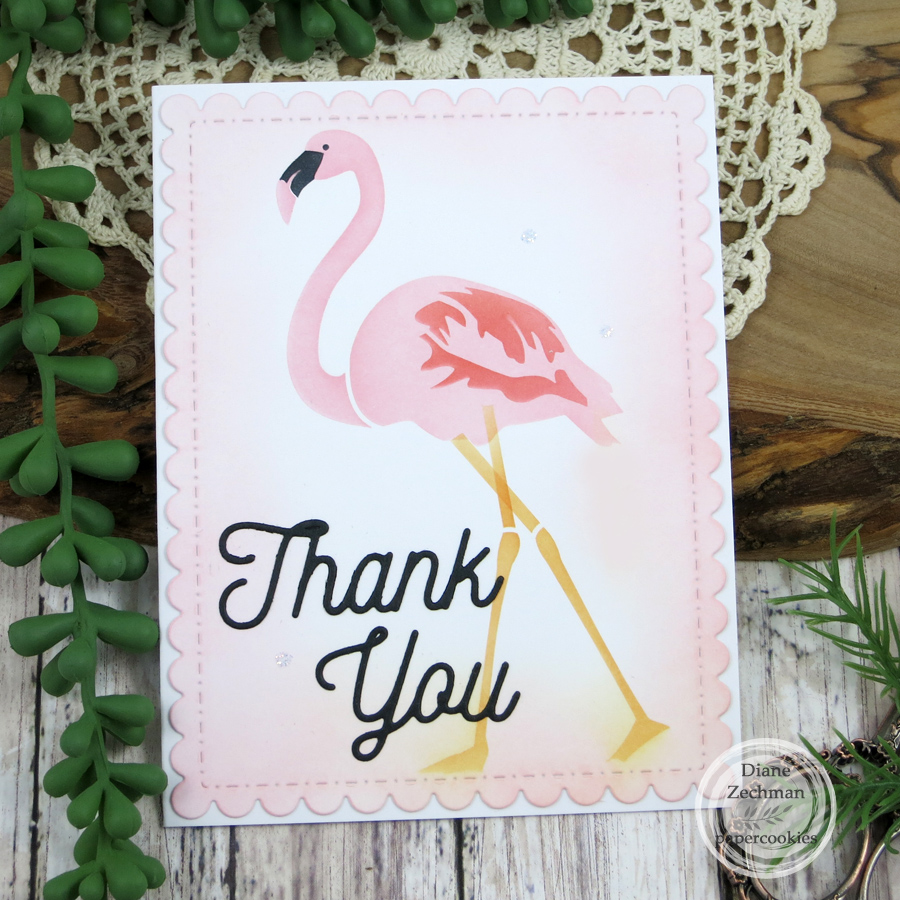
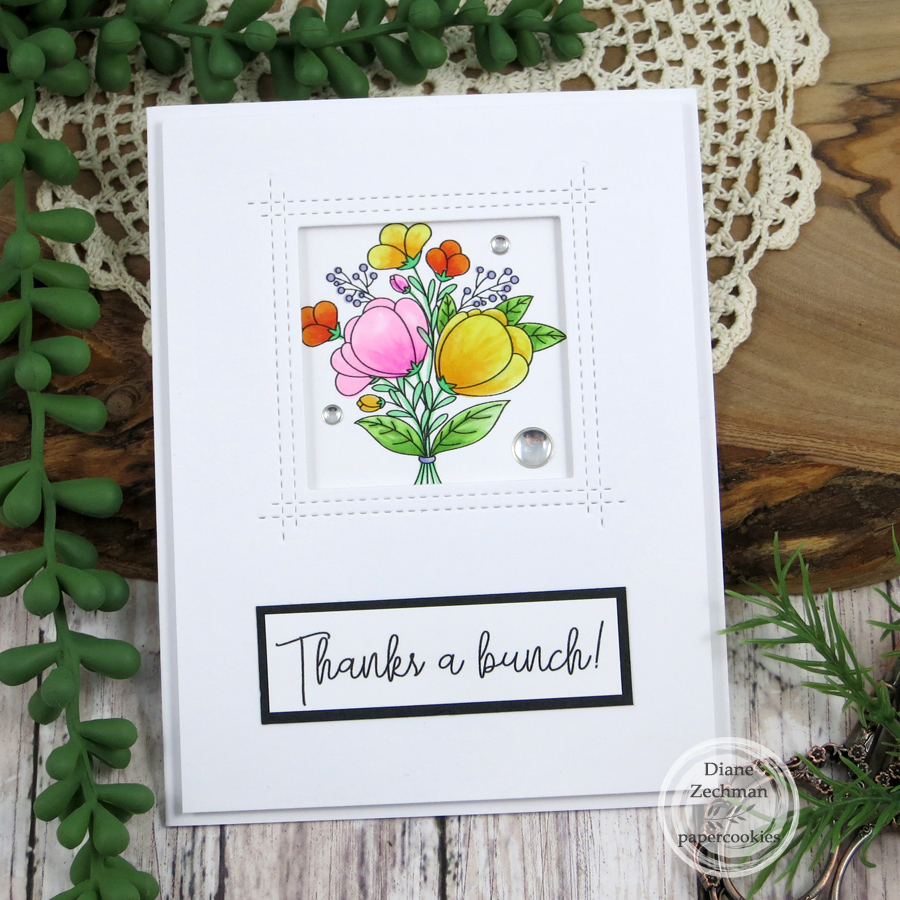
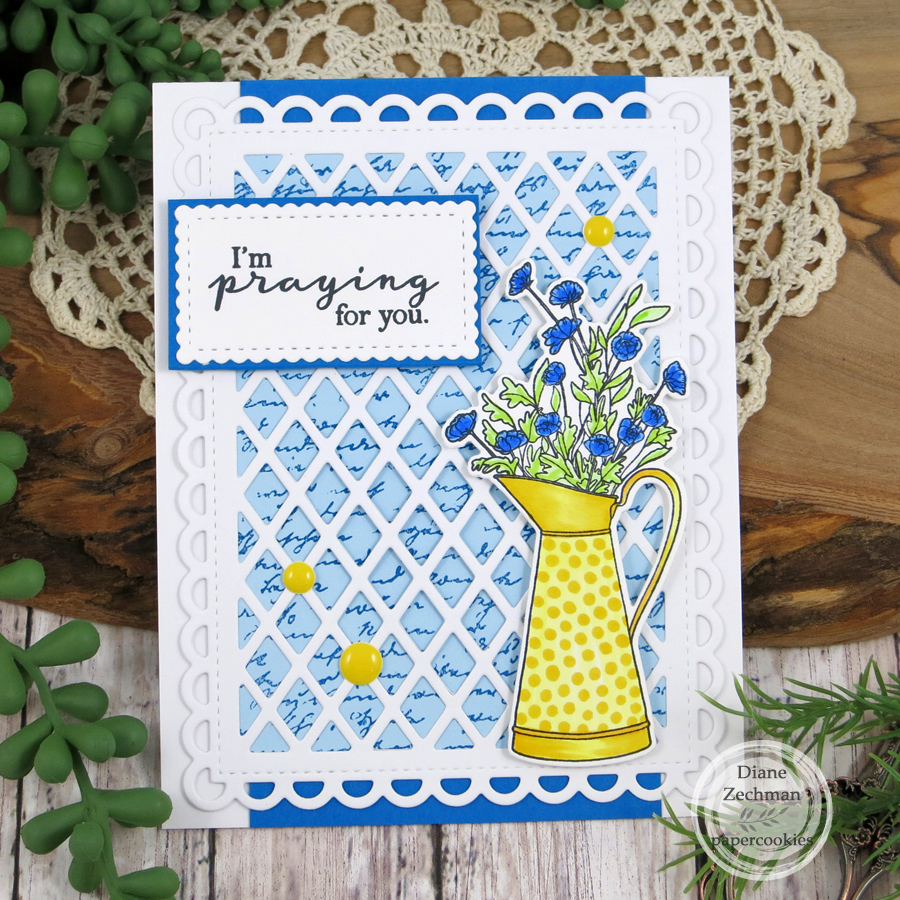
My second card was made in support of Ukraine and was given to someone who has family in shelter there. Praying for everyone in this horrible situation. I used SNSS Beautiful Bouquets Bundle, SNSS Script Background, Sunny Studio Frilly Frames- Lattice, and SU! Stitched So Sweetly dies.

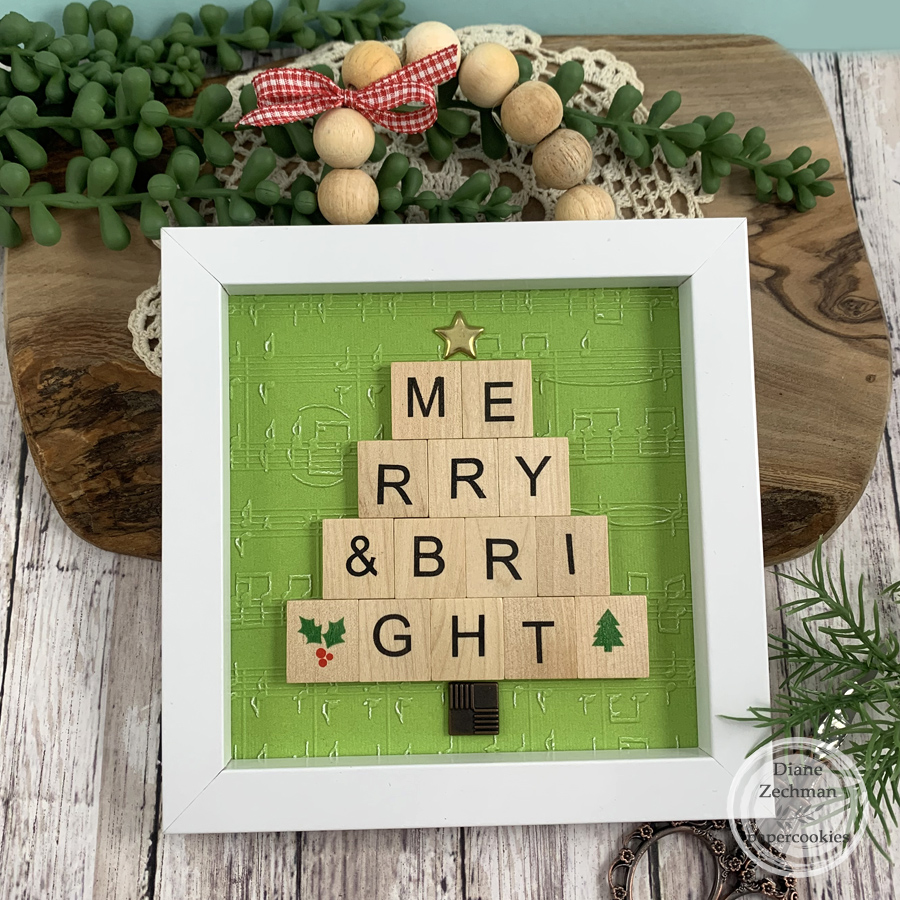
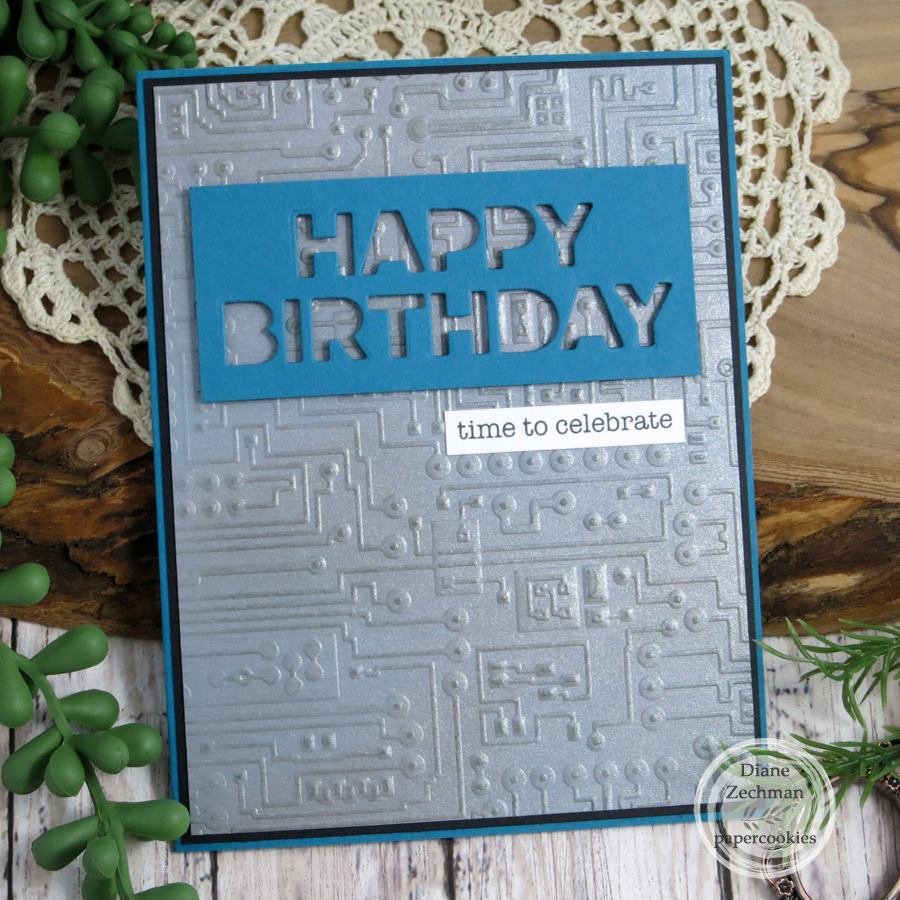
A masculine birthday card using Sizzix Circuit embossing folder and MFT Block Happy Birthday die. The small sentiment is Sweet ‘n Sassy Birthday Wordfetti.

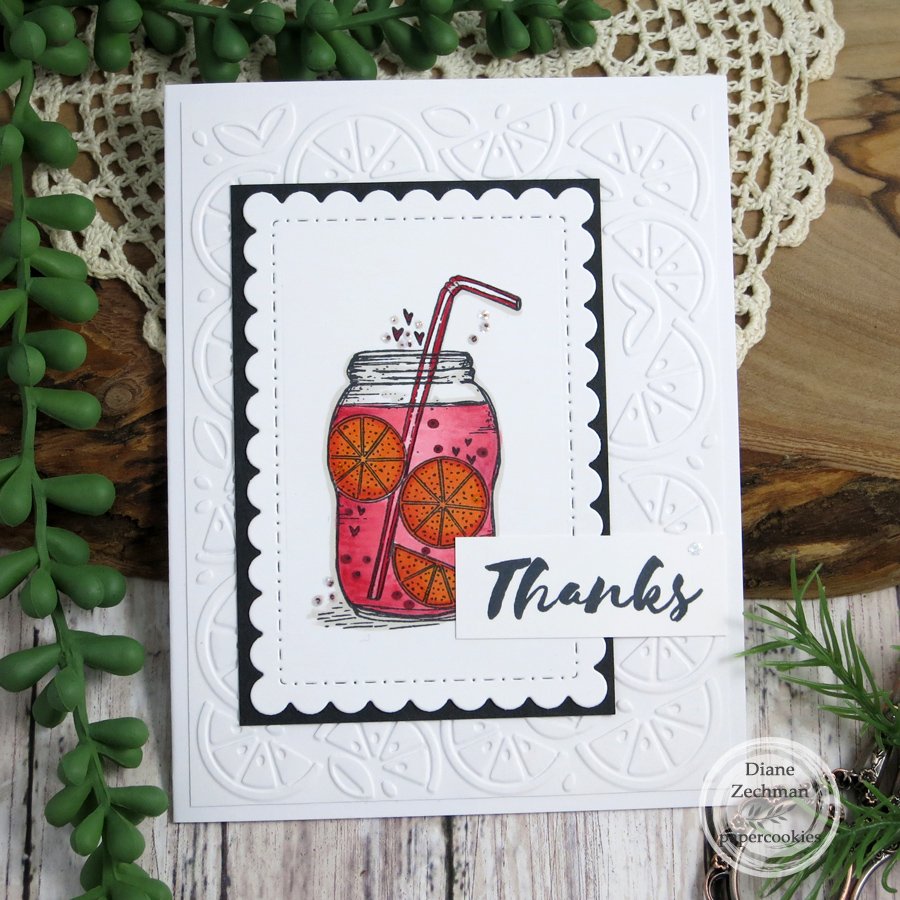
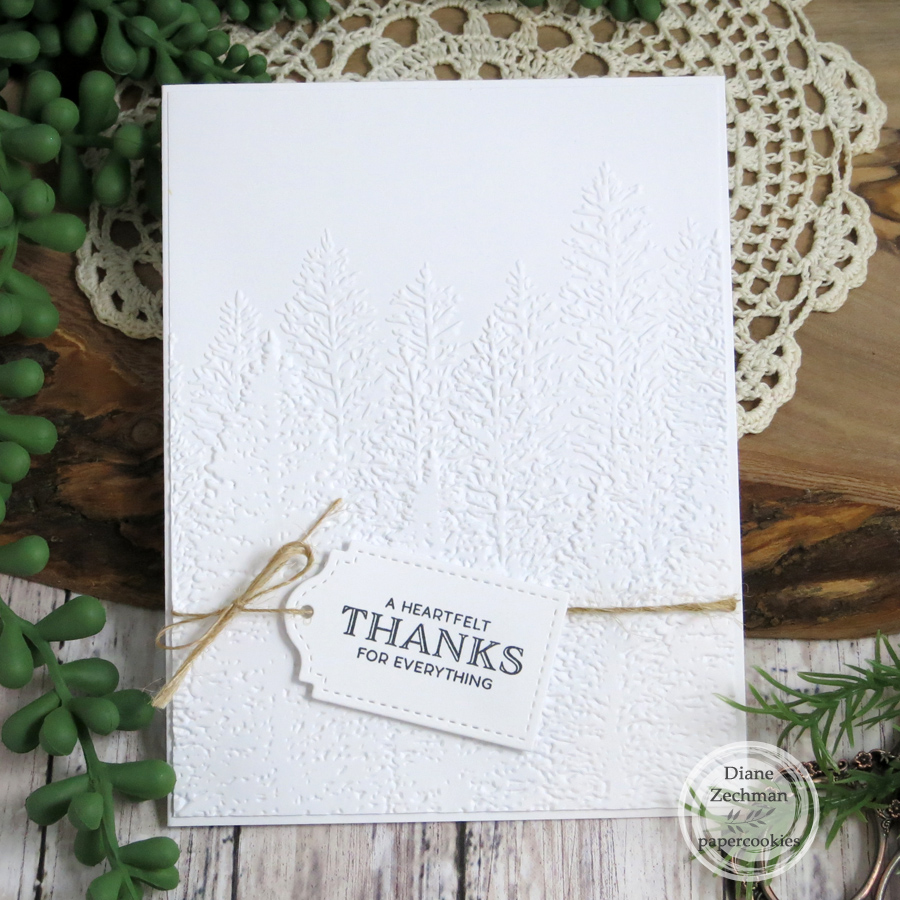
I made a set of CAS thank you cards for a friend who’s father passed away. SU! Punch Party, Trio of Tags Dies, and Evergreen Forest embossing folder.

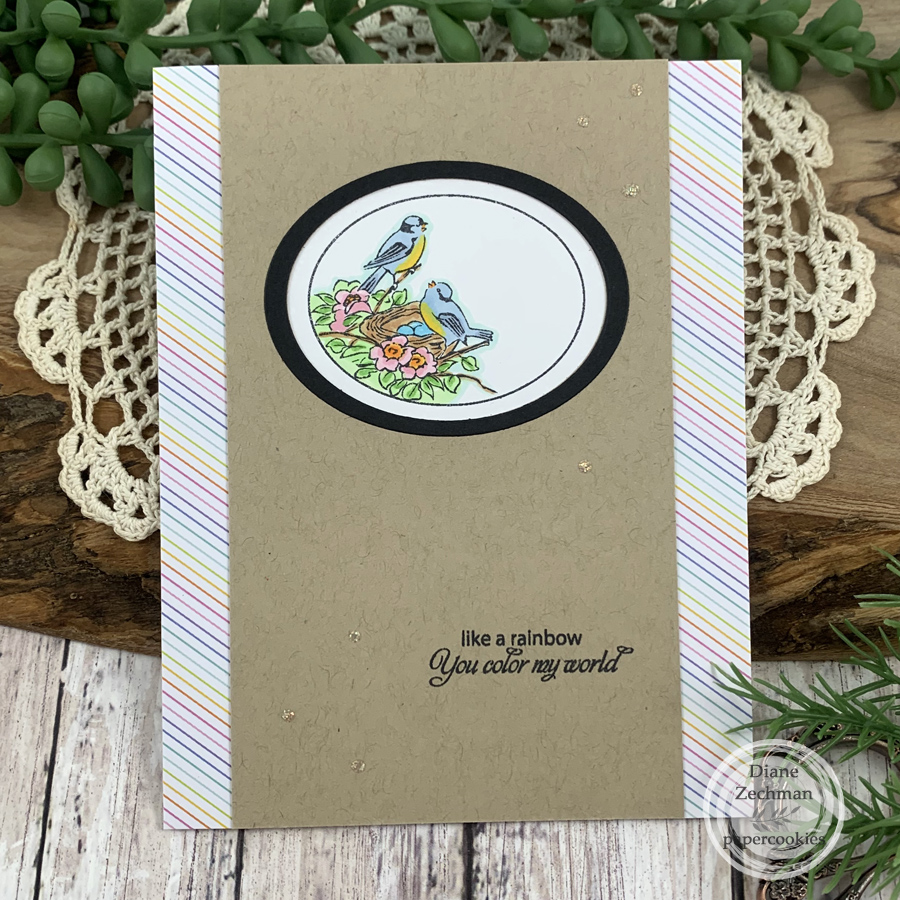
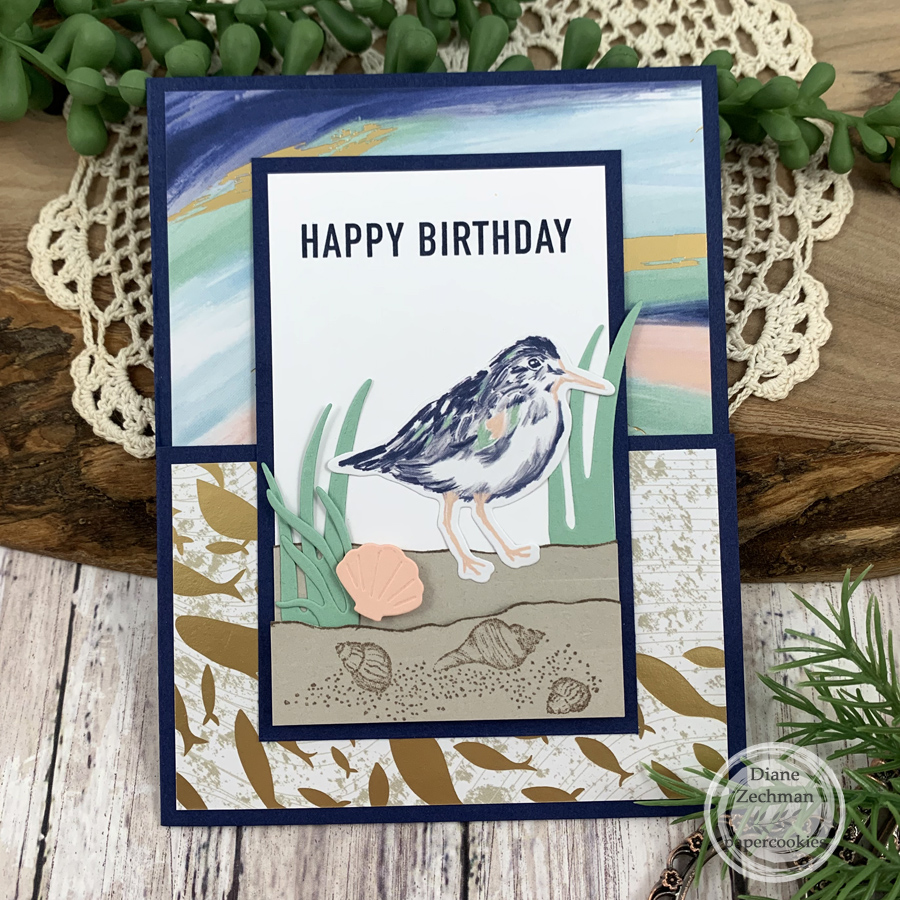
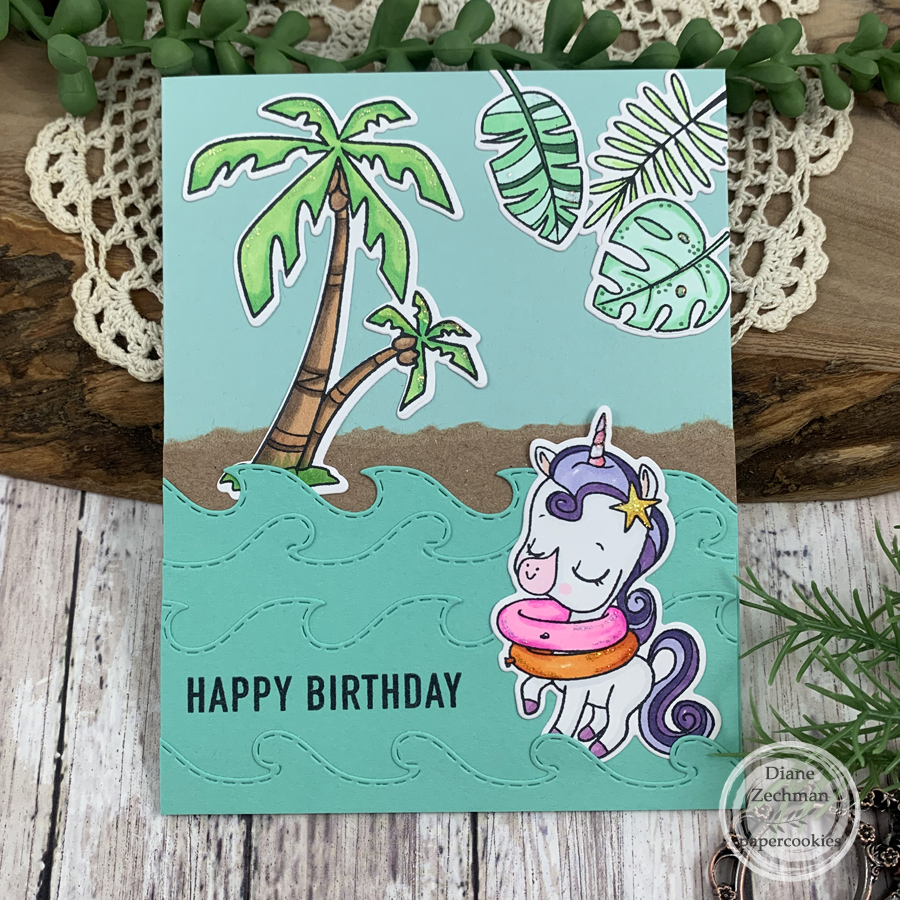
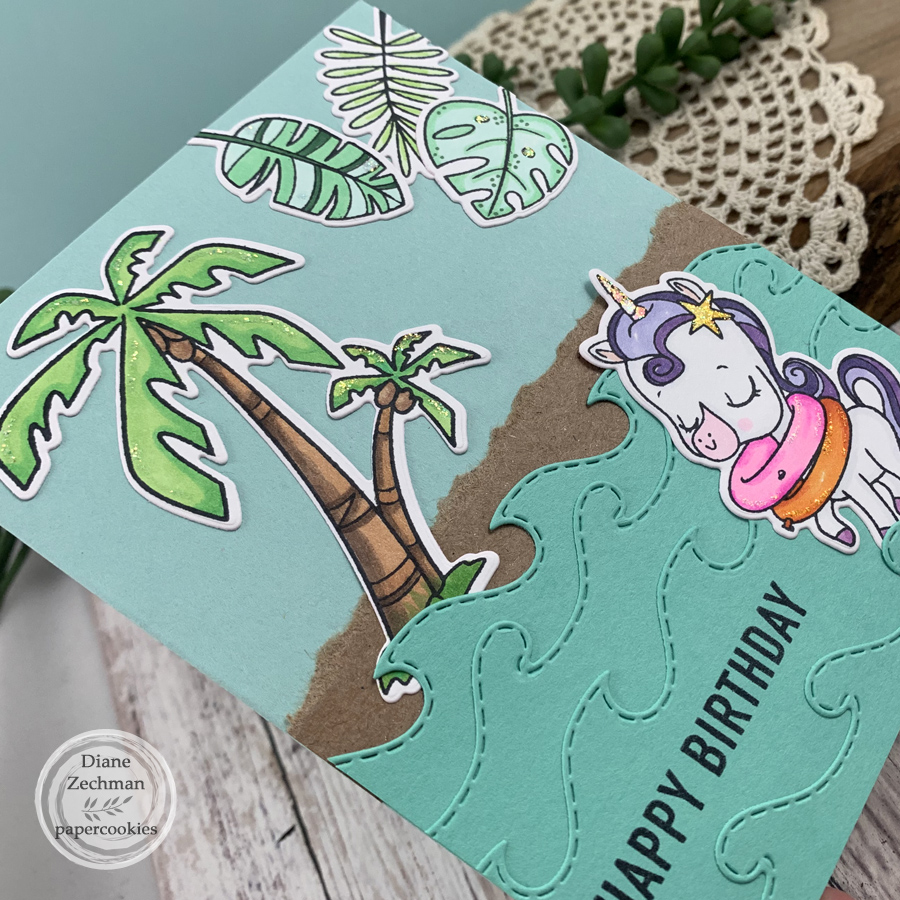
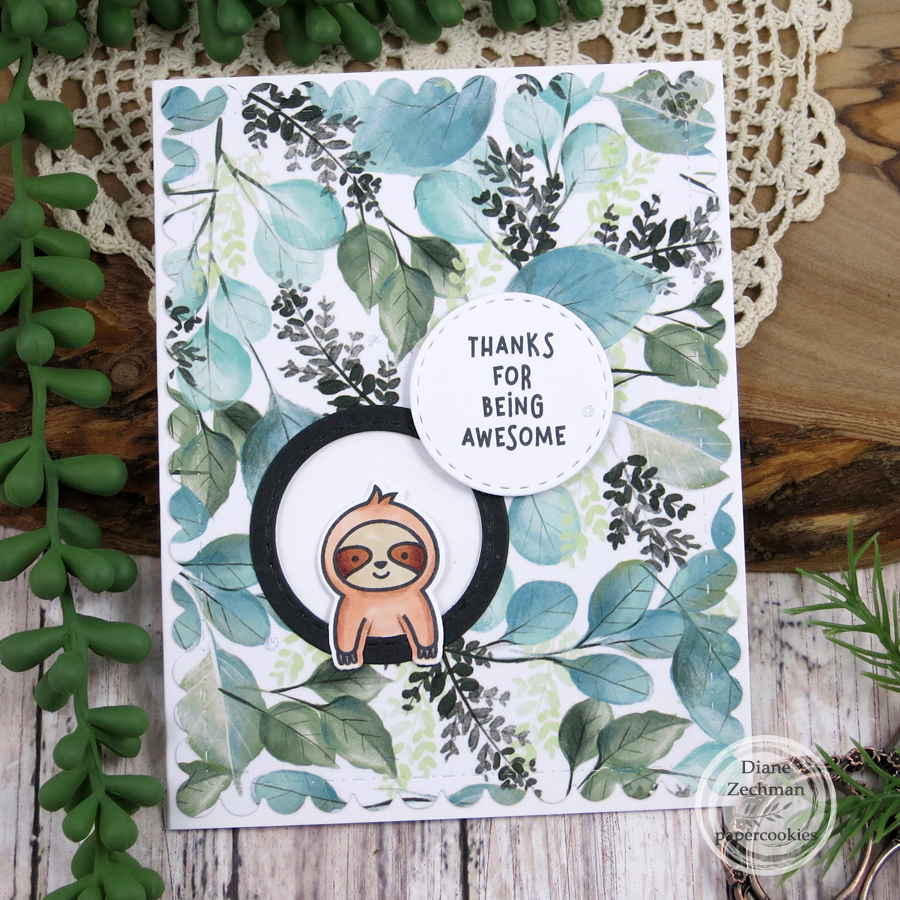
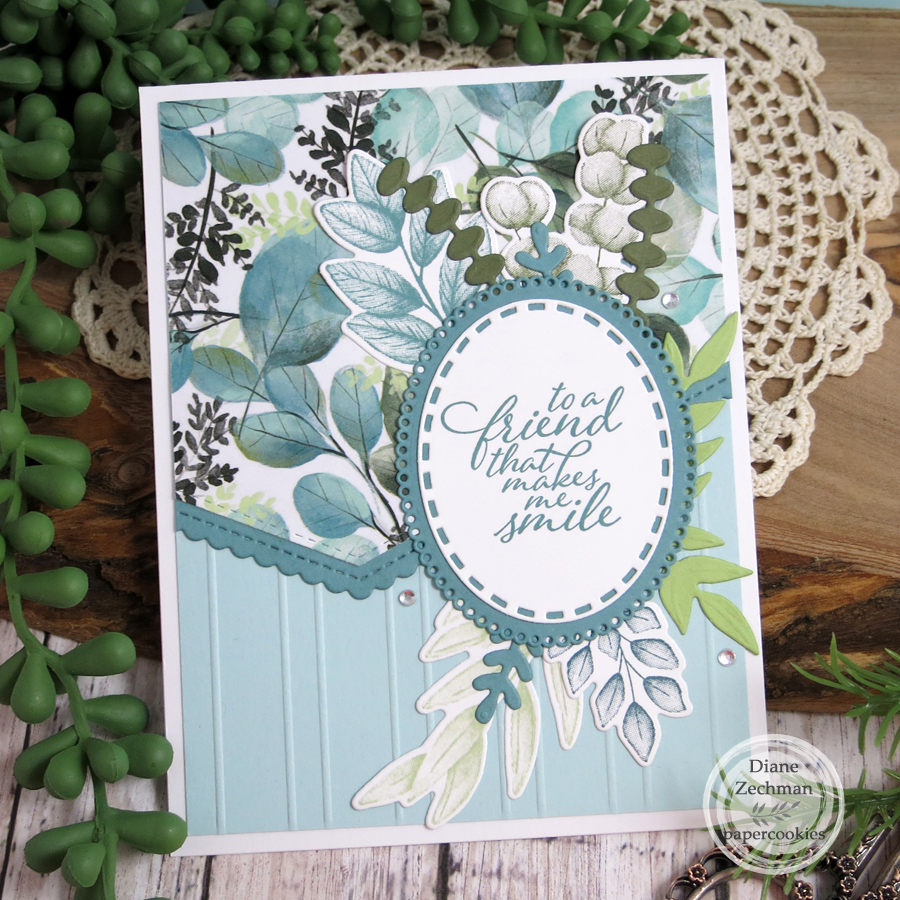
The next two cards use SU! Forever Fern, The Paper Studio- Eucalyptus paper, MFT Stitched Basic Edges and Scalloped Stitched Basic Edges, and Sizzix Layered Ovals. Colors- Soft Sky, Mossy Meadow, Lost Lagoon, Certainly Celery, Blue Bayou, Soft Seafoam.

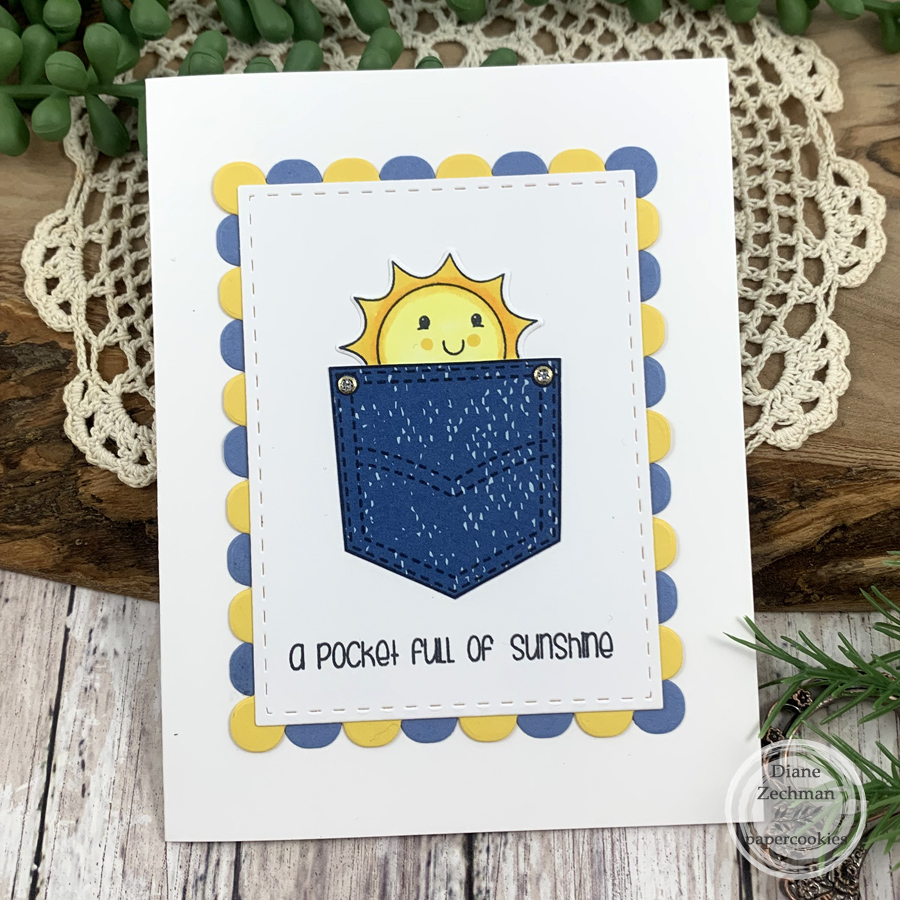
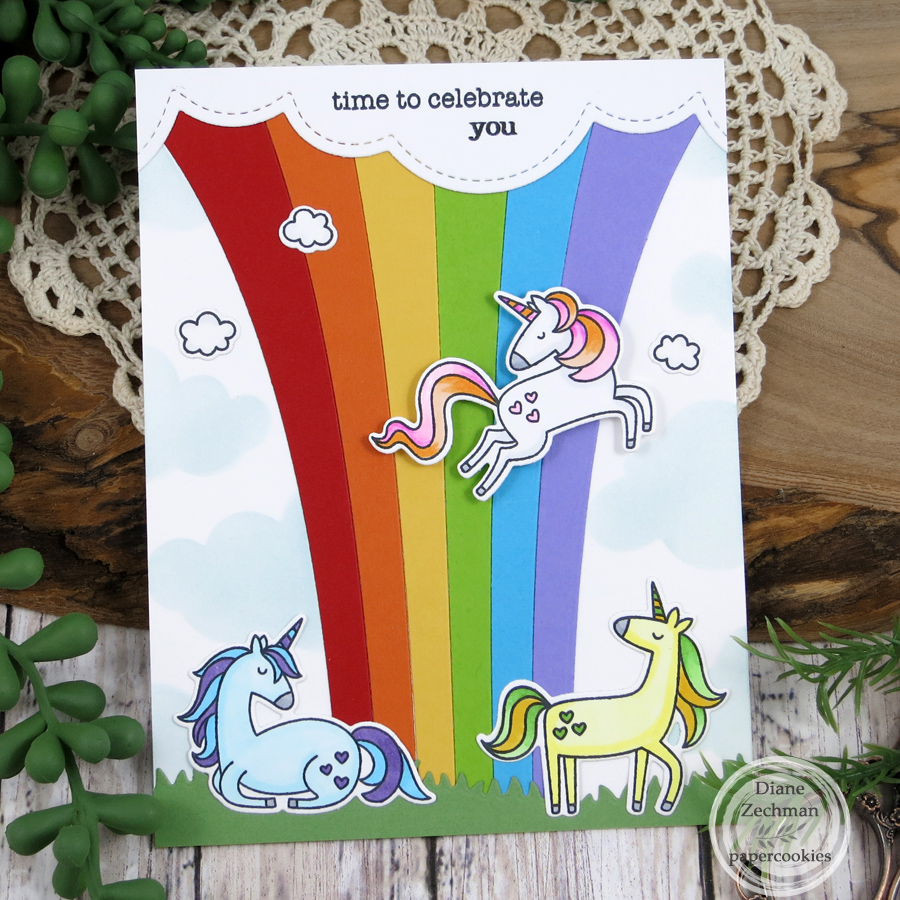
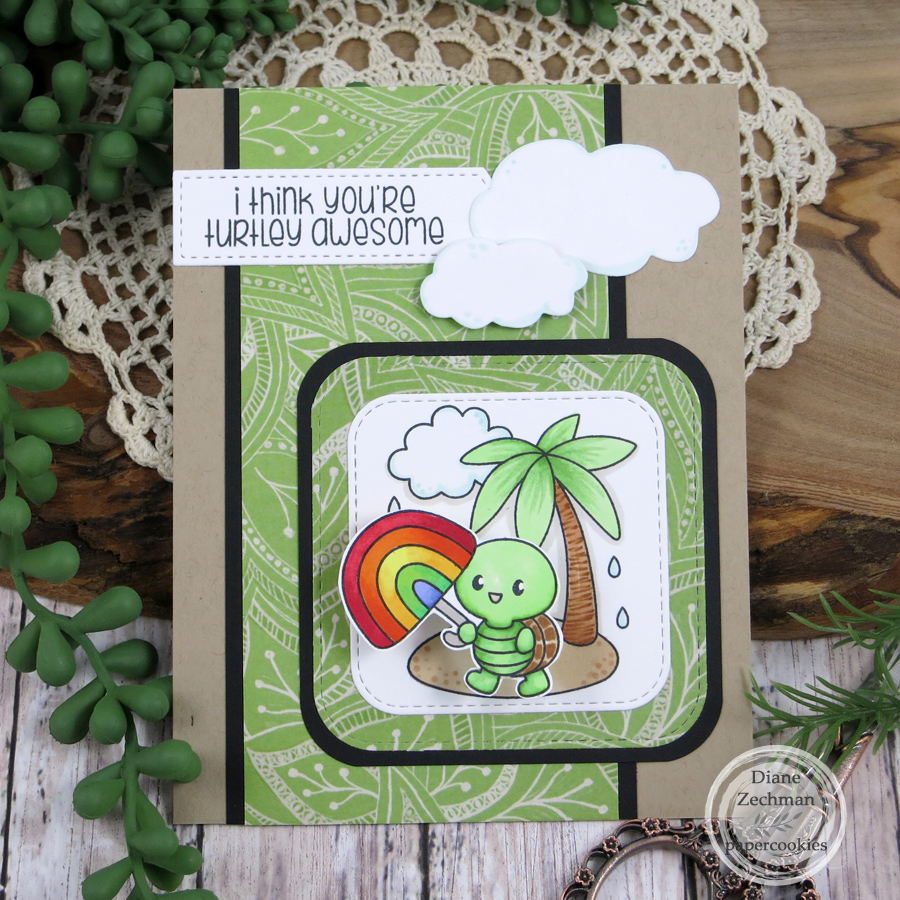
A special card for a birthday girl! MFT Friendly Unicorns & Dies, Color Blast Die, and Grassy Hills Die, Lawn Fawn Puffy Cloud Borders, Sweet ‘n Sassy Birthday Wordfetti and Puffy Clouds Stencil.

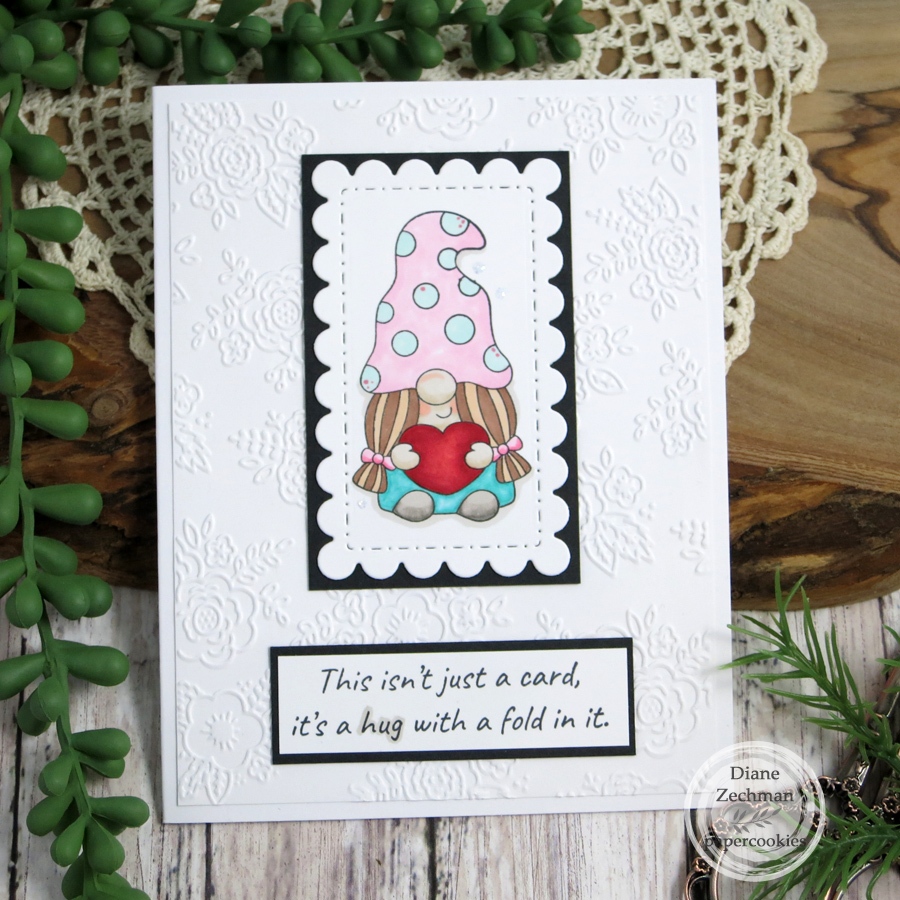
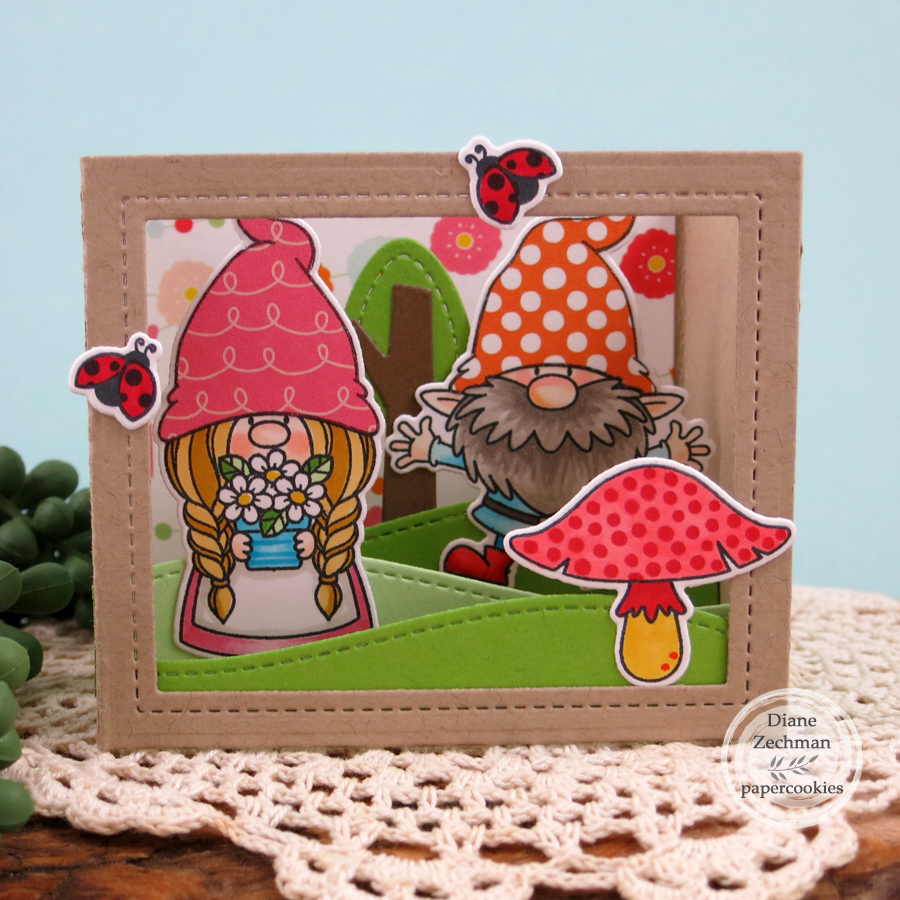
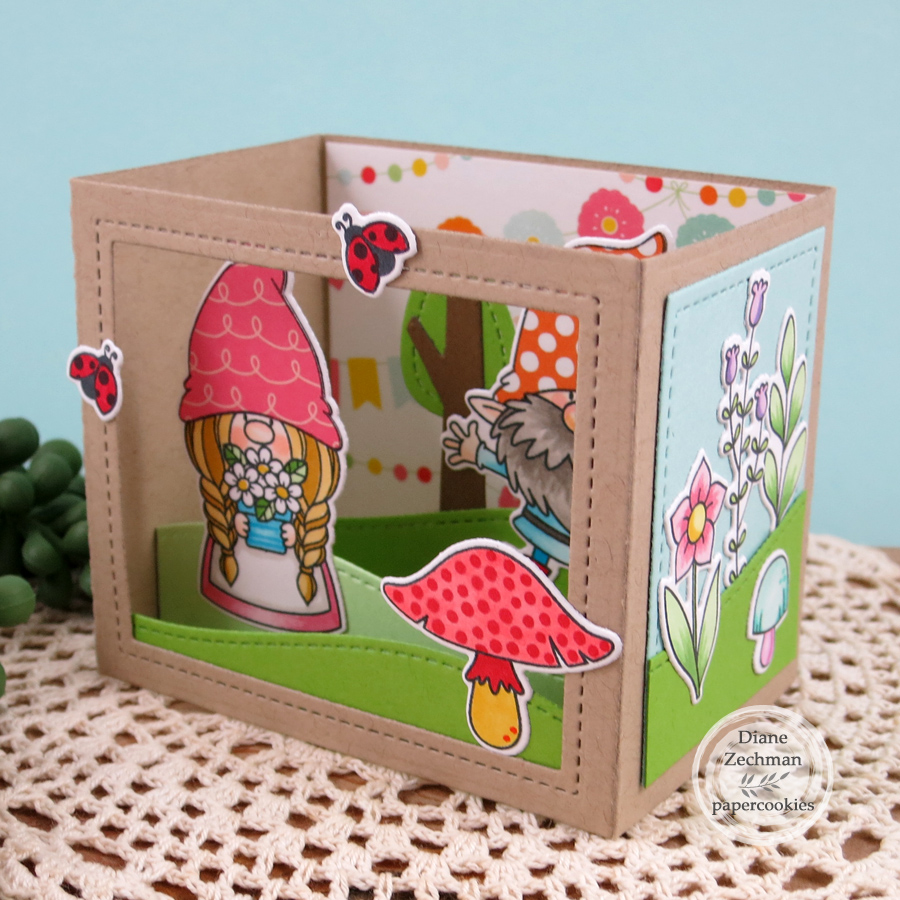
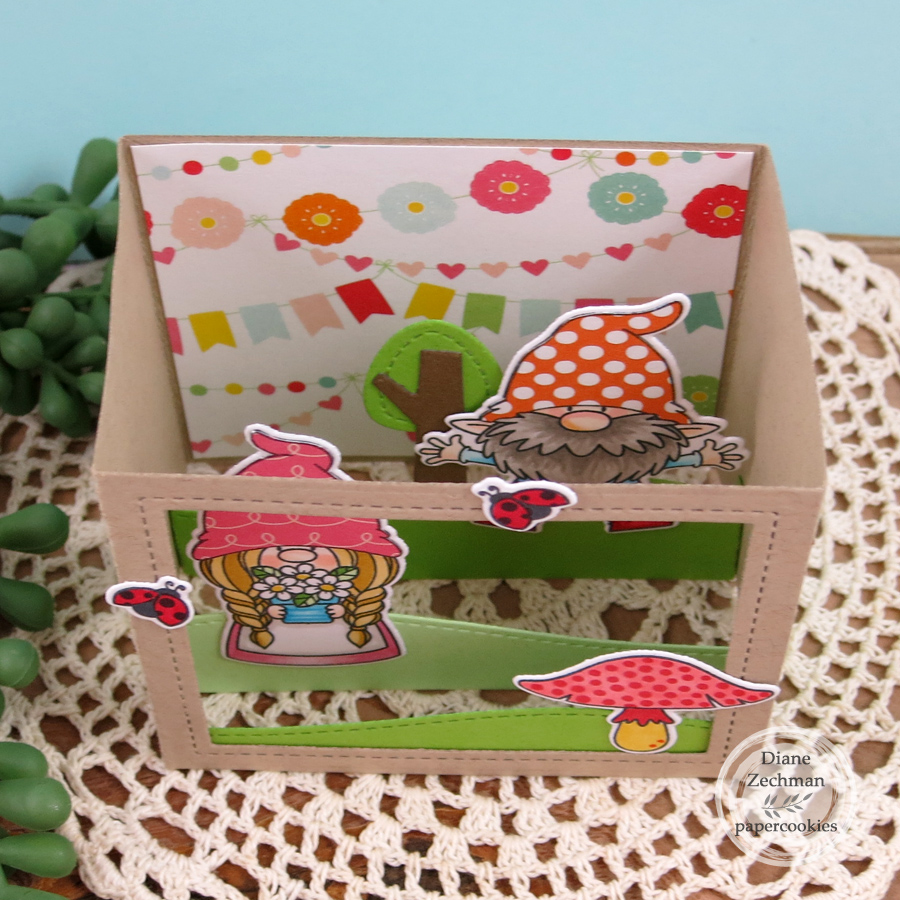
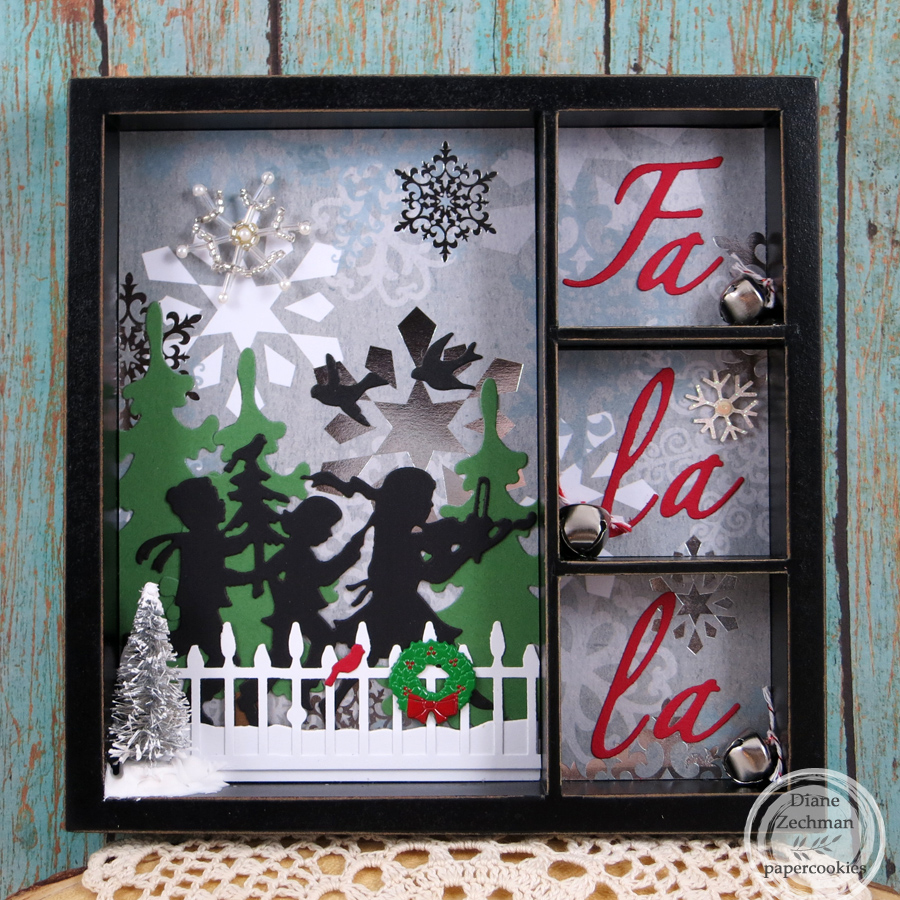
I made a cute gnome shadow box card with Lawn Fawn Shadow Box Dies, and MFT Hanging With My Gnomies.

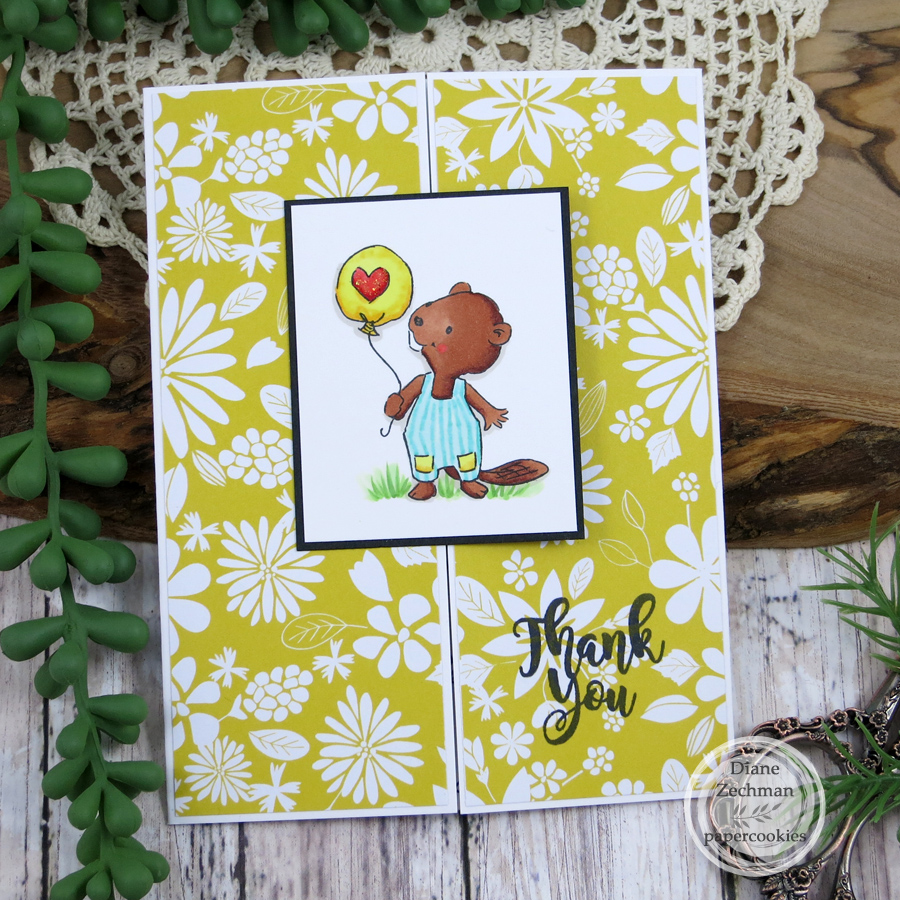
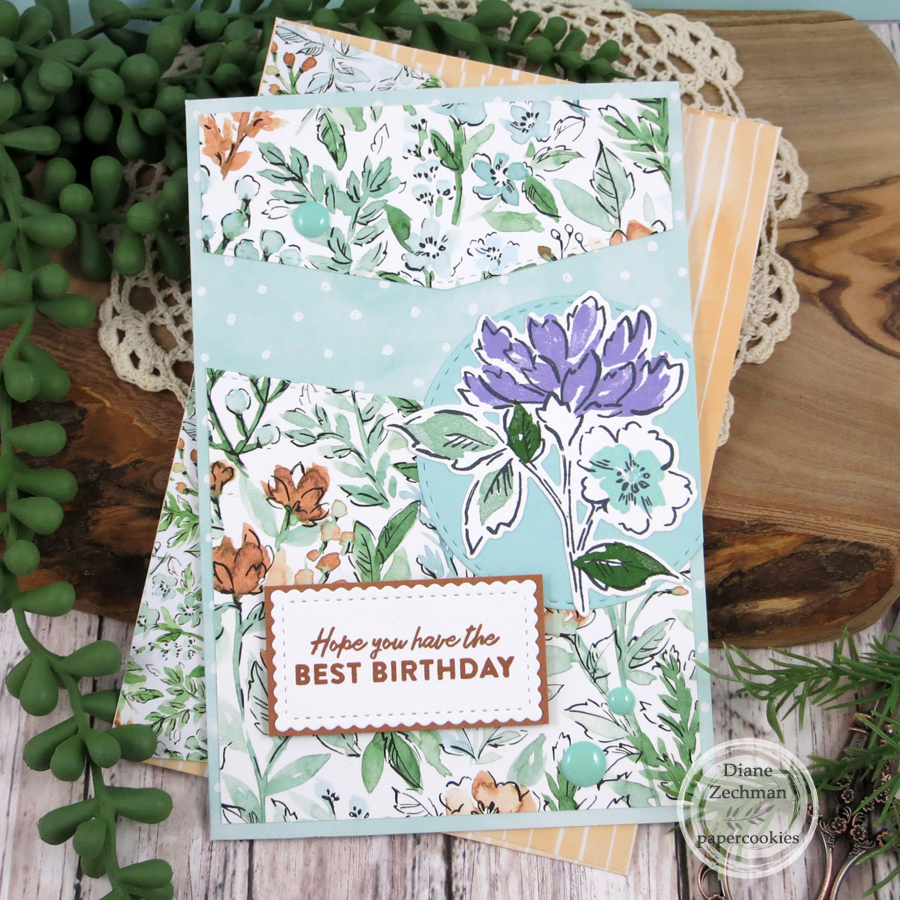
Next is two cards with SU! Hand-Penned Petals and Hand-Penned Memories & More cards & envelopes. I also used the SU! Stitched So Sweetly Dies. On the first card I also used a sentiment from SU! Friendly Hello and SSS Stitched Circles Dies. On the second card I also used SU! Here’s A Card, SU! Brick & Mortar embossing folder, and Gina Marie Stitched Rectangles. It was semi-cased from Elizabeth Price (Seeing Inkspots).

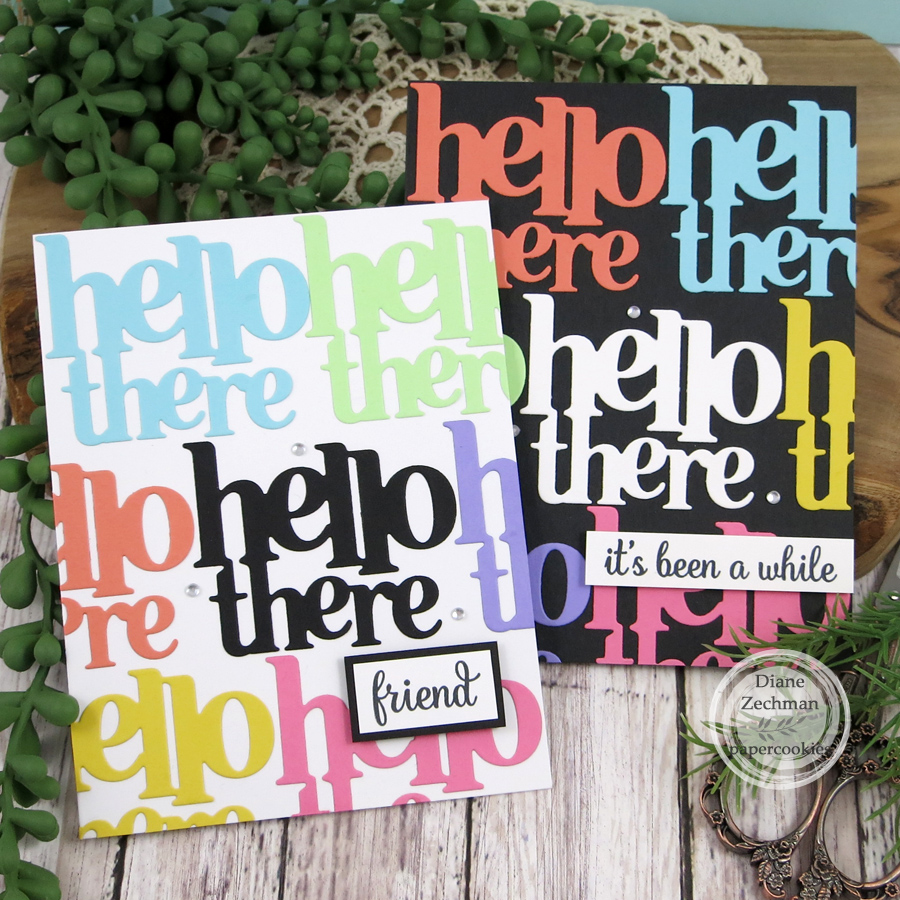
Simple black & white versions of a card using word dies… Hero Arts- Hello There stamp & die set.

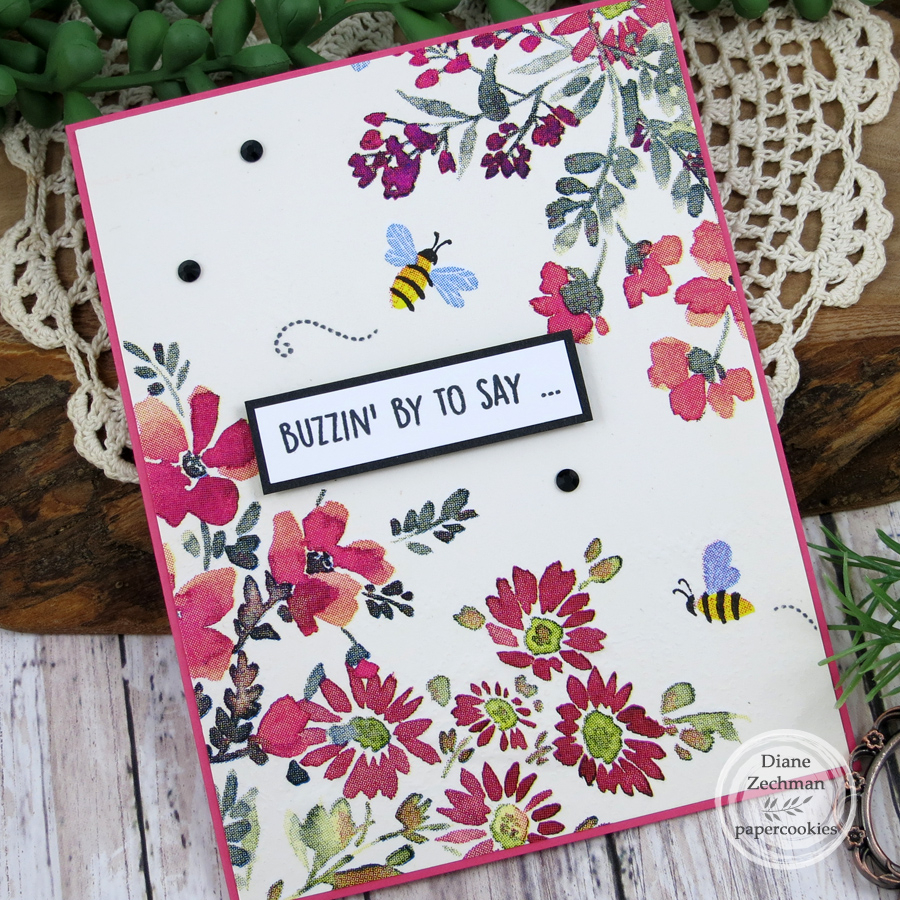
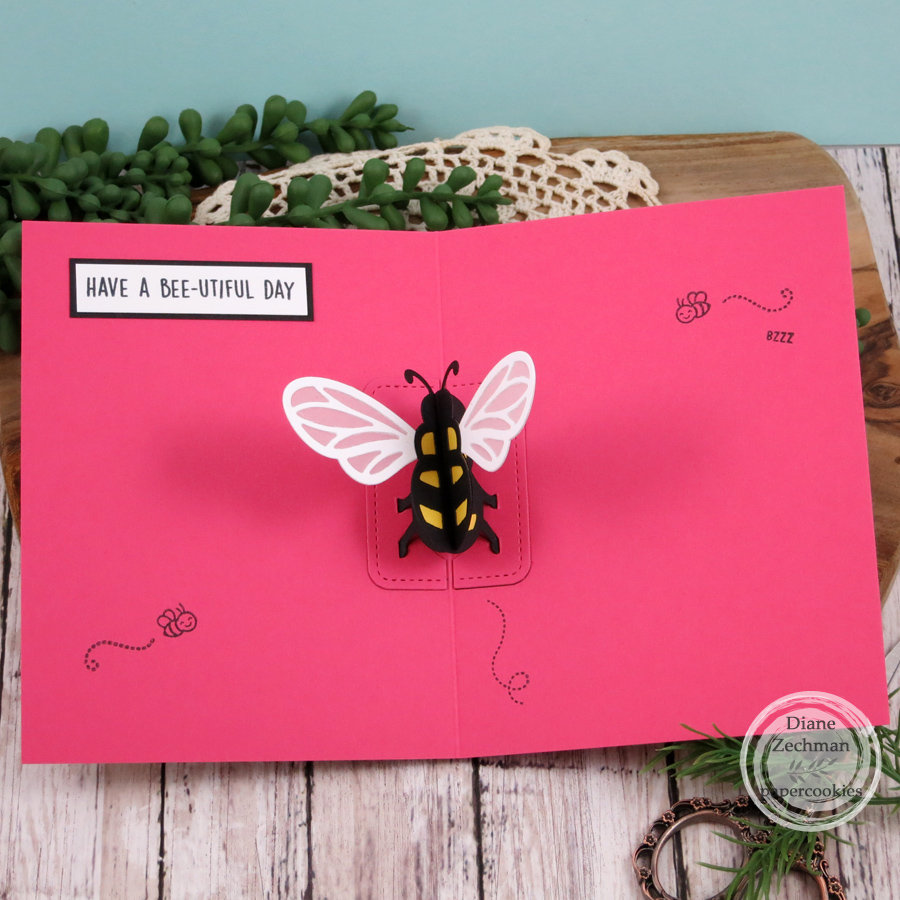
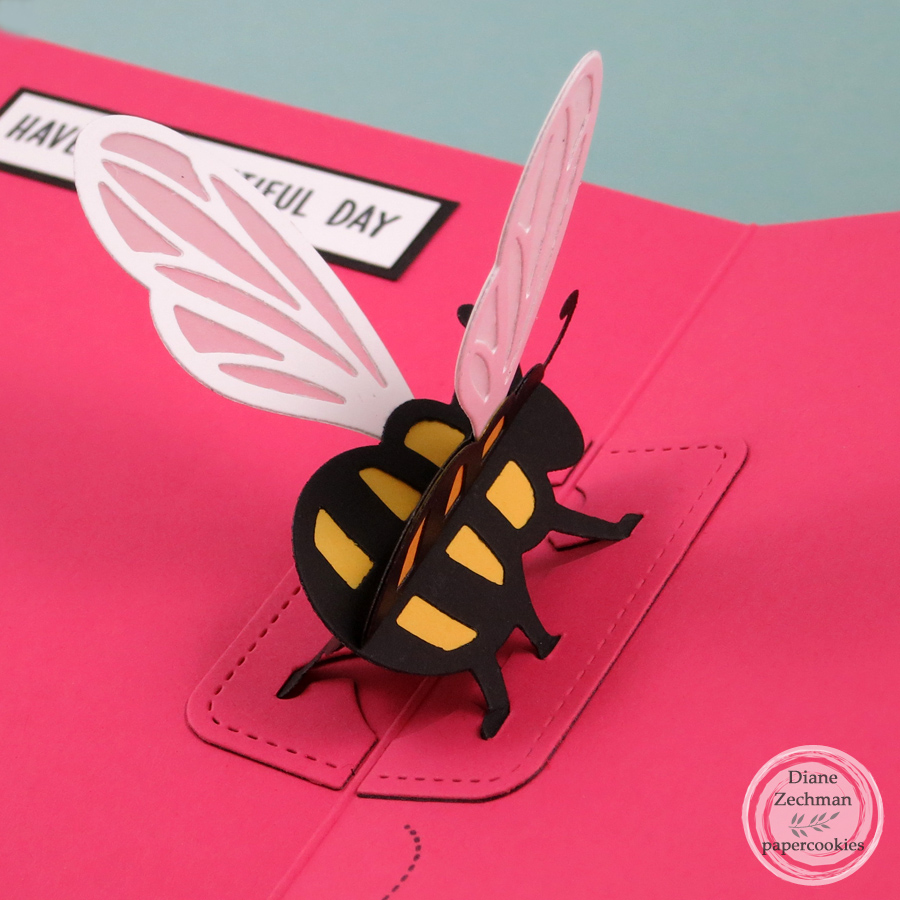
I went with blue and browns for my bee card… SU! Honeybee Home, SU! Hive embossing folder, and circle punches.

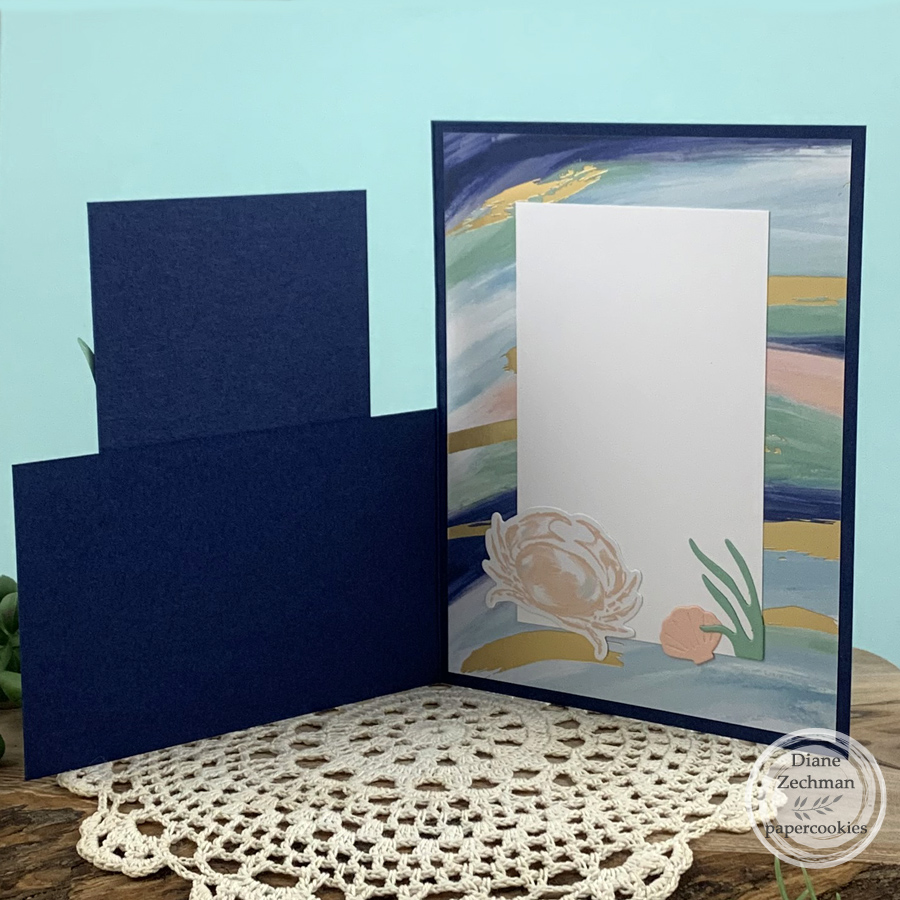
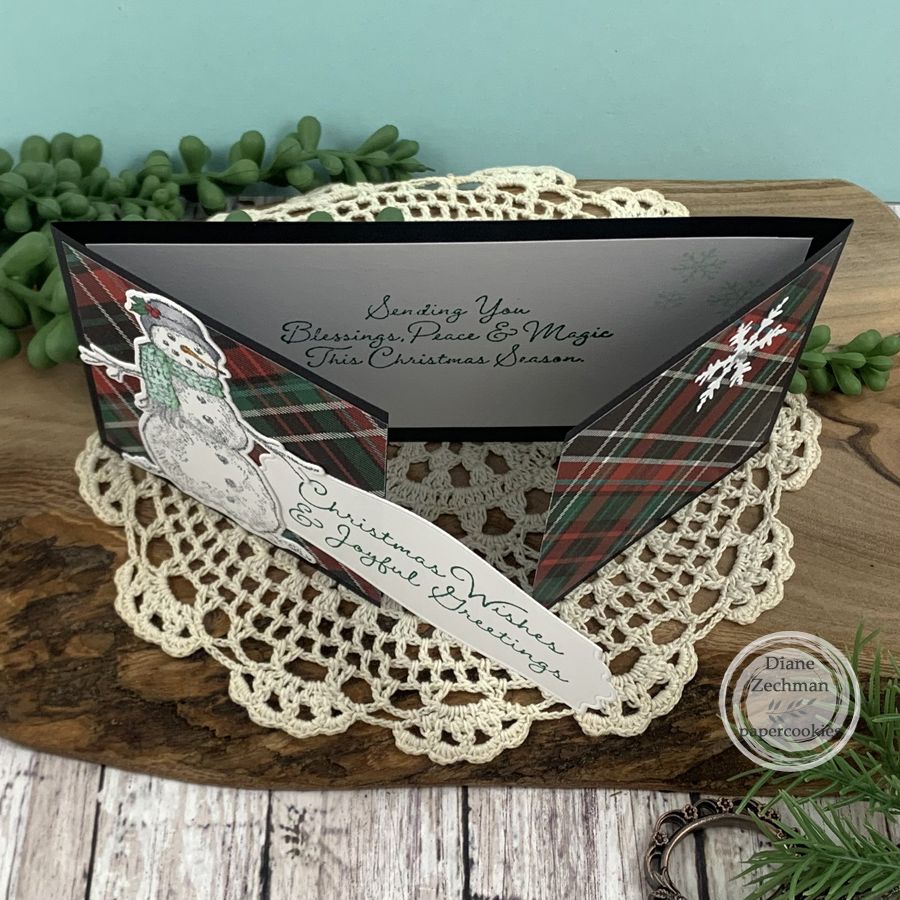
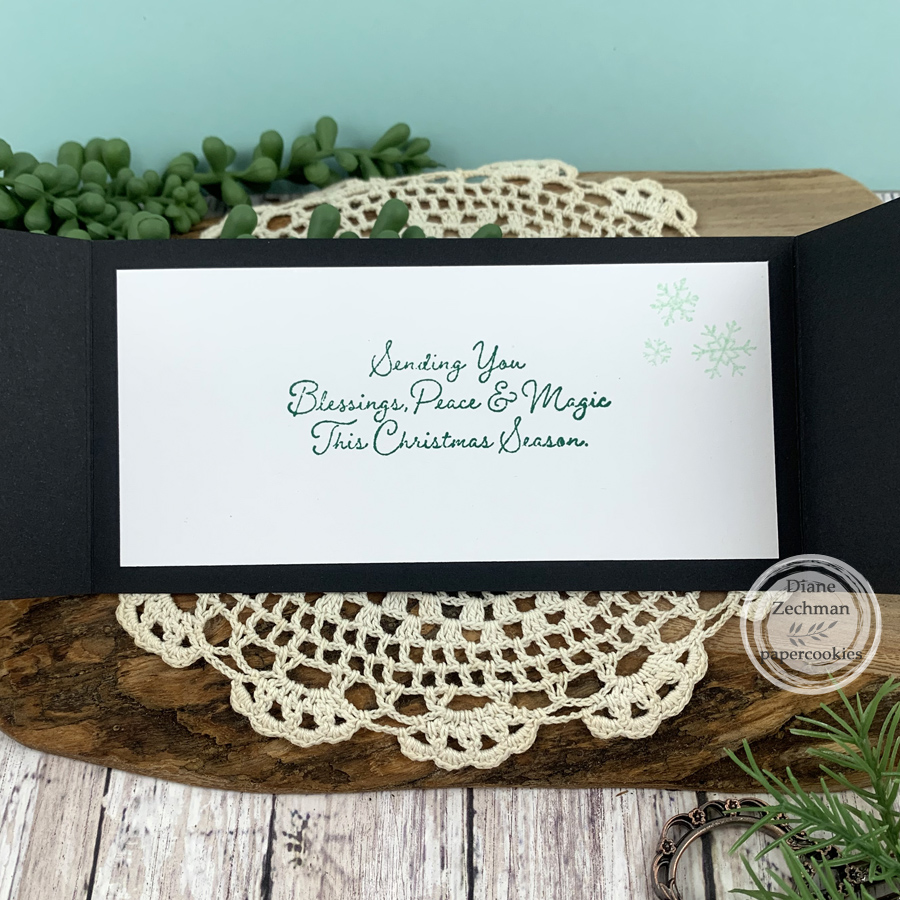
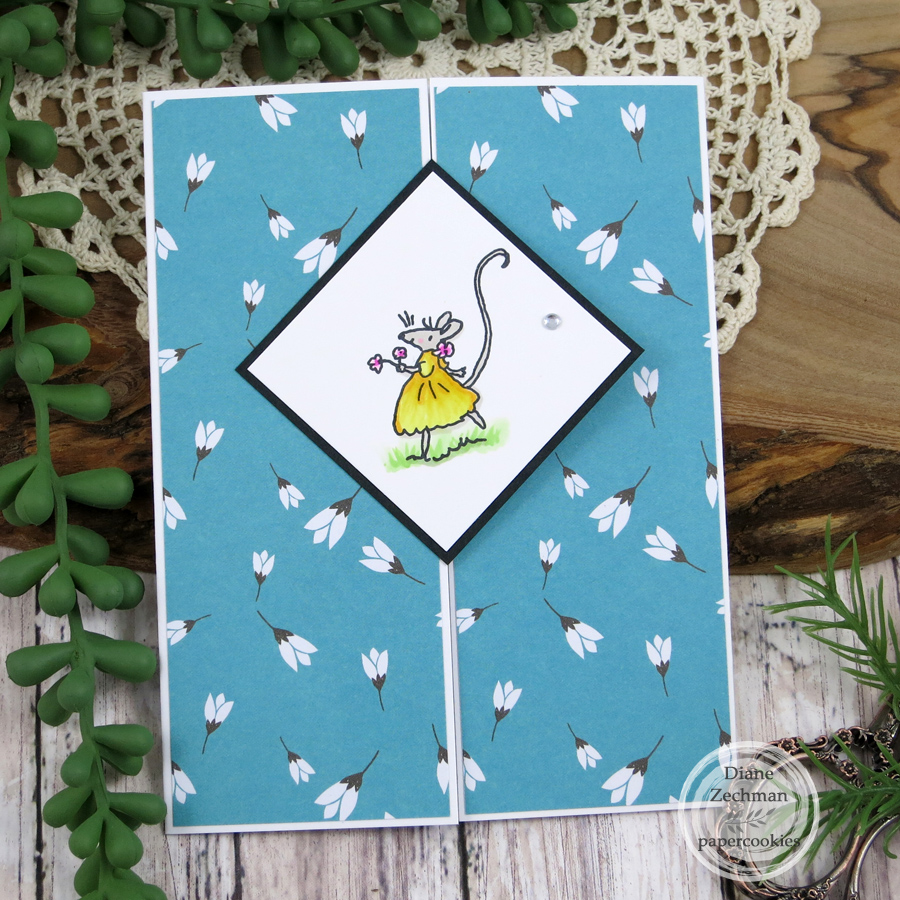
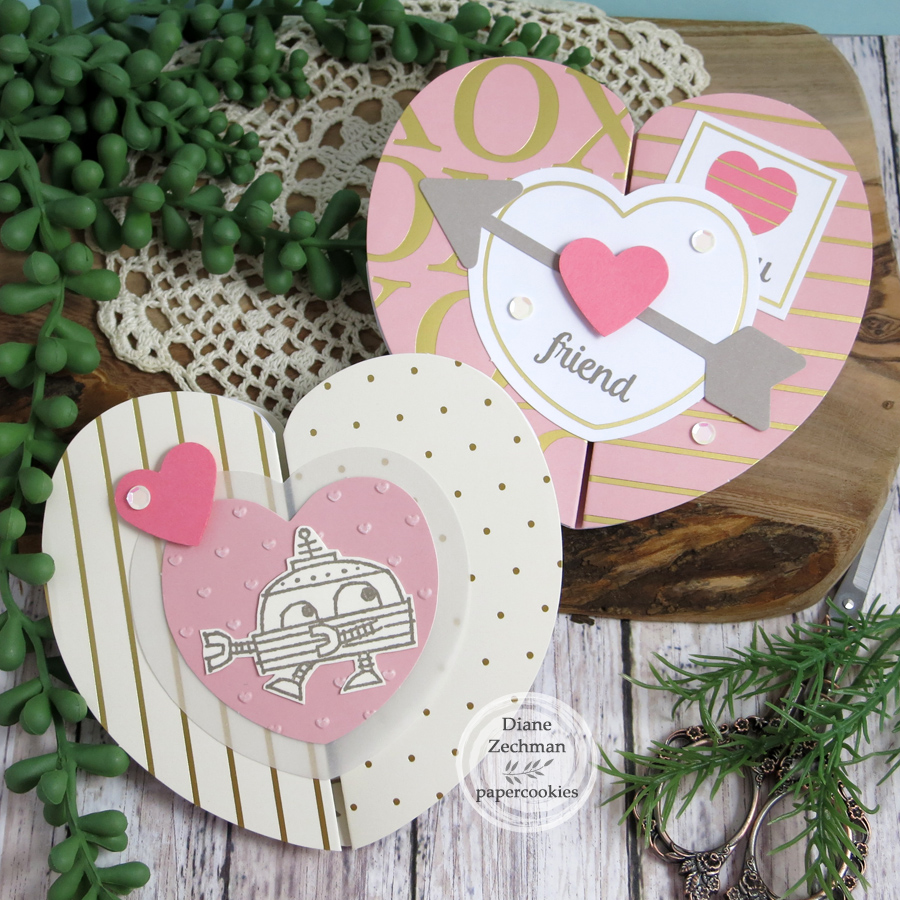
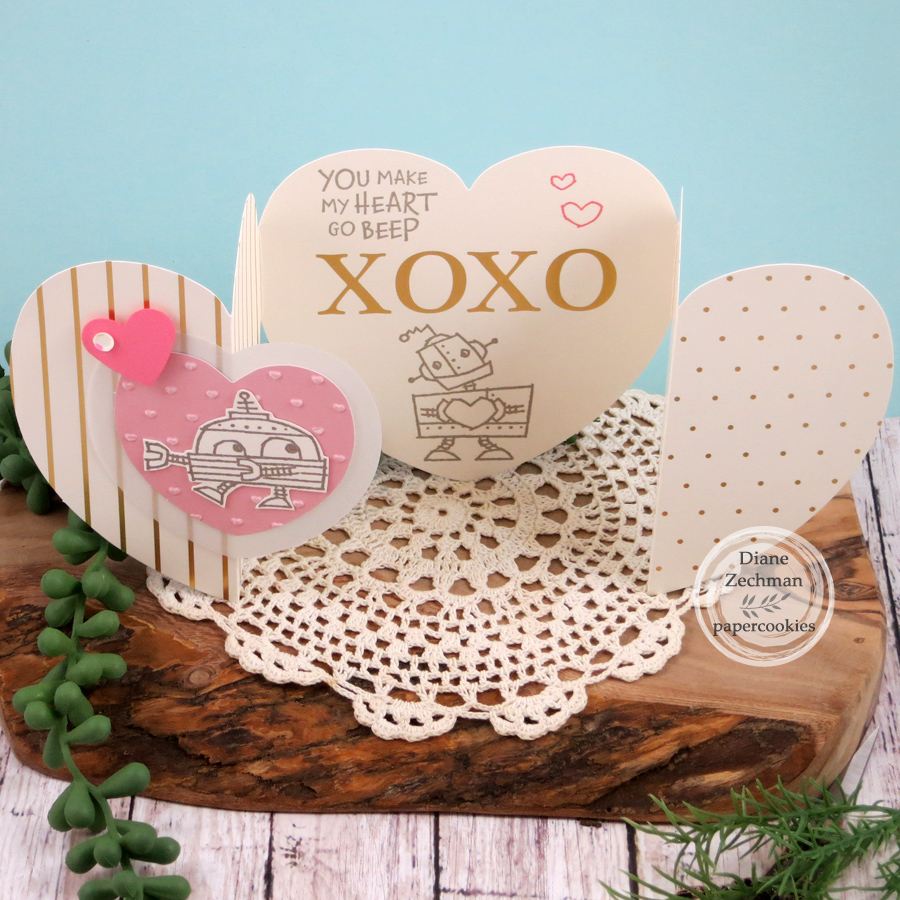
A few alternates from the SU! January 2022 Paper Pumpkin kit. The embossed hearts are from an old Cuttlebug Love Language embossing folder. These were scored to change them from a trifold card to a gatefold. I love shaped cards!

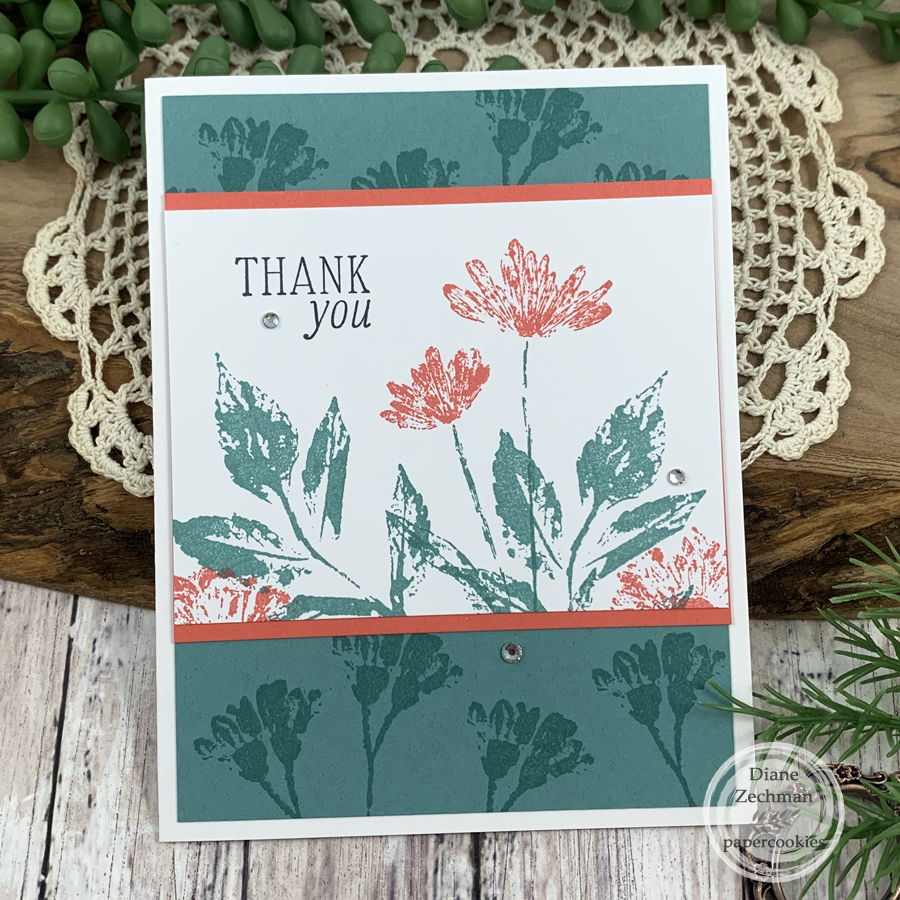
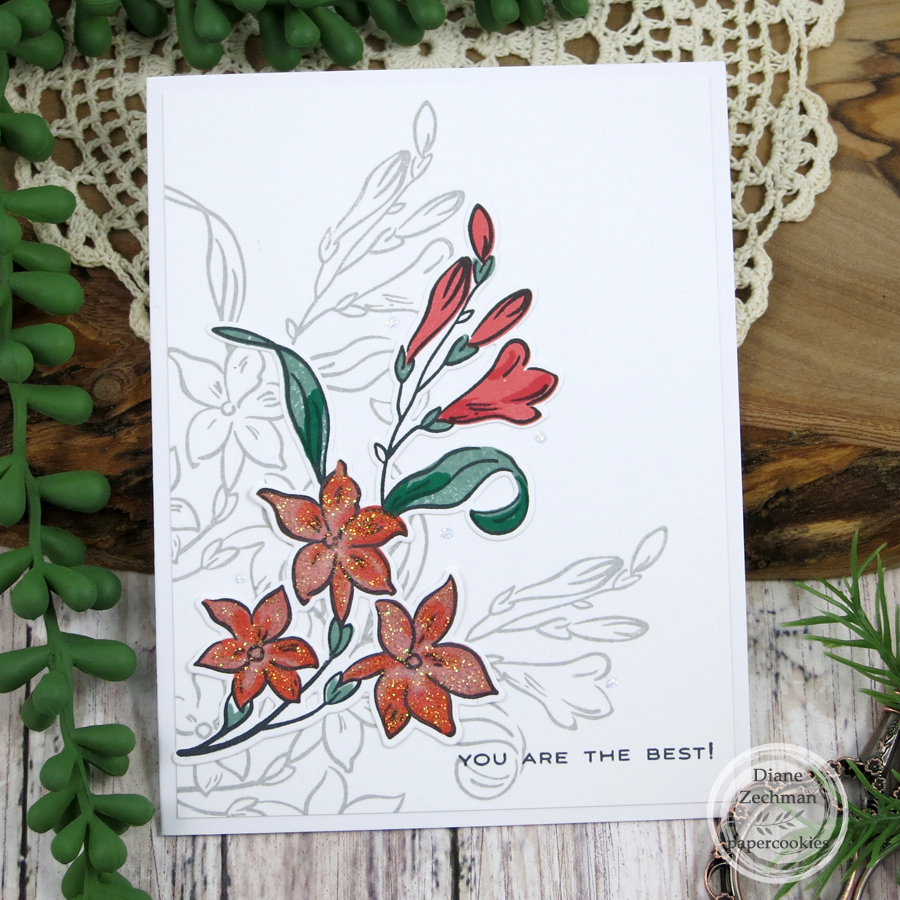
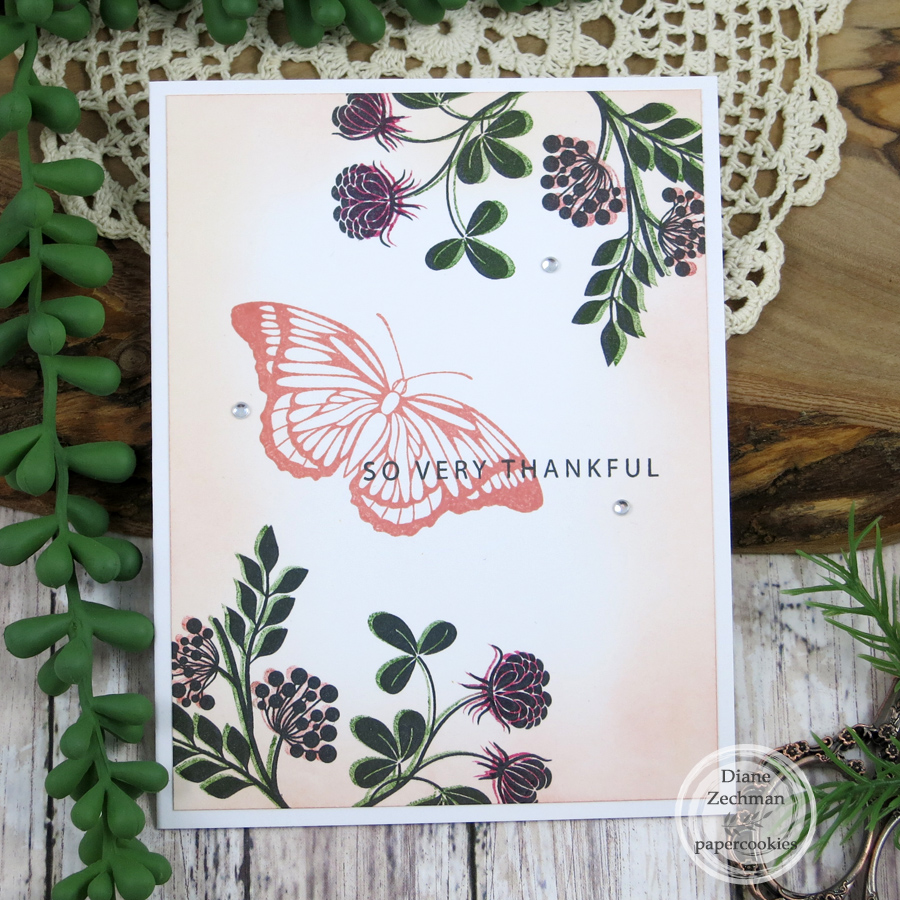
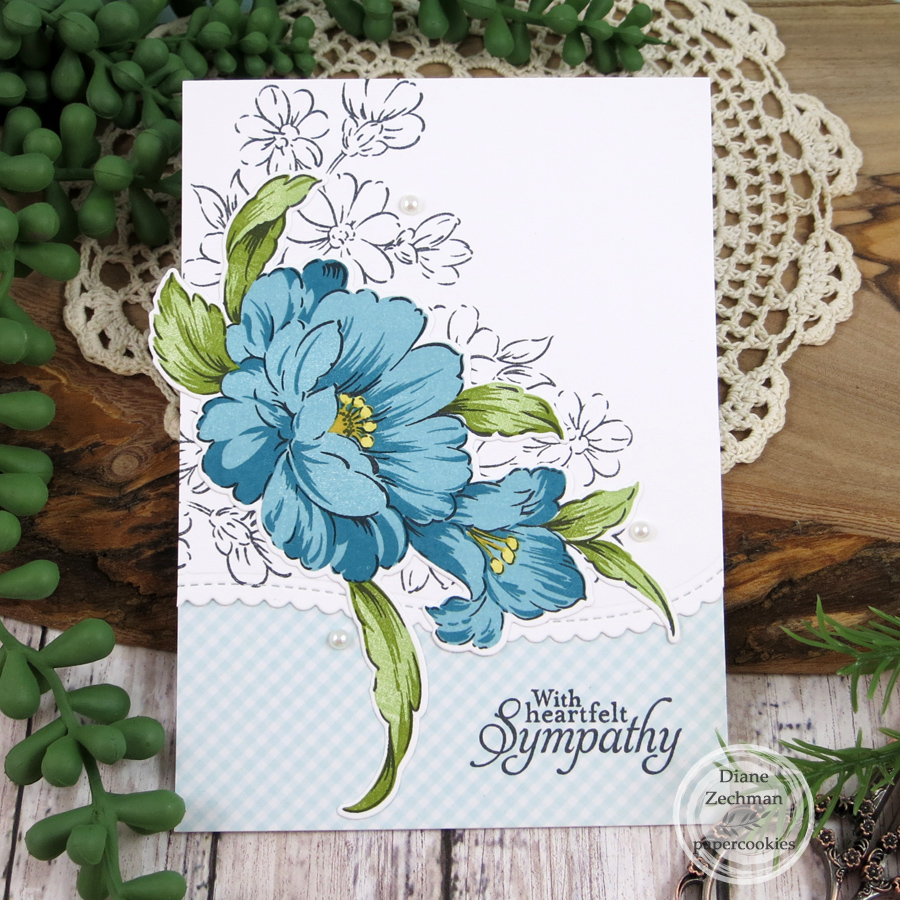
Altenew is known for their florals and the Simple Beauty set was used here to make some sympathy cards. The diecut edge is from MFT Stitched Scallop Basic Edges 2.

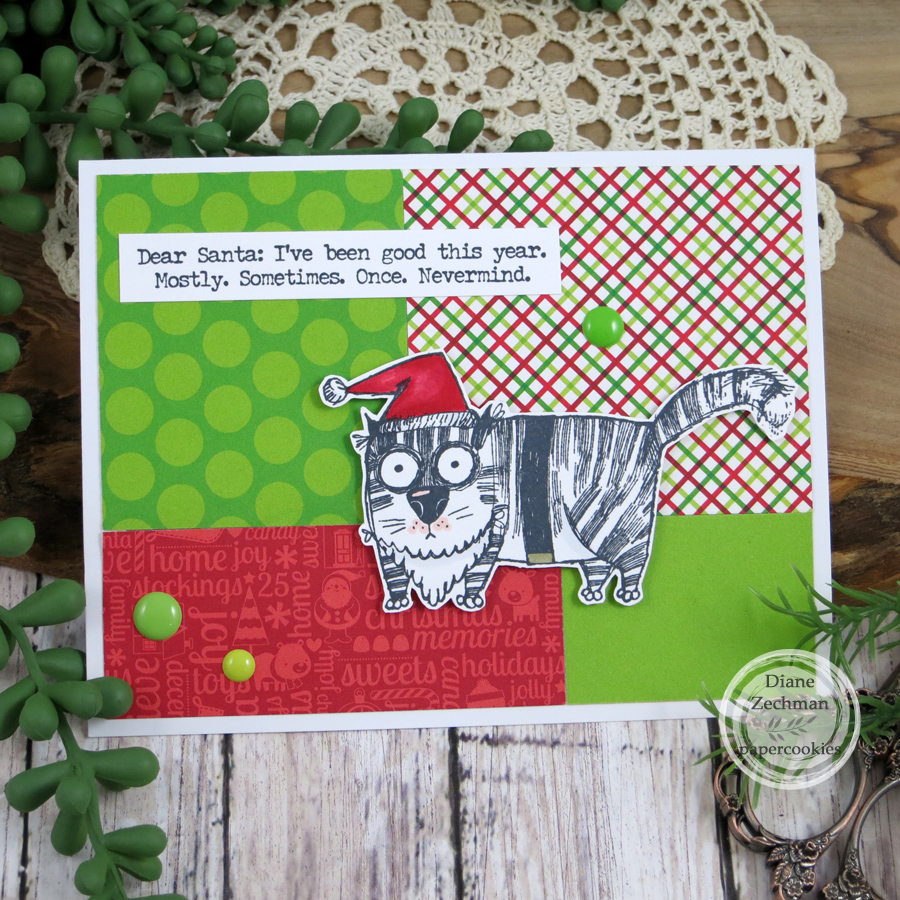
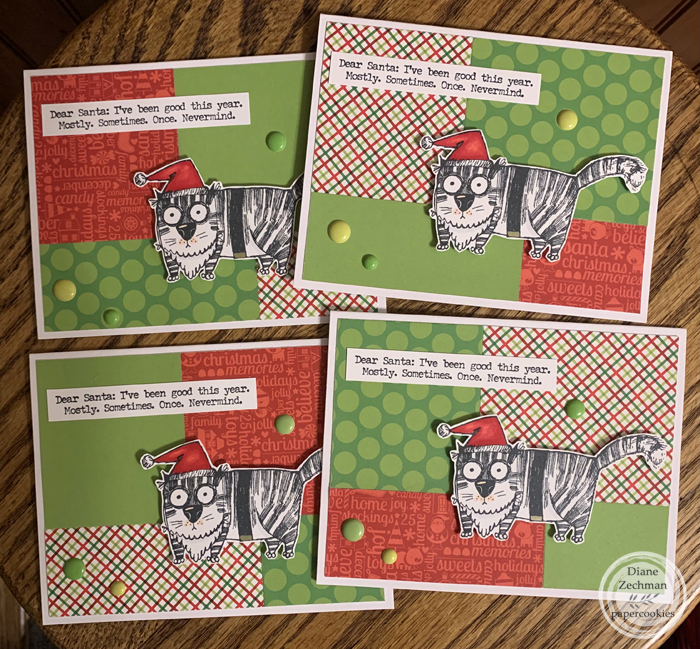
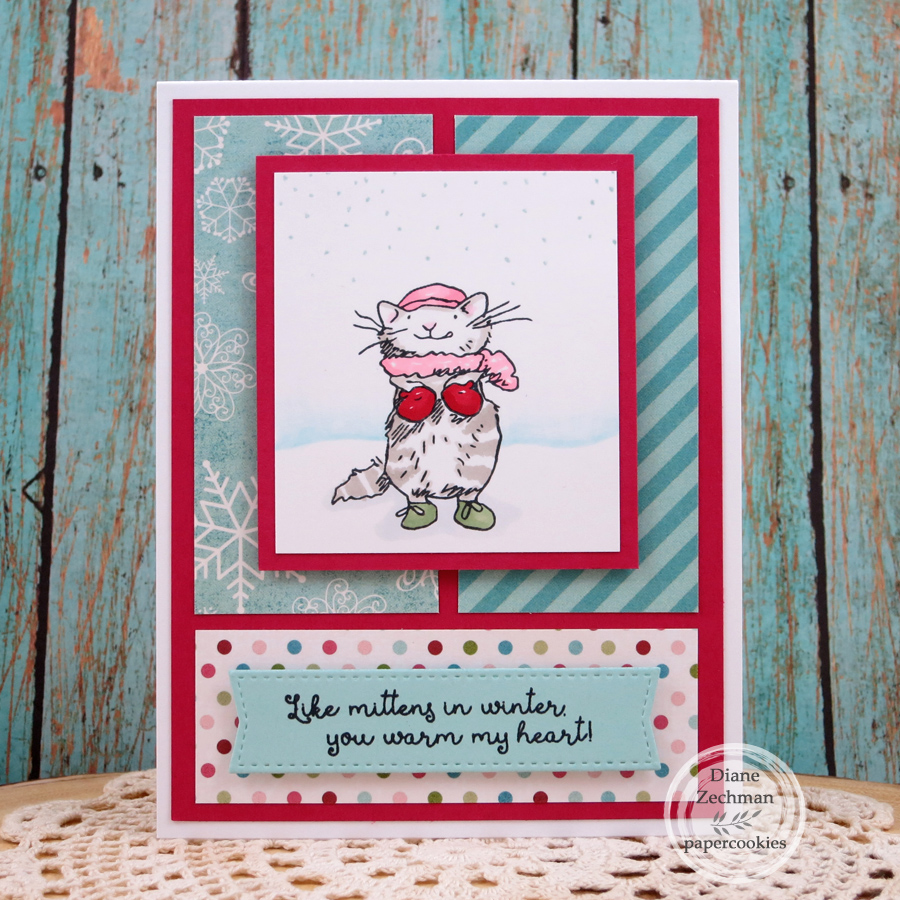
I am late getting a start on this year’s Christmas cards but I squeaked out a few with the TH Snarky Christmas Cat set.

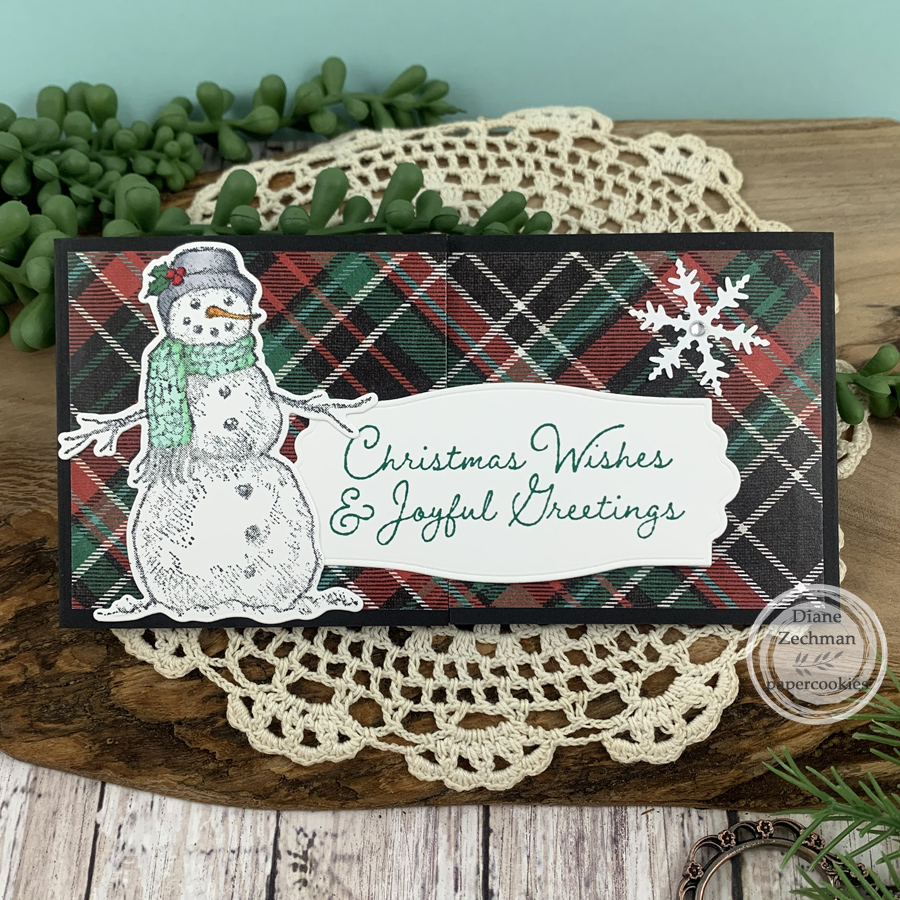
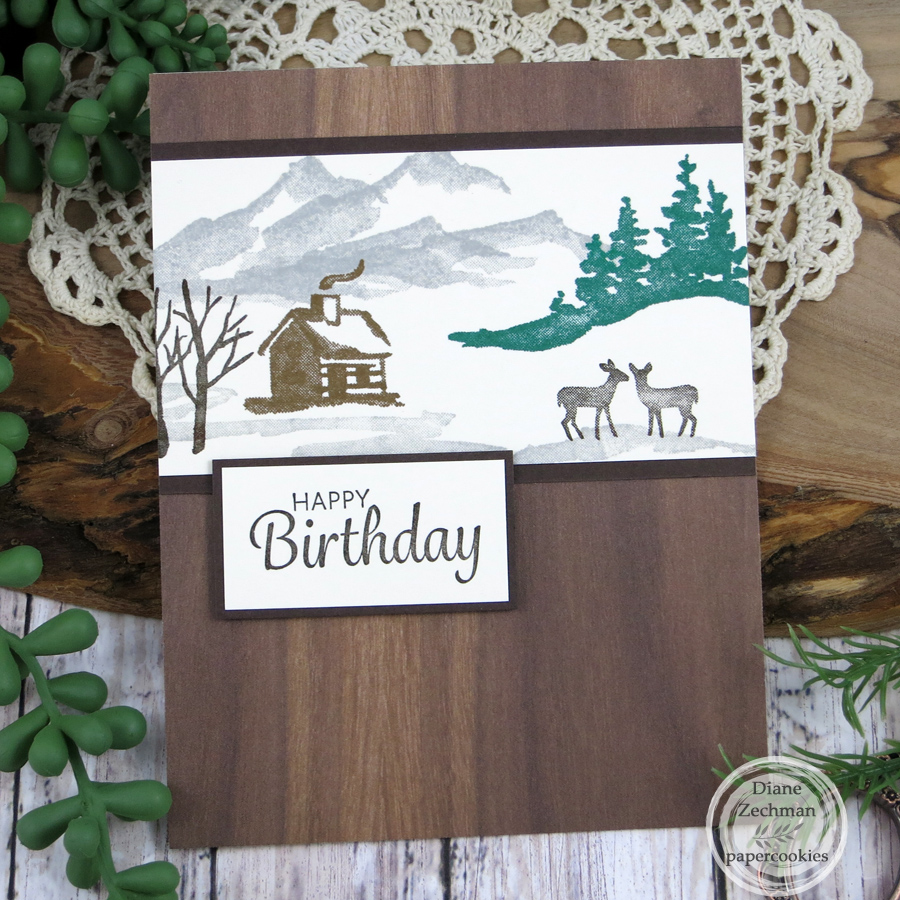
Another masculine birthday card. These are harder for me! SU! Snowfront used here with some woodgrain paper.

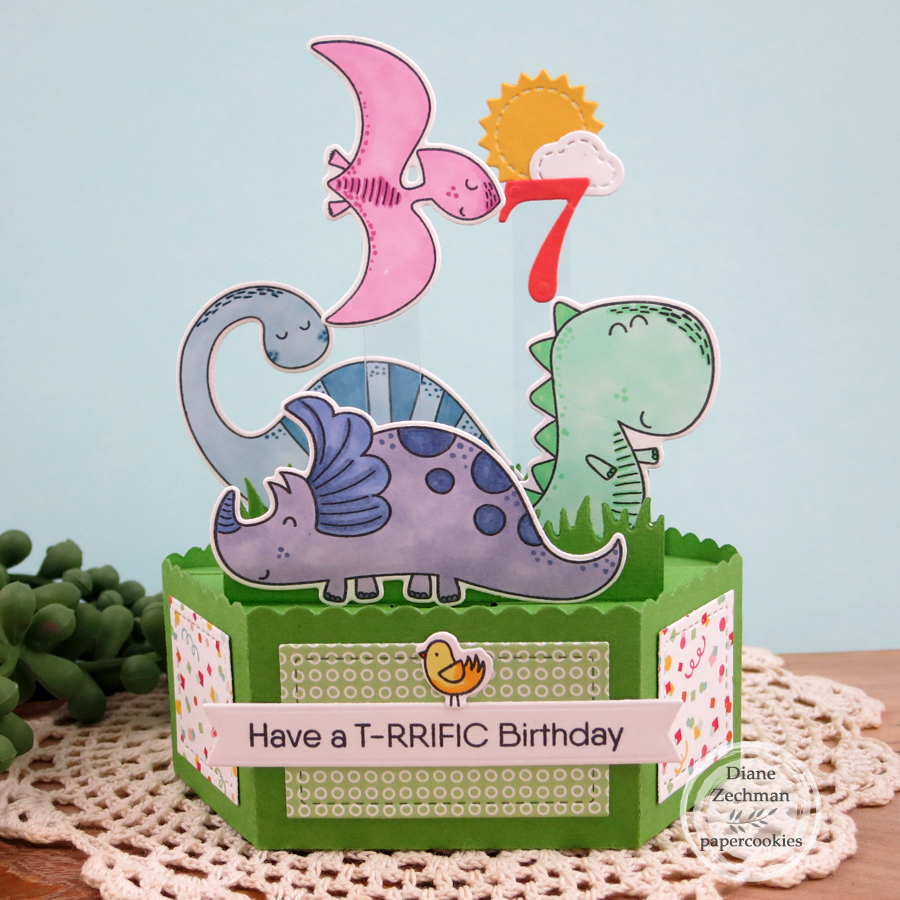
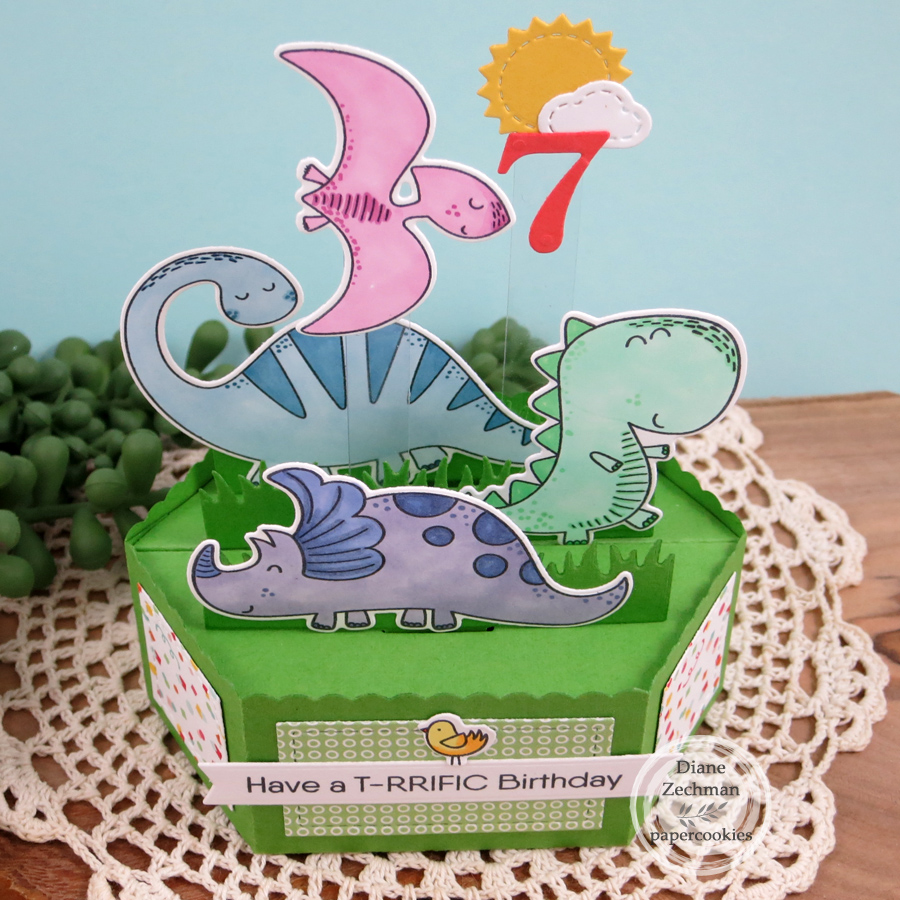
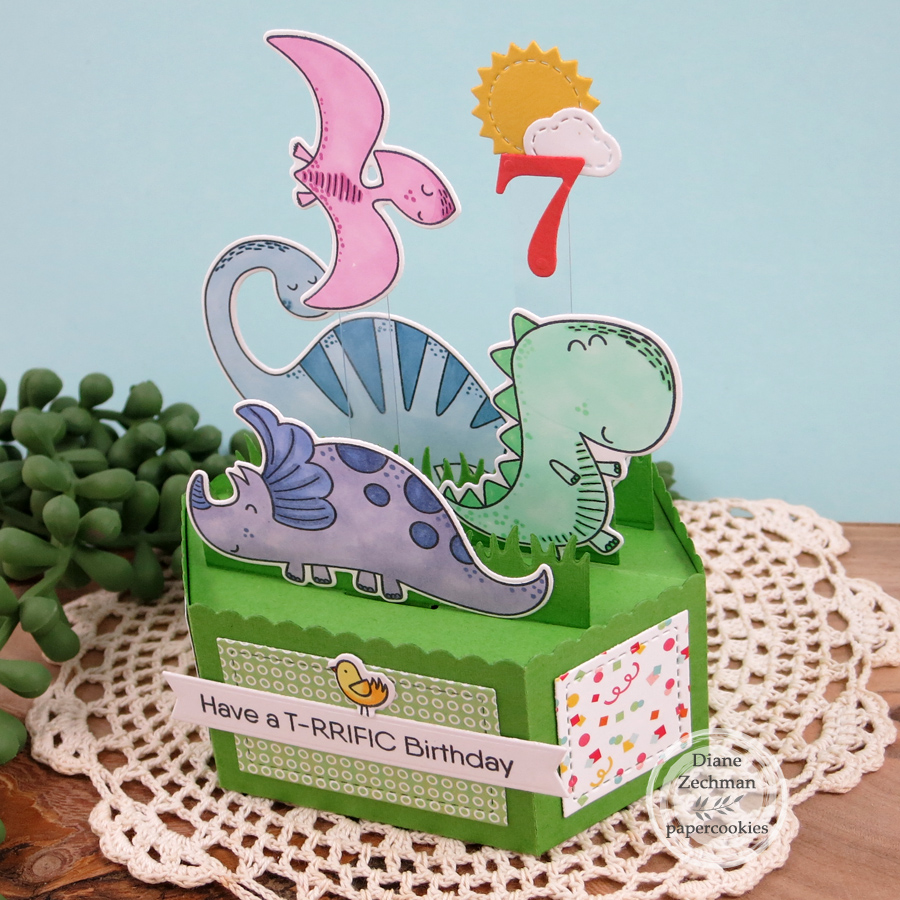
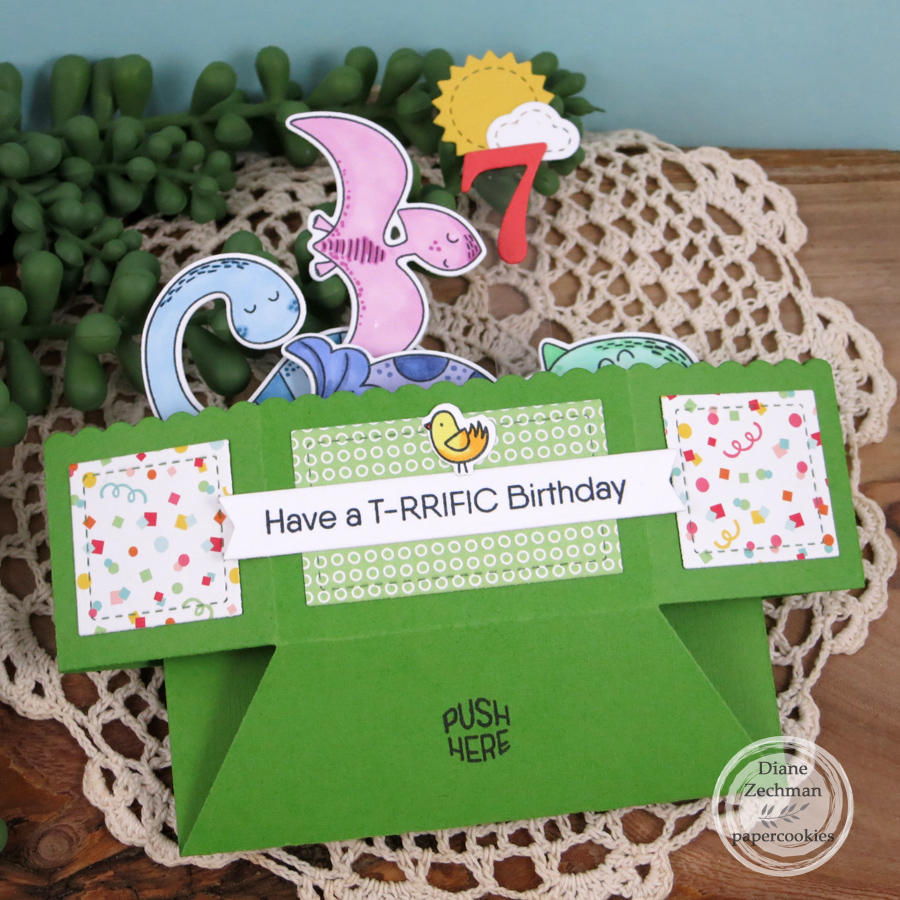
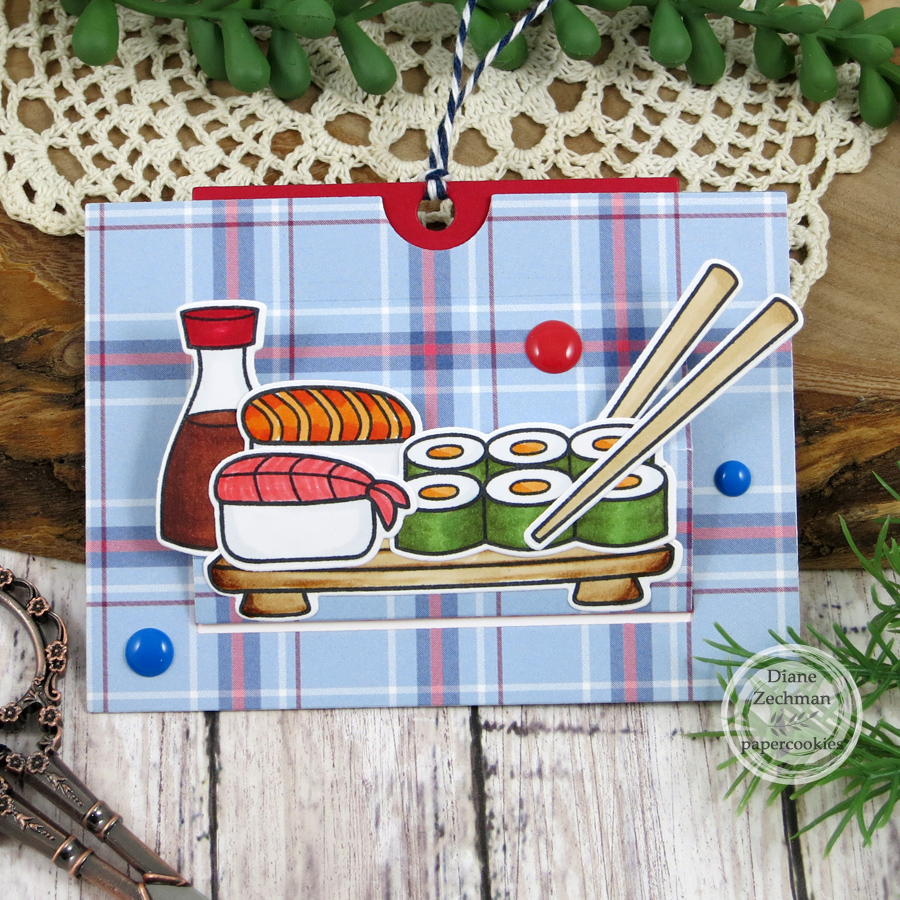
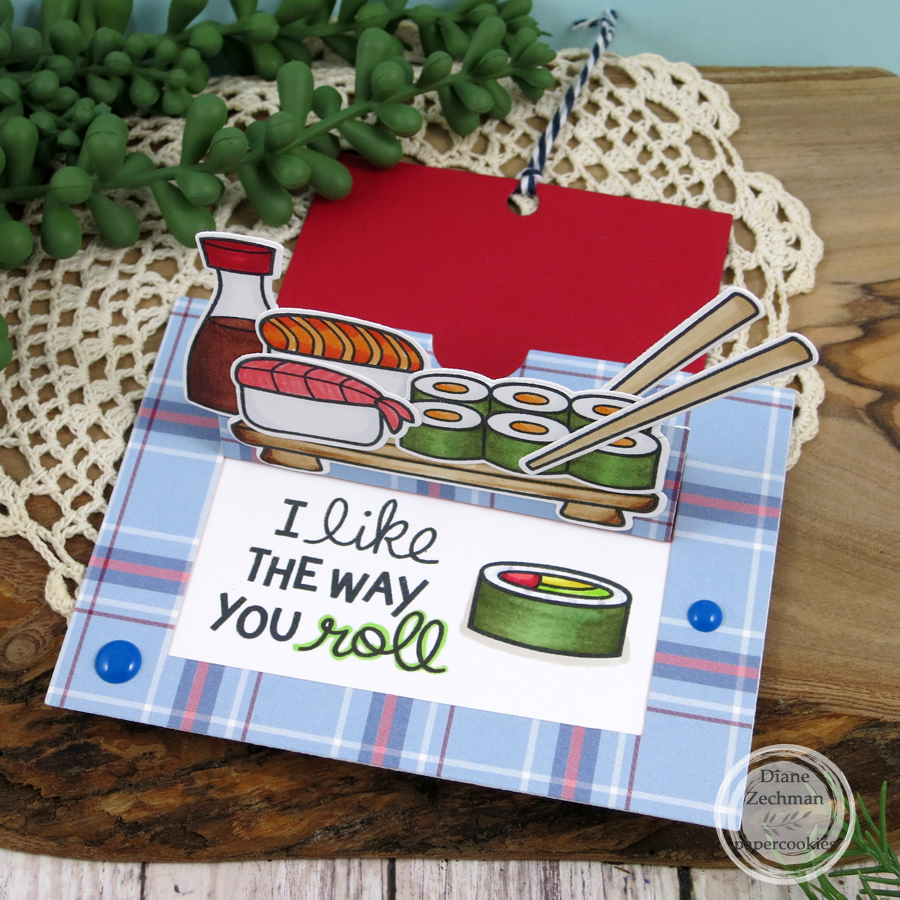
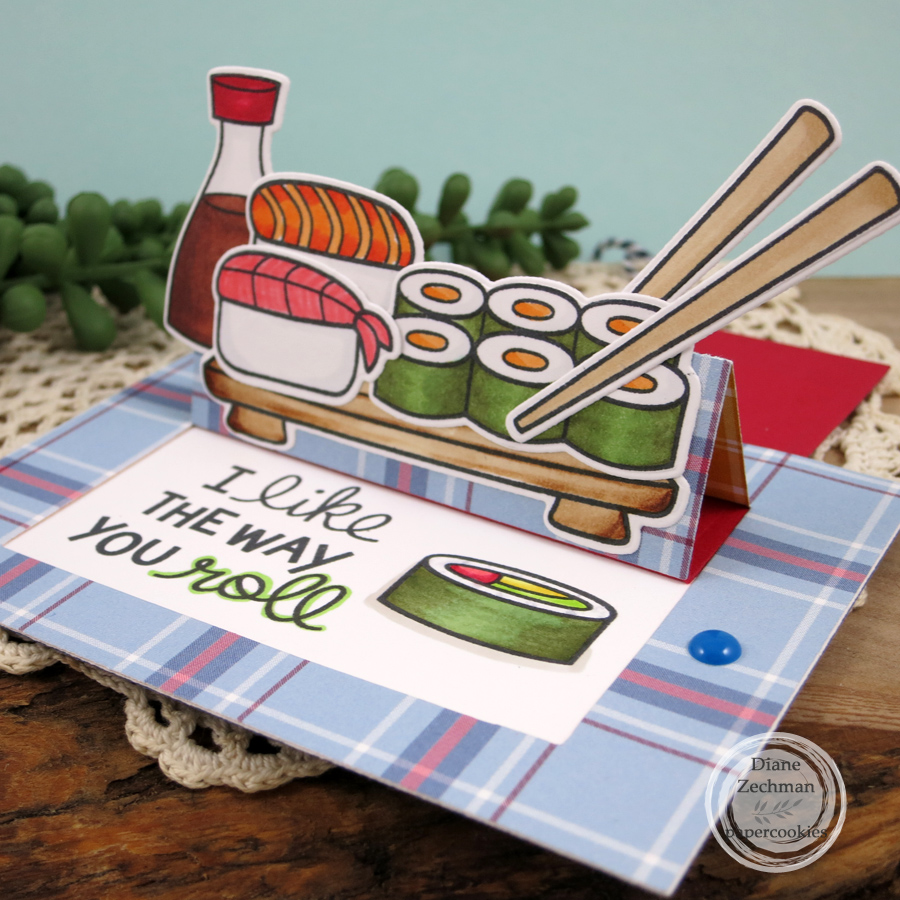
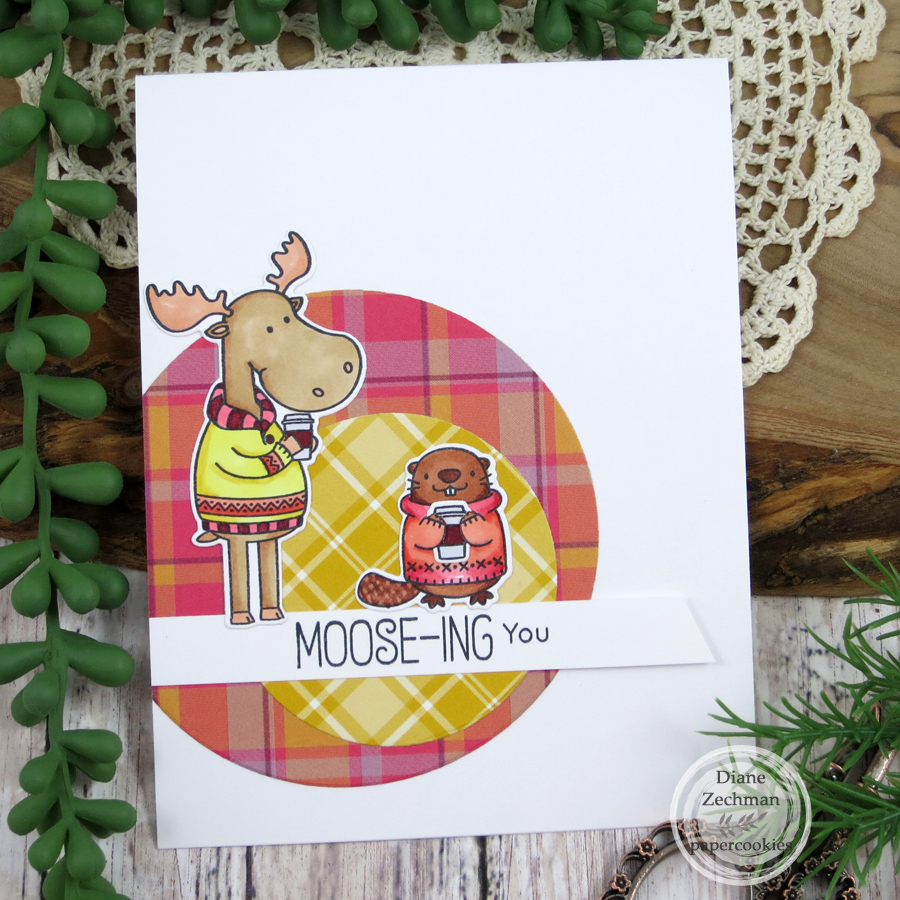
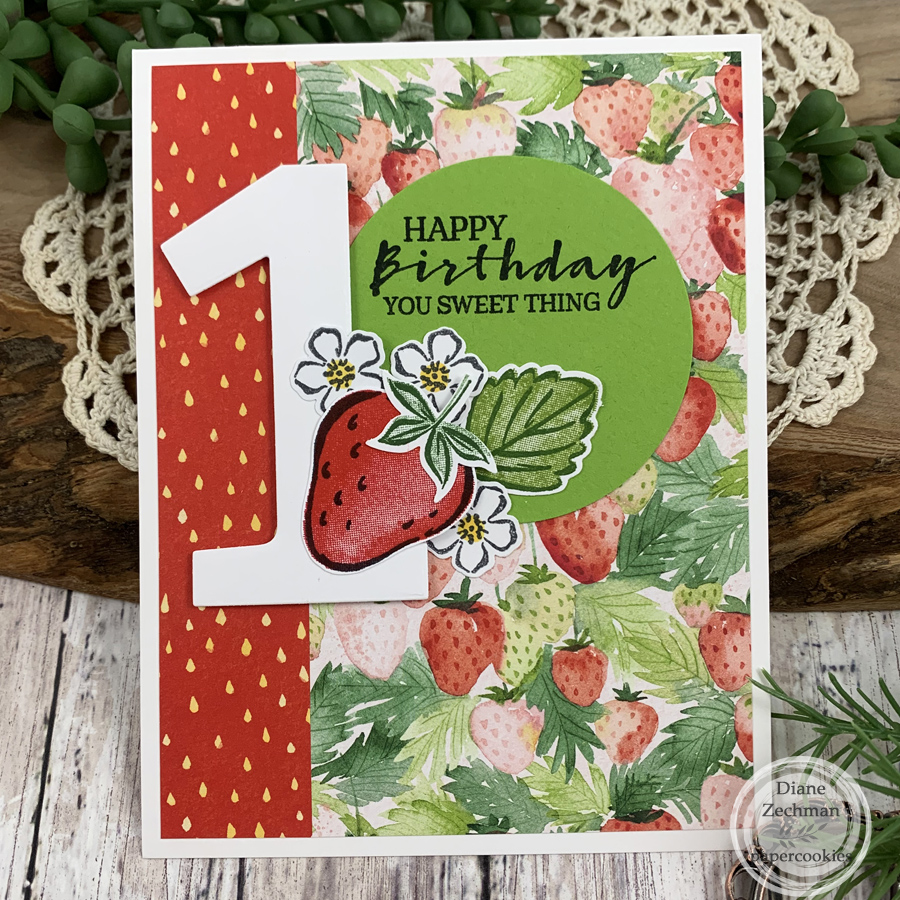
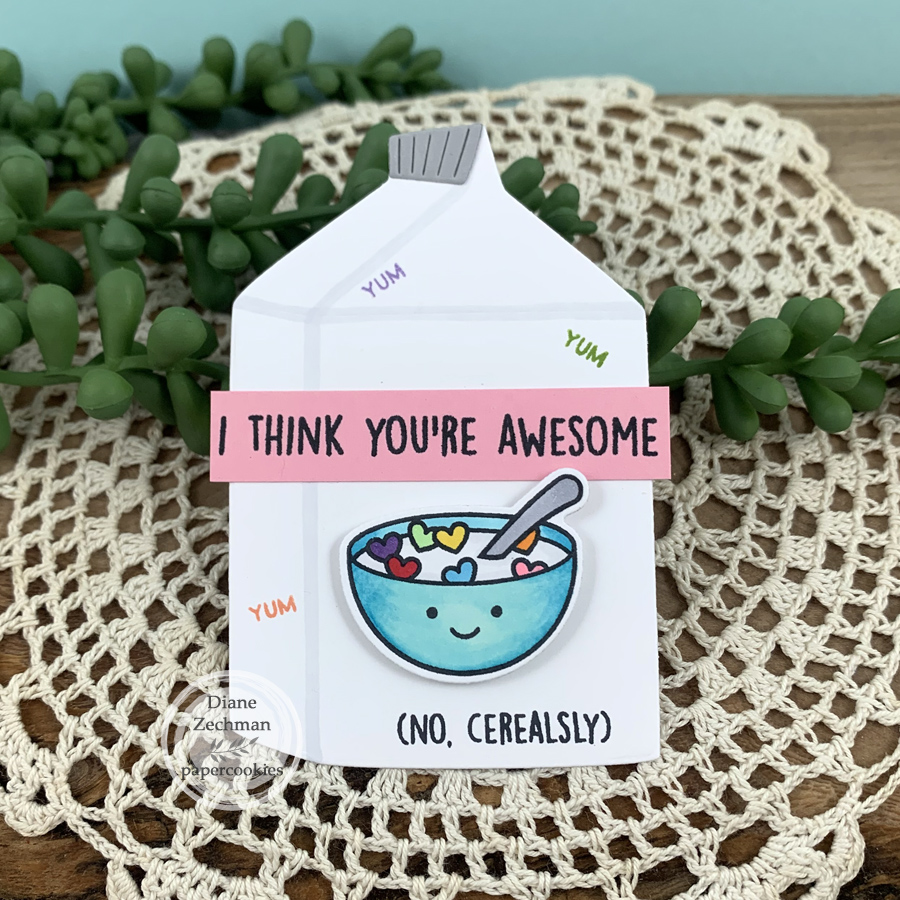
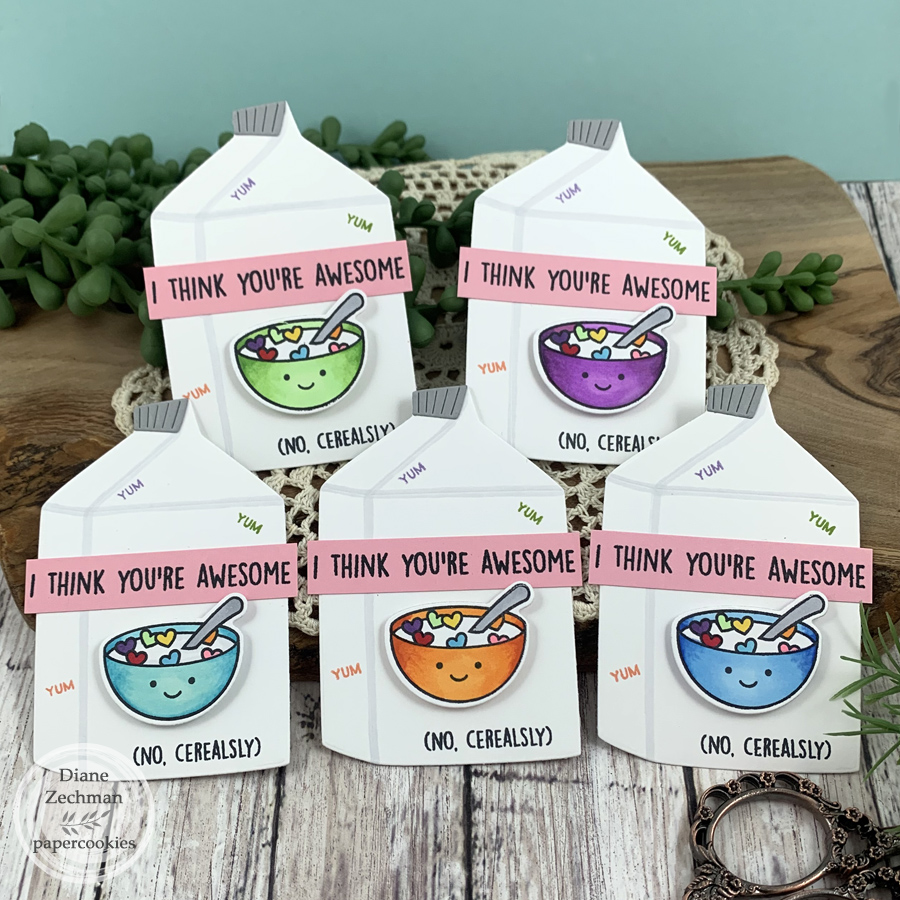
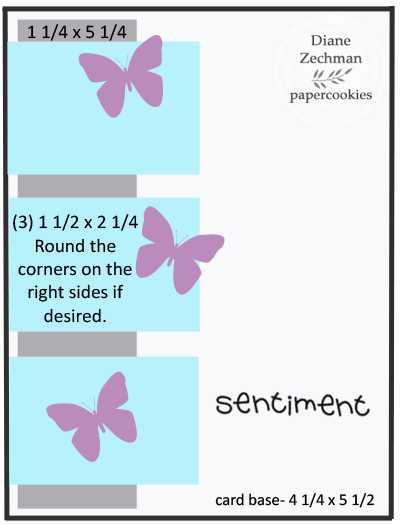
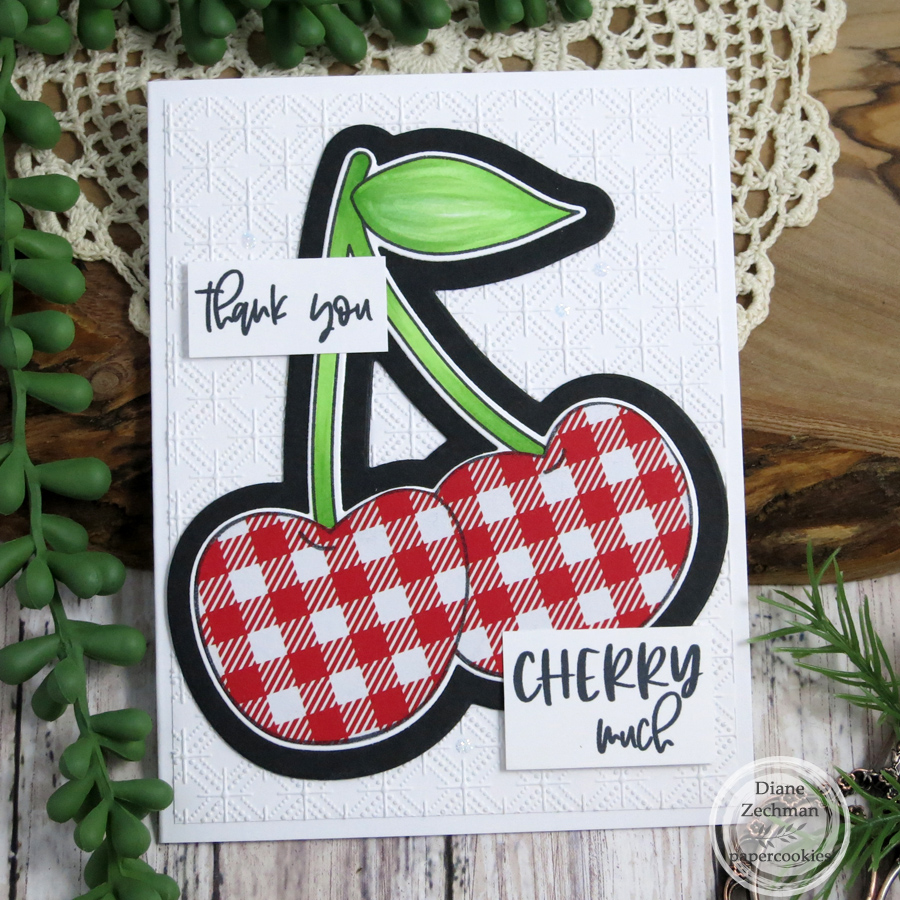
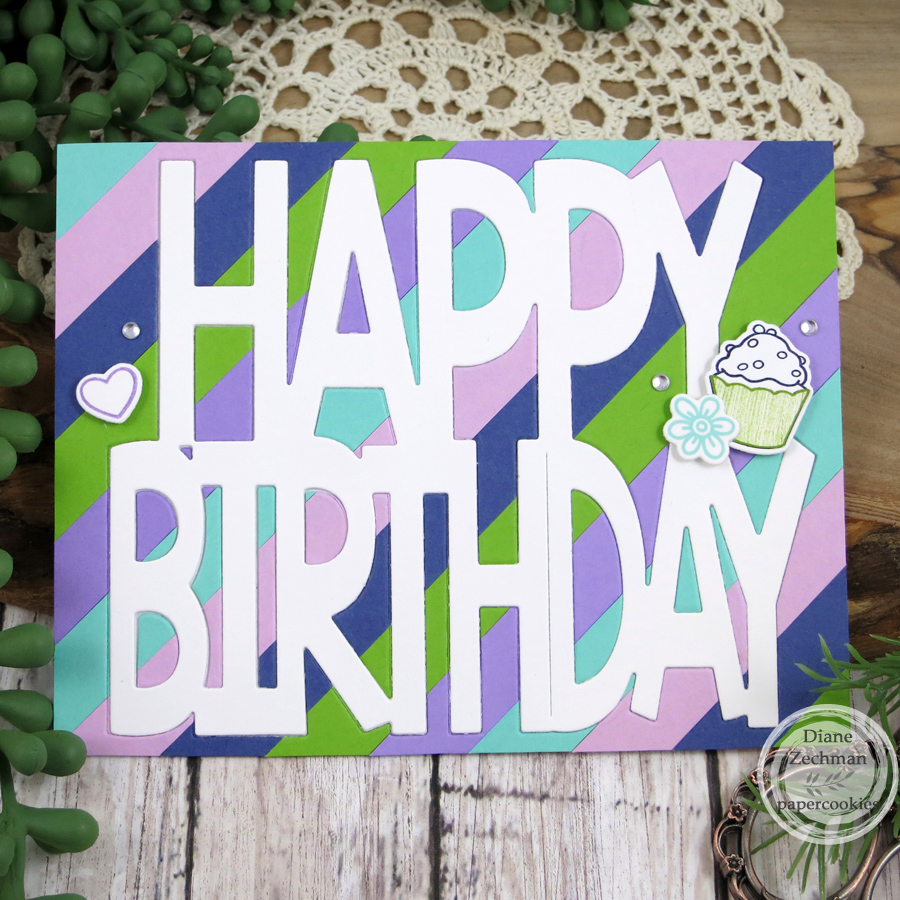
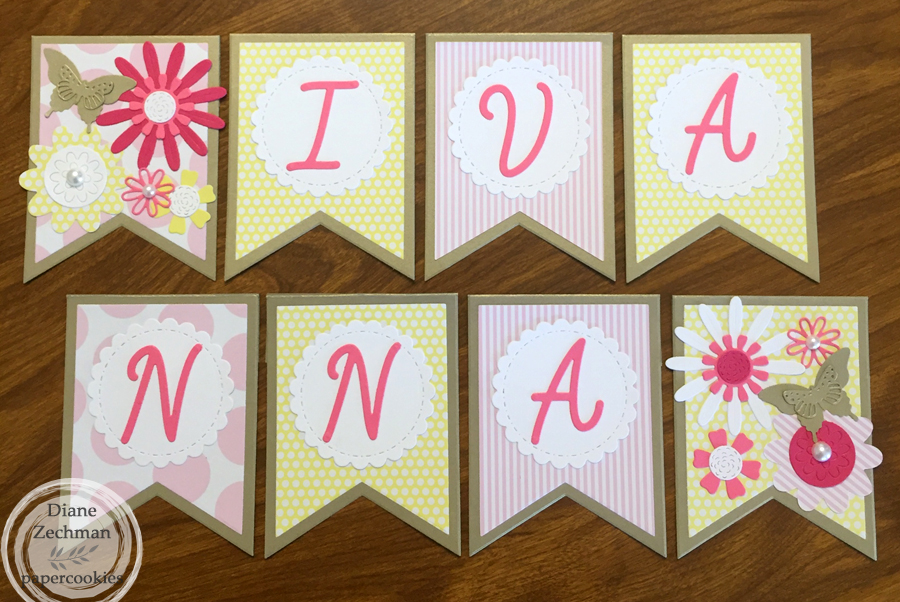
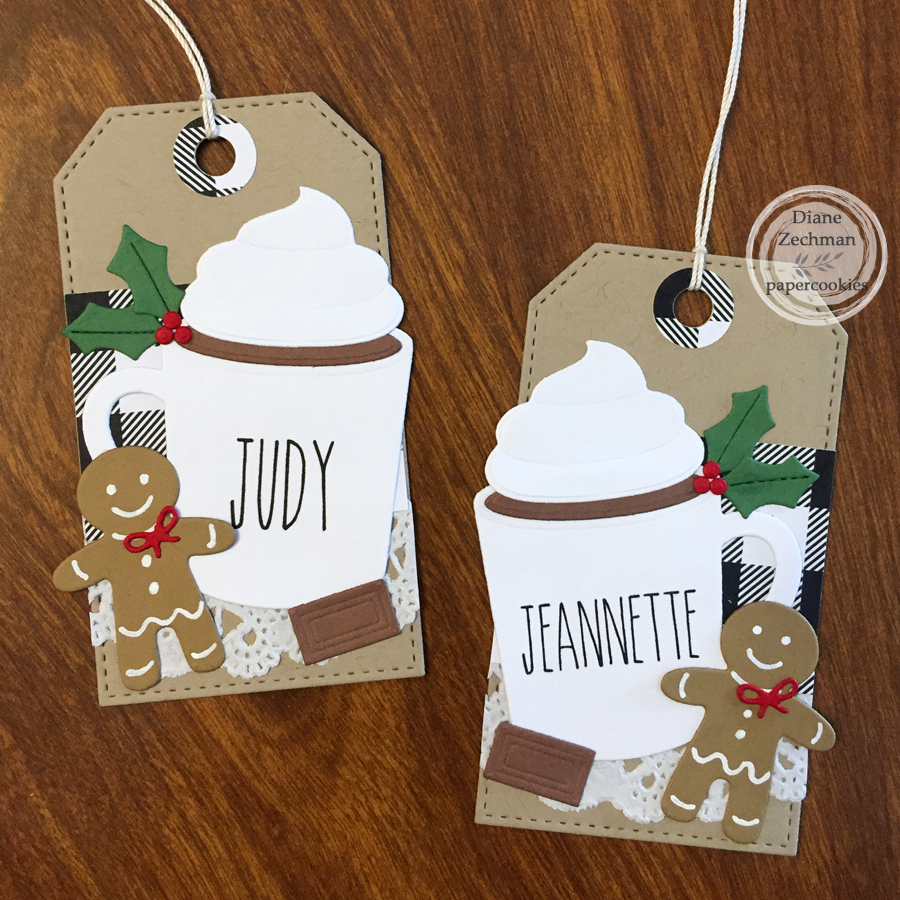
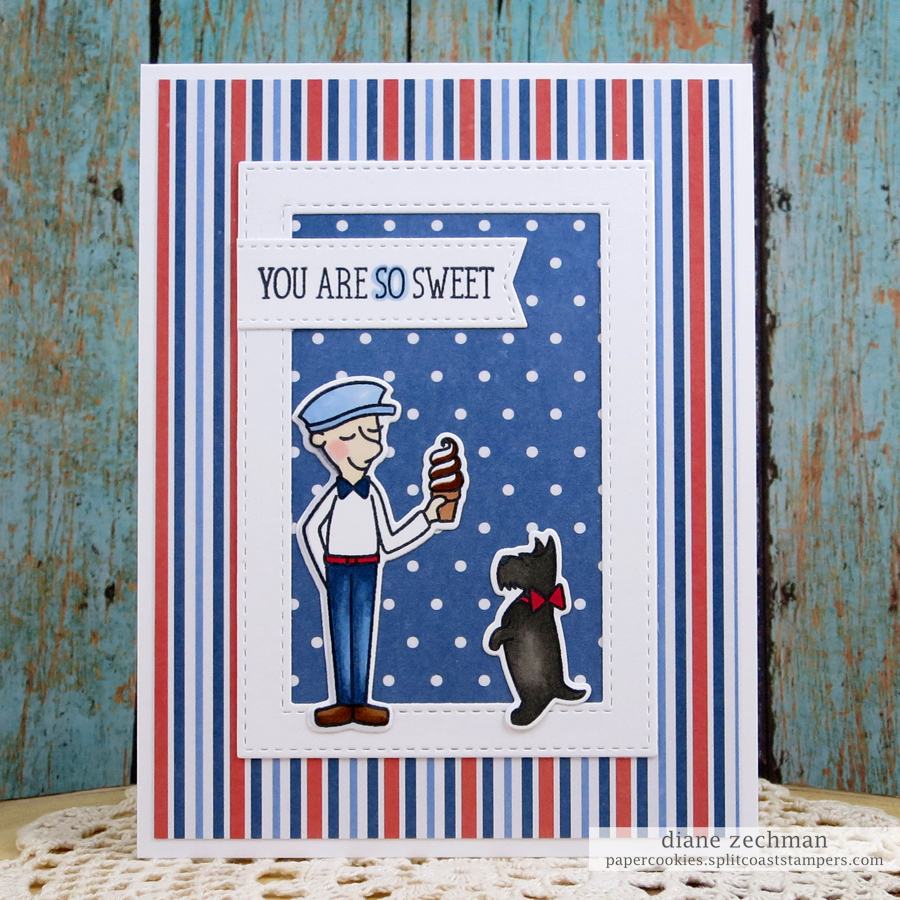
And lastly, some diecut birthday cards using Sweet ‘n Sassy Sweet Treats Stamp & Die Bundle, Sizzix Happy Birthday Drop-Ins Card Dies, Lawn Fawn Double sided adhesive sheets, and a bunch of 1/2″ cardstock strips!

Thanks for scrolling this far and have a great day!

Stamp & Swap thank you cards

This past weekend we held our 6th annual Stamp & Swap event. Our friend, Lou Ann, does an awesome job heading it up and keeping us organized! It’s always a great day to spend crafting with friends. Each year we are blessed to have a few companies donate some of their products to our door prizes and “goodie bags”. We are SO grateful and want them to know how much they are appreciated. Here’s five cards that I made to send out to them. (Our friend Lisa also made one for Stampendous).

Art Impressions- I used 5002- Sloth-some Set and 5135- Hexagon Double Stitched Dies. This also fits the current Ai Challenge!

My Favorite Things- Gifts from Santa & Dies, Evergreen Die-Namics and Stitched Basic Edges 2.

Unity Stamp Company- Crafty Girl.

Lawn Fawn- Fairy Friends and Long Distance Hugs.

Clearly Besotted- Look For Rainbows. (The turtle here is on an Art Impressions Action Wobble!)

Many, many thanks to these companies for helping to make our get-together a success!

2020 wrap up

Hello! Popping in with a second post to wrap up 2020. Some of these are recent projects and some I just never got around to sharing.

This masculine birthday card uses SU! Best Catch and Catch of the Day Thinlits, Old Olive paper and Gina Marie Stitched Rectangle dies.

Next is a wintery card with one of the Anita Jeram kittens (Kittens and Mittens) from Colorado Craft Company. Anita Jeram is the illustrator of the children’s book, Guess How Much I Love you. Her designs are wonderful! The papers are MME- Merry Little Christmas.

The Fa la la framed art was made for a friend in our stamping group’s gift exchange. I started with a 7 Gypsies Shadow Box Tray. Dies: Spellbinders FaLaLa and Santa’s Parade (birds), Sizzix Endless Love Alpha, and Marianne Design tree- LR0136. Background paper: The Paper Studio- Silver Foiled Snowflake. The fence is a Martha Stewart Halloween punch with the bats removed and the wreath is a brad. The beaded snowflake is an old Jolee’s sticker and I added some Aleene’s True Snow around the tiny tree.

I was asked to make a name banner for a newborn baby with pink, gold, and butterflies. Here’s what I came up with. I used Momenta Banner and Alpha dies, Gina Marie Scalloped Stitched Circles, Sizzix Bold Flora dies, and an SU! Butterfly punch.

SU! Love of Leaves fall thank you card in non-traditional colors!

A bible journaling page from August in Pop Art style. The printables were created by Diane Noble.

I made a bunch of Rae Dunn style mugs but only got two finished into tags. I guess I have a good start for next year. lol. These were inspired by some I saw on the internet. I typed and printed a skinny font. The tag and mug dies are MFT. The accent images are from Sizzix Festive Treats dies.

They’re so cute on a package!

Next, I have two more fall projects. The first one is with a vintage Rubber Stampede Halloween Snoopy stamp and some old Cuttlebug dies.

And last is a CAS masculine thank you card. I used Gina Marie Chevron BKGD cutting plate, Altenew Bold Thanks, and Prima Forest Leaves.

Have a great week!

a few thank you cards

I recently made a few quick thank you cards for some companies that donated to our local Stamp & Swap event. Many thanks to them for supporting us! I always like to use each companies’ products when making their thank you card. For Art Impressions, I used the cute 5112- Hedgehogs stamp set. I also used MFT’s Stitched Arch Stax.

Here I used Avery Elle’s The Scoop stamp set and matching dies, along with MFT’s Stitched Rectangle Frames.

The cute little boat is from Clearly Besotted. The wave dies are Lawn Fawn Stitched Wave Borders.

And for MFT I used the lovely Stitched Blooms dies along with Blueprints 31.

I’ll be back to share my swap projects. Have a great day!

swap cards

Hello! A few weeks ago I attended a swap with friends. Here are the two cards I took…one was for a masculine swap and the other was my “shoebox” project that I prepared for everyone to make.

The first card was for the masculine swap I participated in. This was semi-cased from a card by Tina Wardell. The background was masked and sponged. After stamping the boat from the SU! Sailing Home set, I colored it in with a black Sharpie. I also used the High Tide set and the sentiment is from Wonderful Moments. The embossing folder is Darice- Nautical Theme.

For my shoebox project, I used a freebie stamp set from MFT- Jumping Giraffe. I knew I wanted to mount him on an Ai Mini Action Wobble to make him “jump”! I also used the Die-Namics Blueprints 20 and 31 die sets. Since the giraffe was a bit smaller than the action wobble, I first placed him on a orange circle cut with a Spellbinders Pinking Circles die.

Have a great day!